[Disclaimer: Finding Mandee is reader-supported, if you purchase through links on my site I may earn an affiliate commission at no additional cost to you. As an Amazon Associate, I earn from qualifying purchases.]
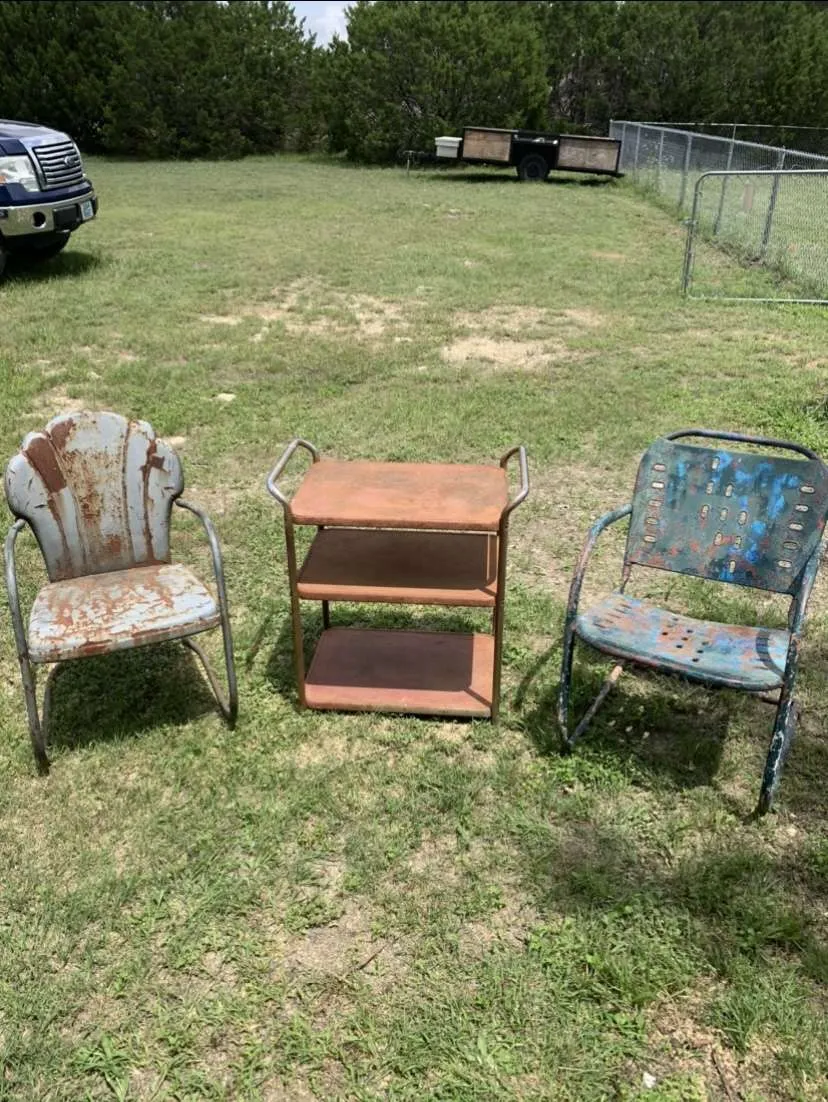
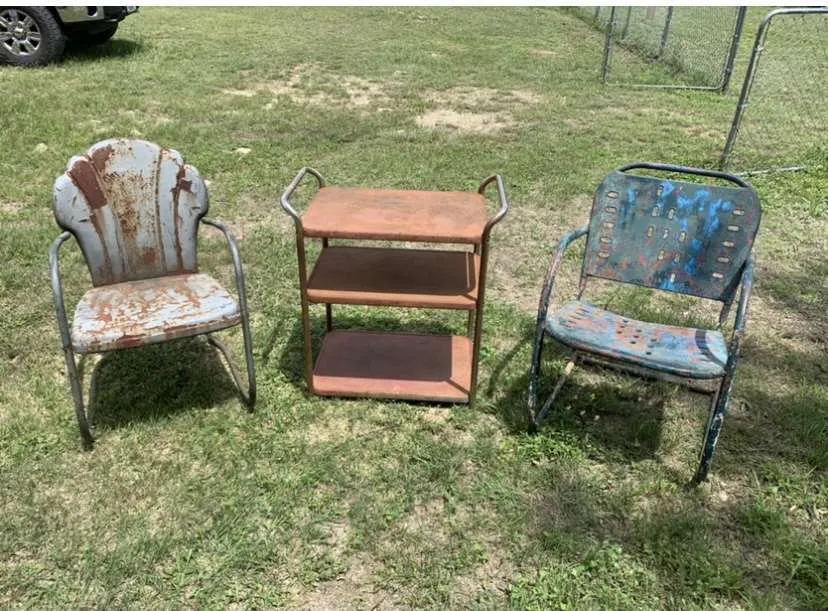
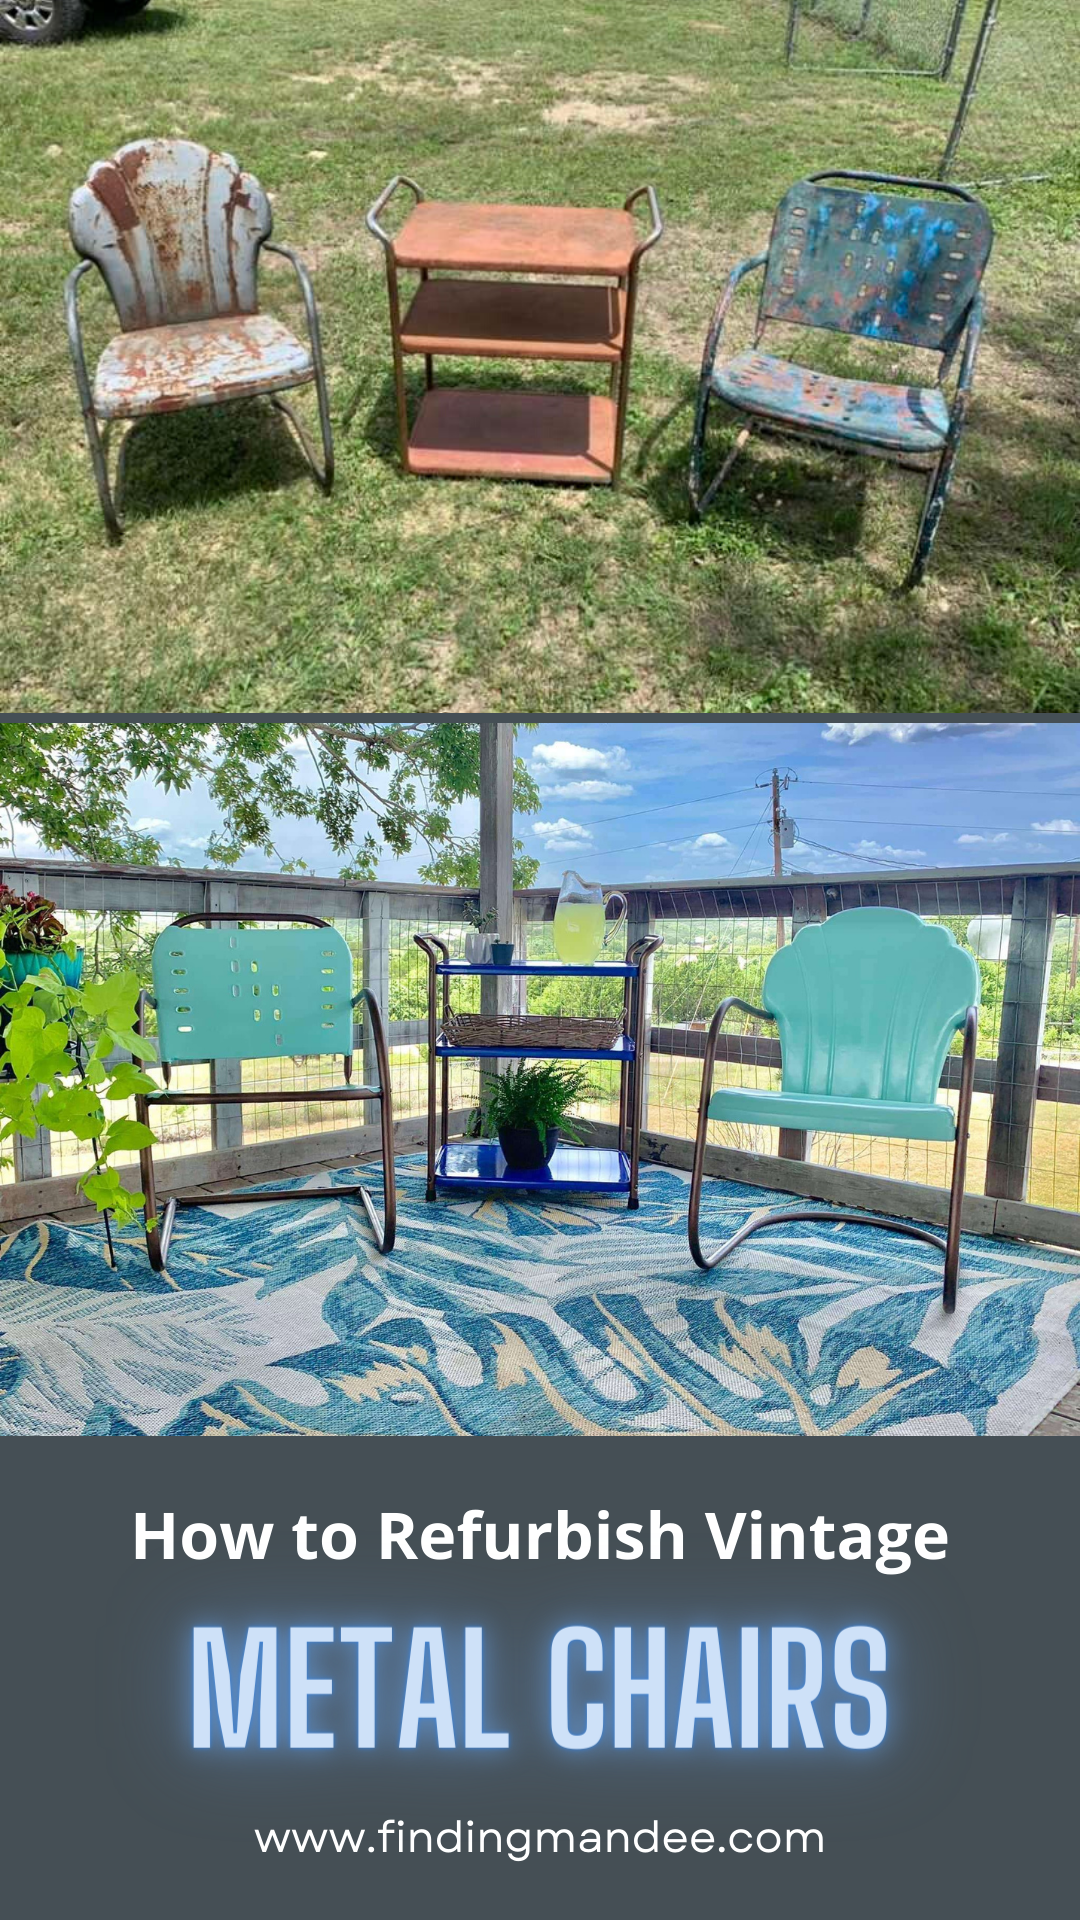
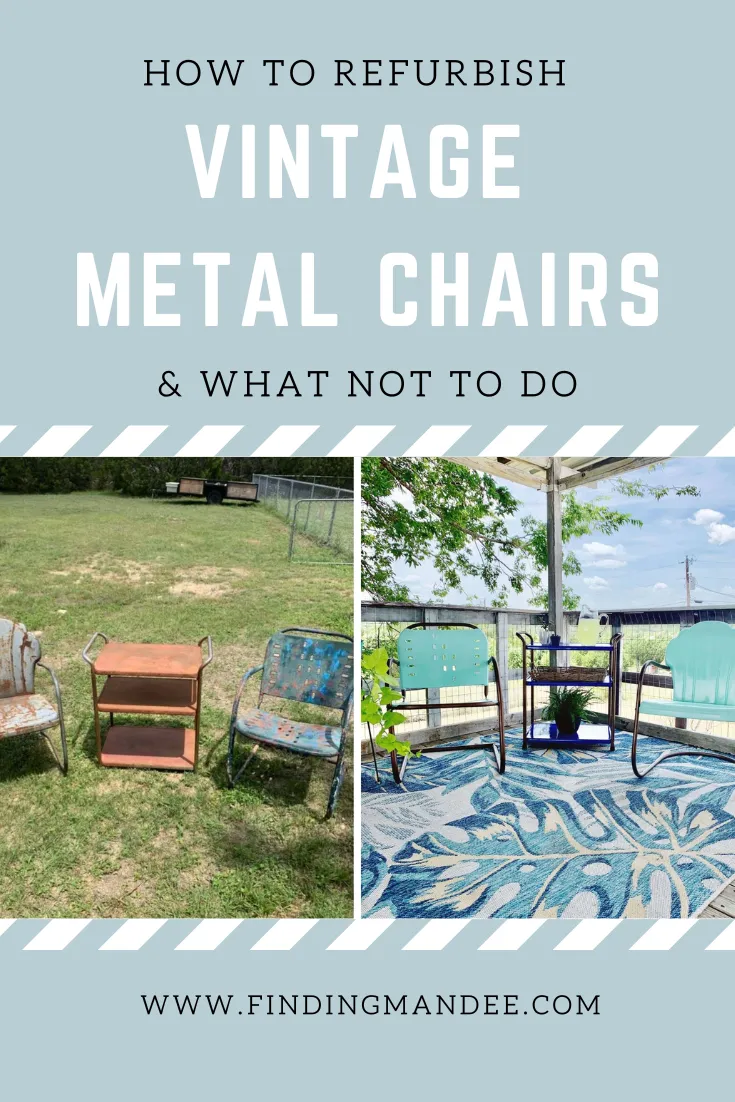
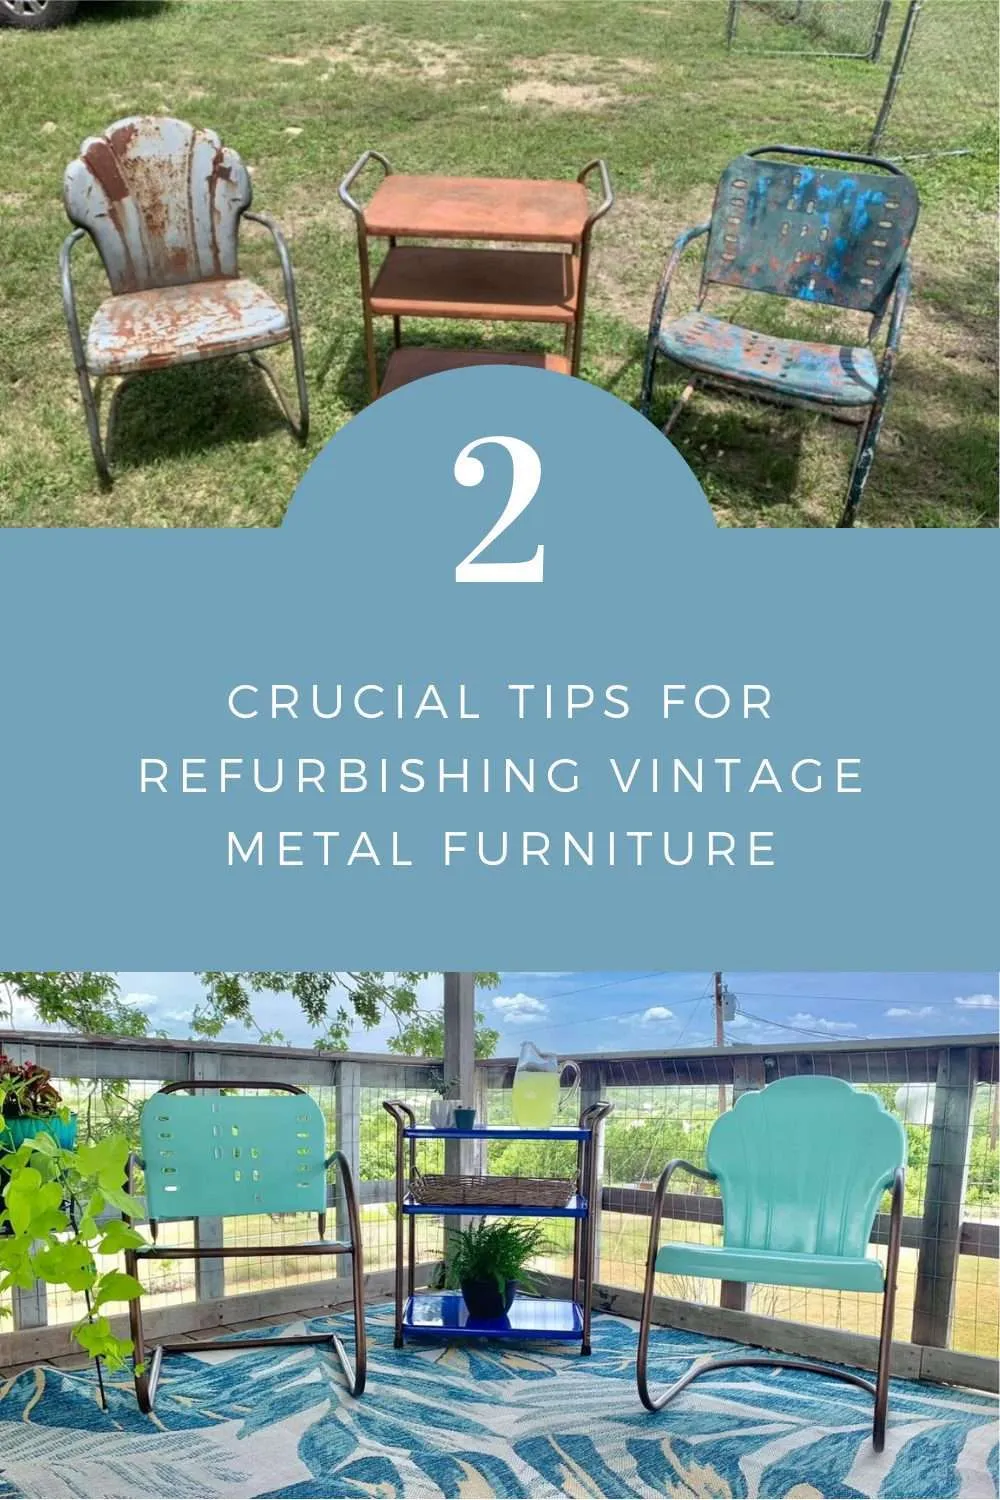
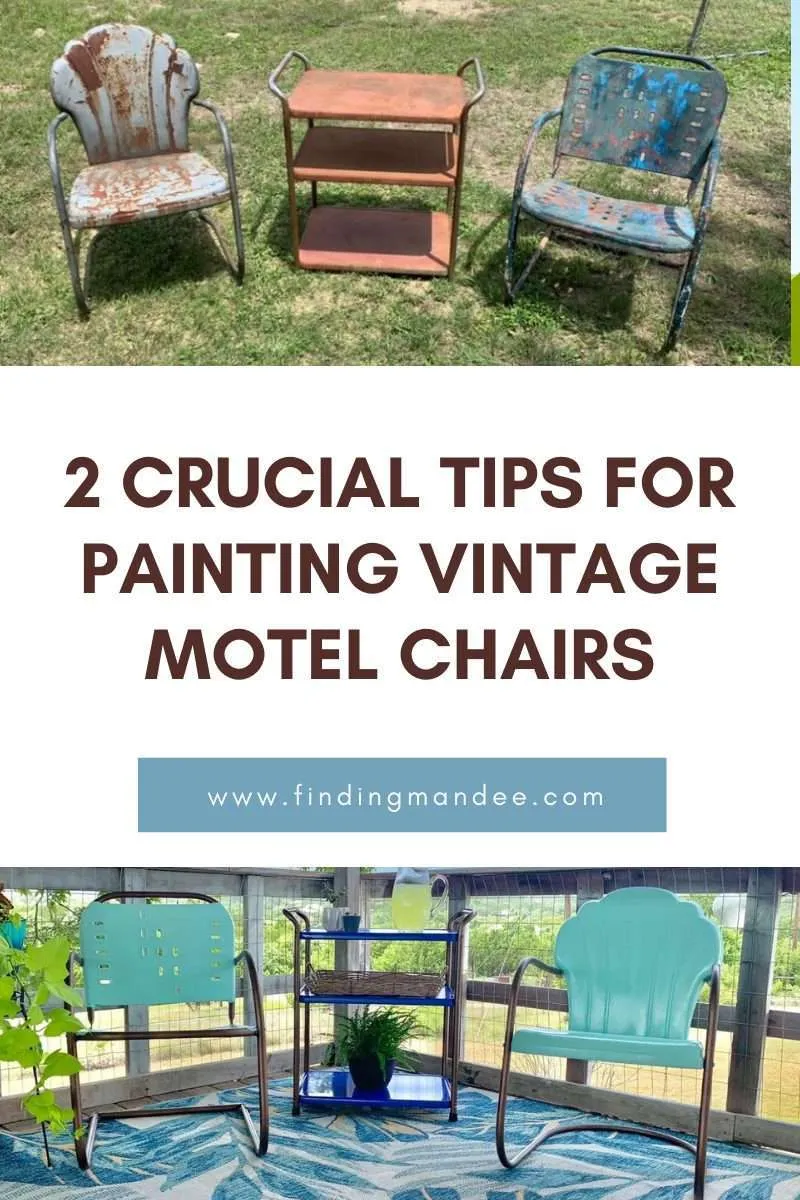
I have been on the lookout for vintage metal chairs for a looonnggg time. But every time I found some, they were either too rusty to salvage or too expensive.
Apparently, these chairs are popular right now during this mid-century modern craze!
I found some during our first trip to the Round Top Antique Show. They’re not a matching pair, but I was still excited! I only paid $45 each; it was my favorite find of the whole weekend.
This project was pretty straightforward.
Refurbishing these vintage metal chairs was a “simple” 2-step process:
- remove rust
- paint
However, here are some things that we learned during this process that made it easier.
Supplies
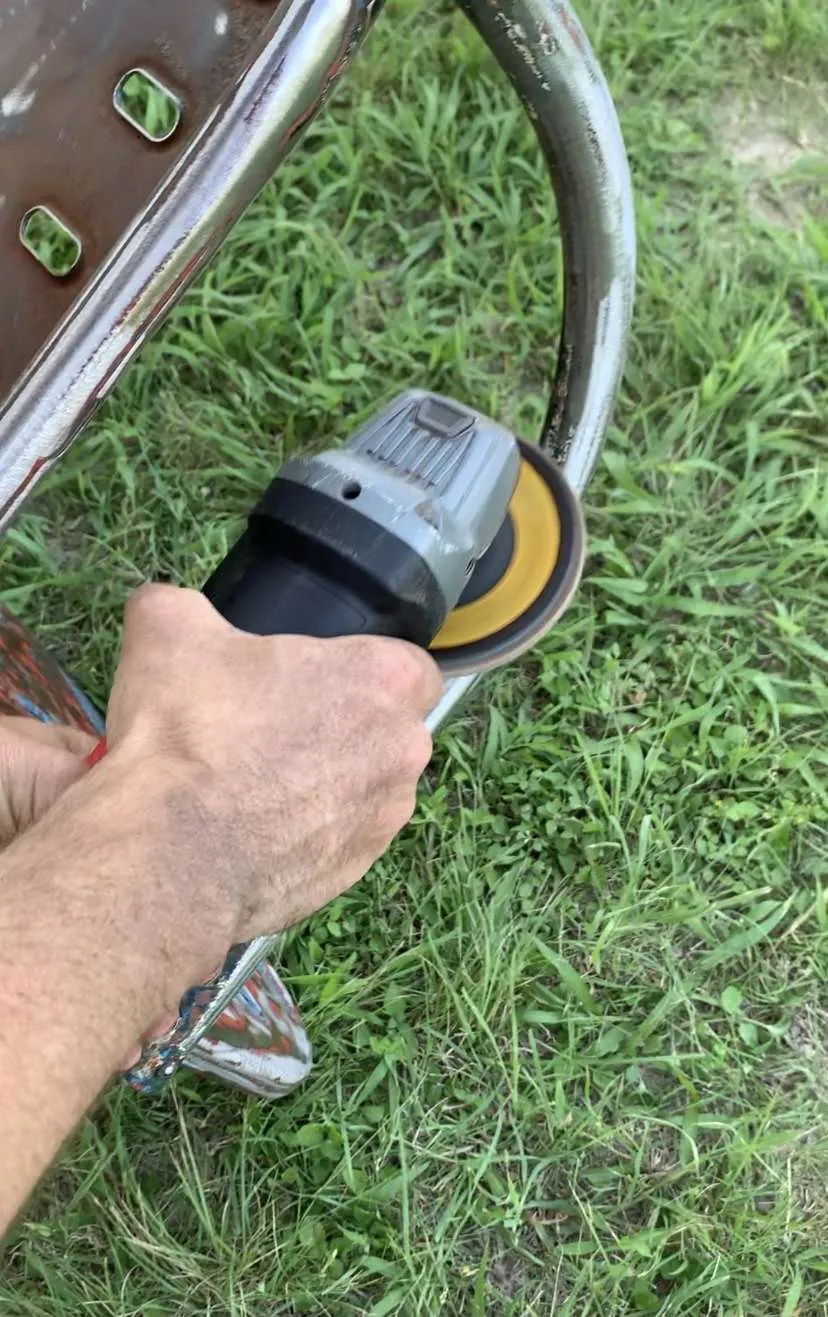
Skip the Sander
What?
But sanding is arguably the most important part of prepping any refurbish project???
That is true.
However, these chairs had 70-ish years of rust and MULTIPLE layers of paint on them. My orbital sander didn’t stand a chance.
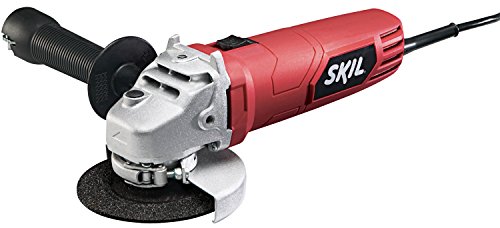
I wasted way too much time trying to sand these things down before my husband saved the day. We ended up using his angle grinder and flap discs to get the job done.
Switching out these two tools, cut our prep time in half!
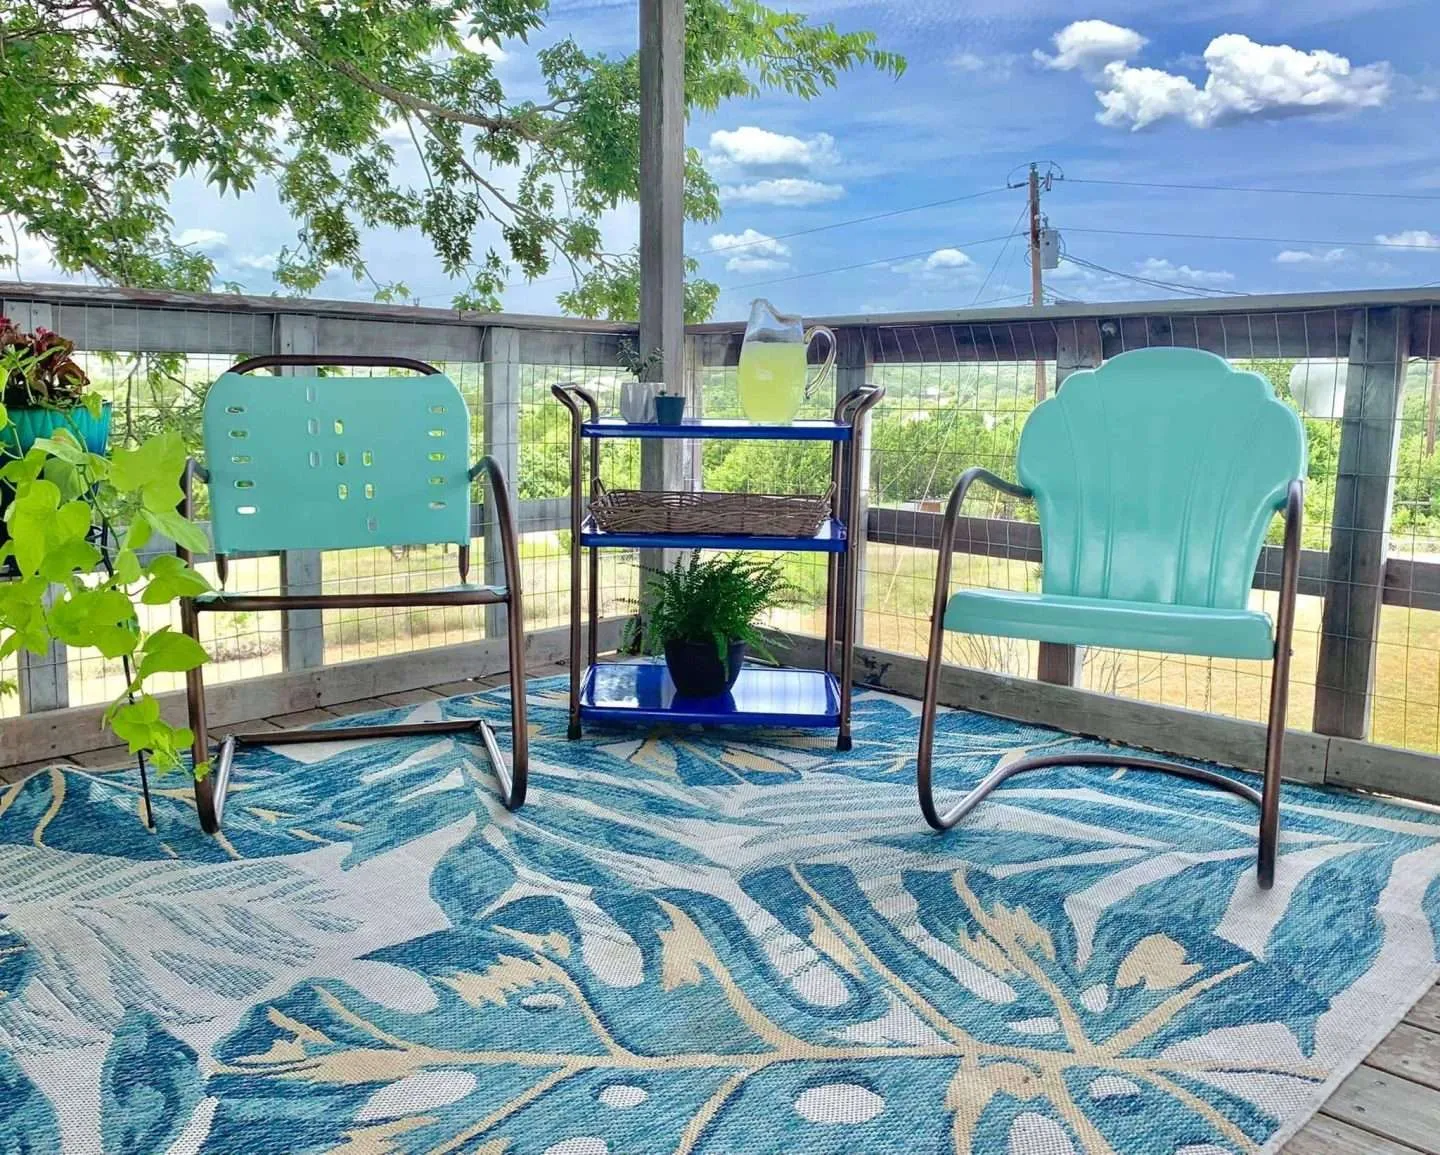
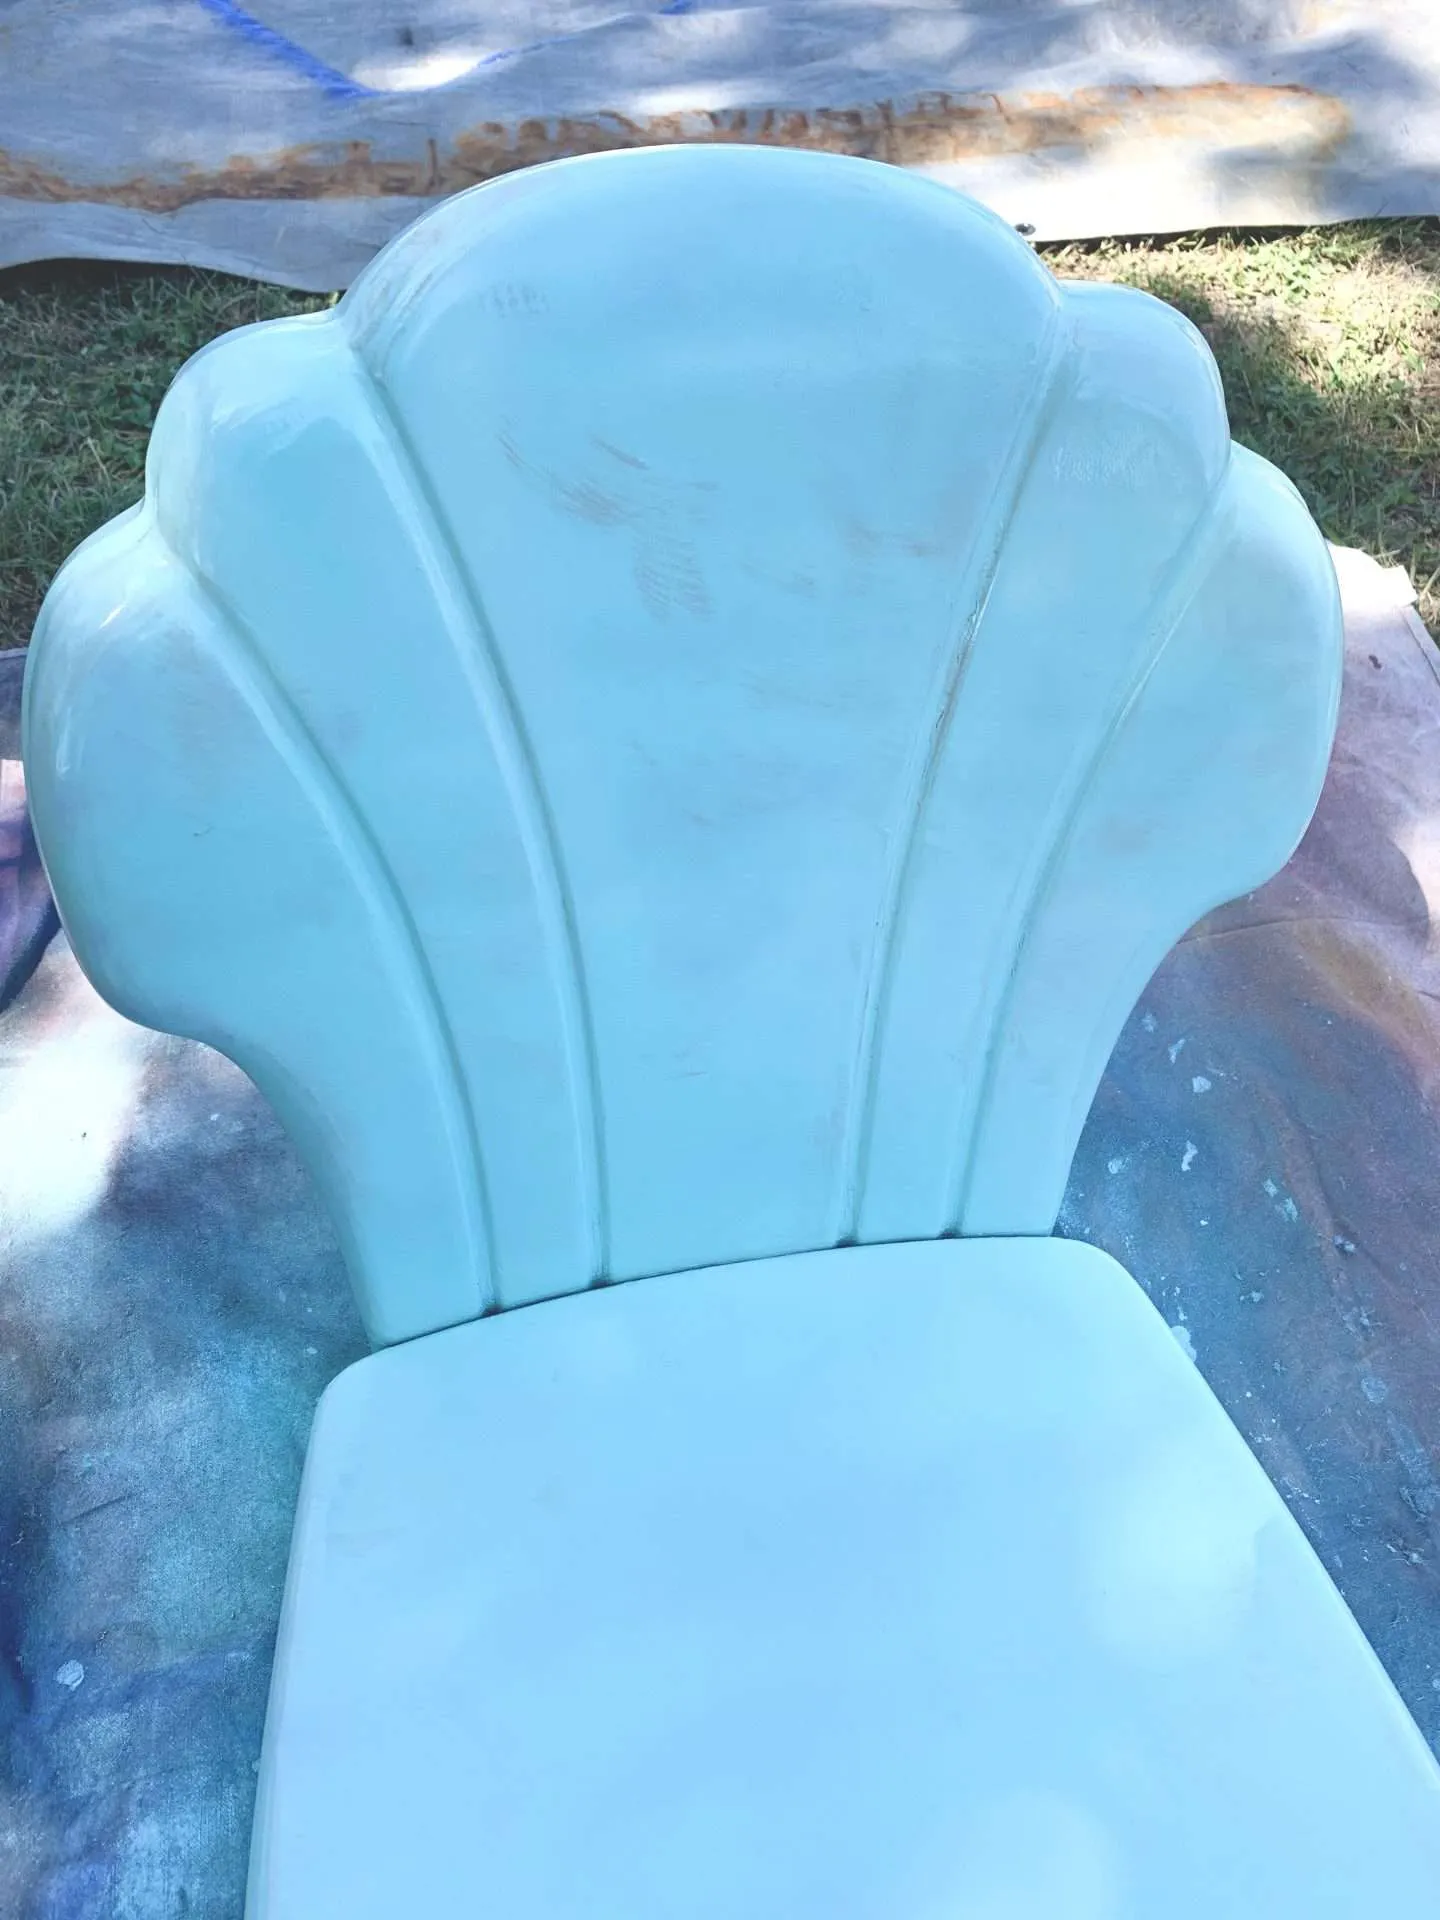
If you are ever trying to remove yearsss of rust and paint from metal surfaces, I highly recommend this approach. We were able to get these chairs back to their bare metal surfaces. This gave us a beautiful finish after painting.
SKIL 9295-01 6.0 Amp 4-1/2-Inch Angle GrinderLotFancy Flap Discs 4 1/2 for Angle Grinder, 20PCS, 40 60 80 120 Grit Sanding Disc, 4.5 x 7/8 Inch Grinding Wheels Welding Tools, Aluminum Oxide Abrasive, Type 27

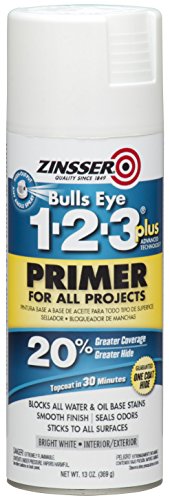
Use Primer
Unfortunately, this was a lesson that we had to learn the hard way.
We thought since we had removed virtually all of the rust and bought a spray paint/primer combination that we didn’t need to use a primer.
However, lead paint (especially red) is HARD to cover. No matter how many coats of paint we put on these chairs, an orange-y, pink stain bled through.
After about 4 coats, we did a light scuff sanding and added a coat of primer. FINALLY, we were able to cover those stains.
It would have saved us SO much time (and paint!) if we had started with primer at the beginning!
Zinsser 272479 Bulls Eye 1-2-3 Plus Spray Primer, 13 oz, WhiteRust-Oleum 285025 American Accents Ultra Cover 2X Gloss, 12 Fl Oz (Pack of 1), Ocean Mist

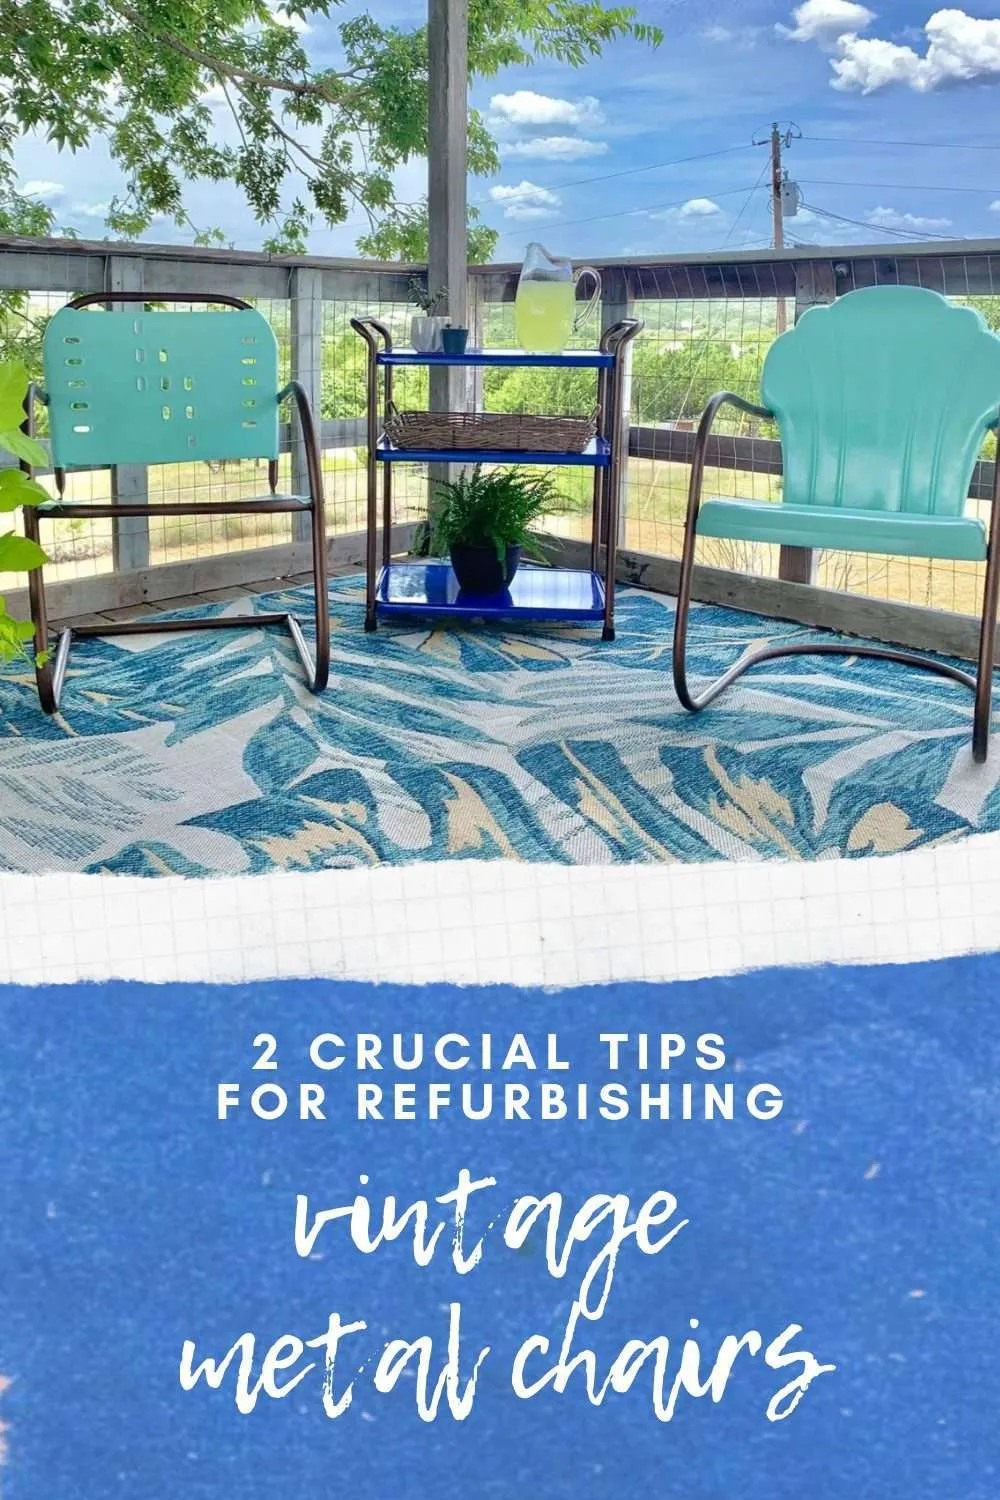
I absolutely LOVE how these chairs turned out!
They are a bright, beautiful addition to our back deck and the finish is nearly FLAWLESS.
These vintage metal chairs were a lot of work and hard to find, but they were worth the wait!

I got 2 matching medal chairs they where my dad’s mother’s chairs . Iive in Kentucky I wanted to paint these I got but then was just thinking of saling them that was a good price on those ones u bought . The ones I had are white painted but need to be redone they haven’t been painted since my grandmother did so that’s been I say 15 years or longer . If it wasnt so dark and storming I send pictures of the two . I thought if anyone interested buying them I got 2 for sale. That close to Lexington or Frankfort or even Louisville Kentucky I’m in the middle of them Anderson County Kentucky.
You could definitely sell them. Every time we go to a flea market, we see some. But I would paint them and keep them if I was you! They could be so pretty!
Your chairs look fantastic! I have been refinishing this type of chair too and I love them. How do you get the bottoms not to chip? Thank you
Thank you! So far there hasn’t been any chipping, but I have noticed a little bit of rust on the backs. But we made sure to get ALL of the old paint off with a wire wheel/drill and the angle grinder with a flap disc and that made a HUGE difference.