[Disclaimer: Finding Mandee is reader-supported, if you purchase through links on my site I may earn an affiliate commission at no additional cost to you. As an Amazon Associate, I earn from qualifying purchases.]
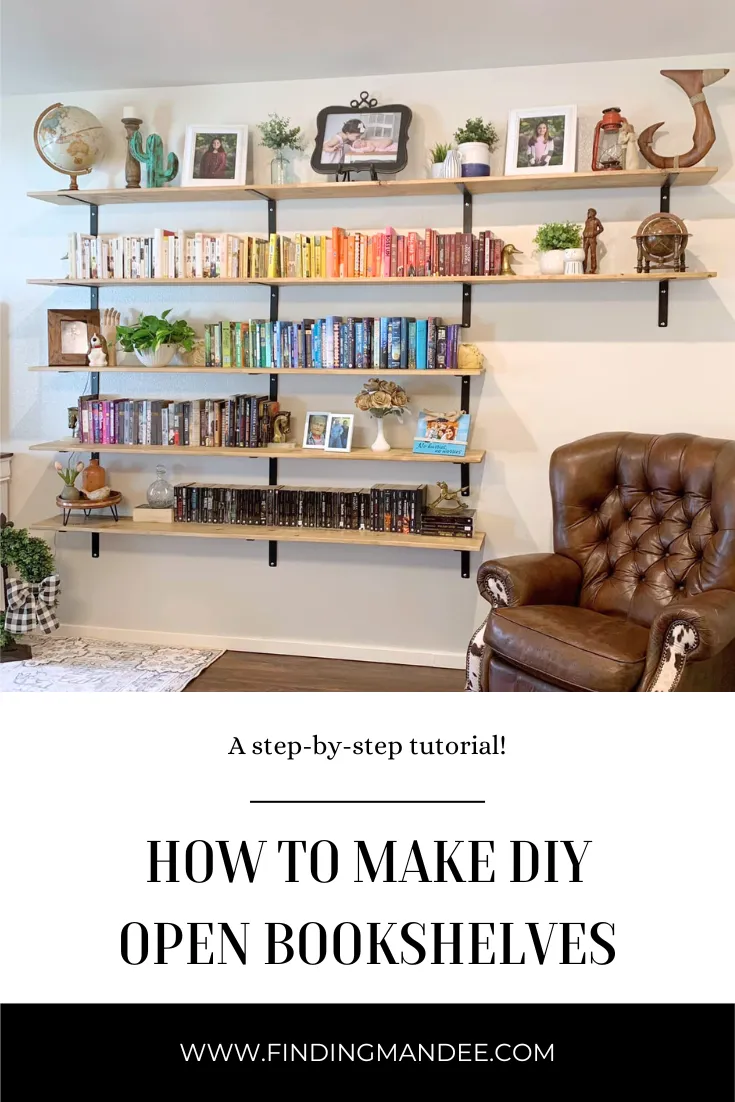
We moved into our new house on Wheeler Army Airfield in Hawaii, with 7 boxes full of books and no bookshelves! So, we had to figure something out…or live with those boxes for the next 3-4 years.
I thought hard about getting the IKEA Billy Bookshelves and customizing them to look like built-ins. I’ve seen DIY-ers make gorgeous home libraries that way. Buuutttt, it involves removing baseboards and attaching trim to the walls and ceiling, and military housing isn’t known for being lenient on move-out inspections.
So, we decided to make some DIY open bookshelves. After getting our supplies, we were able to knock out this project in one weekend!
Here’s how we did it:
Supplies
- metal shelf brackets (17)
- 1x12x10 pine boards (2)
- 1x12x8 pine boards (3)
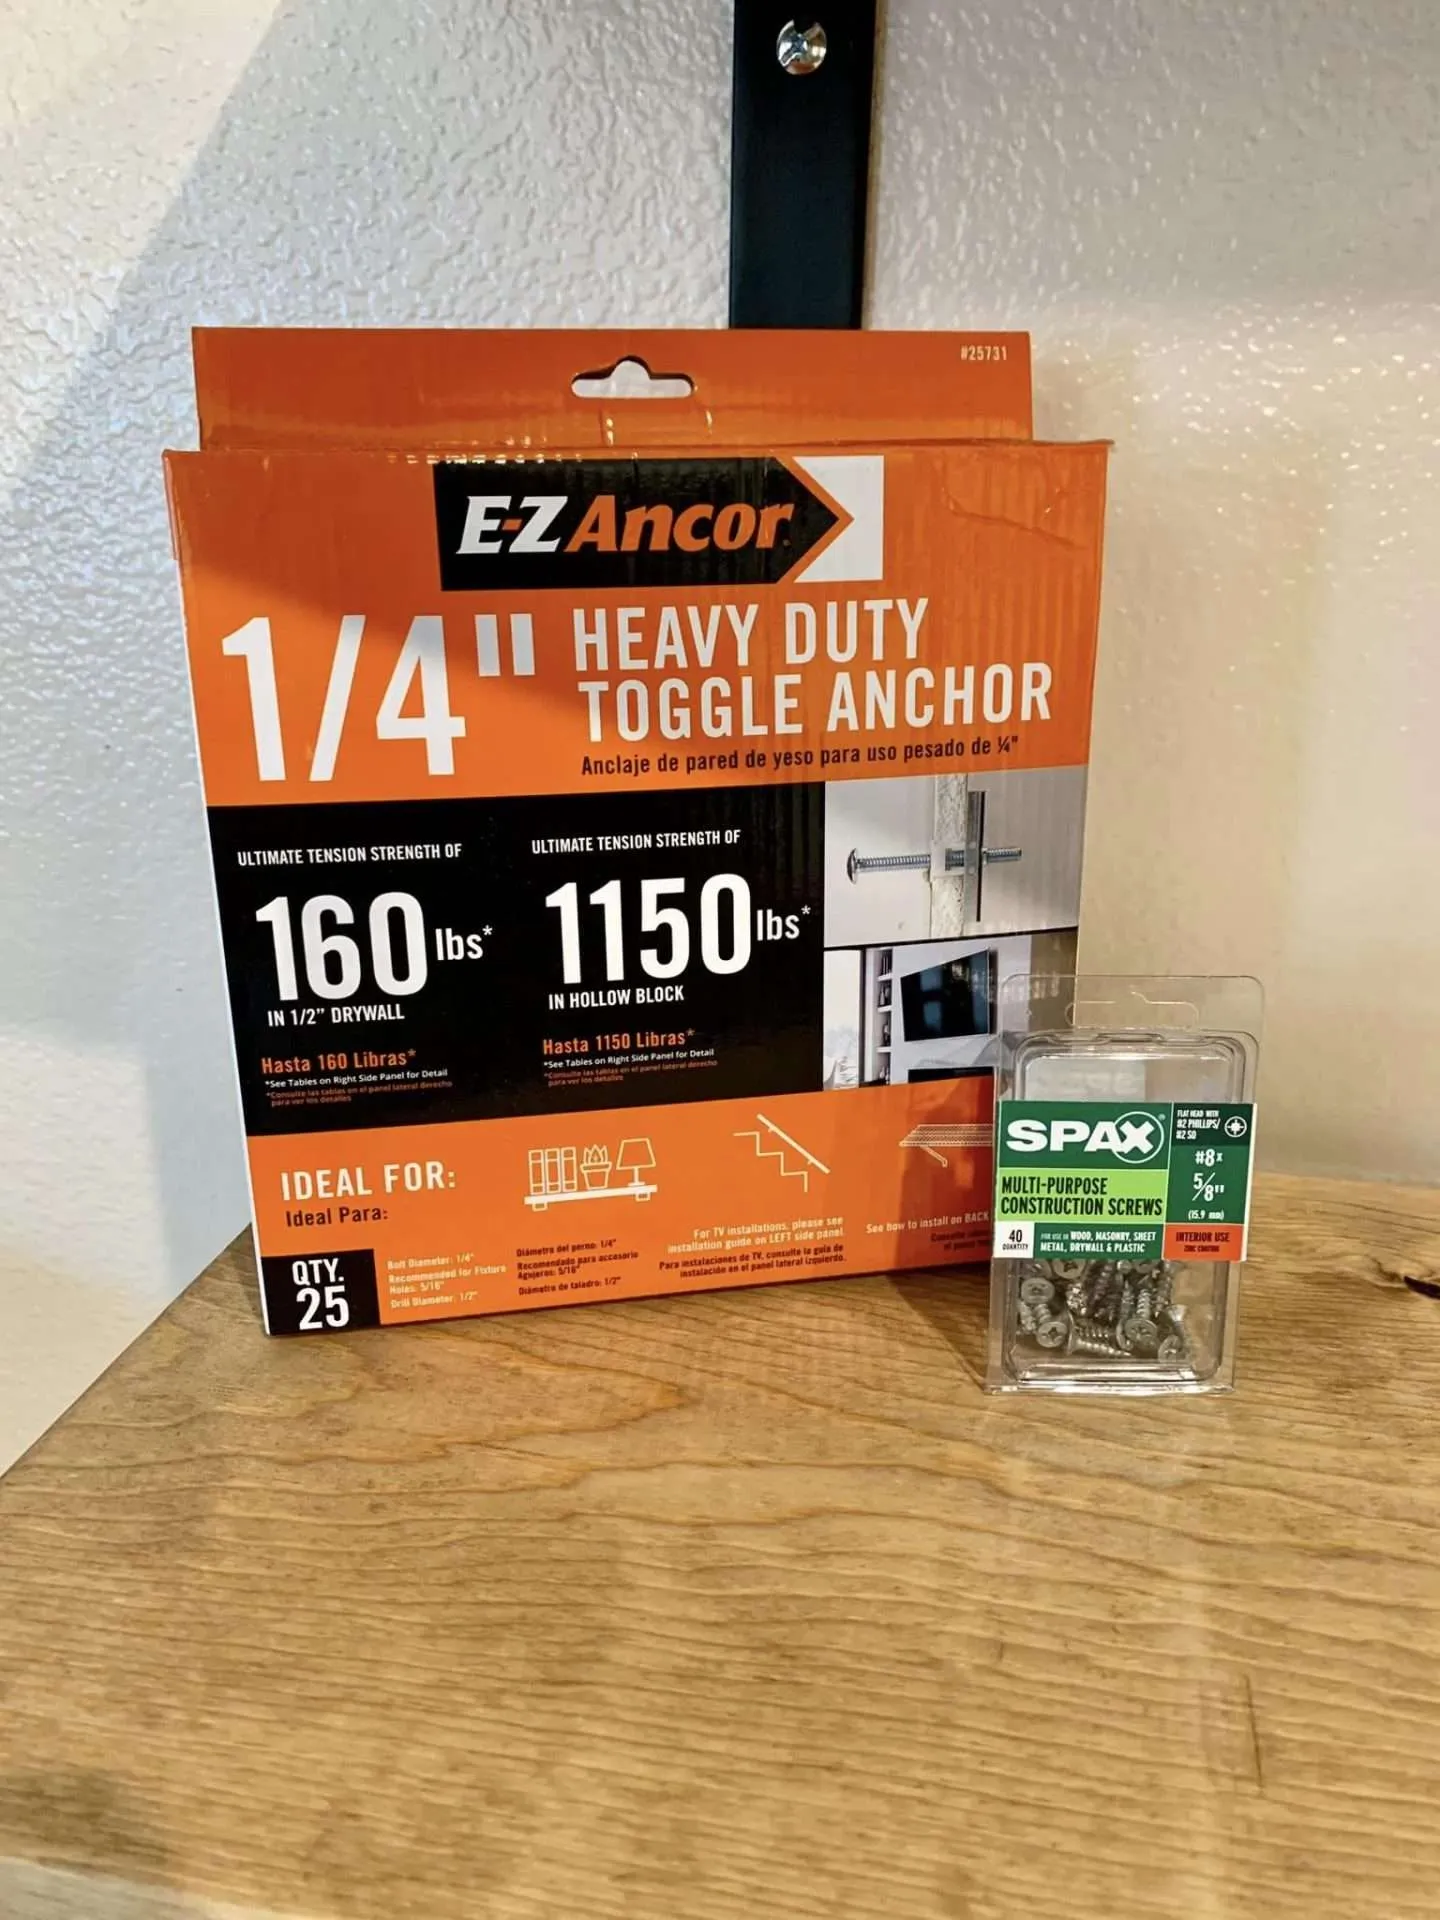
- 1/4″ heavy duty toggle anchors (22)
- 1/2″ armor plated drill bit
- drill
- laser level
- tripod
- stud finder
- 1/2″ wood screws (34)
- painter’s tape
- orbital sander & sanding pads
- wood stain (special walnut)
- rags
- measuring tape
- pencil
- polycrylic topcoat (semi-gloss)
- topcoat applicator
8 Pack – L12CRAFTSMAN V20 Cordless Drill/Driver Kit, 1/2 inch, Battery and Charger Included (CMCD701C2)


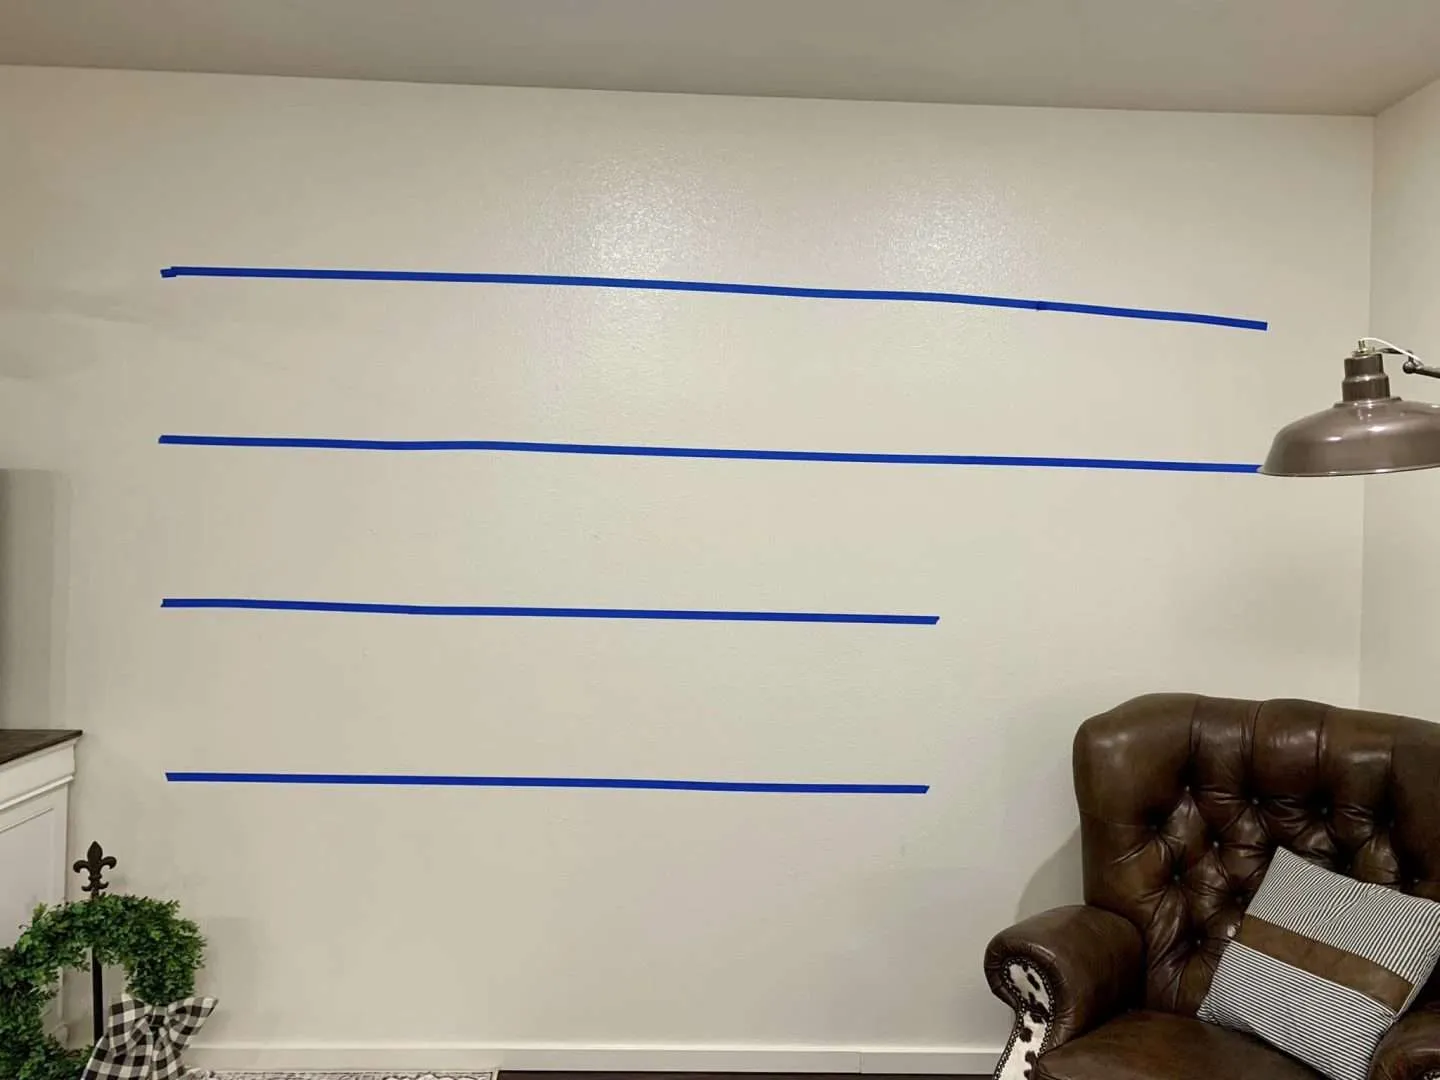
Step 1: Figure Out Shelf Configuration
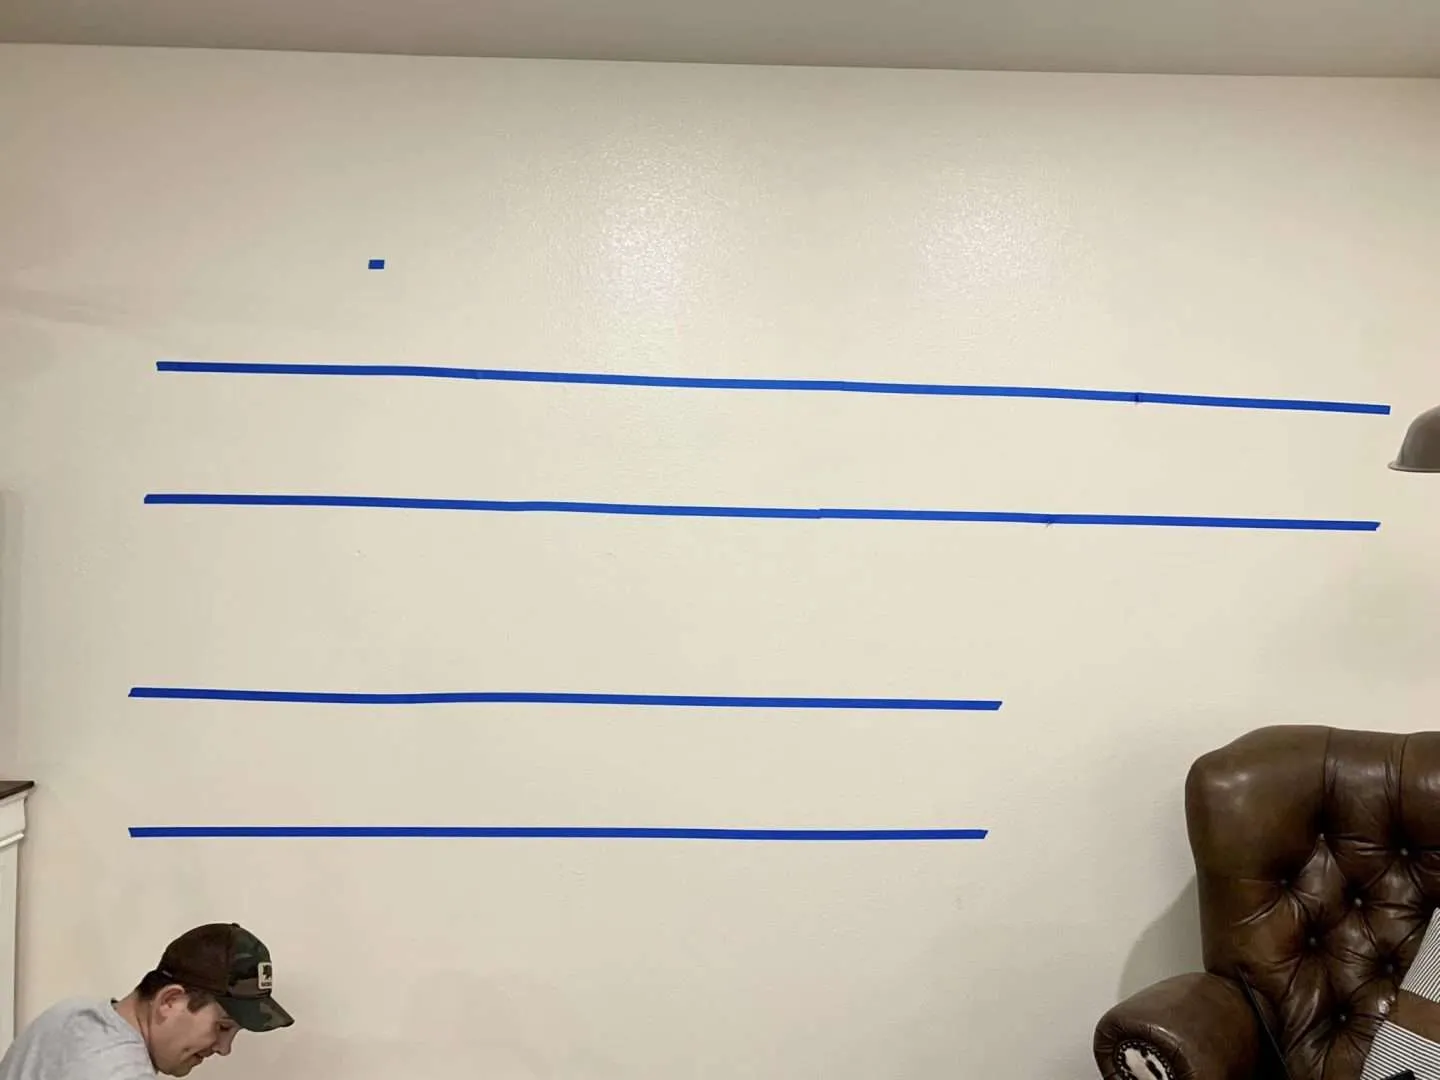
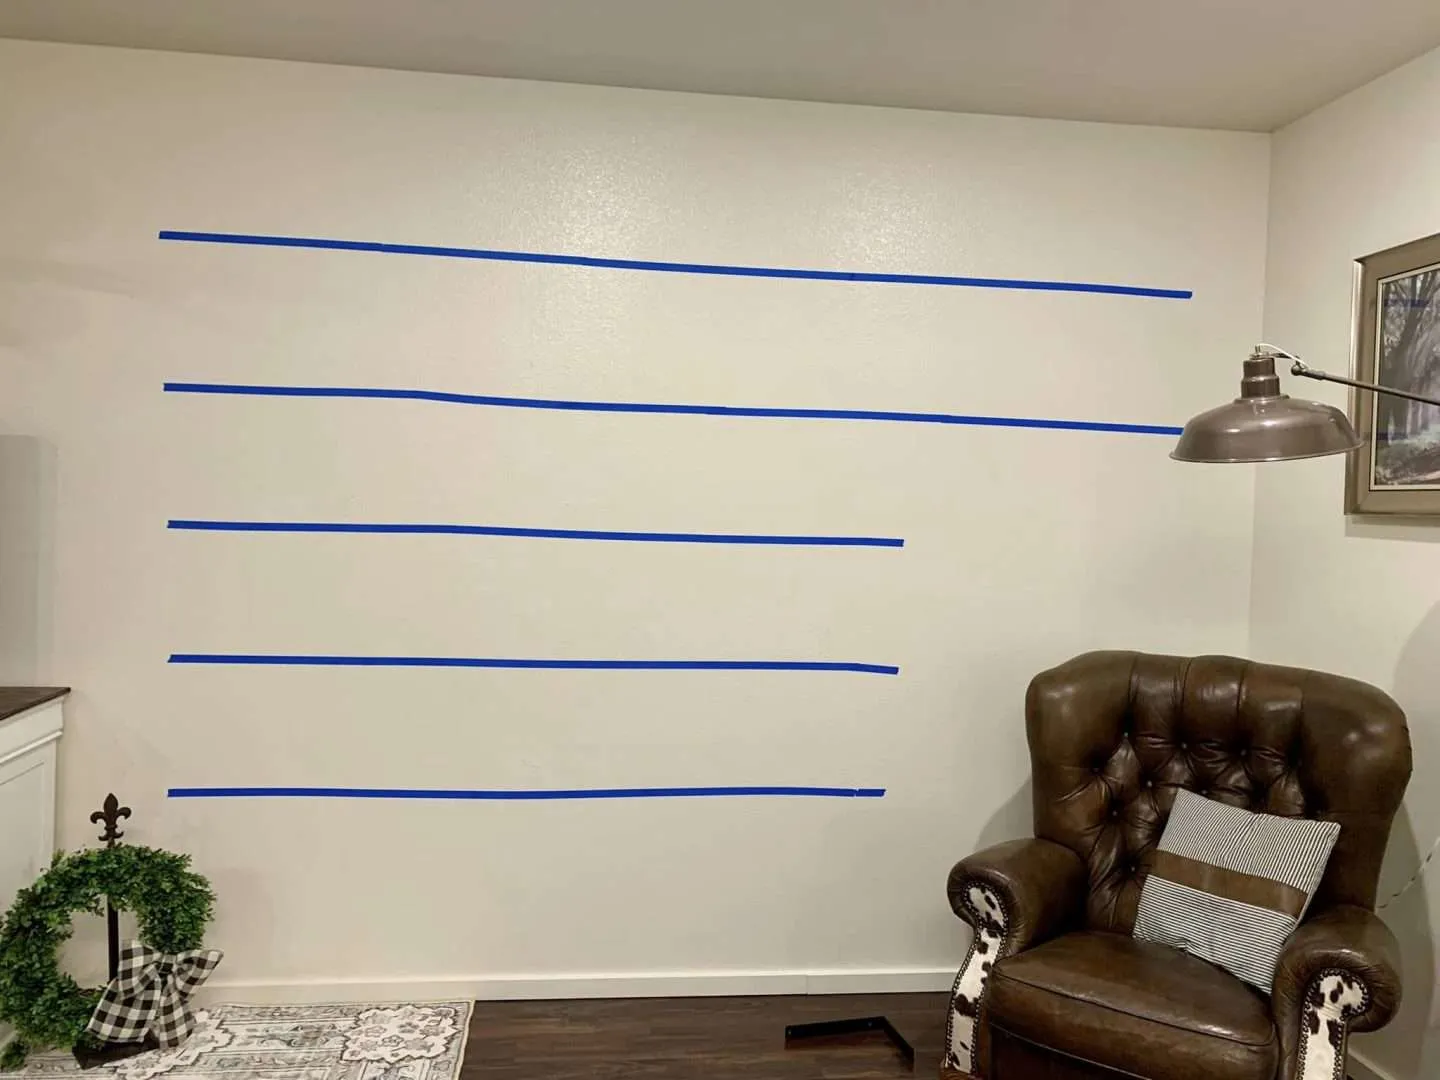
The first step to building our DIY open bookshelves was to figure out where and how they would be placed on the wall.
I used painter’s tape to map out my shelf layout. I actually tried a few different configurations with the tape before I decided on the final one. The tape wasn’t precise because I knew we would get out the laser later.
Once we knew how many shelves were going up and where. We had to figure out the length to fit the maximum amount of stuff, but still leave enough room for the furniture on both sides.
We decided to make the top 2 shelves longer to extend over the chair, creating a kind of cozy little reading nook.
4PCS Premium Blue Painters Tape, Paint Tapes, Masking Tape for DIY Crafts & Arts, Painting Tape with Adhesive Backing, Easy Removal Painter’s Wall Paper for Decoration, Labeling, Home (0.94IN*65FT)Pink Power 25ft Pink Tape Measure – Pink Measuring Tape Measure for Womens Tool Kit with Retractable Blade and Lock Button – Girls Tape Measure for Pink Tools – Lightweight Measurement Tape


Step 2: Mark Placement for Shelves
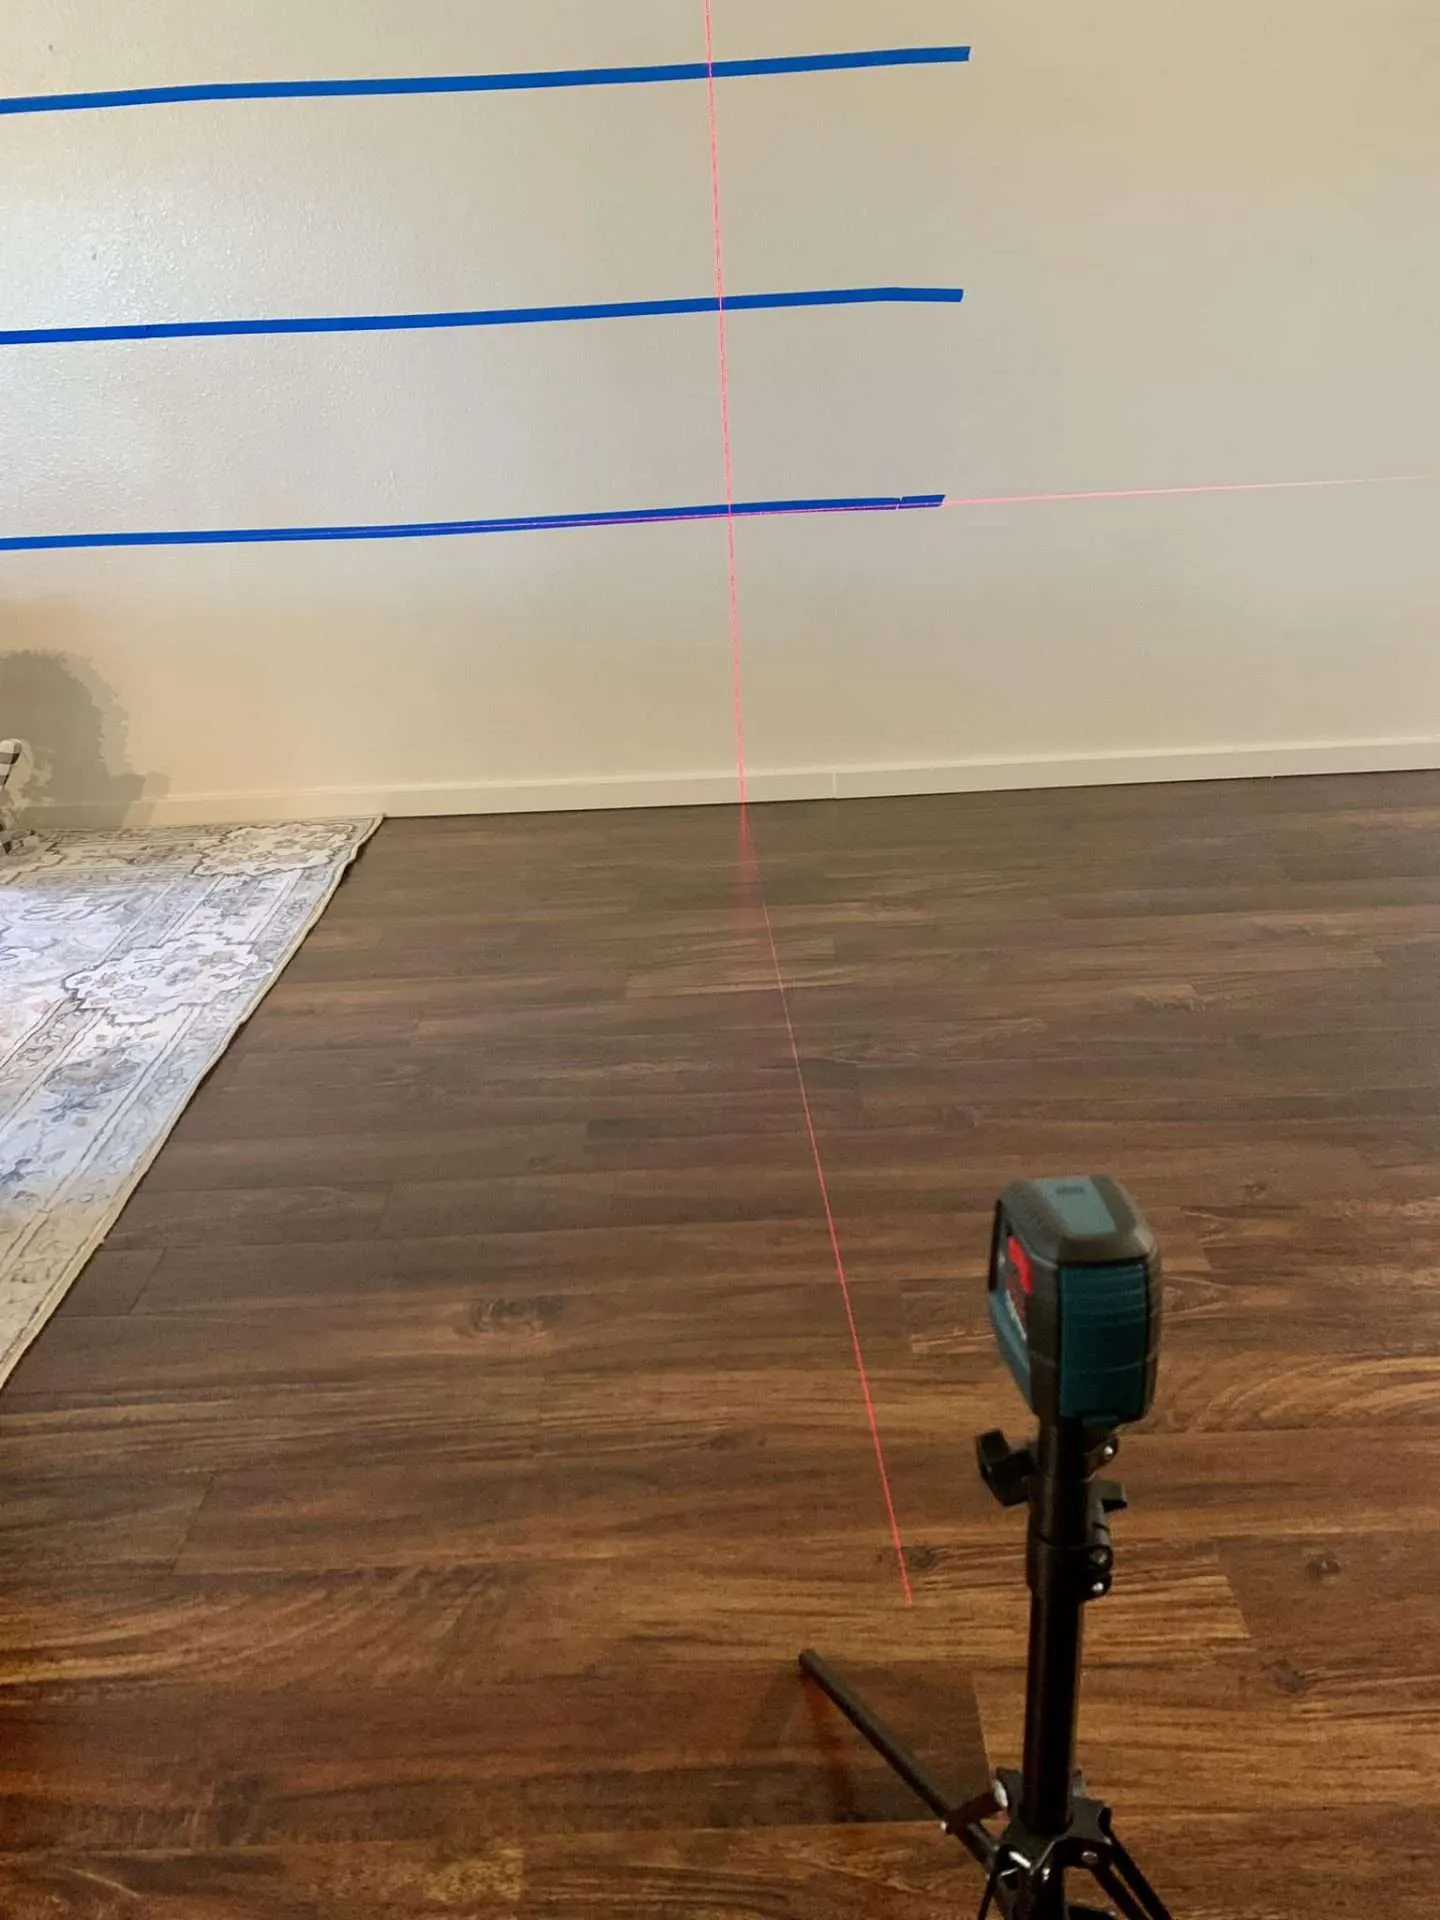
The next step to making our DIY open bookshelves was to mark the placement of each bookshelf.
Using the laser on the tripod, we set the horizontal line to where we wanted the bottom shelf to be. It is 24 inches from the ground.
Then we used the laser’s vertical line to mark the center of the bottom shelf. When determining the center of your shelf, make sure to put an equal distance between the ends of the shelf and the furniture on either side of it.
**Pro Tip: Take your time doing this. All of the other shelves will be lined up on this mark too.**
Using this same process, we marked the height and center for each of the shelves. Which was mostly in line with the tape layout, but of course the tape wasn’t perfectly straight.
There are 14 inches between the bottom 2 shelves, 15 inches between the middle 2 shelves, and 21 inches from the top shelf to the ceiling.
Bosch GLL55 50ft Cross Line Laser Level Self-Leveling with VisiMax Technology, L-Bracket Adjustable Mount and Hard Carrying Case, 4.4 x 2.2 x 4.2 inchesBOSCH Aluminum Heavy Duty Elevator Quick Clamp Tripod BT300, 45 Inch, Silver


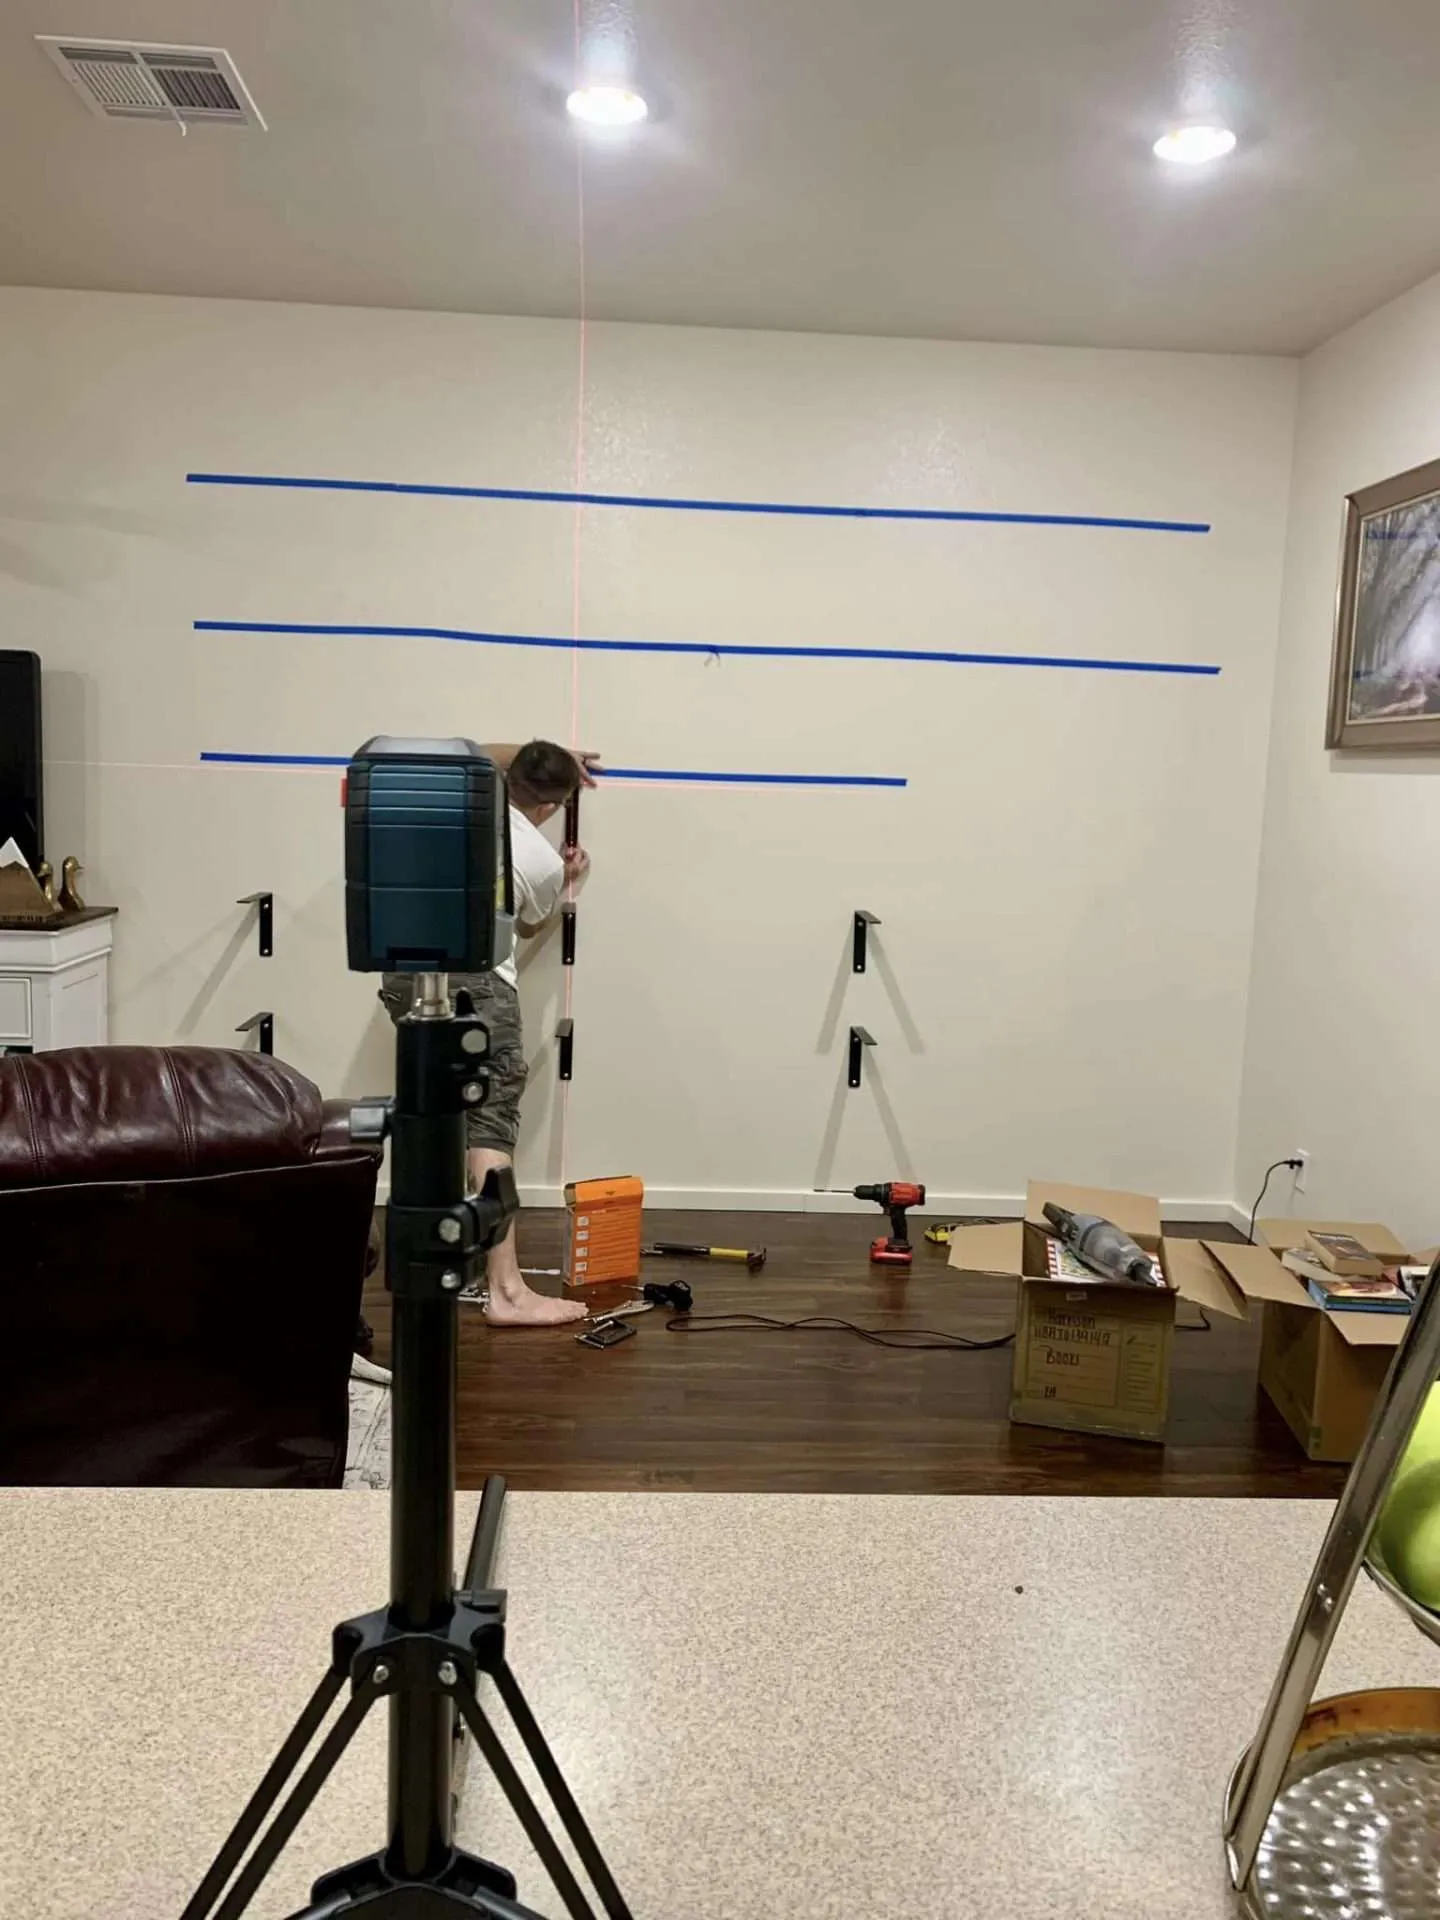
Step 3: Mark Placement for Shelf Brackets
Next, we got out the stud finder to mark the placement of the shelf brackets. It was fate that our center line fell right on top of a stud.
None of the other brackets landed on studs, but that’s what heavy-duty anchors are for. However, the more brackets that can be placed on studs the more secure your shelves would be.
Using a pencil, we held a bracket up to the wall and marked where the bolts would go for each individual bracket.
Our shorter shelves are 7 feet long and have 3 brackets placed 37 inches apart.
The top two shelves are 10 feet long and have 4 brackets. We kept the left 3 brackets lined up with the brackets on the bottom shelves for the sake of continuity. Then placed the bracket on the far right 34 inches apart. Although there is a 3-inch difference in the bracket placement, it really isn’t noticeable.
Franklin Sensors FST1302 ProSensor T13 Professional Stud Finder with 13-Sensors for The Highest Accuracy Detects Wood & Metal Studs, High Accuracy with High SpeedStud Finder Wall Scanner 5 in 1 Upgraded Electronic Wall Scanner with Battery for Wood Metal and AC Wire Detection,HD LCD Display and Audio Alarm (Orange)


Step 4: Drilling Holes & Placing Anchors
After all of the brackets were marked, it was time to drill the holes and place the anchors.
Since our house here in Hawaii has hollow metal studs, we ended up using anchors for all of the holes, even the one over the studs.
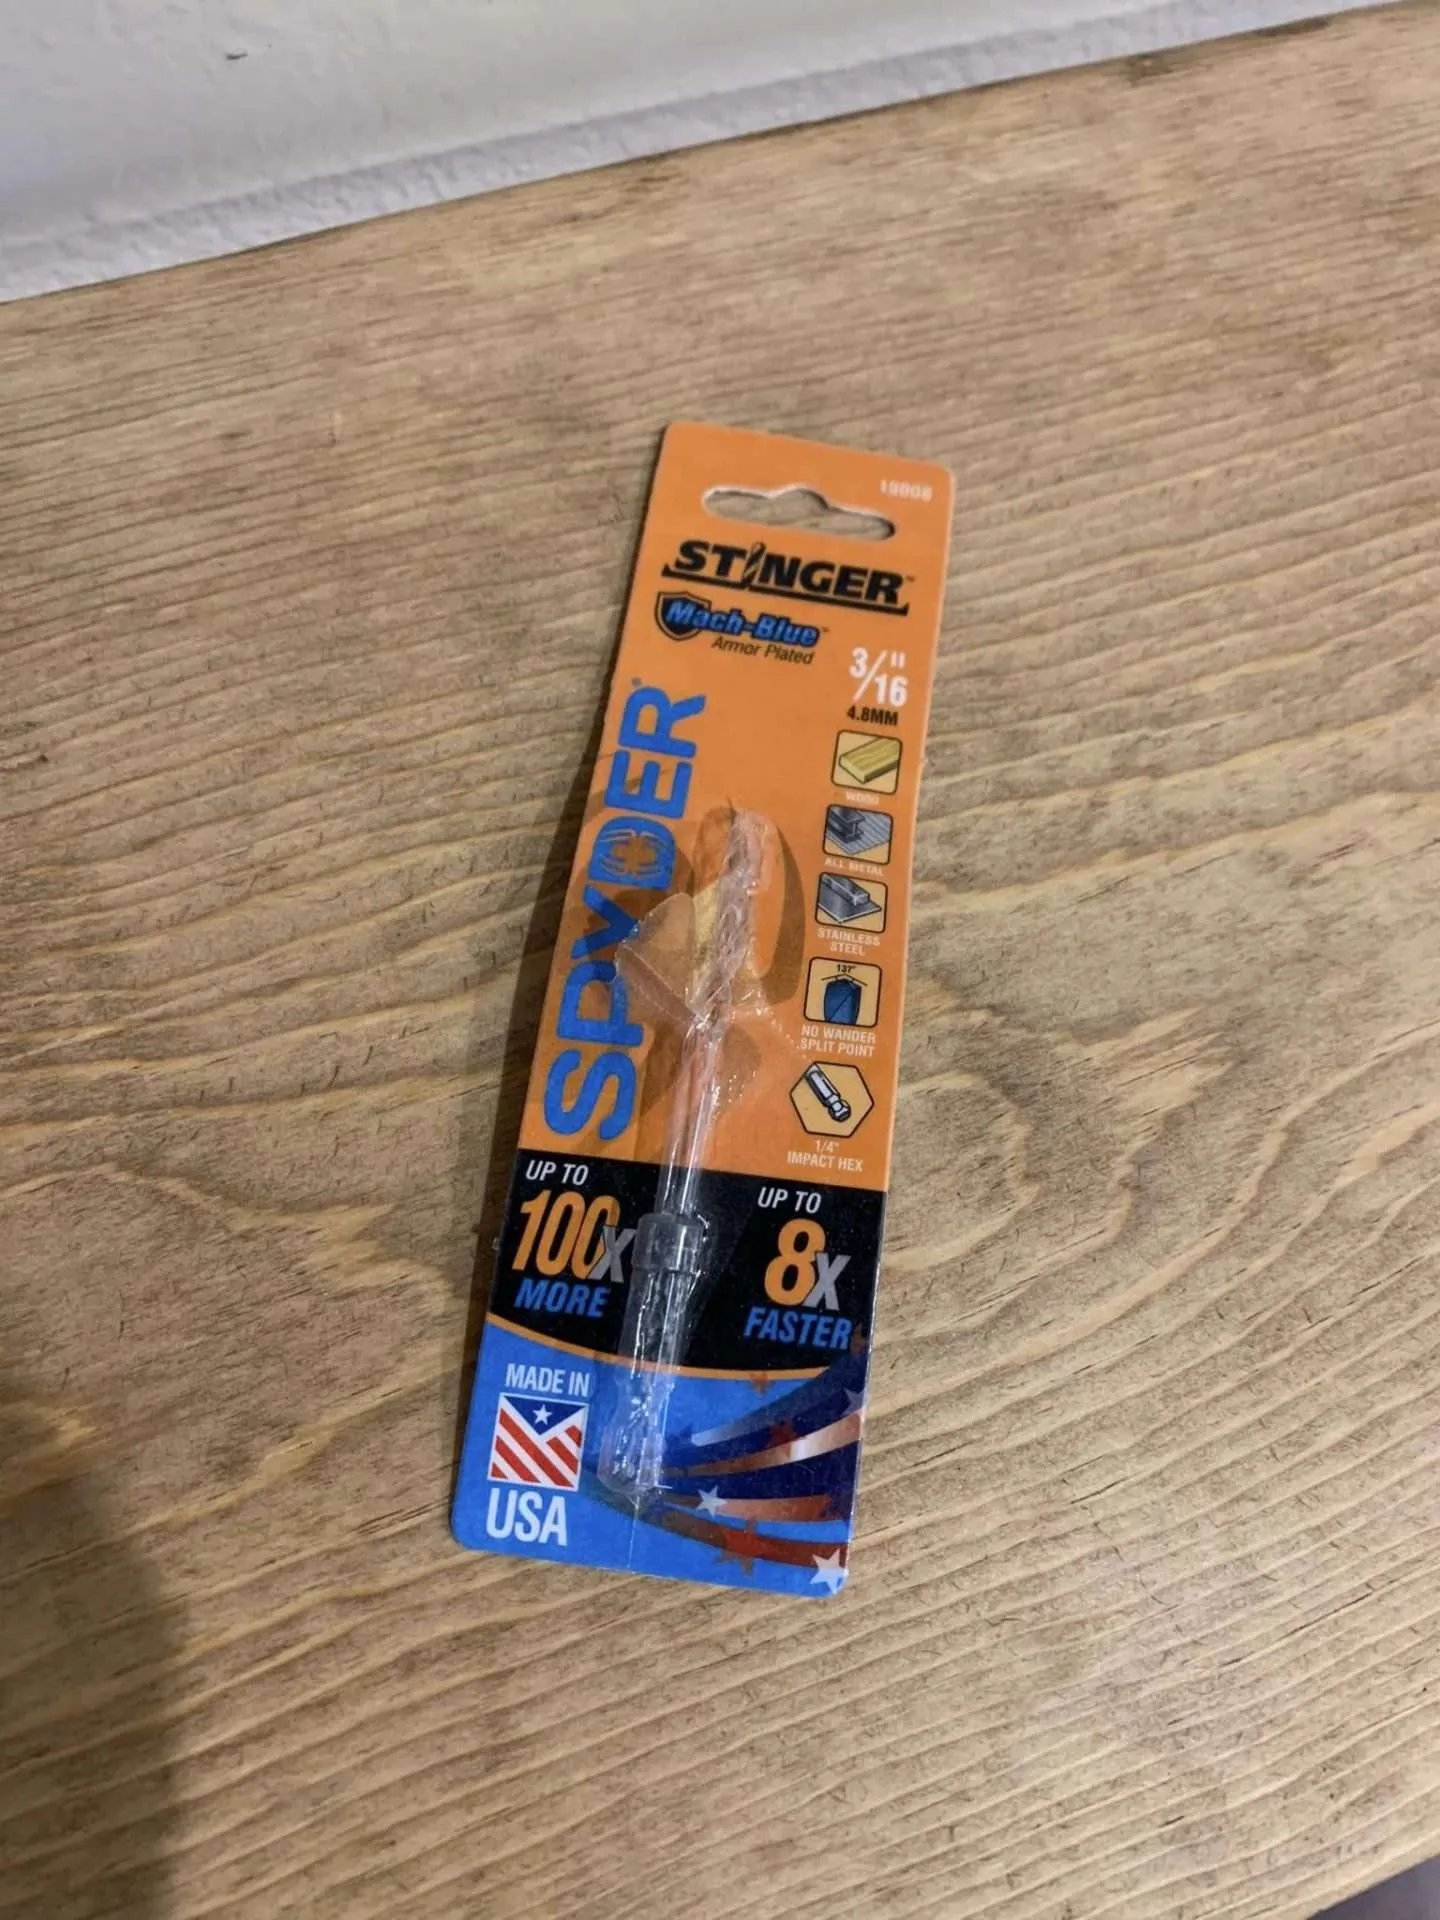
**Pro tip: The easiest way to drill into metal studs is with an armor-plated drill bit.**
To place these heavy-duty toggle anchors you first have to drill a 1/2-inch hole in the wall. The bolt diameter for these toggle anchors is only 1/4-inch, but the box tells you what size drill bit you will need. And ours said the drill diameter needed to be 1/2-inch.
**Pro tip: Read your box thoroughly before you leave the hardware store so that you don’t have to make an extra trip back!**
After the hole is drilled follow the instructions on the box for how to place the anchor. Then install the brackets.
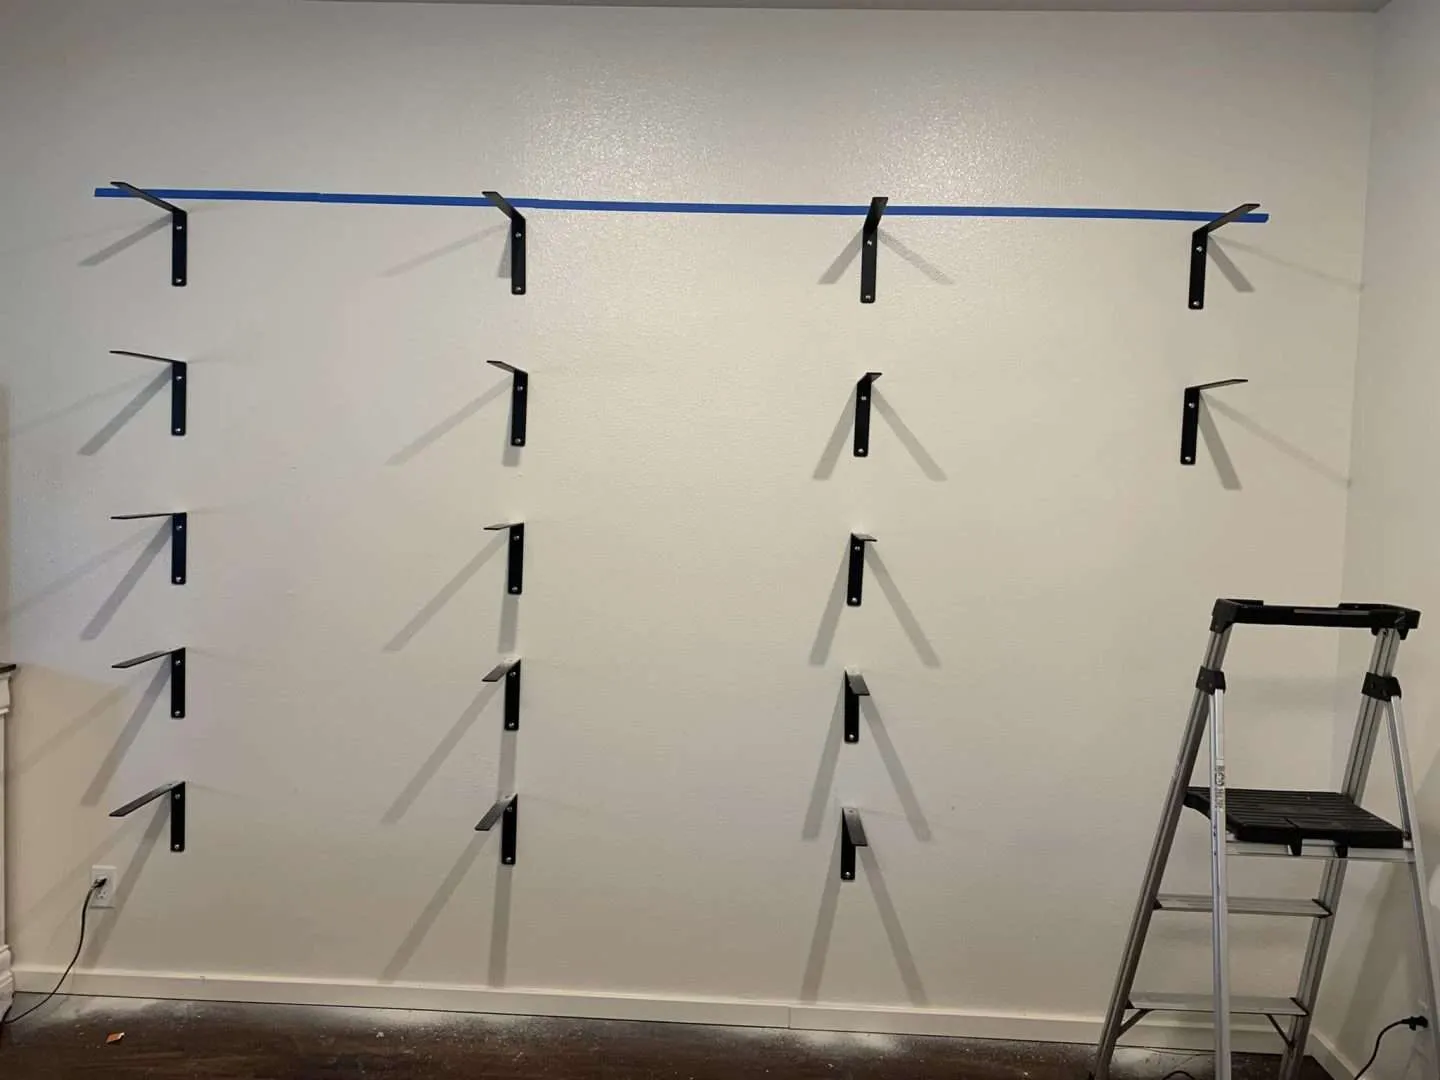
(At this point, our shelves looked like some kind of strange, abstract art gallery.)
Wensilon (30 pcs) 1/4Spyder 19017 10 PC Stinger Drill BIT Set


Step 5: Prepare Wooden Shelves
After all of the brackets were ready, it was time to prepare the wooden shelves.
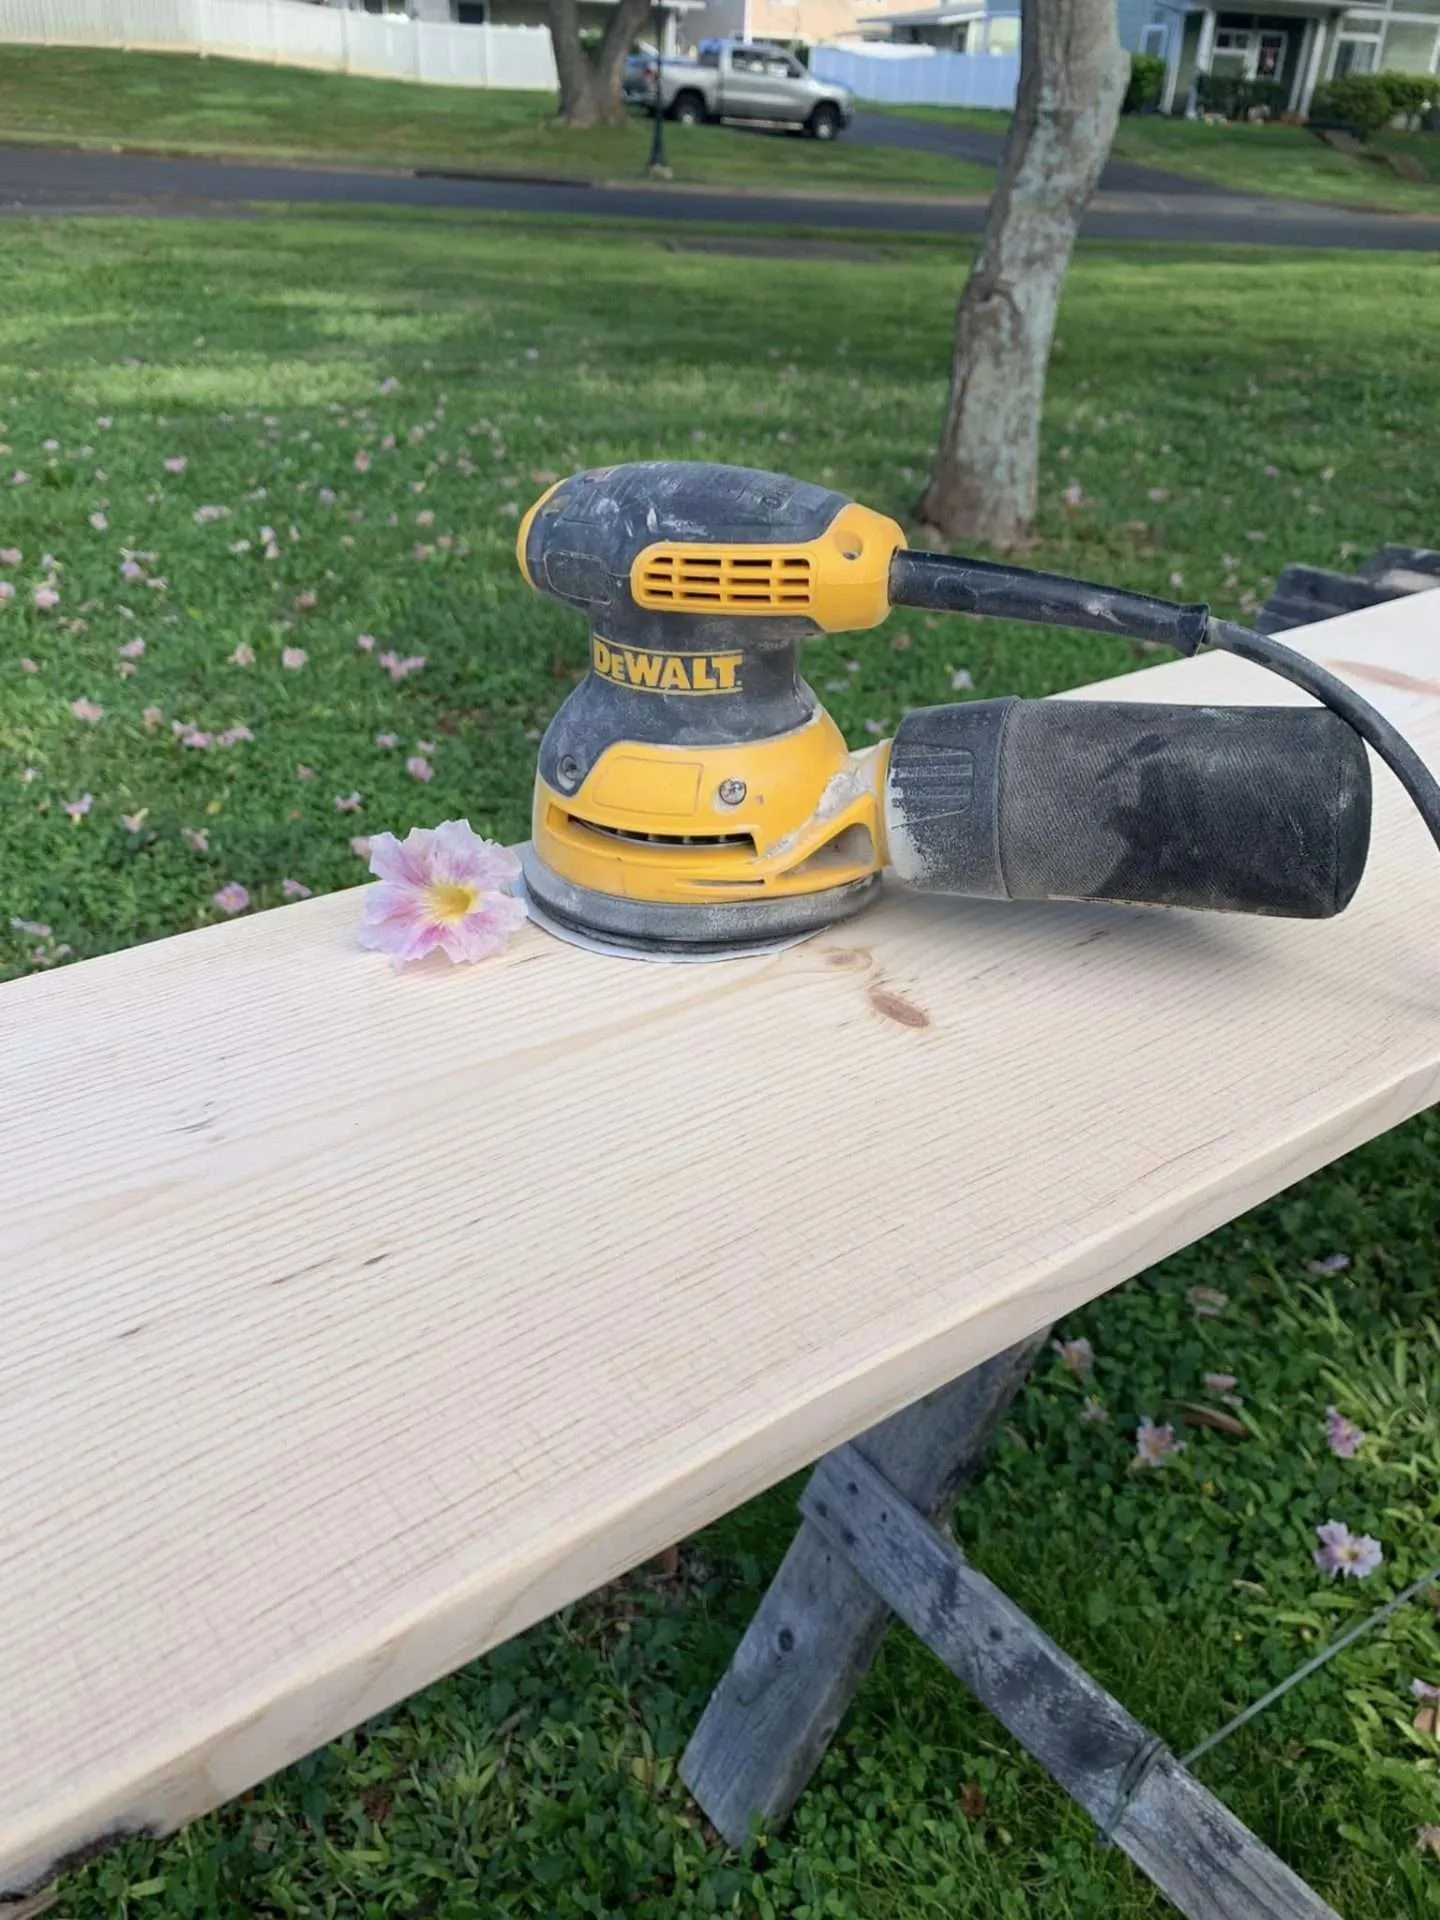
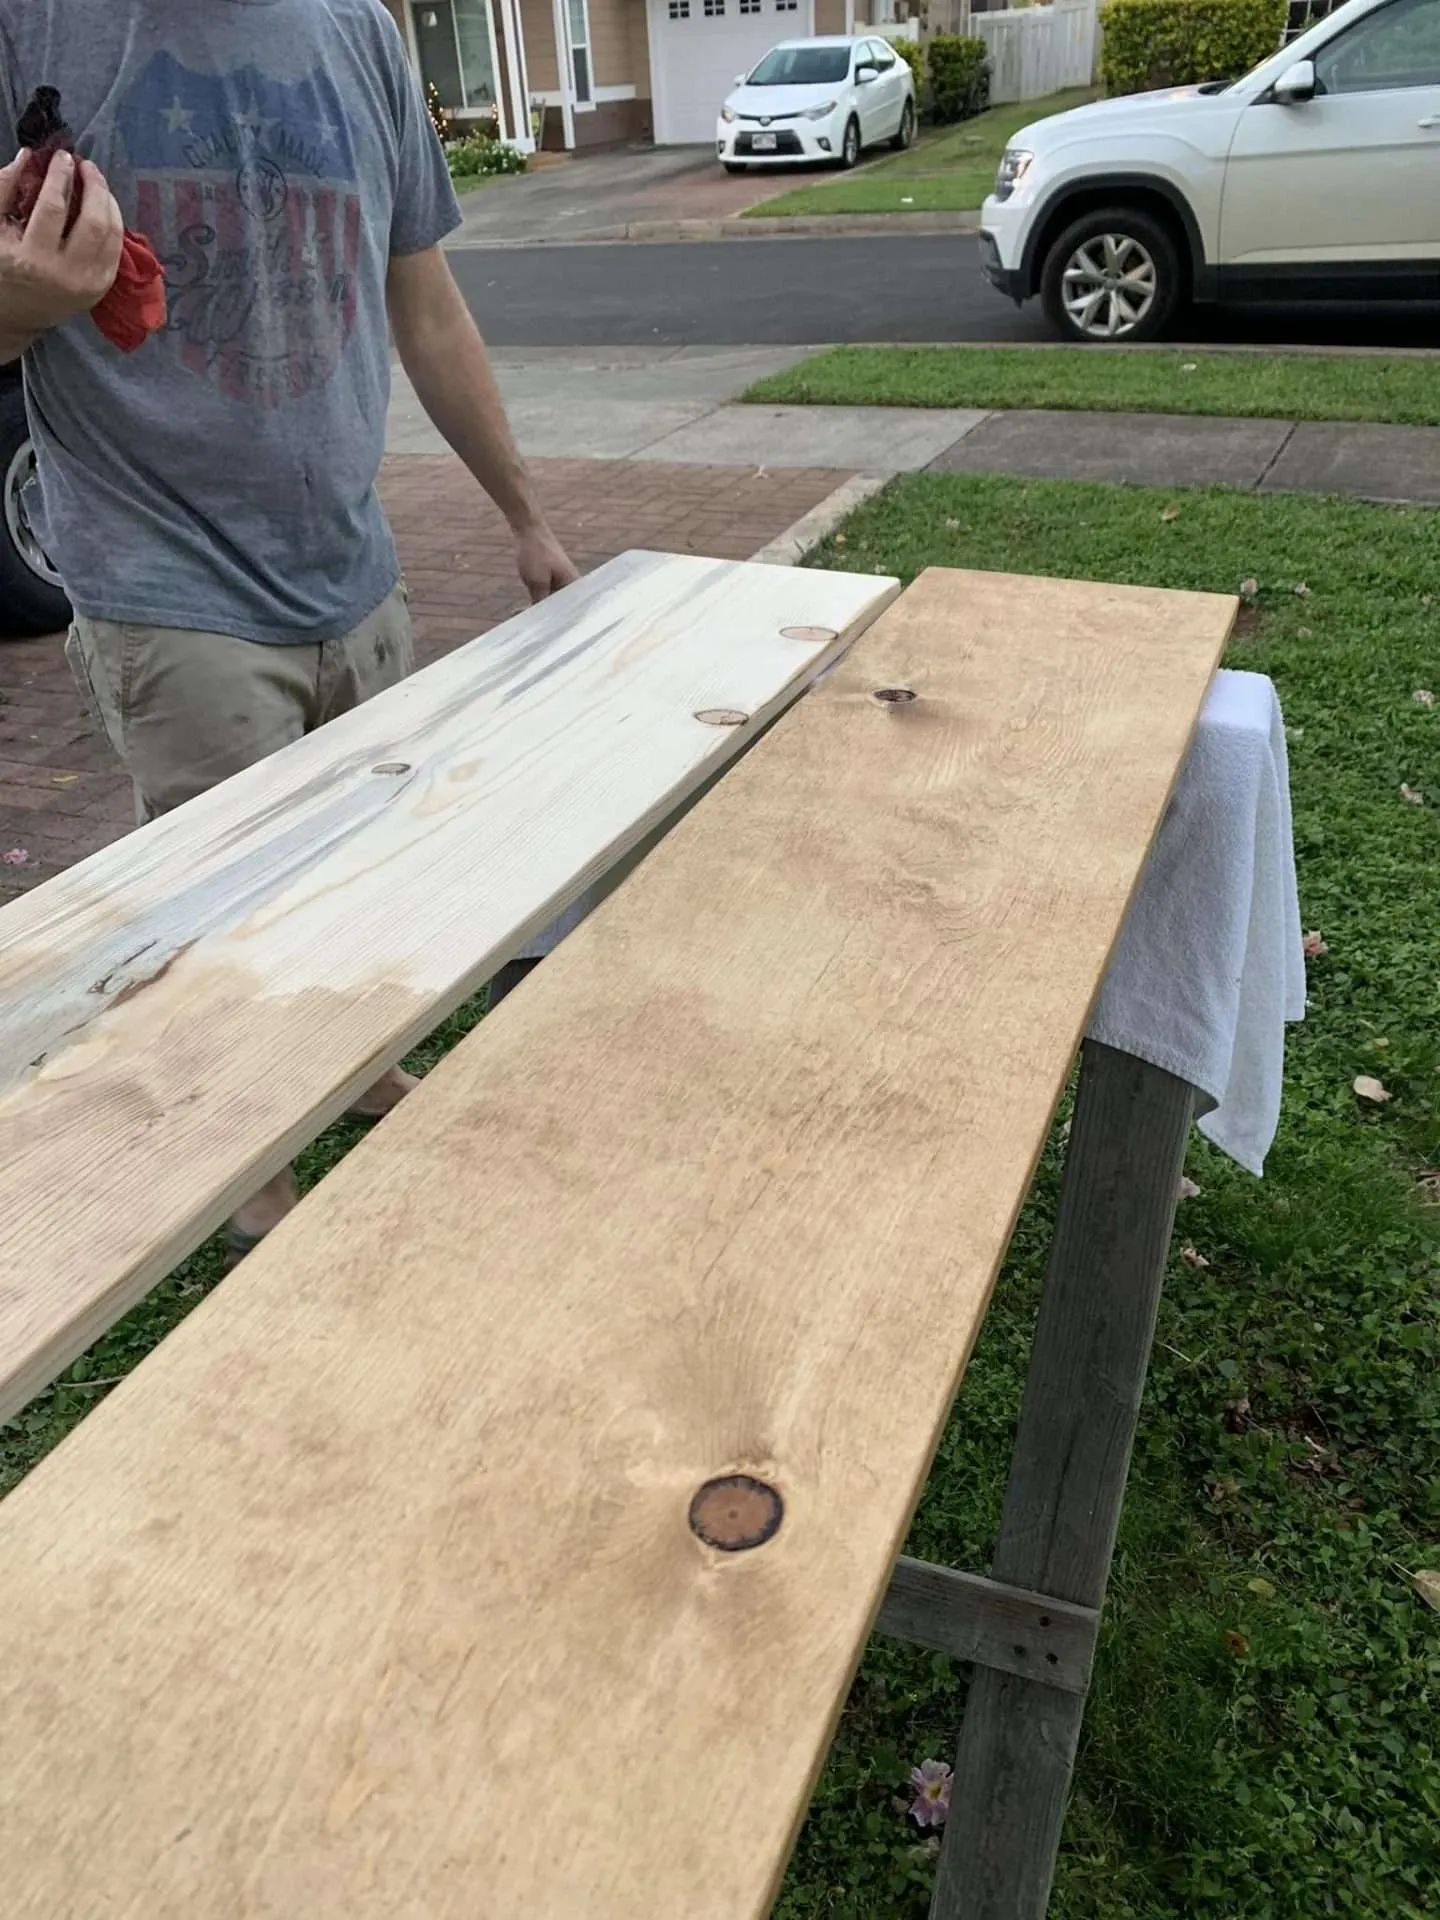
First, we cut the wood down to the correct sizes. There were three 7-foot shelves and two 10-foot shelves.
Then we sanded them until they were as smooth as possible. I started with a 120-grit sanding pad, moving on to a 220-grit, and finally a 320-grit sanding pad.
After cleaning the dust off of them, we stained the shelves with Minwax Wood Finish (Special Walnut) and a rag. The stain was left to dry overnight.
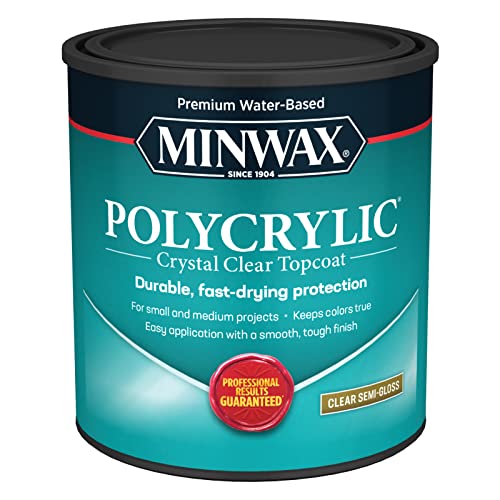
The next day we did a light clear coat on all the shelves. We used a Minwax Polycrylic Topcoat (semi-gloss) and applied it with a large applicator. The topcoat was left to dry overnight.
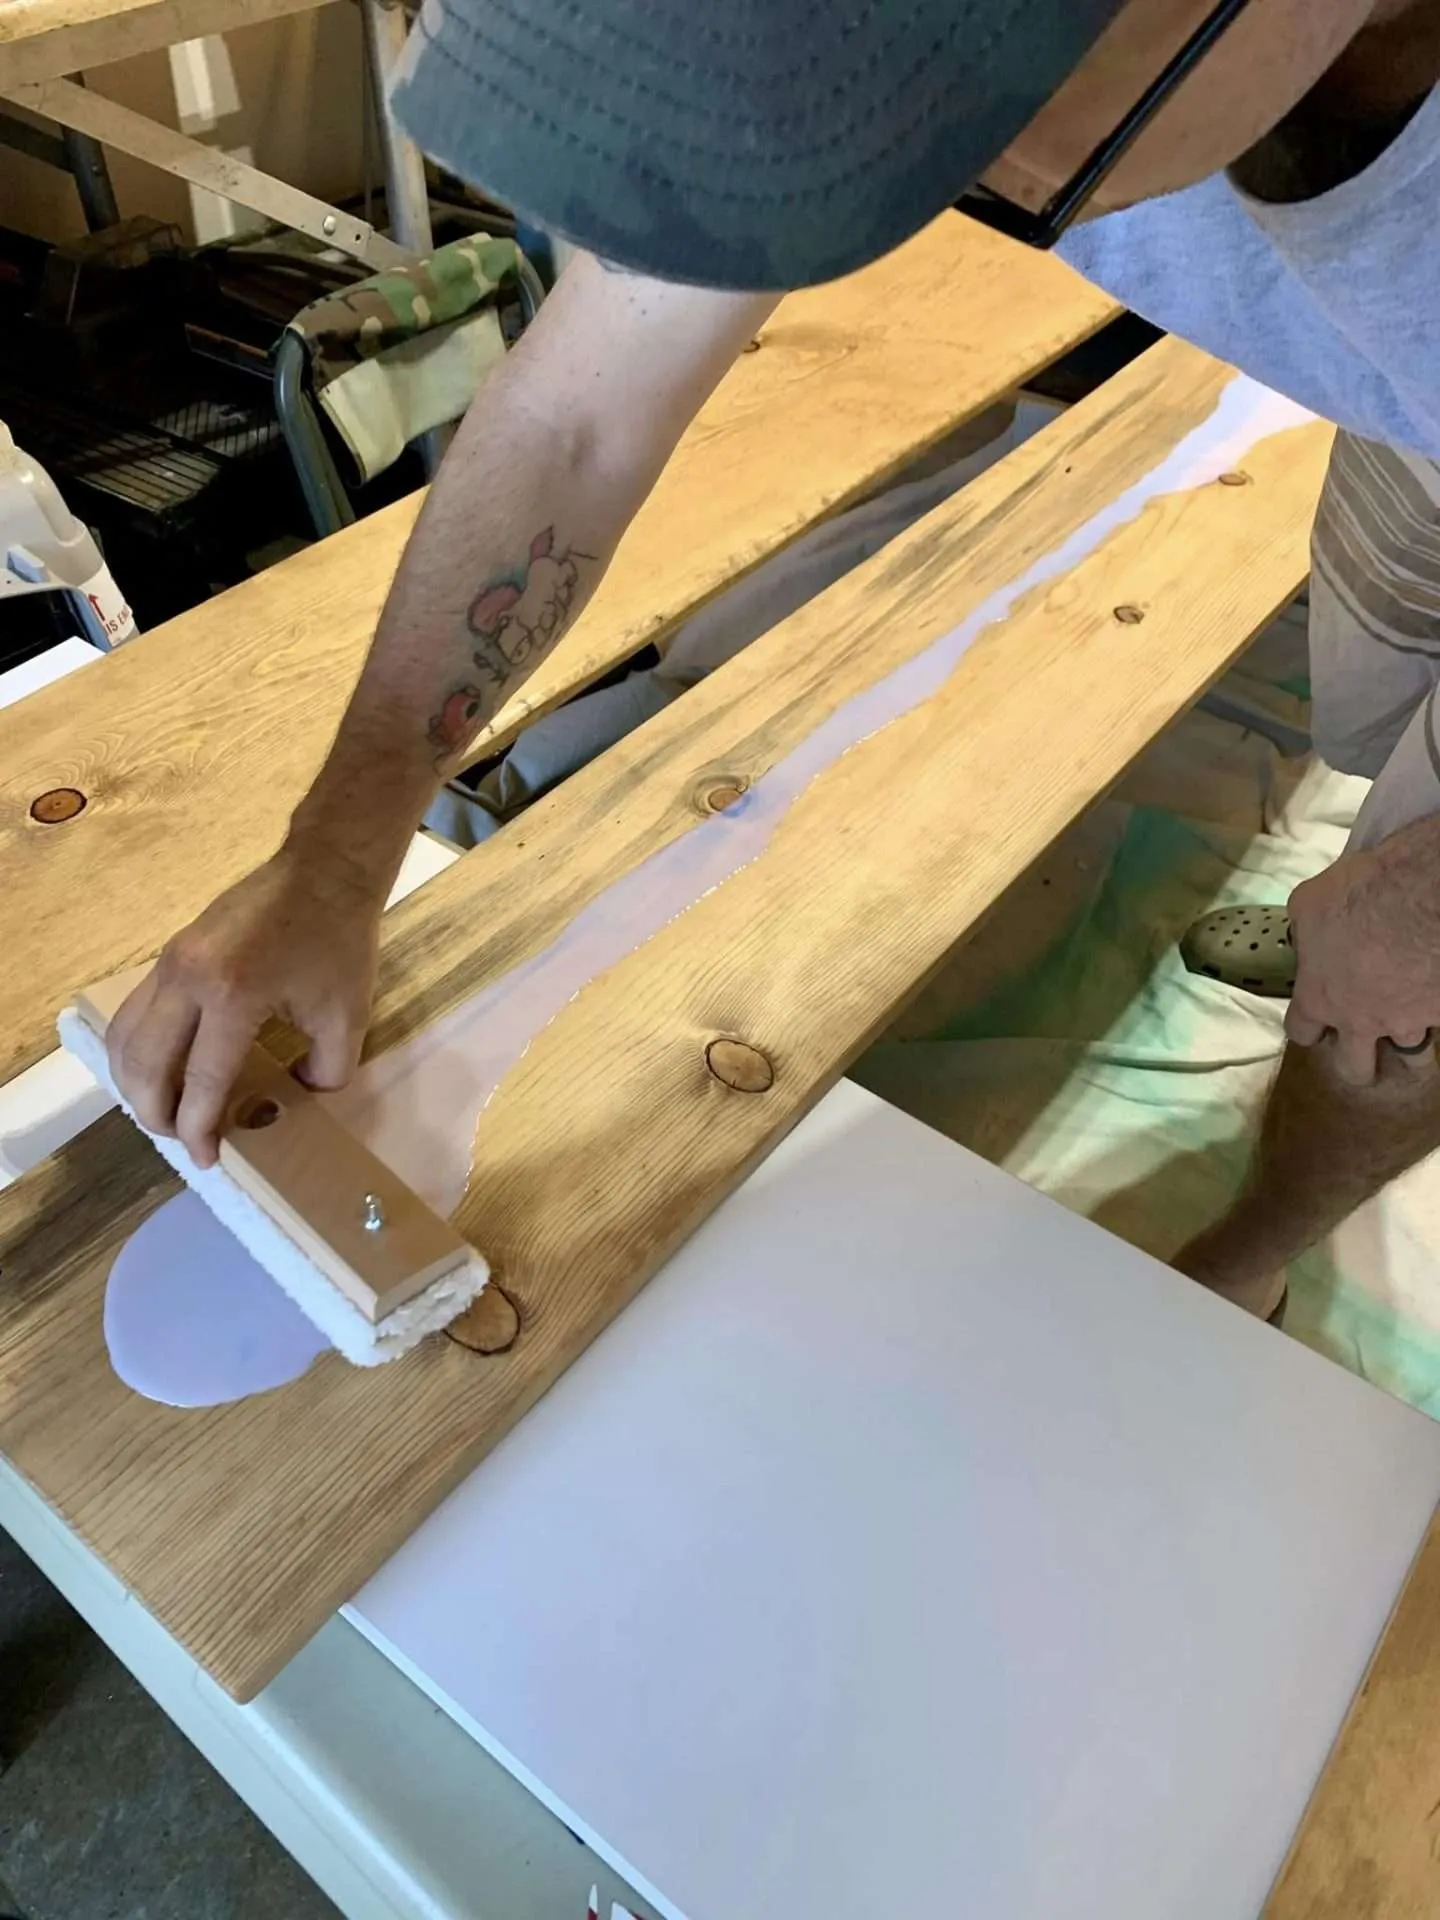
1 qt Minwax 64444 Clear Polycrylic Water-Based Protective Finish Semi-GlossRUST-OLEUM 989751 Waterborne Applicator

Step 6: Attach Shelves & Decorate
After the top coat was fully dry, we took the shelves inside and screwed them onto the waiting brackets using 1/2-inch wood screws.
And finally, it was time to unpack the books and decorate!
The toggle anchors that we used are rated for up to 160 pounds in drywall. The shelves have been up for a few weeks and everything is holding up fine.
**Pro tip: Place your books and heavy items close to the wall to reduce the tension on the anchors and protect your drywall.**
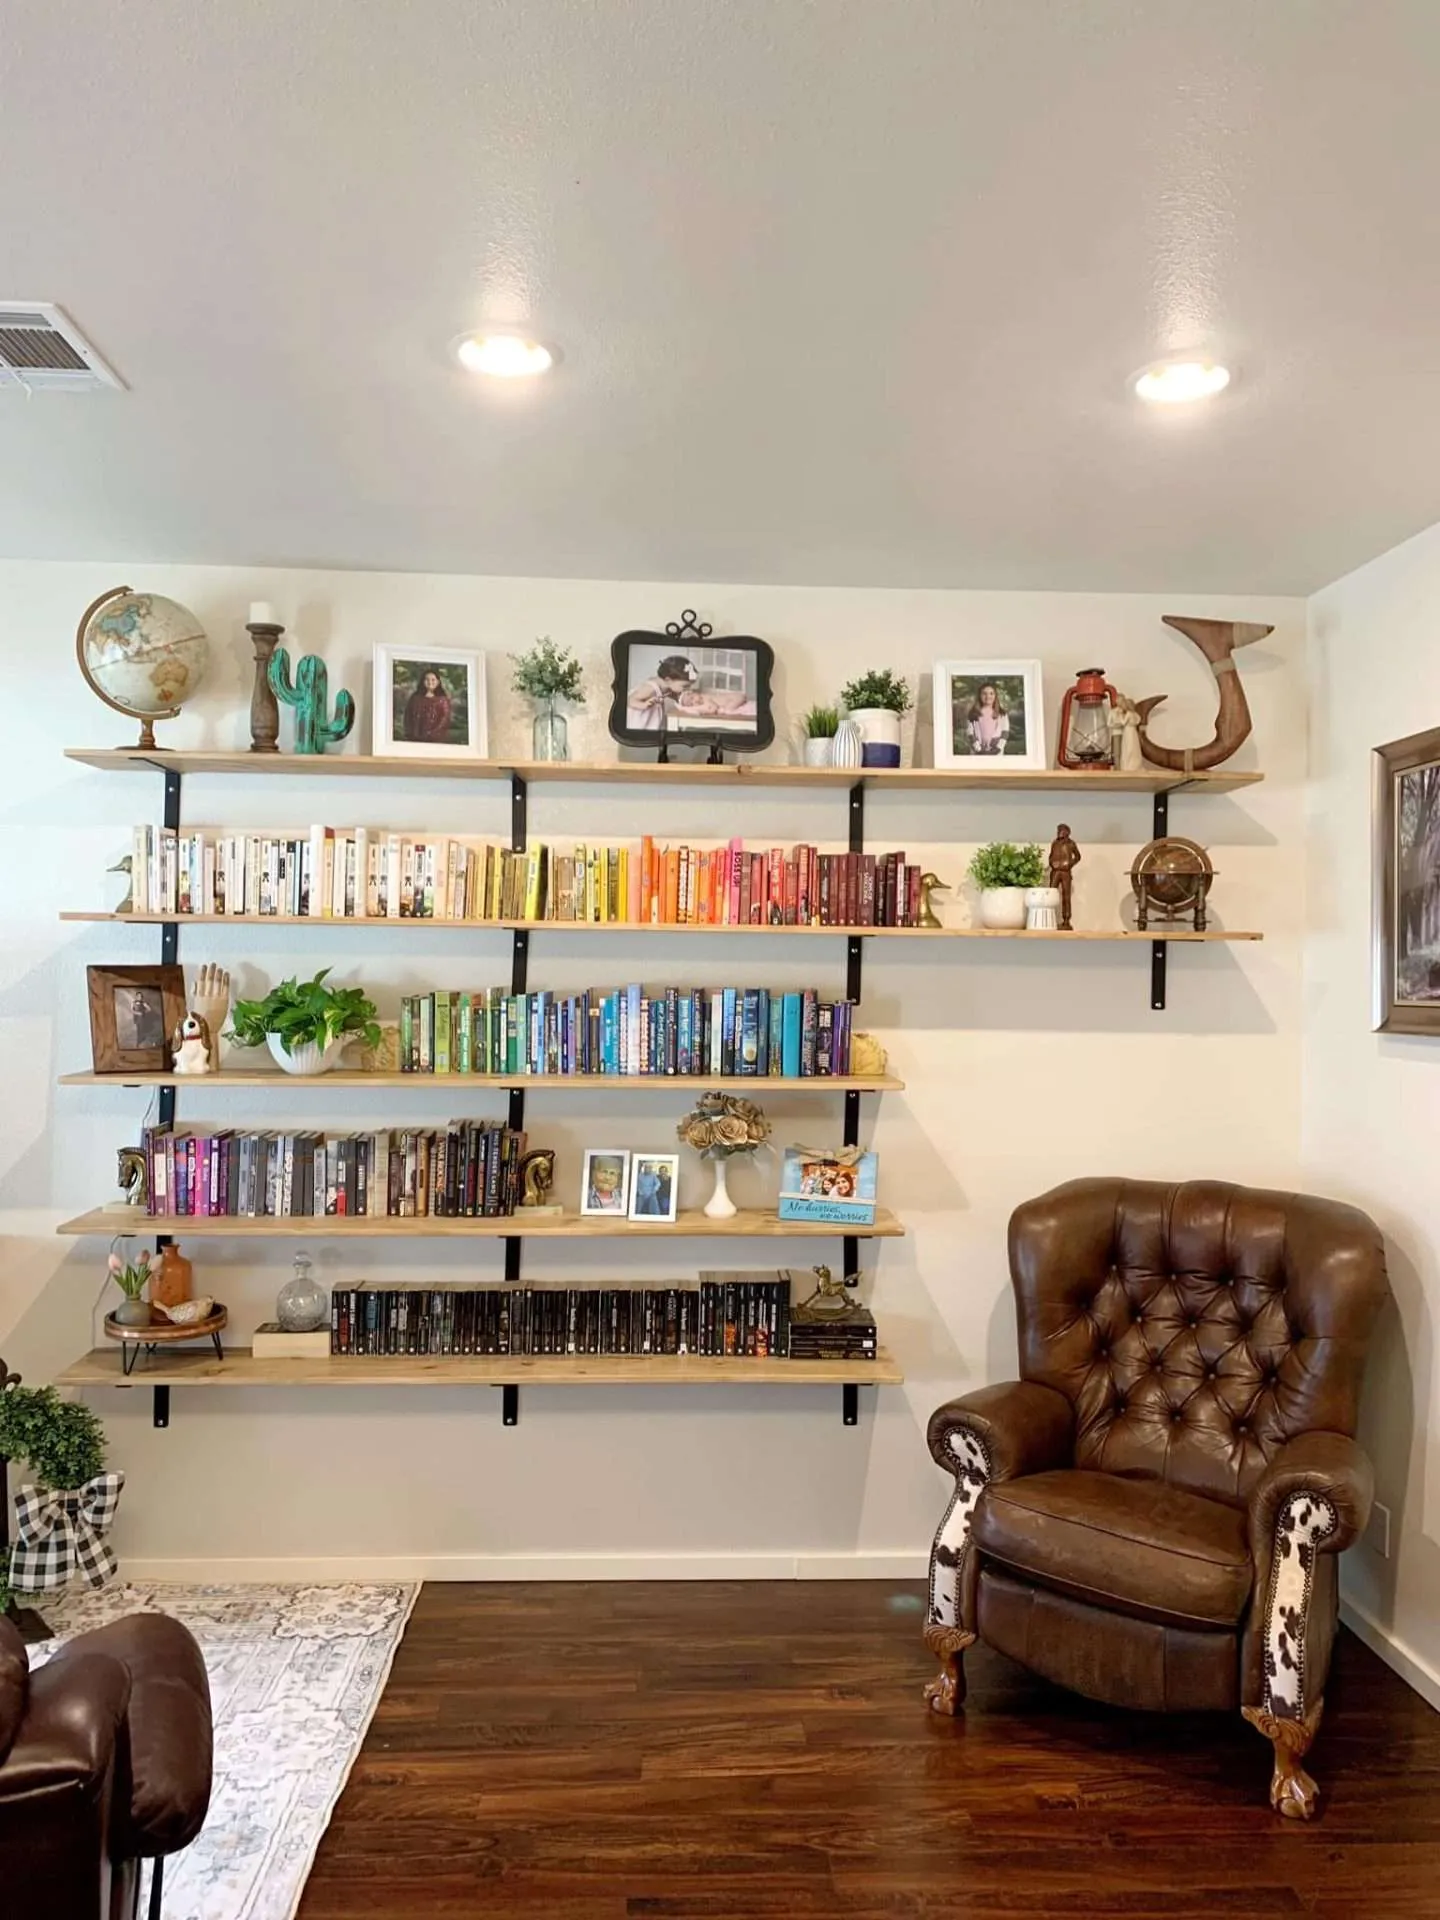
Aside from storing our books, these DIY open bookshelves are a great way to fill the huge empty space in our living room. Also, they won’t take up as much room or weight as traditional bookshelves next time we PCS.
I am so happy with how these shelves turned out! They are full of our favorite stories, photos, and my favorite flea market and thrift store finds.