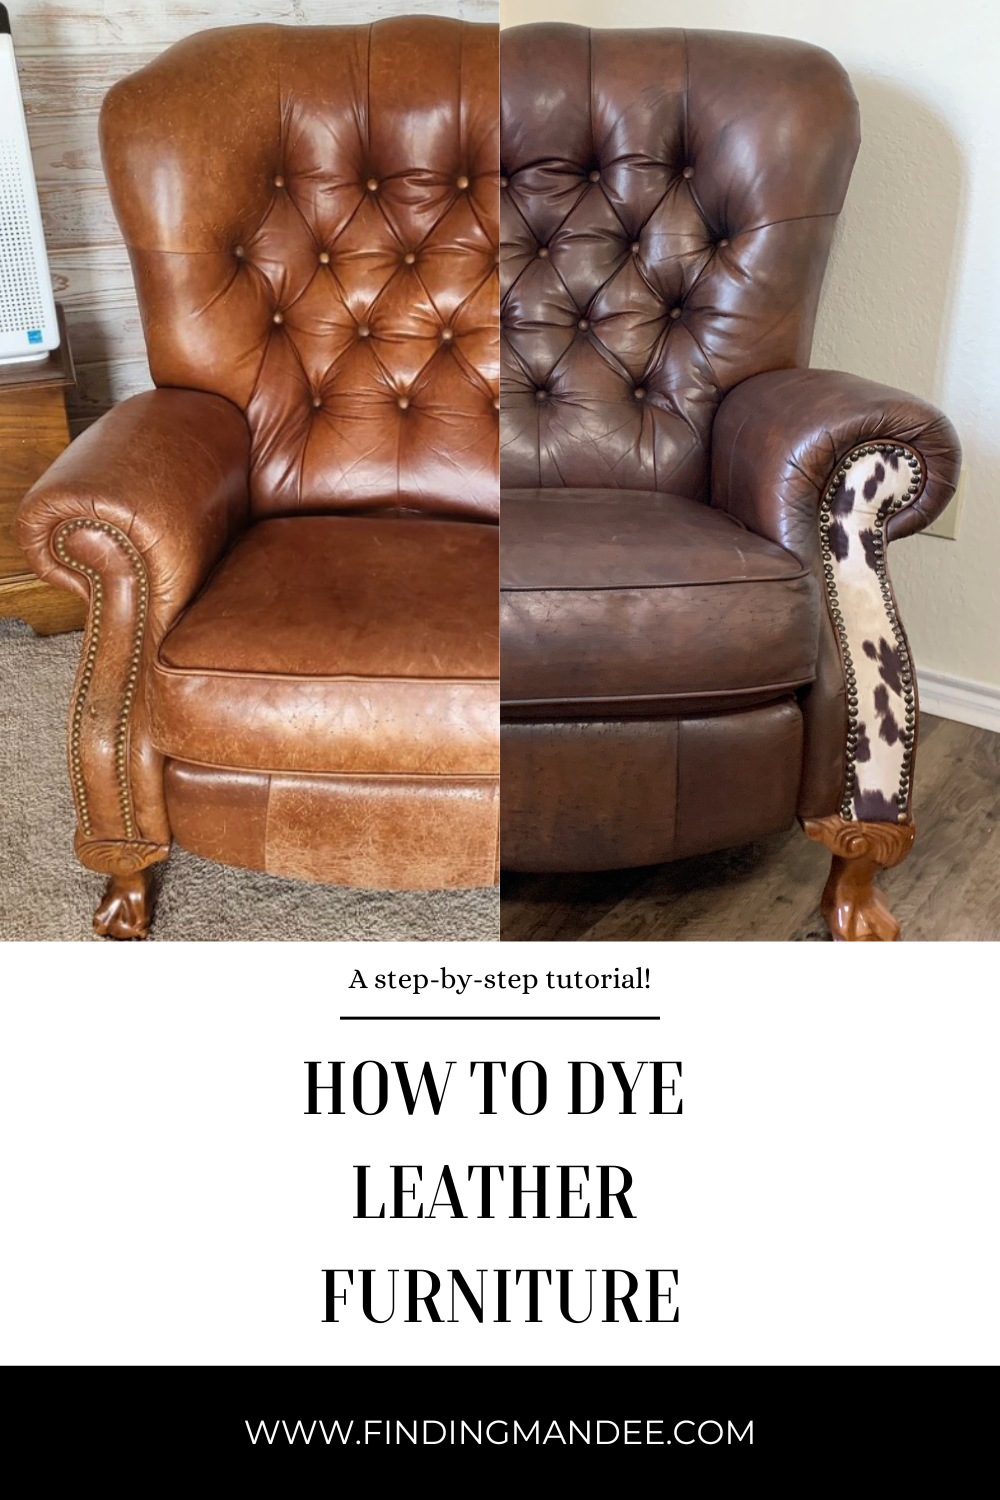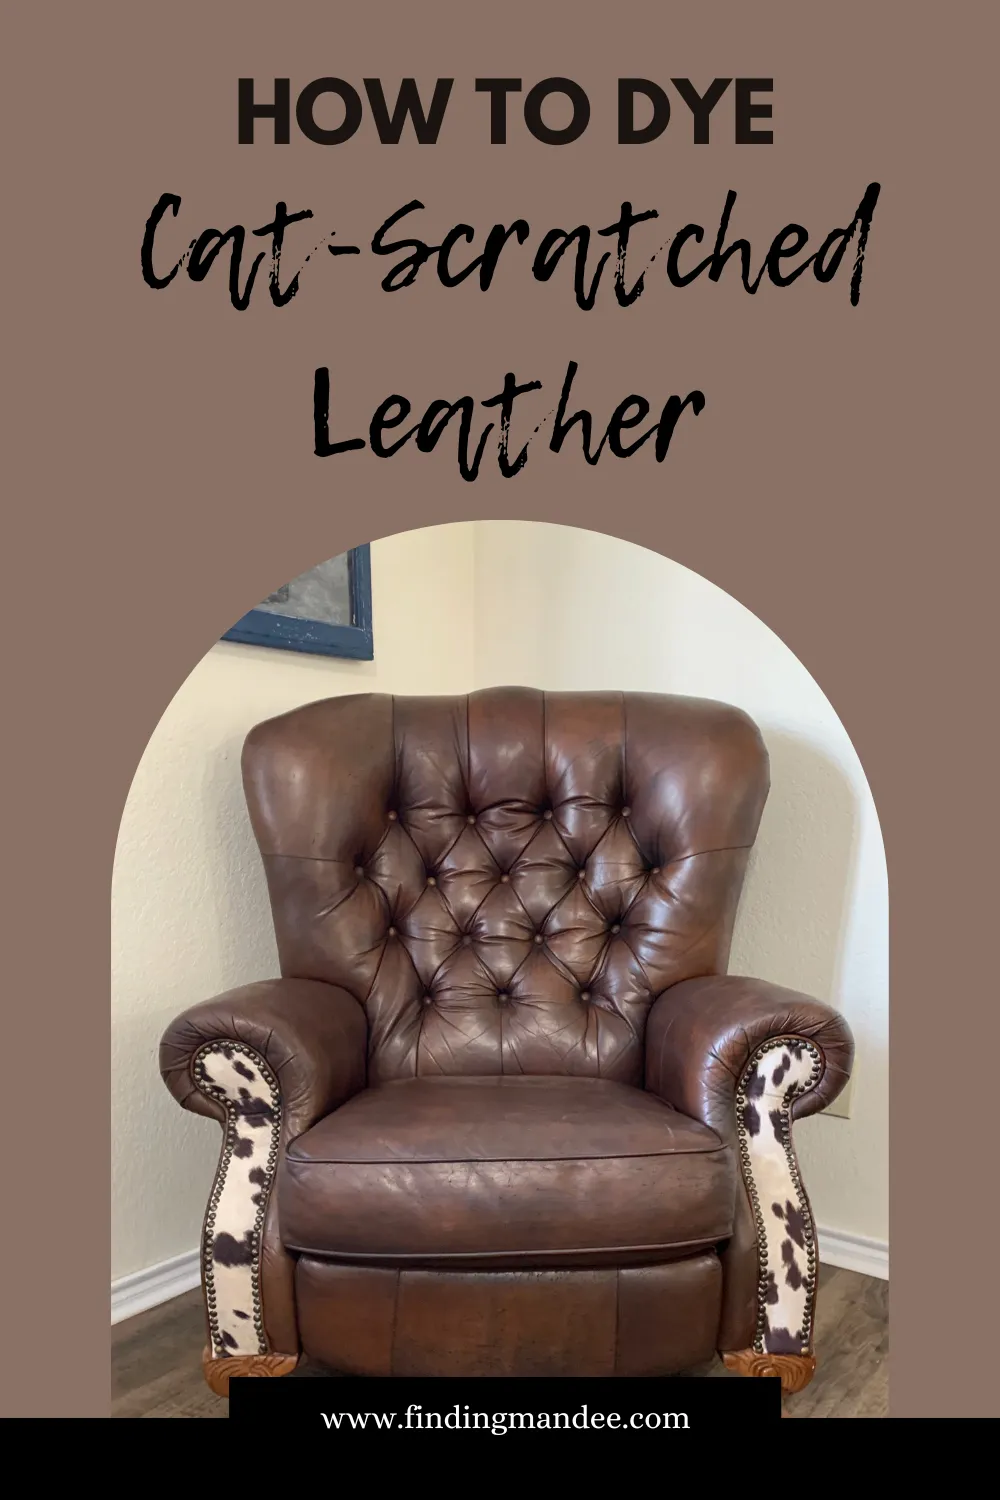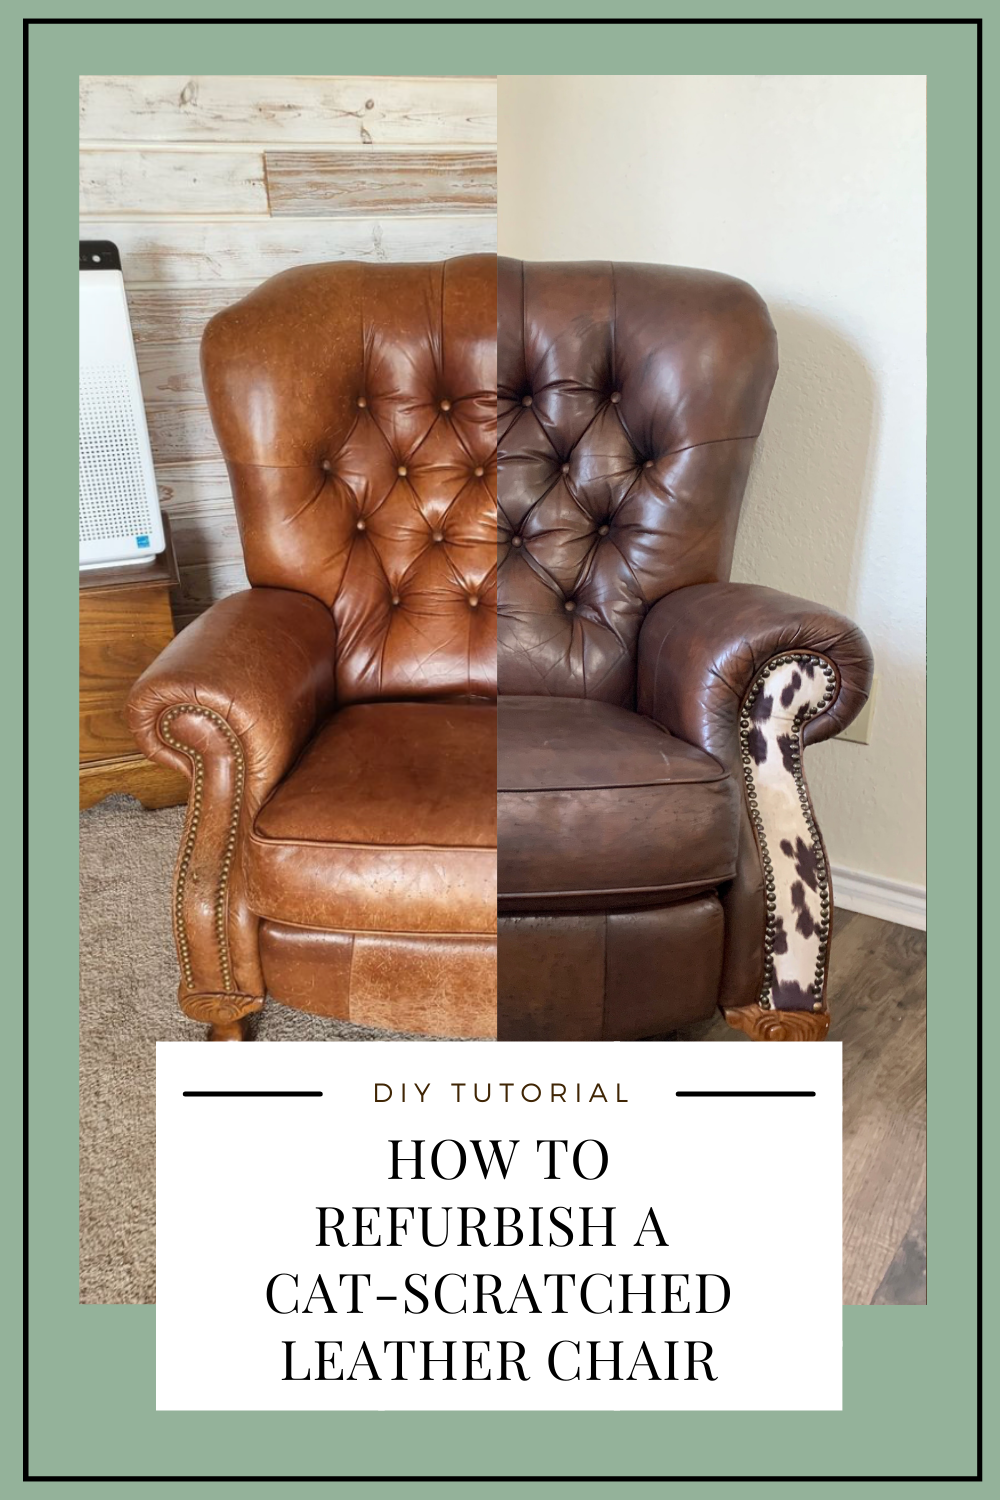
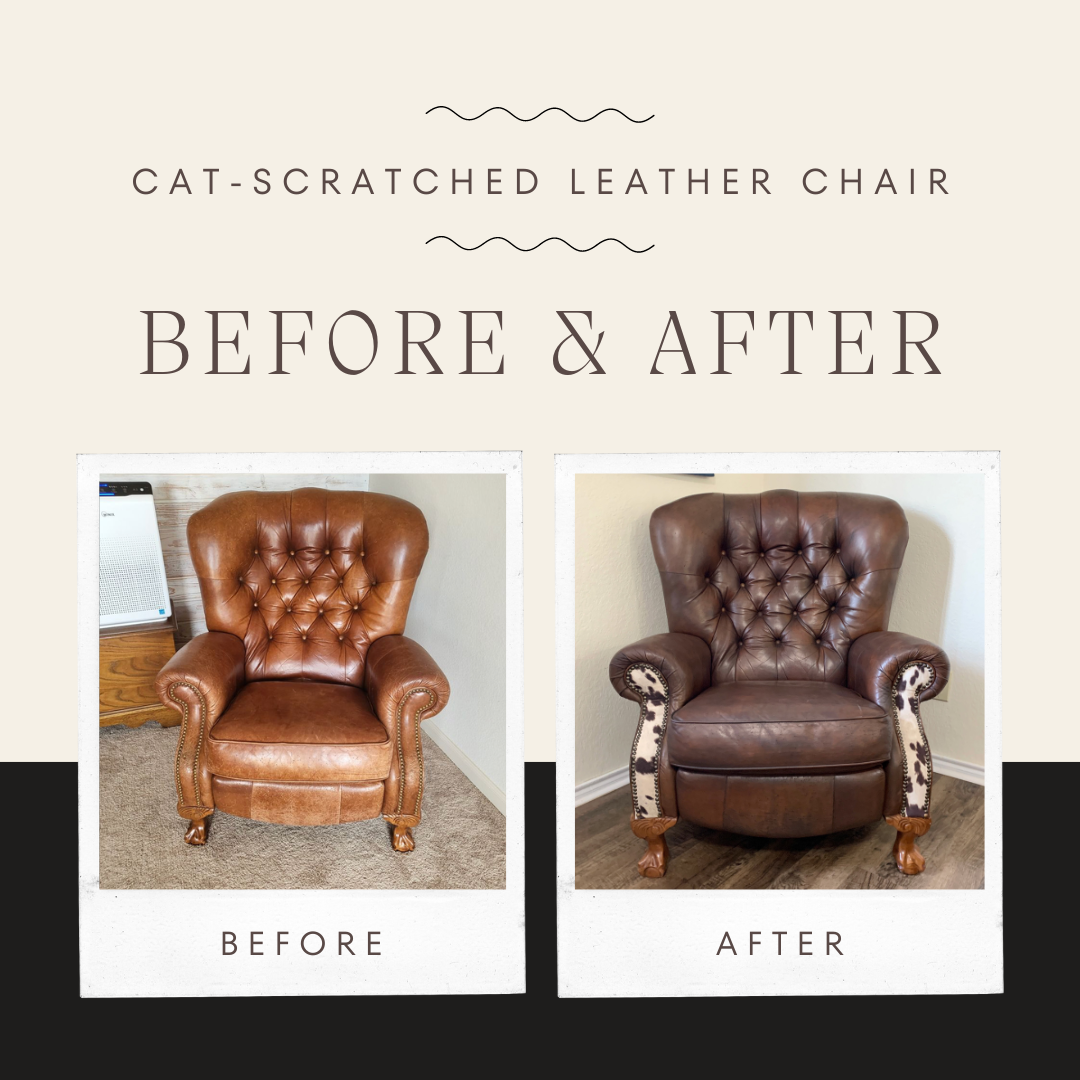
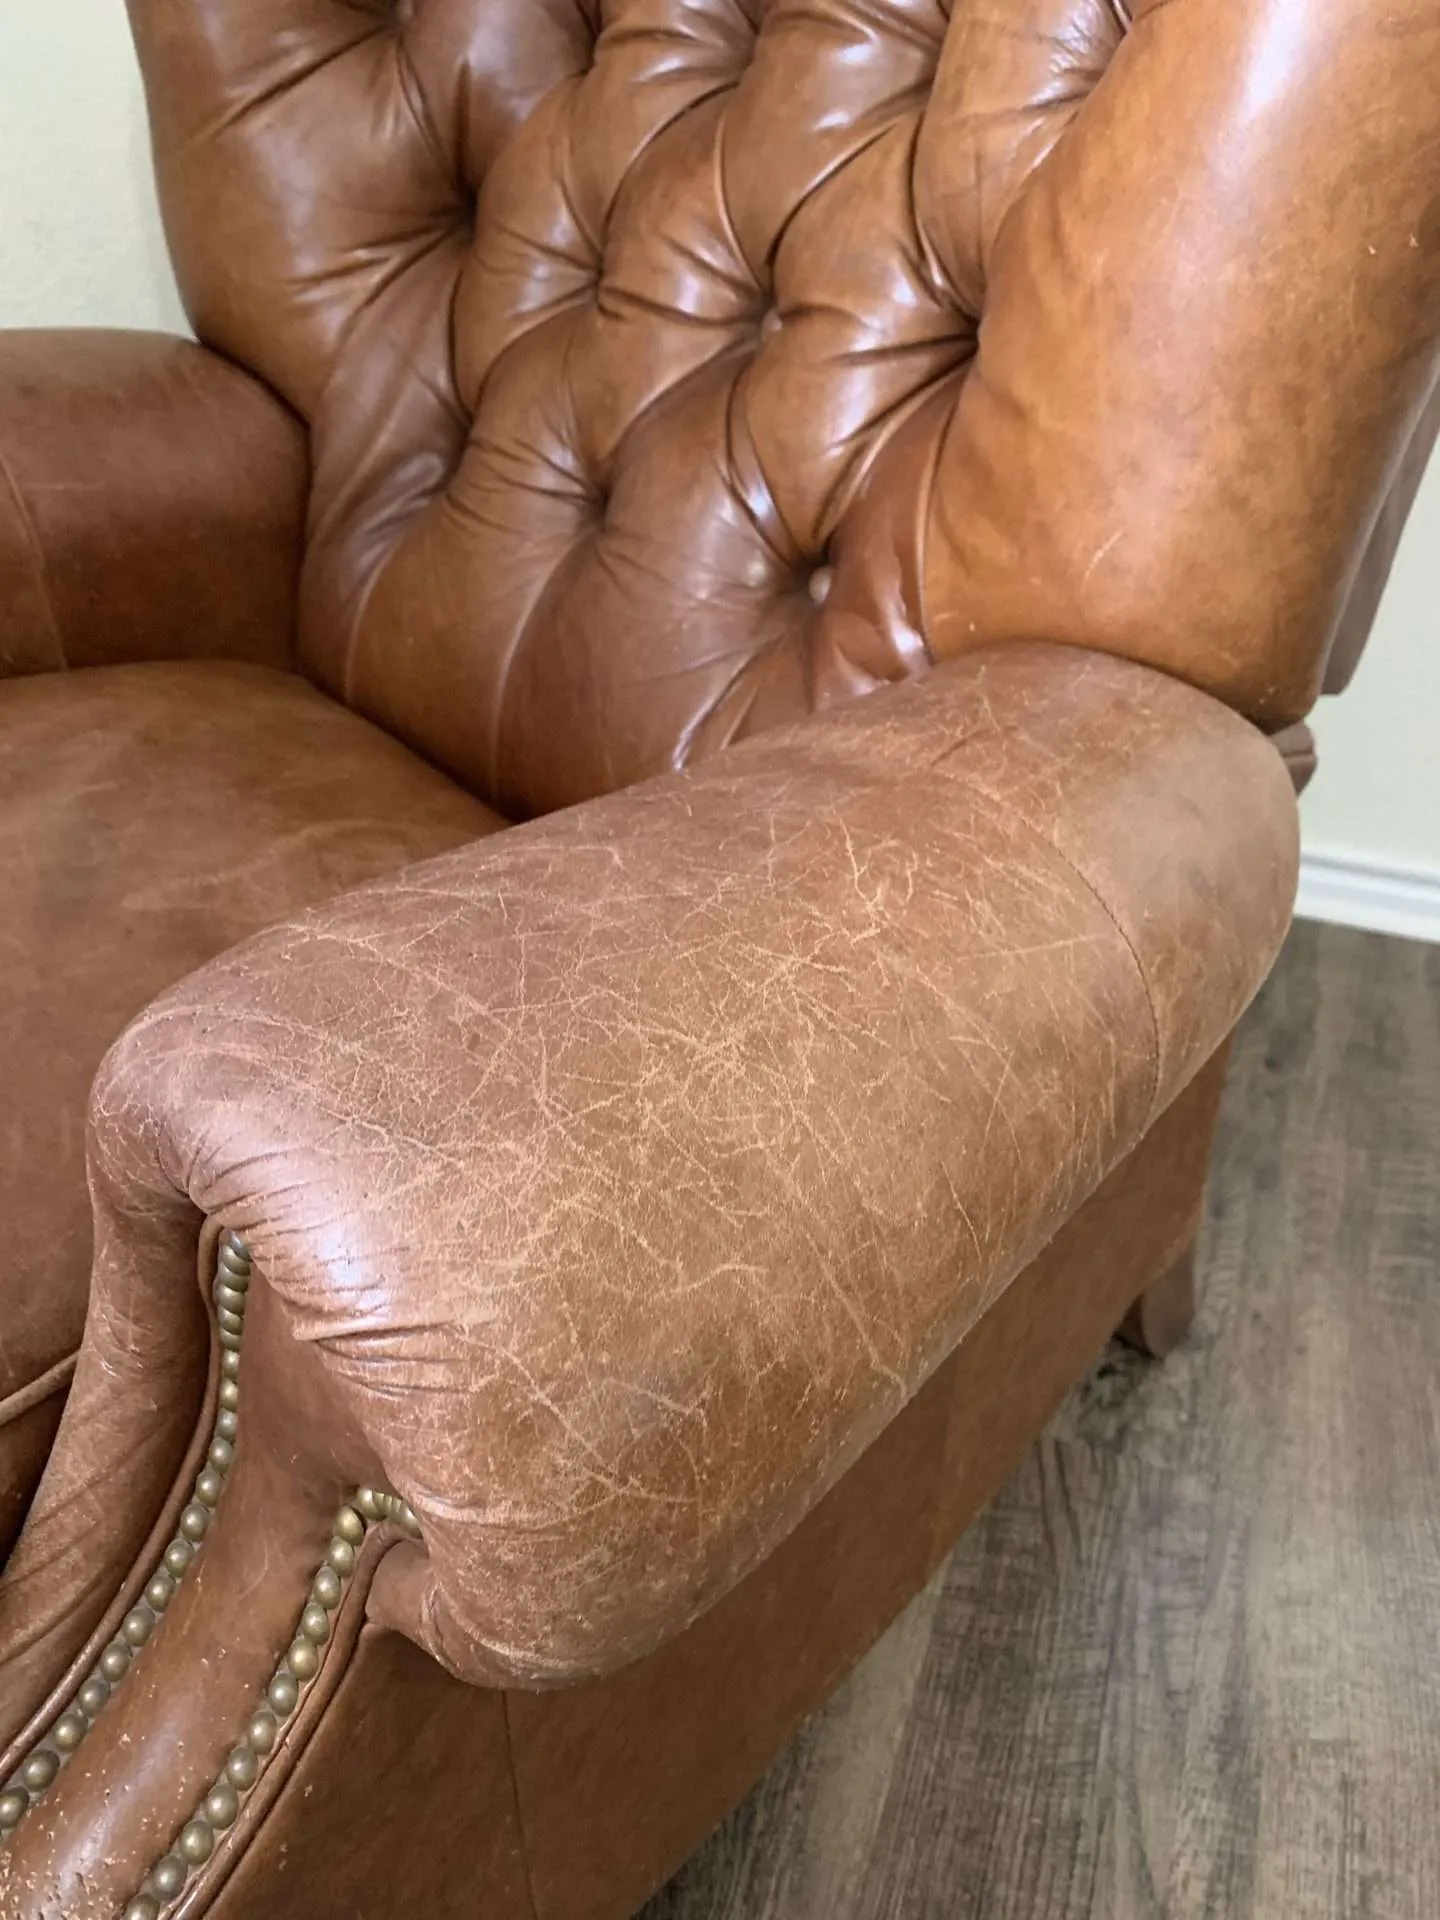
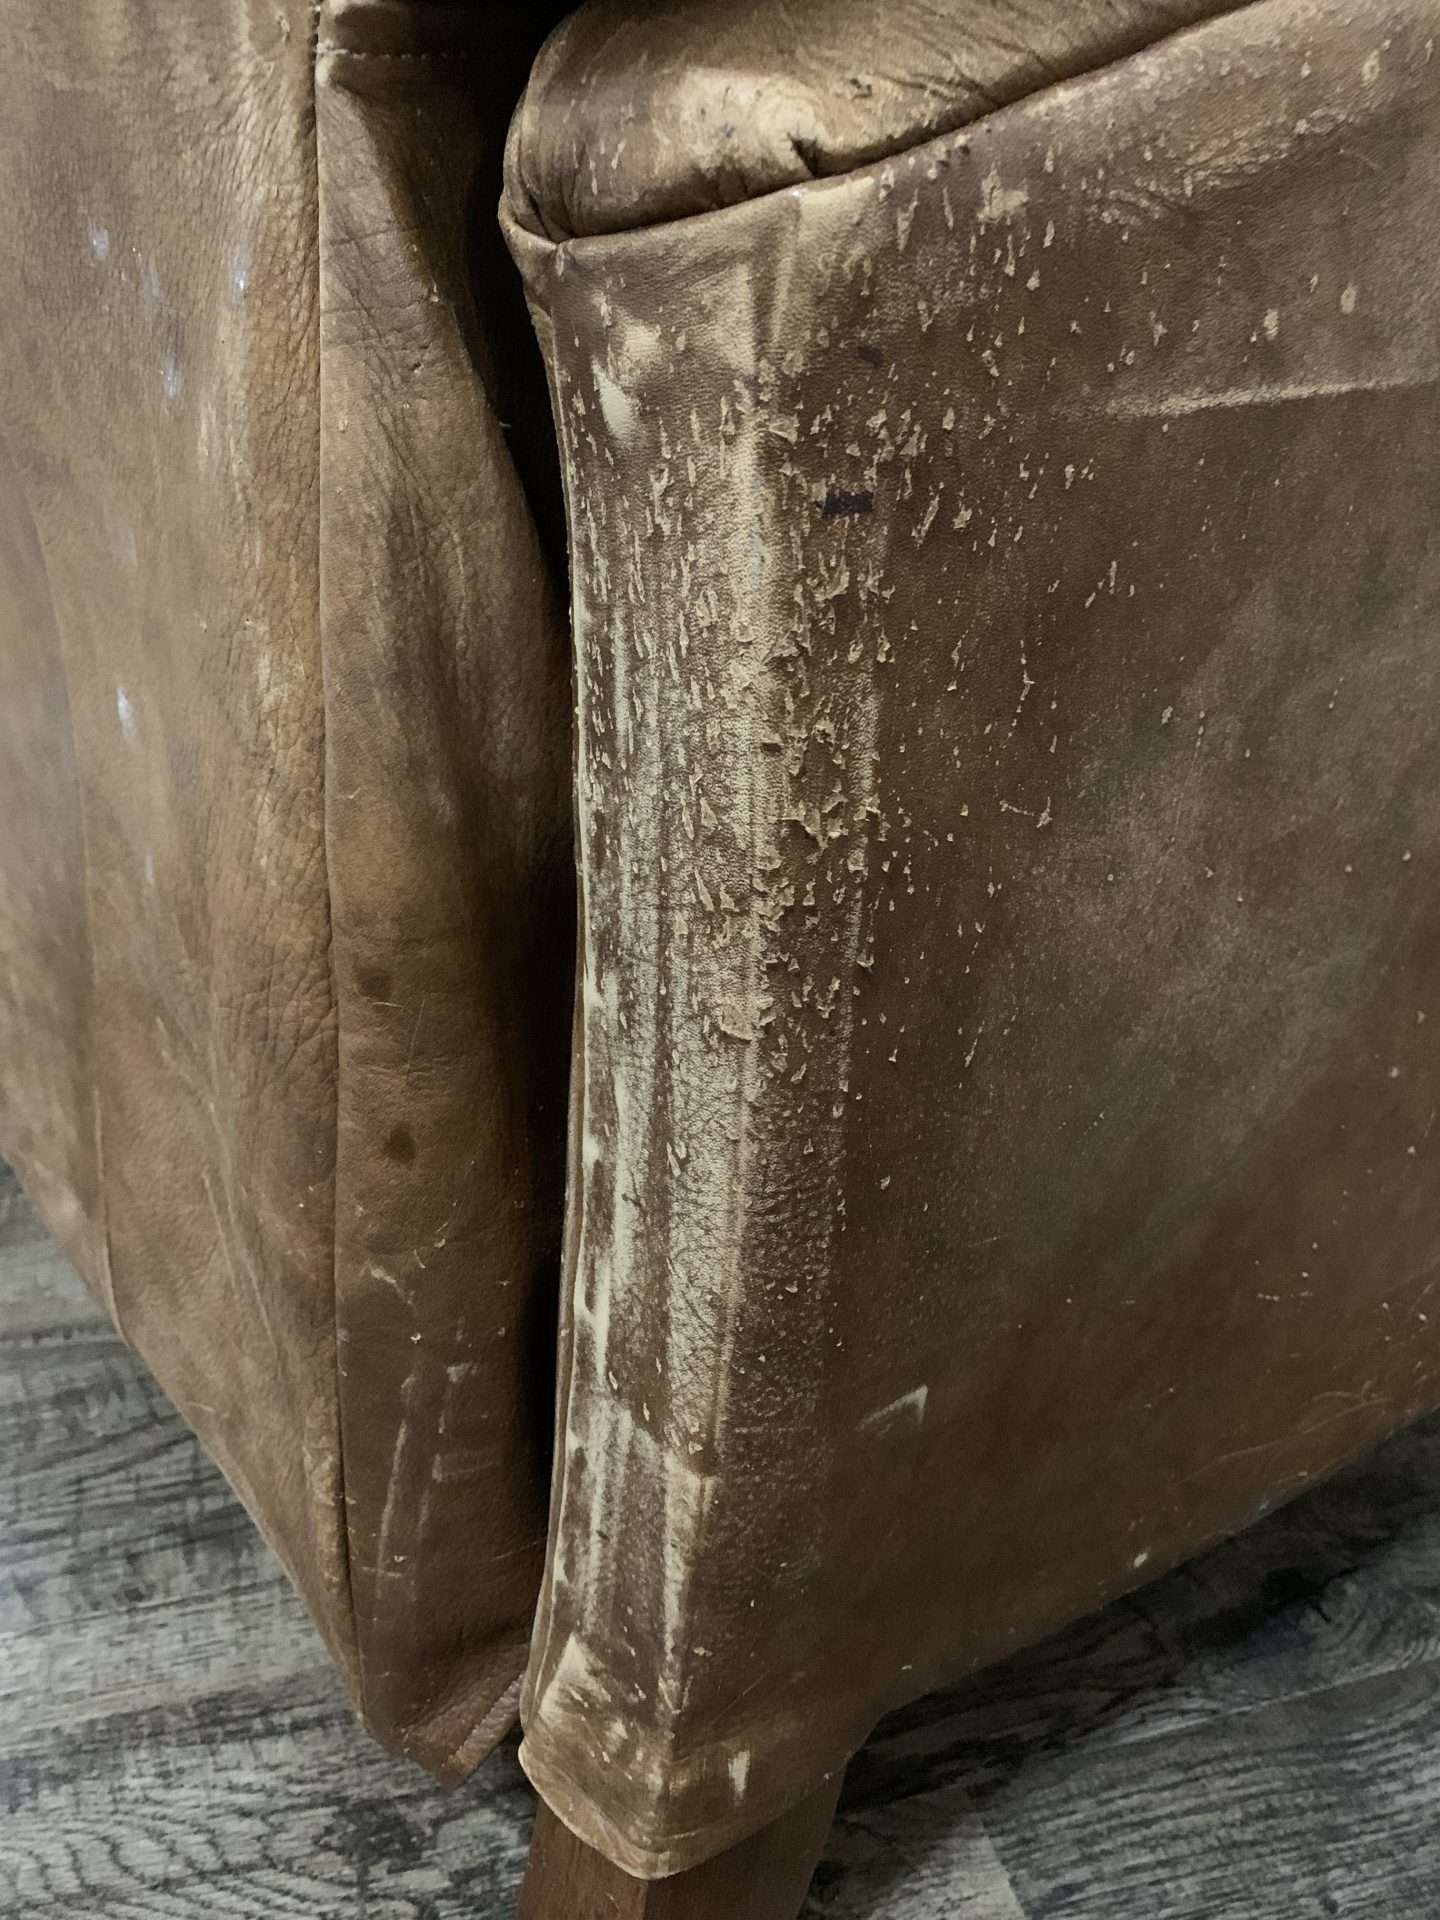
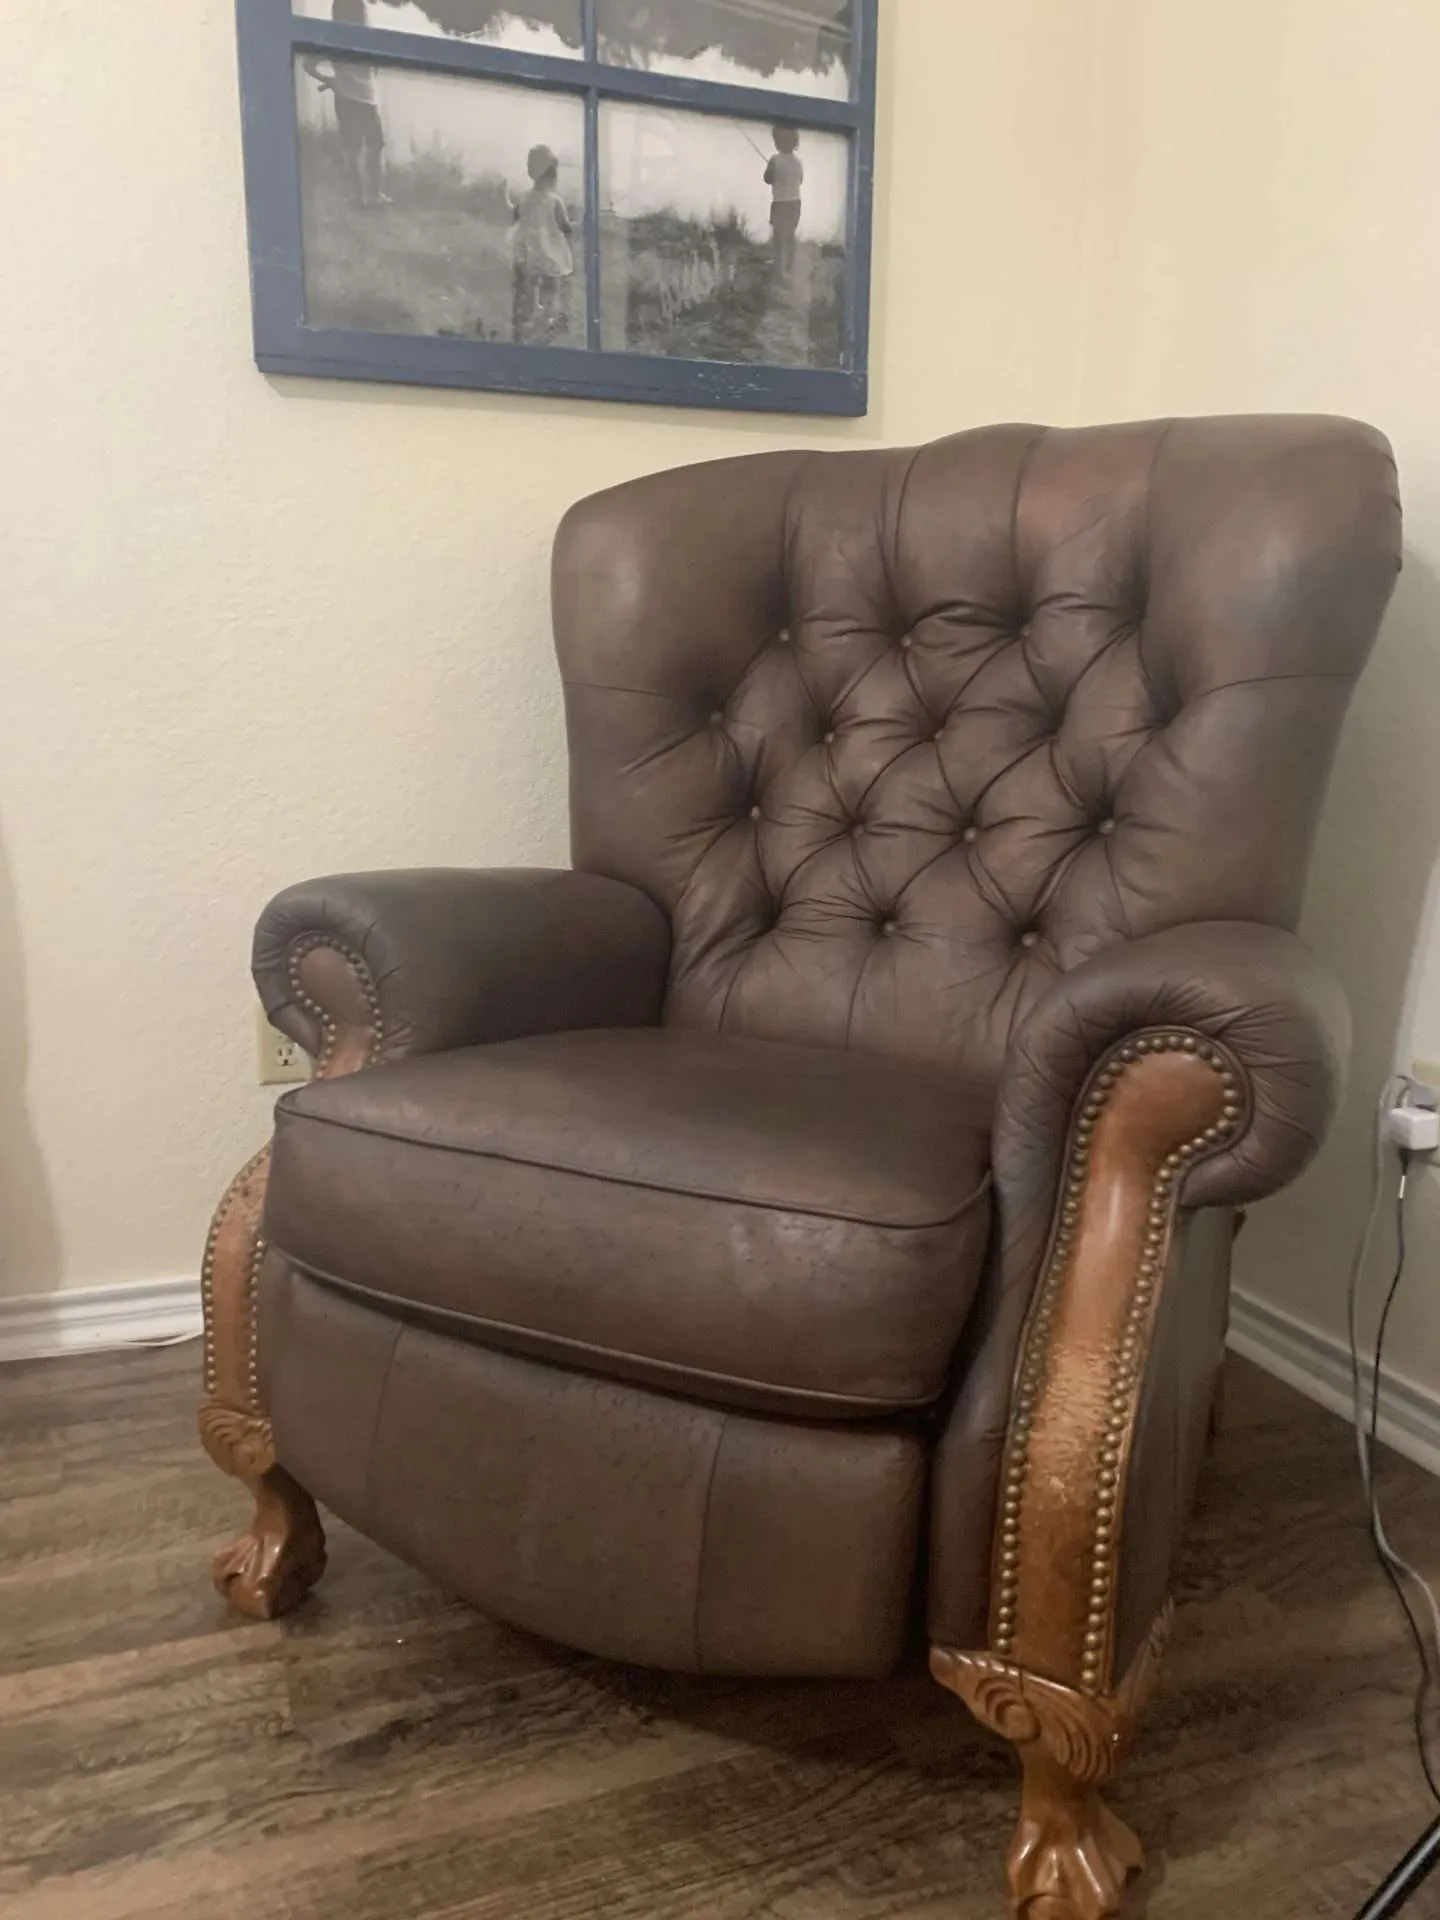
Y’all know how much I love a Facebook Marketplace treasure. And when I came across this cat-scratched leather chair, I had to have it.
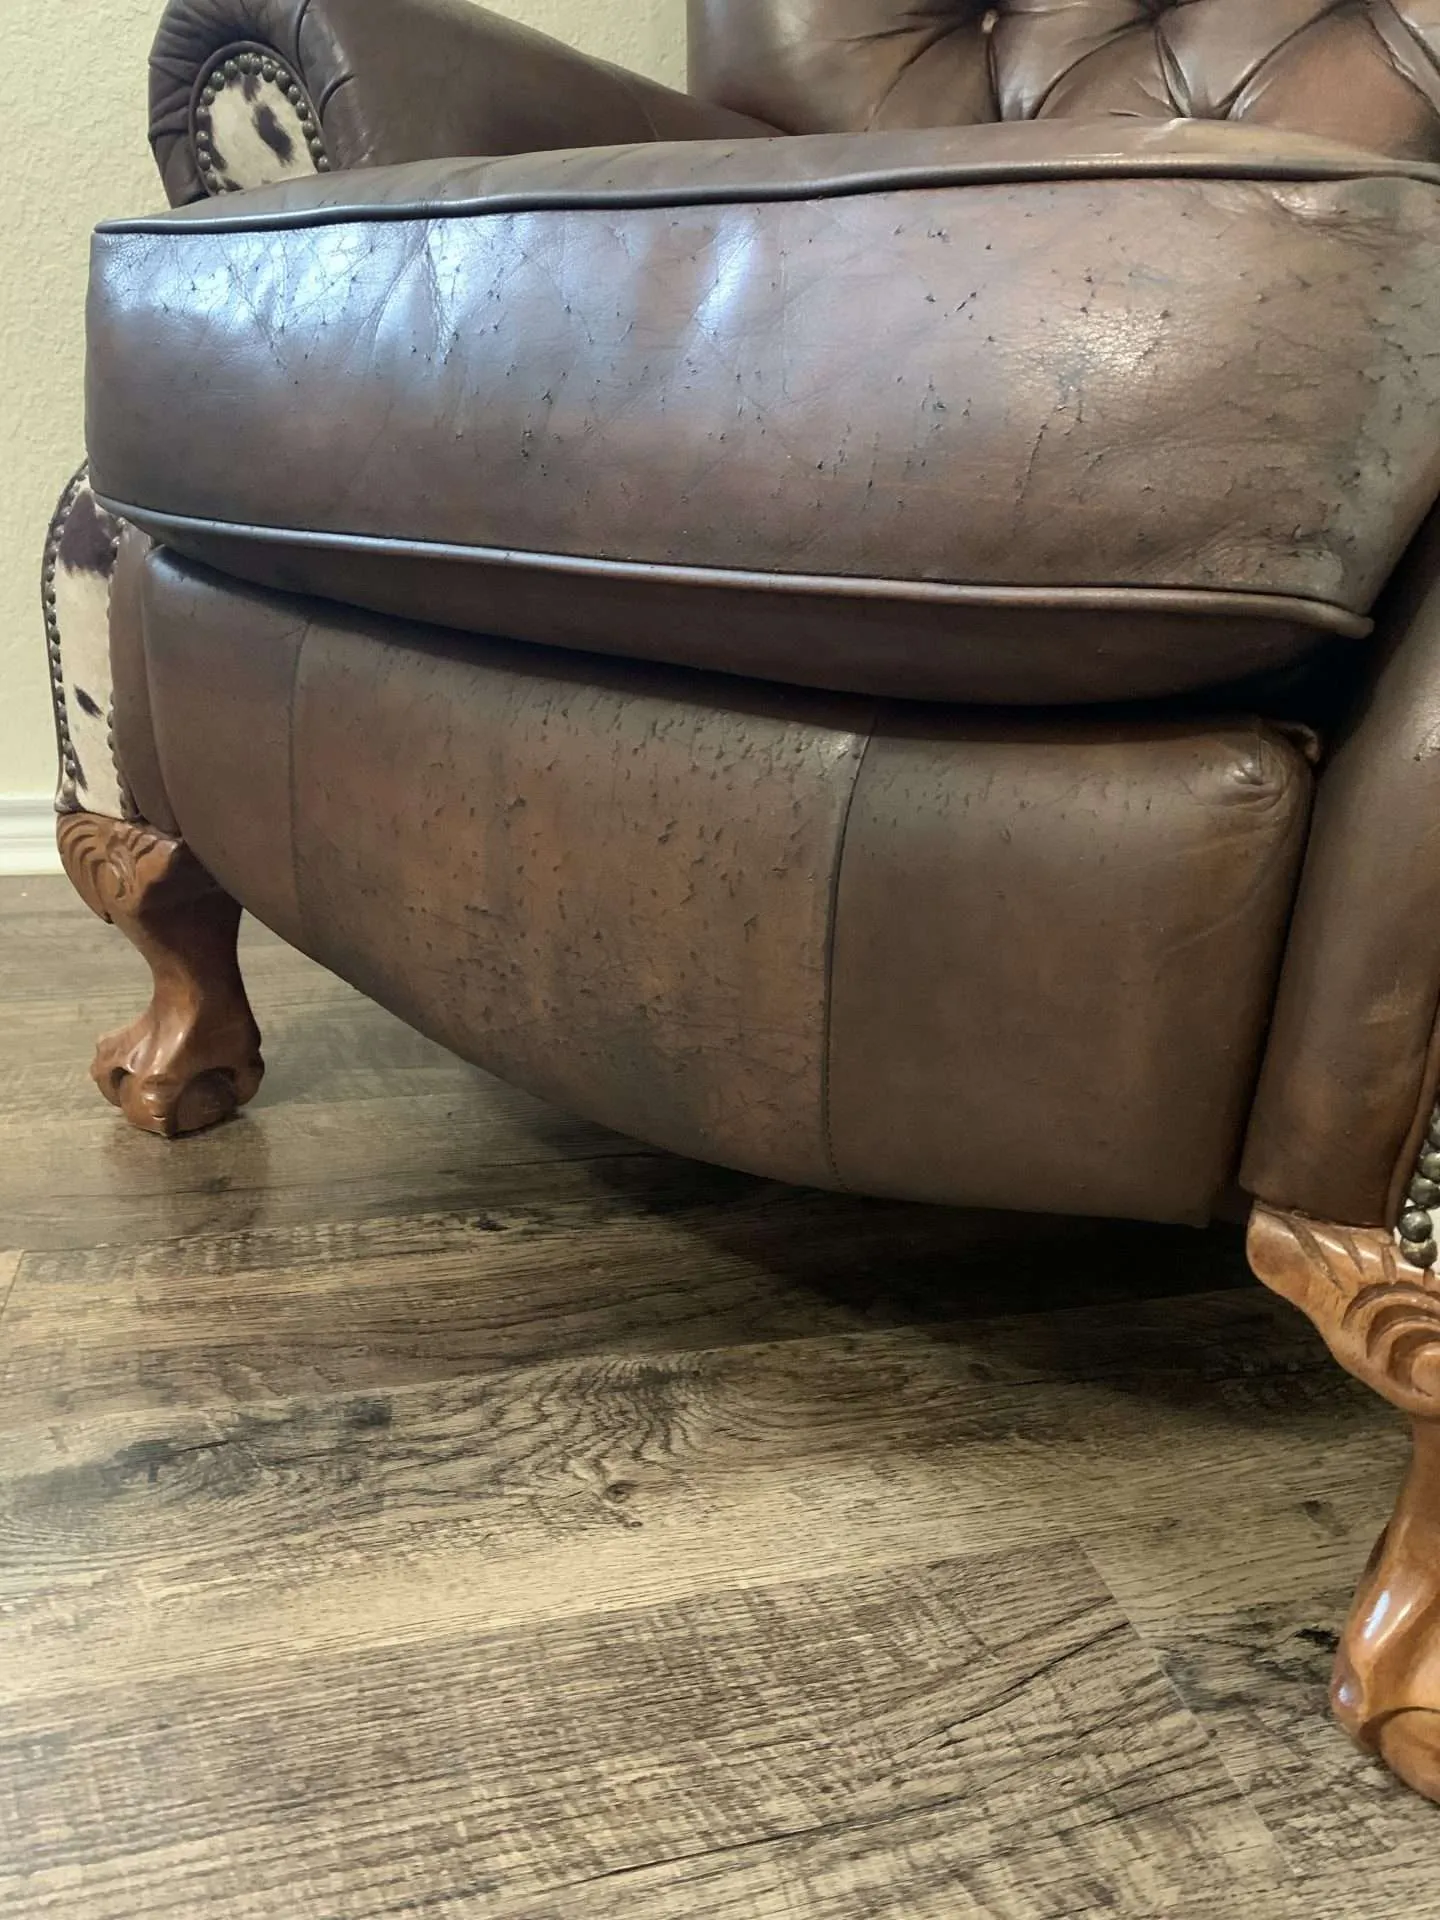
Someone paid over $1000 for this beautiful, tufted leather La-Z-Boy recliner and then their cat used it as a scratching post! There were hundreds of scratches ALL OVER the chair.
I bought the chair for $80, dyed the leather, and replaced the worst pieces with fabric leftover from our antique bed makeover. So, I appreciate that bad little cat!
Here’s how I turned this piece of ‘trash’ into treasure.

Do The Water Drop Test FIRST!
Before you buy or do anything to your leather furniture, do the water drop test first to determine the absorbency of the leather. (Check here for the full Furniture Clinic tutorial.)
Basically, you place a few drops of water on an undamaged section of leather. If the water absorbs into the leather and leaves a mark, then your leather is absorbent and the Recoloring Balm will work. If the water beads up on the surface and doesn’t soak in, then your leather is non-absorbent and this tutorial is not for you.
Supplies:
This is not a sponsored post. I used the Furniture Clinic products after reading reviews online. I’m sure there are several products that will give you great results. This is just what I used.
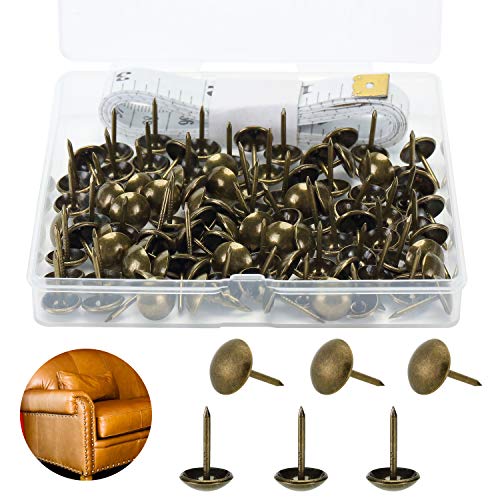
- extremely fine-grit sandpaper
- rags
- leather filler
- putty knife
- leather recoloring balm by Furniture Clinic (I used Dark Brown)
- leather protection cream by Furniture Clinic
- flathead screwdriver
- upholstery fabric
- scissors
- upholstery tacks
- staple gun and 1/4″ staples
- needle-nose pliers
- hammer

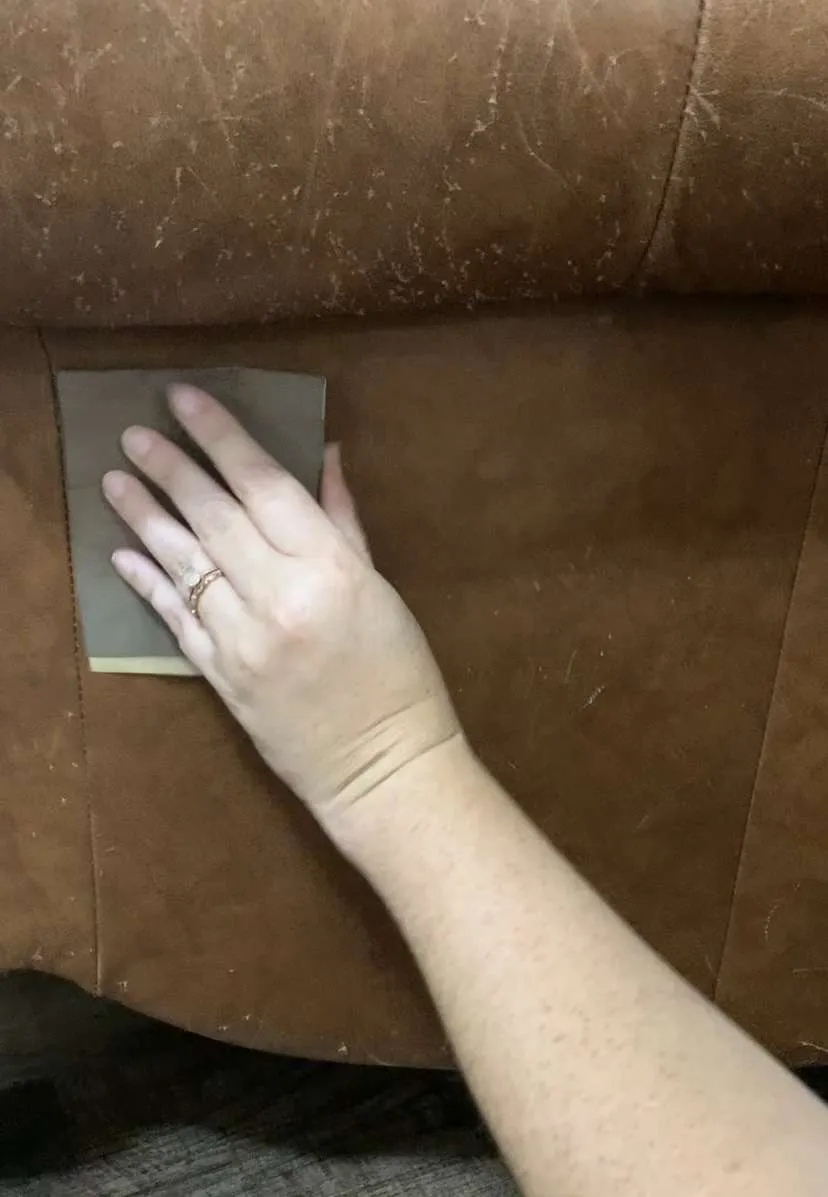
Step 1: Sand and Clean
As with any furniture flip, before you can dye leather, there is a lot of prep work.
Sanding the chair took the most time, but it was a crucial part of getting good results.
However, don’t just use any sandpaper that you have laying around. You’ll need sandpaper with an extremely fine grit so that you don’t damage the leather. I used 1500 and 2000-grit sandpaper.
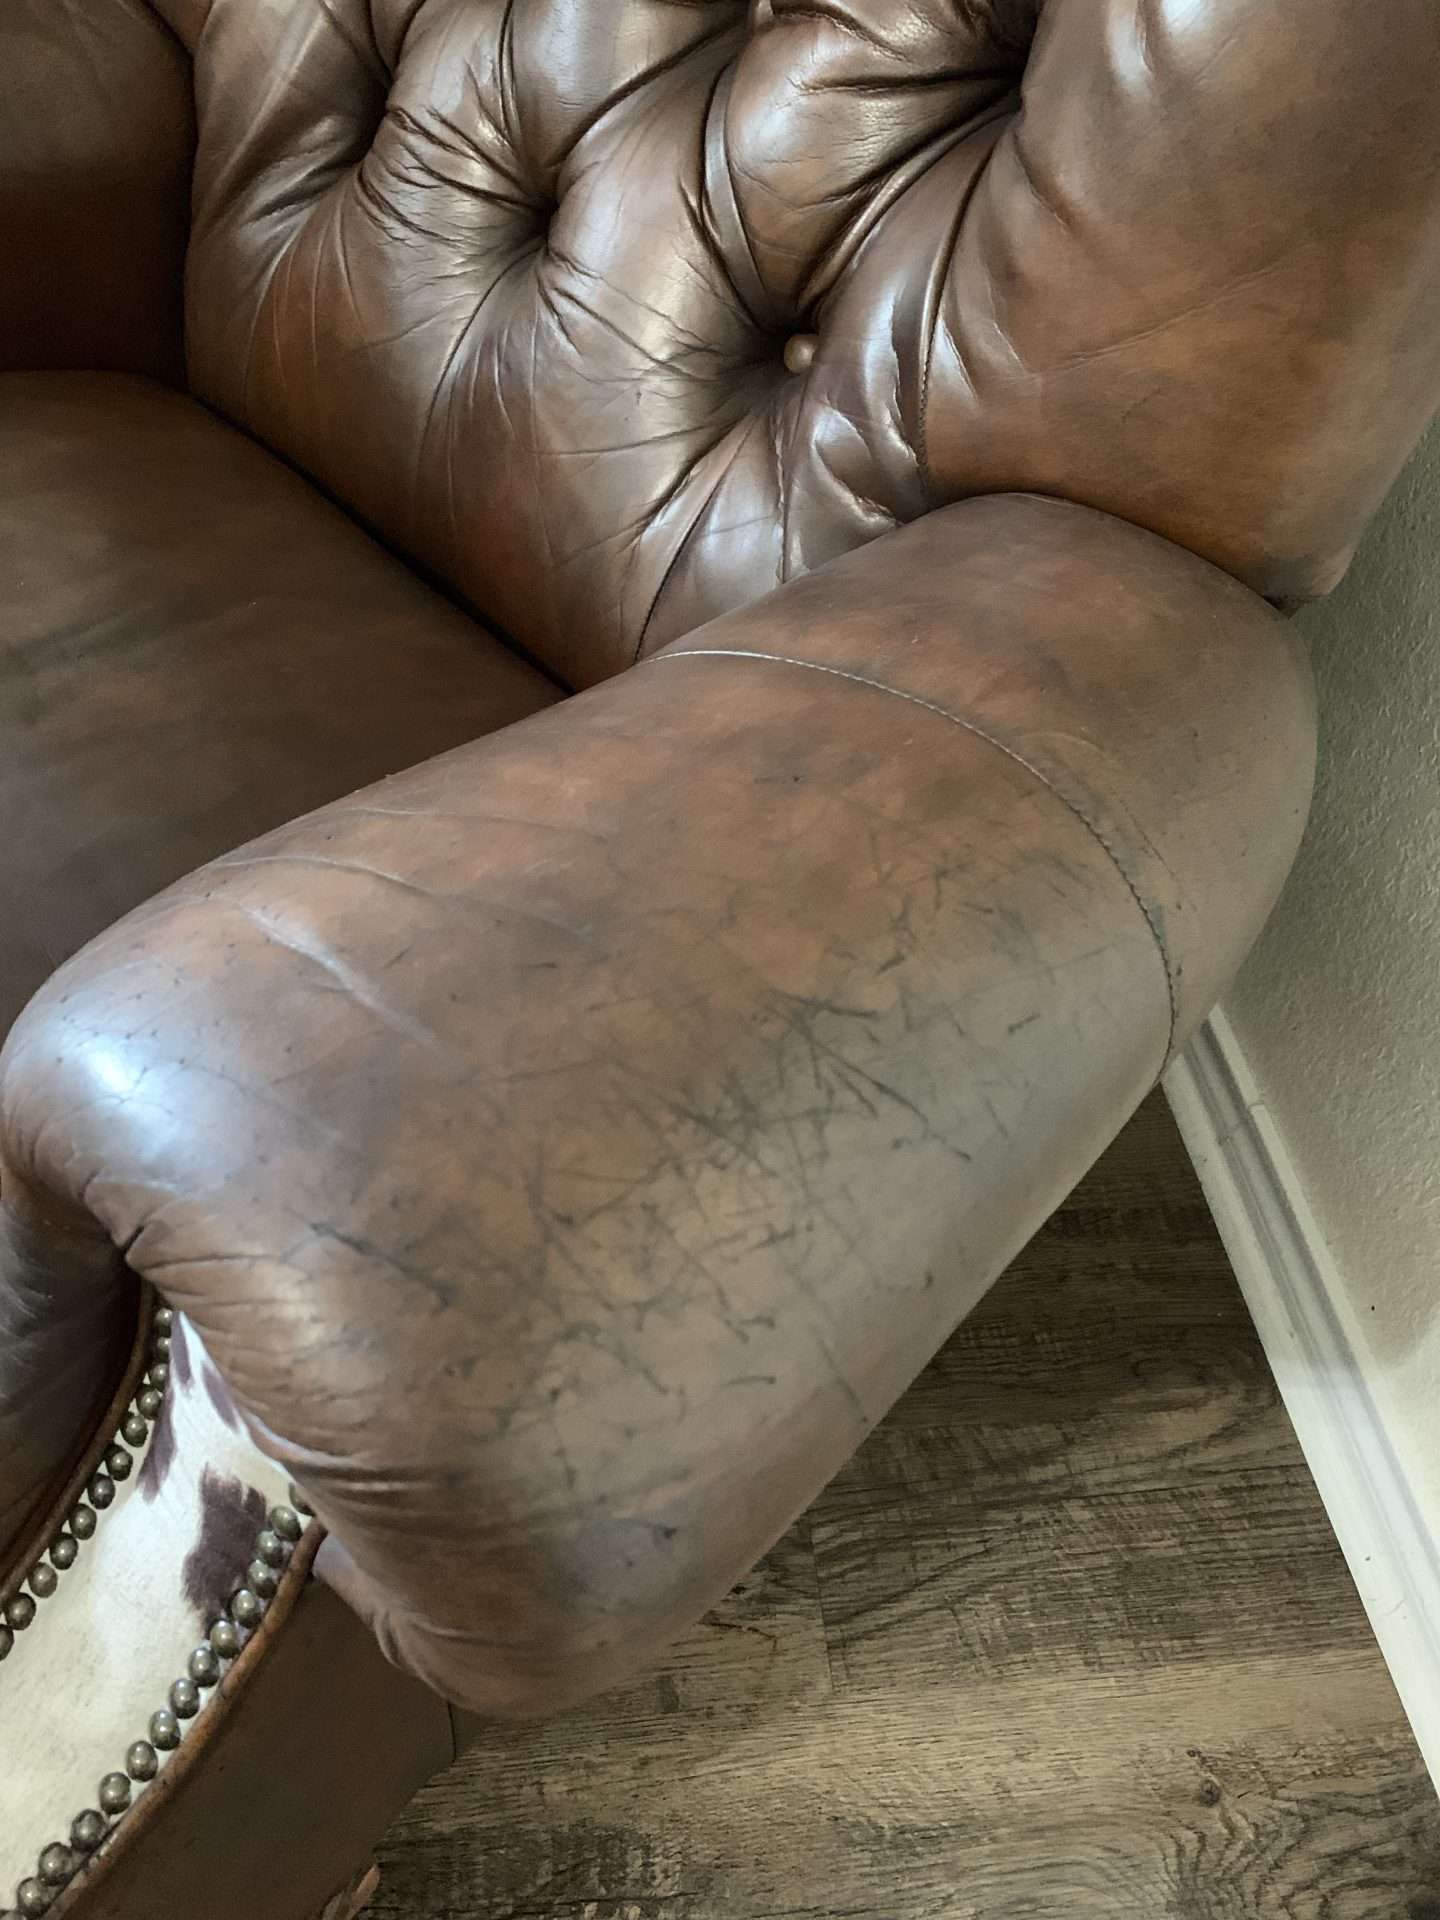
The main reason that this chair needed sanding before I could dye the leather, was because of the roughness caused by the cat scratches. I also lightly sanded the leather that wasn’t worn and still had a shiny look to it. On this chair, these areas were mostly at the top of the chair’s back.
After sanding, wipe the chair with a damp cloth to get rid of all the dust. I had to wipe the chair twice to make sure all of the dust was gone.
Sandpaper, 90 Pcs 400 to 3000 Grit Wet Dry Sandpaper Assortment 9×3.6 Inch for Automotive Sanding – Wood Furniture Finishing – Wood Turing Finishing and More by VERONESAUSTOR 36 Pieces Sandpaper 1500 2000 2500 3000 5000 7000 High Grit Wet and Dry Sandpaper Assortment 9 x 3.6 Inches Abrasive Paper


Step 2: Trim Any Scraggly Pieces
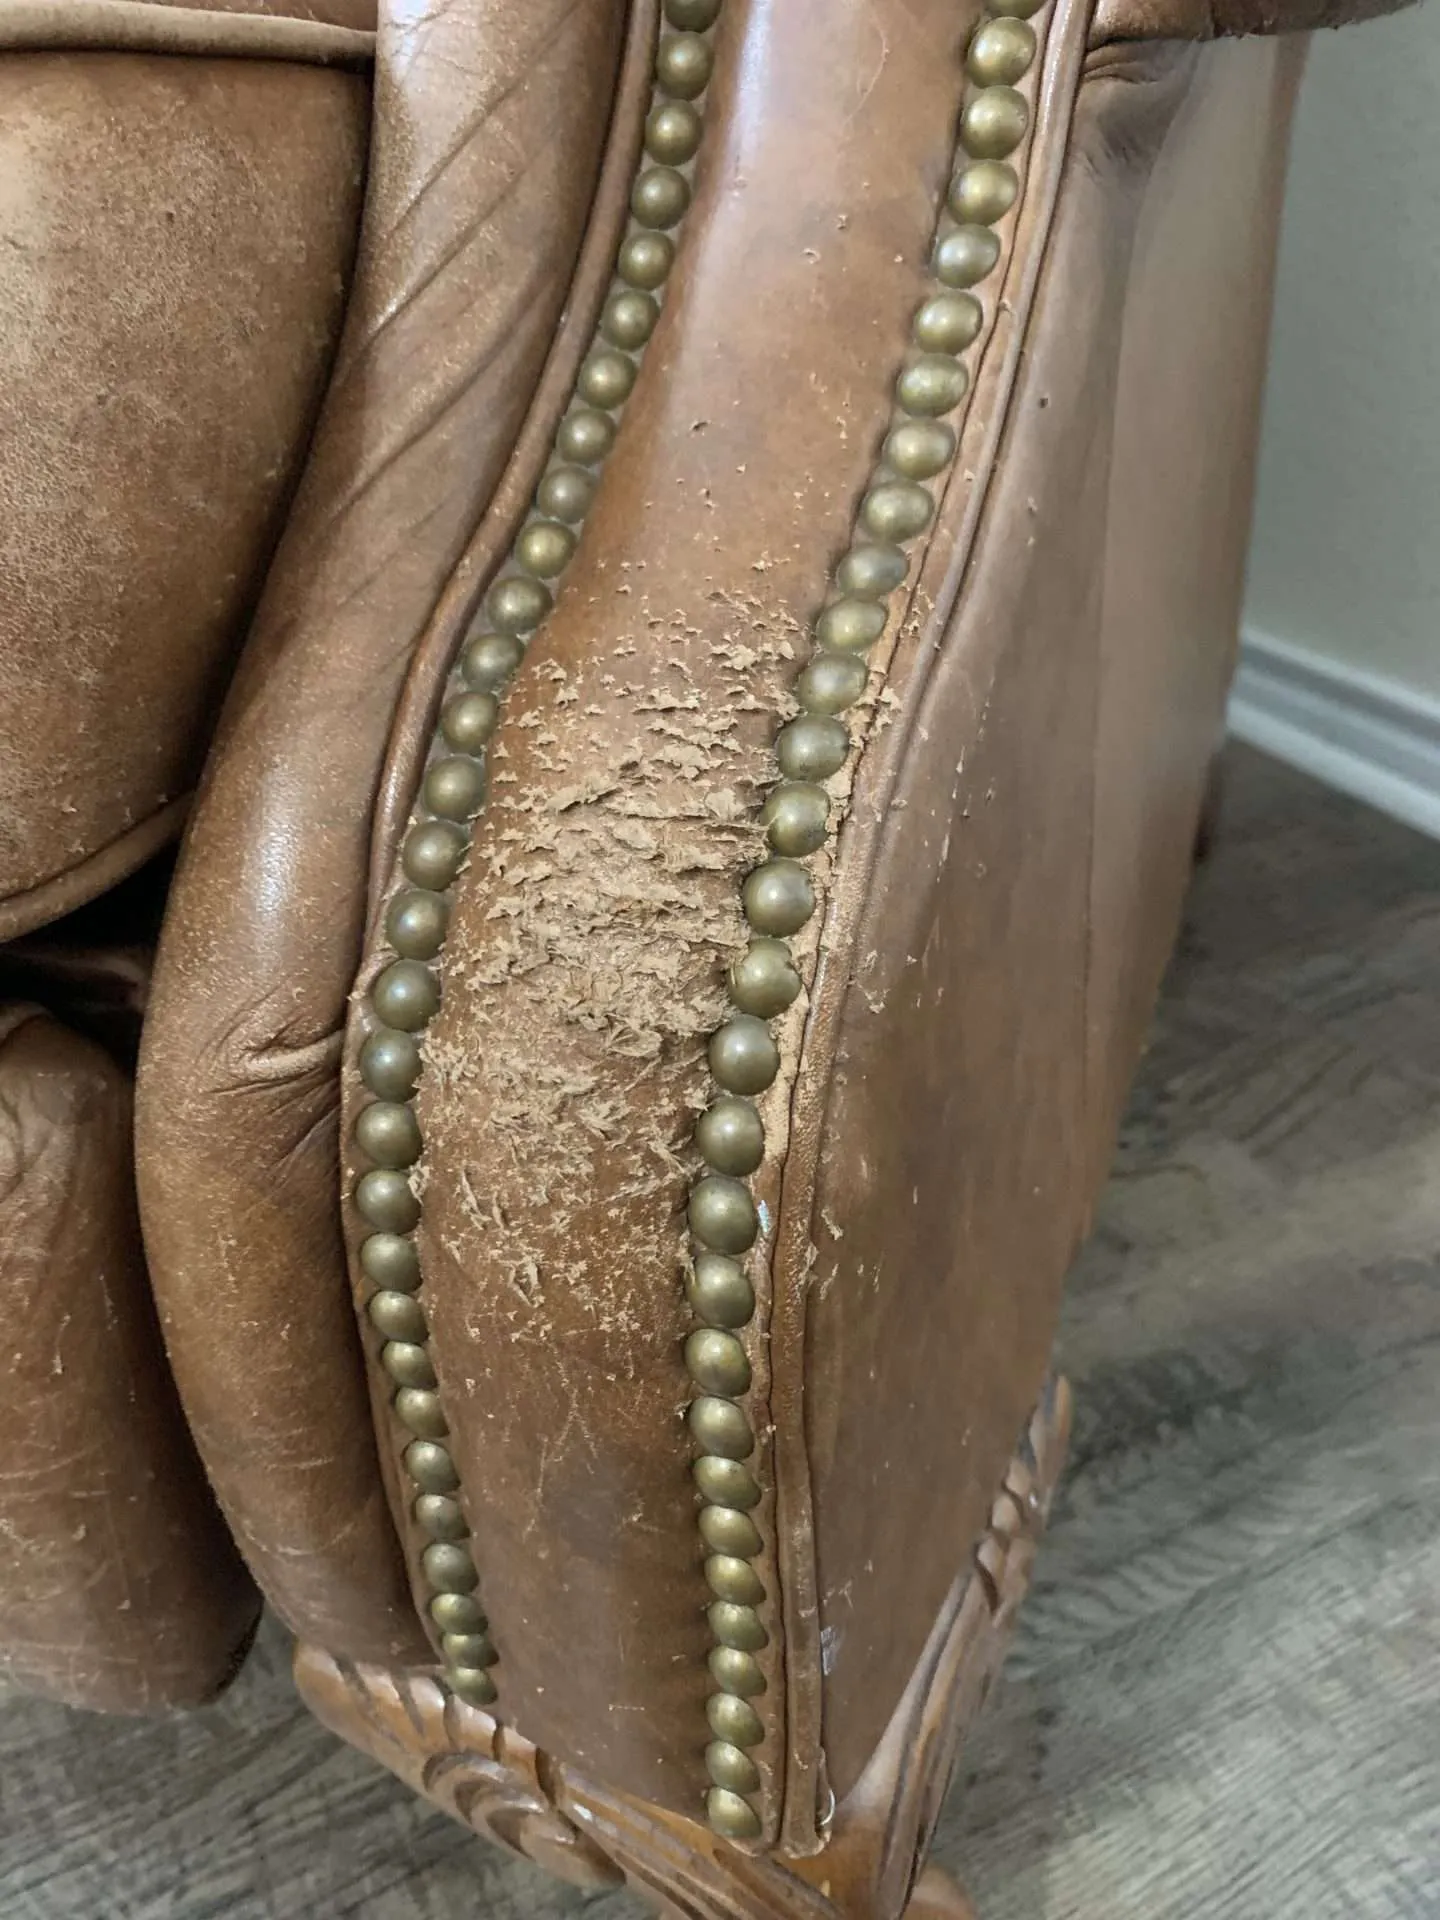
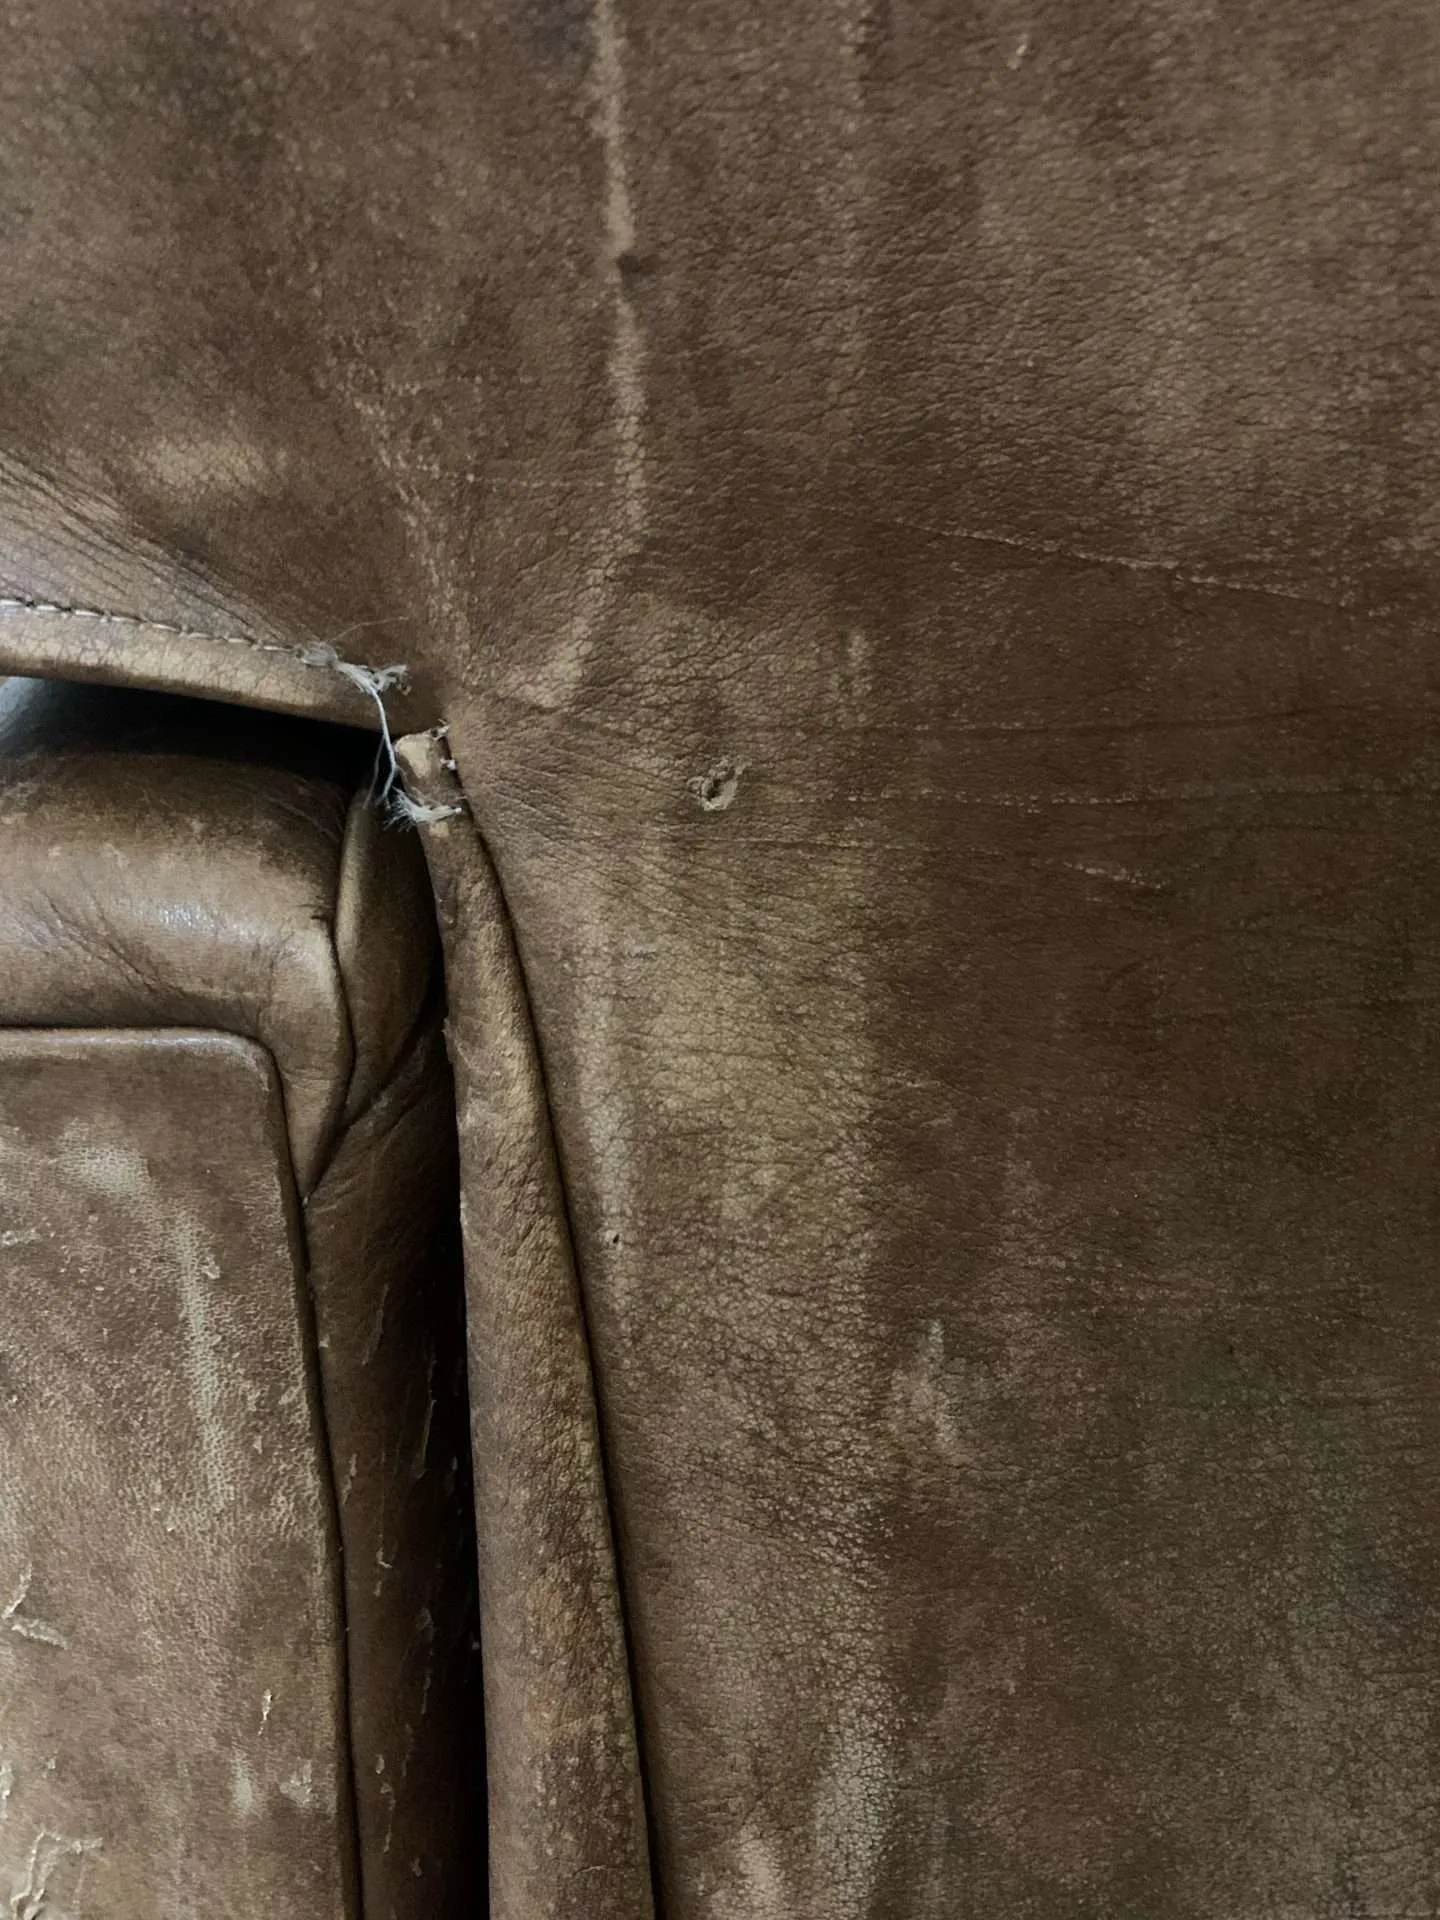
It was a demon cat that used this chair as its personal scratching post because there were SO MANY holes and deep scratches that left little scraggly pieces hanging off of the chair. Most of them came off with sanding, but there were a few that were still hanging on.
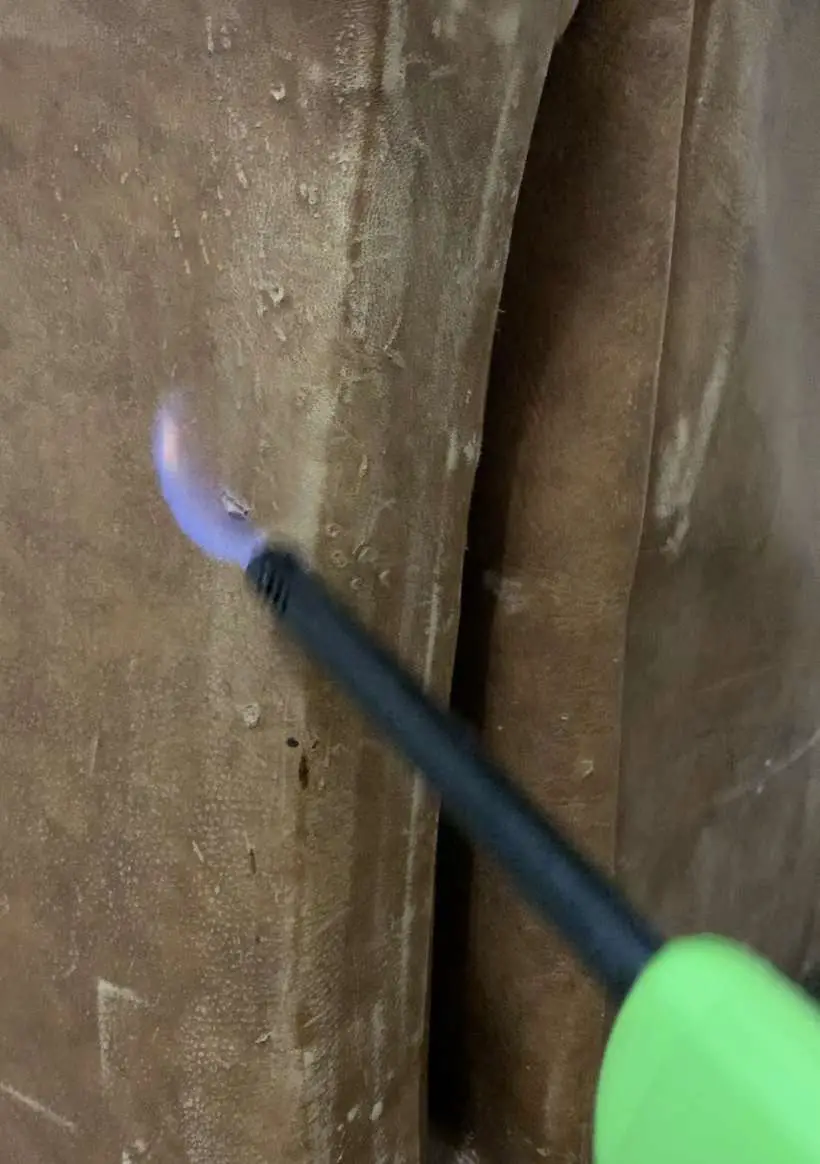
I used scissors to trim off any bits that I could, but most of them were too small for scissors to reach. So, I used a lighter to burn them off instead.
Be VERY careful doing this, you don’t want to scorch your beautiful leather. You have to keep the flame moving and go over the area quickly. The little scraggly pieces should burn off and not cause a problem.
**Pro Tip: Spot-test a small area on the back of the chair to make sure the heat doesn’t cause any discoloration.**
The heat caused a few small dark discolorations on this chair, but because I was going to dye the leather dark brown anyway, it didn’t matter.
DEEINN 4.1inch Sewing Scissors(pack of 3) Yarn Thread Cutter Small Snips Trimming Nipper – Great for Stitch, Mini DIY Supplies (Multicolored-3)Westcott 16380-001 4

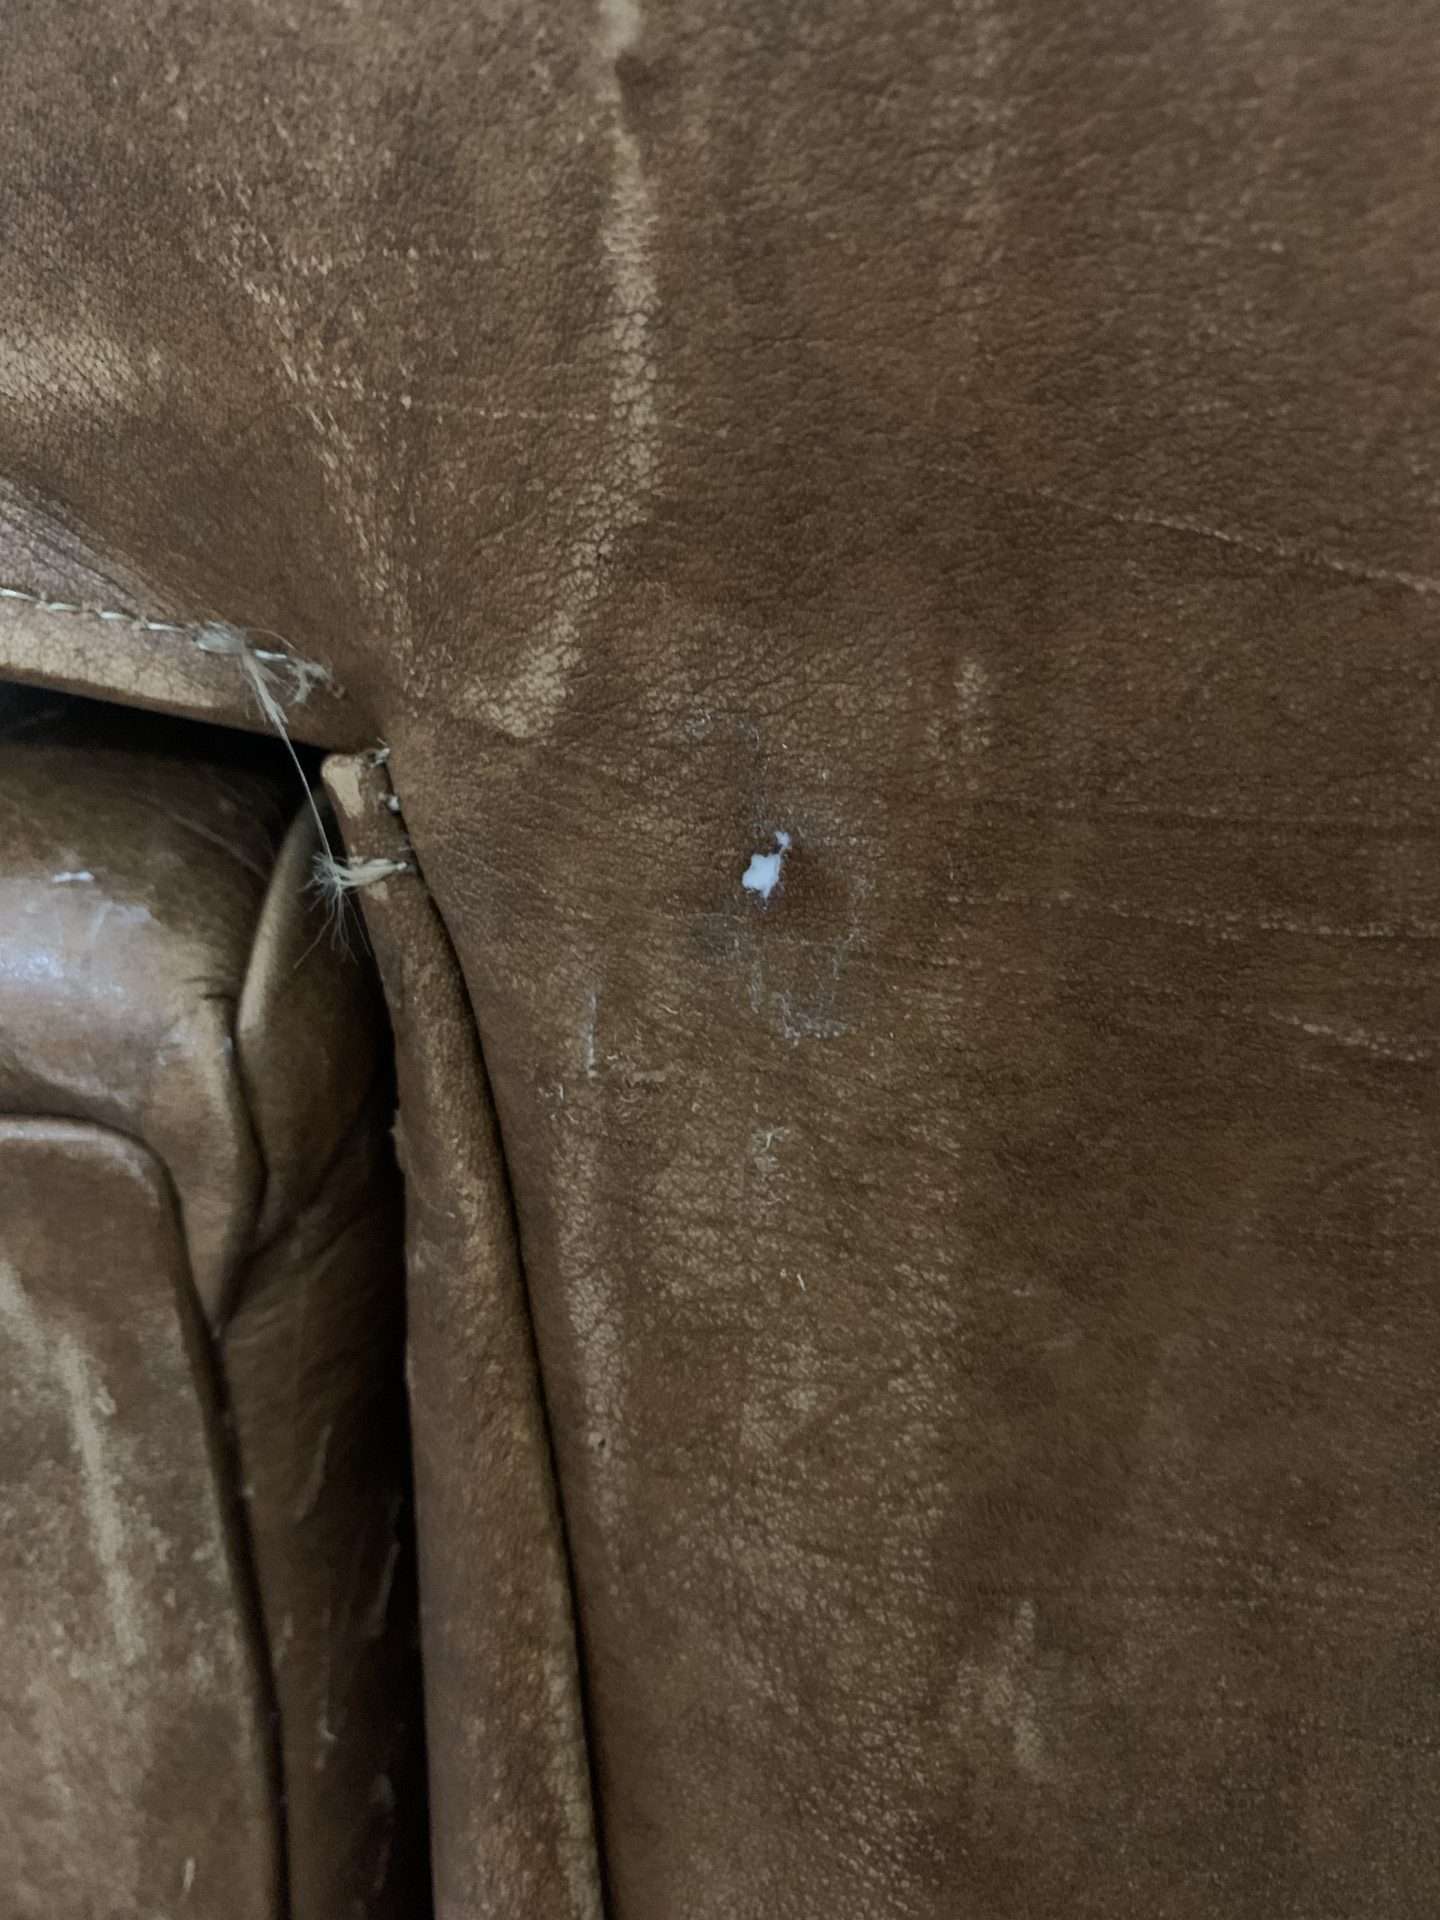
Step 3: Repair the Leather
Next, it was time to repair as much of the leather as I could.
Everywhere that I found a rip or hole I filled in the gap with the leather filler.
Using a putty knife get just a tiny bit of filler on the end of it and, keeping the putty knife as flat as possible, swipe it over the damaged area.
It is important to scrape off any excess around the hole/rip.
Once you have all of your rips and holes filled, let the filler set for a few hours. When the filler is dry, sand those areas again to make sure they are smooth.
For deeper rips or tears, you might have to do this process twice. (I had to fill twice on several areas.)
Once everything is filled and sanded, wipe the chair one more time with a damp cloth to get rid of dust.
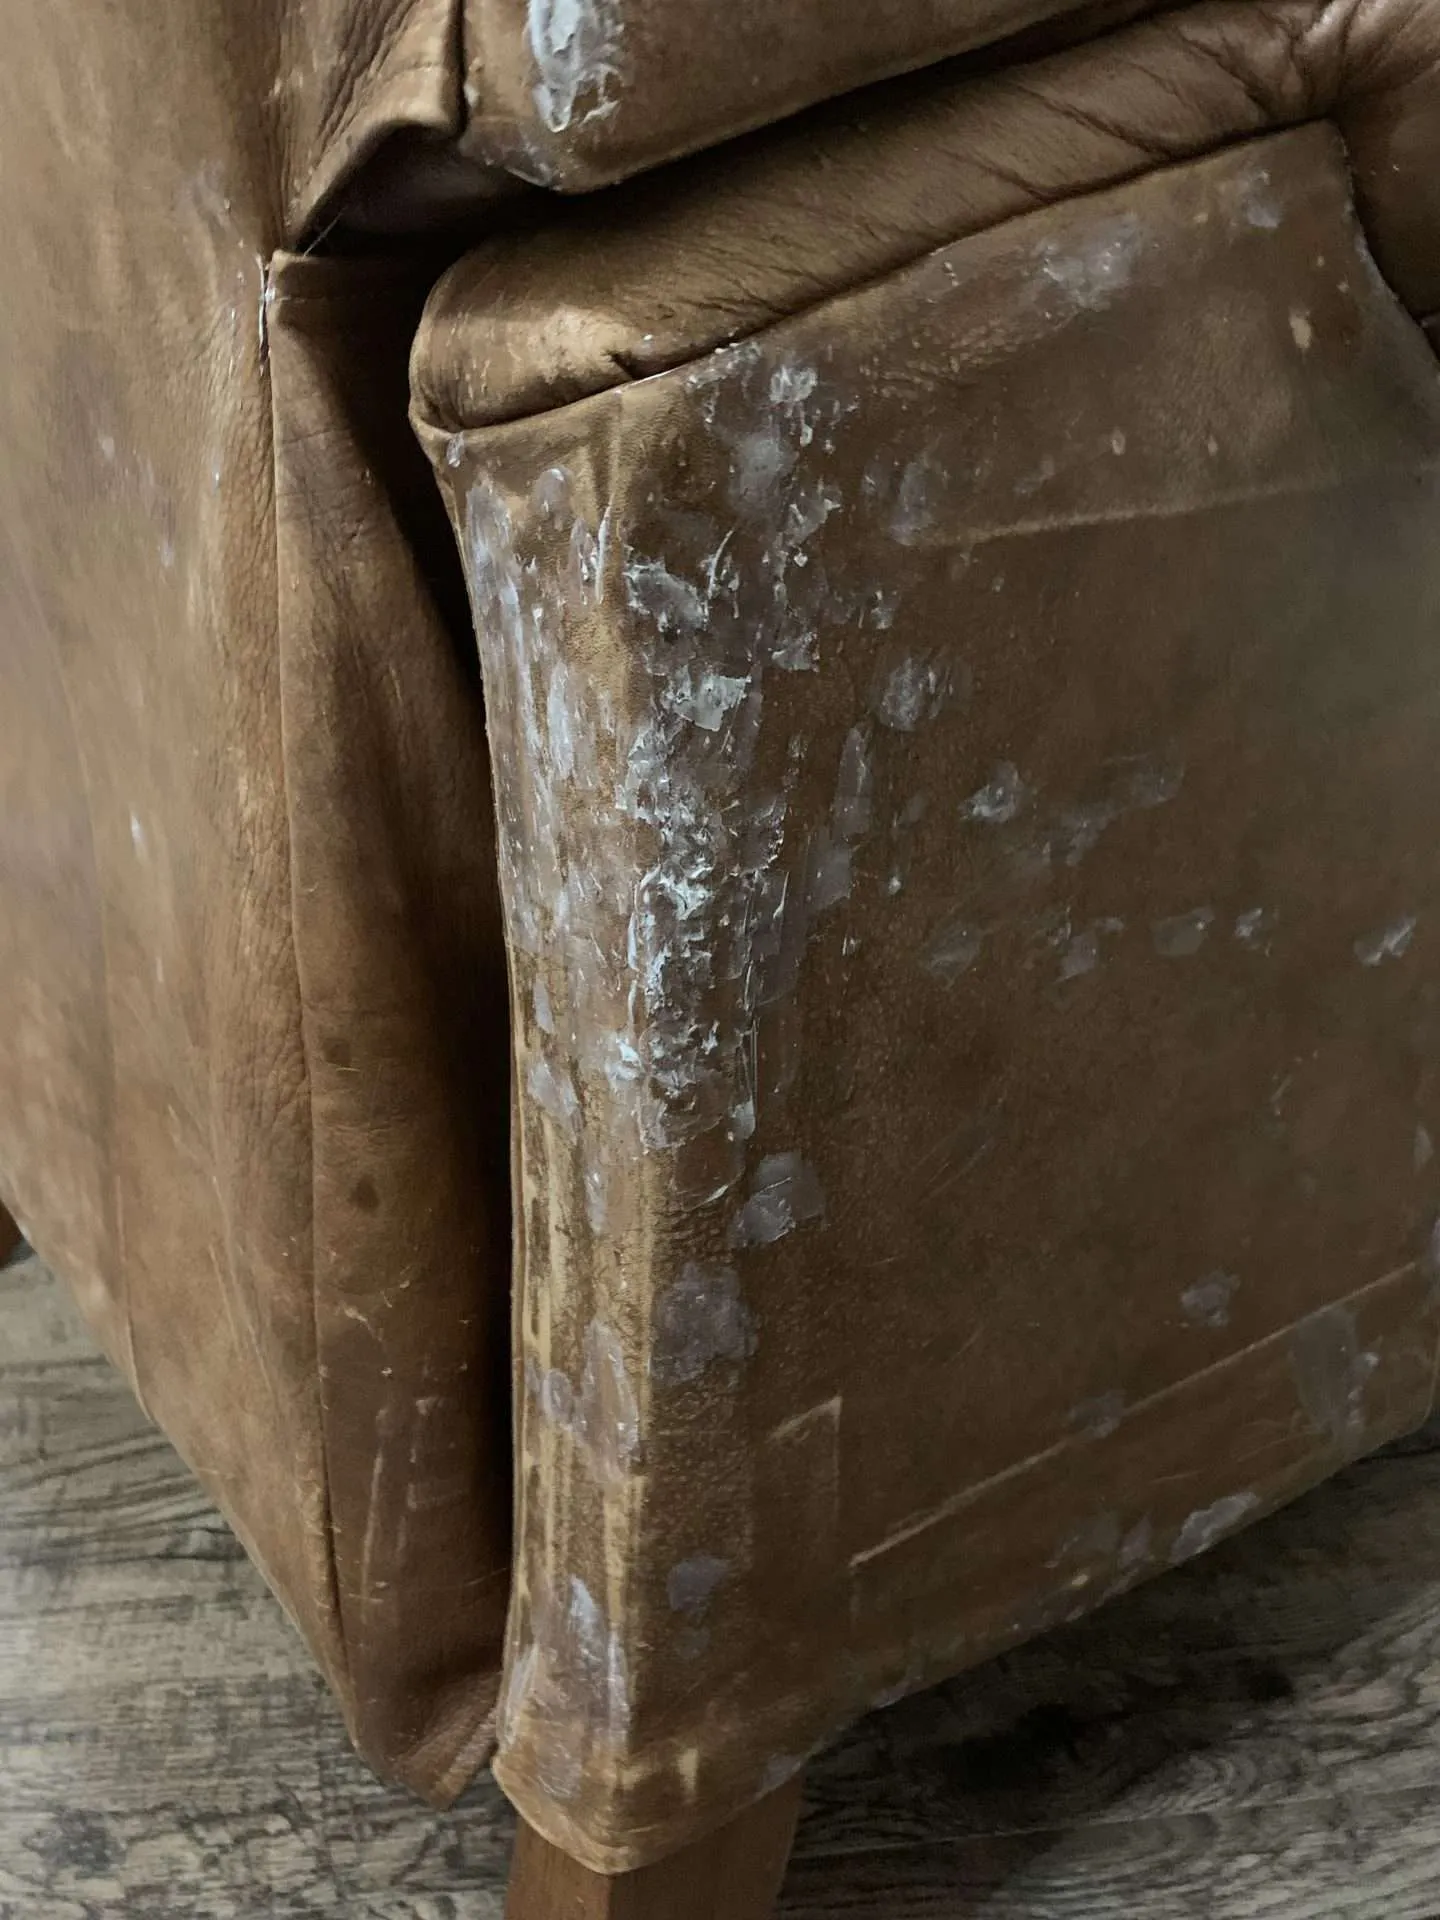
(After filler.)
2 Pcs Leather Filler for Filling or Repairing Holes Scratches Flexible Leather Filling Paste White Leather Restorer Multipurpose Leather Refinish for Leather Car Seats Vinyl Sofa Shoes Chair (2 Pcs)Liquitex Professional Freestyle Small Painting Knife, No. 1


Step 4: It’s Time to Dye Leather
Finally, after all of that prep work, it is time to actually dye leather!
I started applying the Recoloring Balm on the back of the chair first, using the sponge that came with it. I worked in small sections working the balm into the leather. After the section was covered I let the balm sit for a few minutes before wiping it with a dry rag to remove any excess.
**Pro Tip: Make sure you wear gloves when working with this balm, because it will stain your hands.**
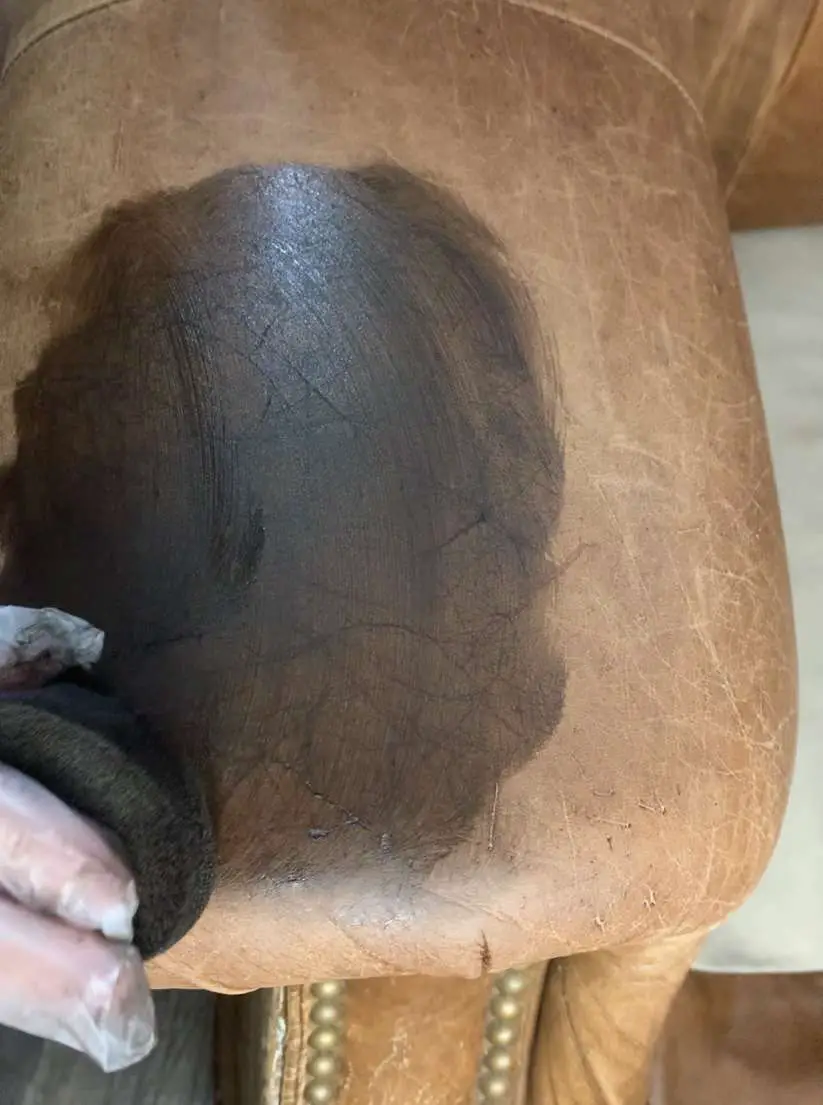
After one coat of Recoloring Balm, the back of the chair was looking patchy and streaky. I was worried that this furniture flip was going to be a huge failure. Thankfully, after the second coat, it looked much better.
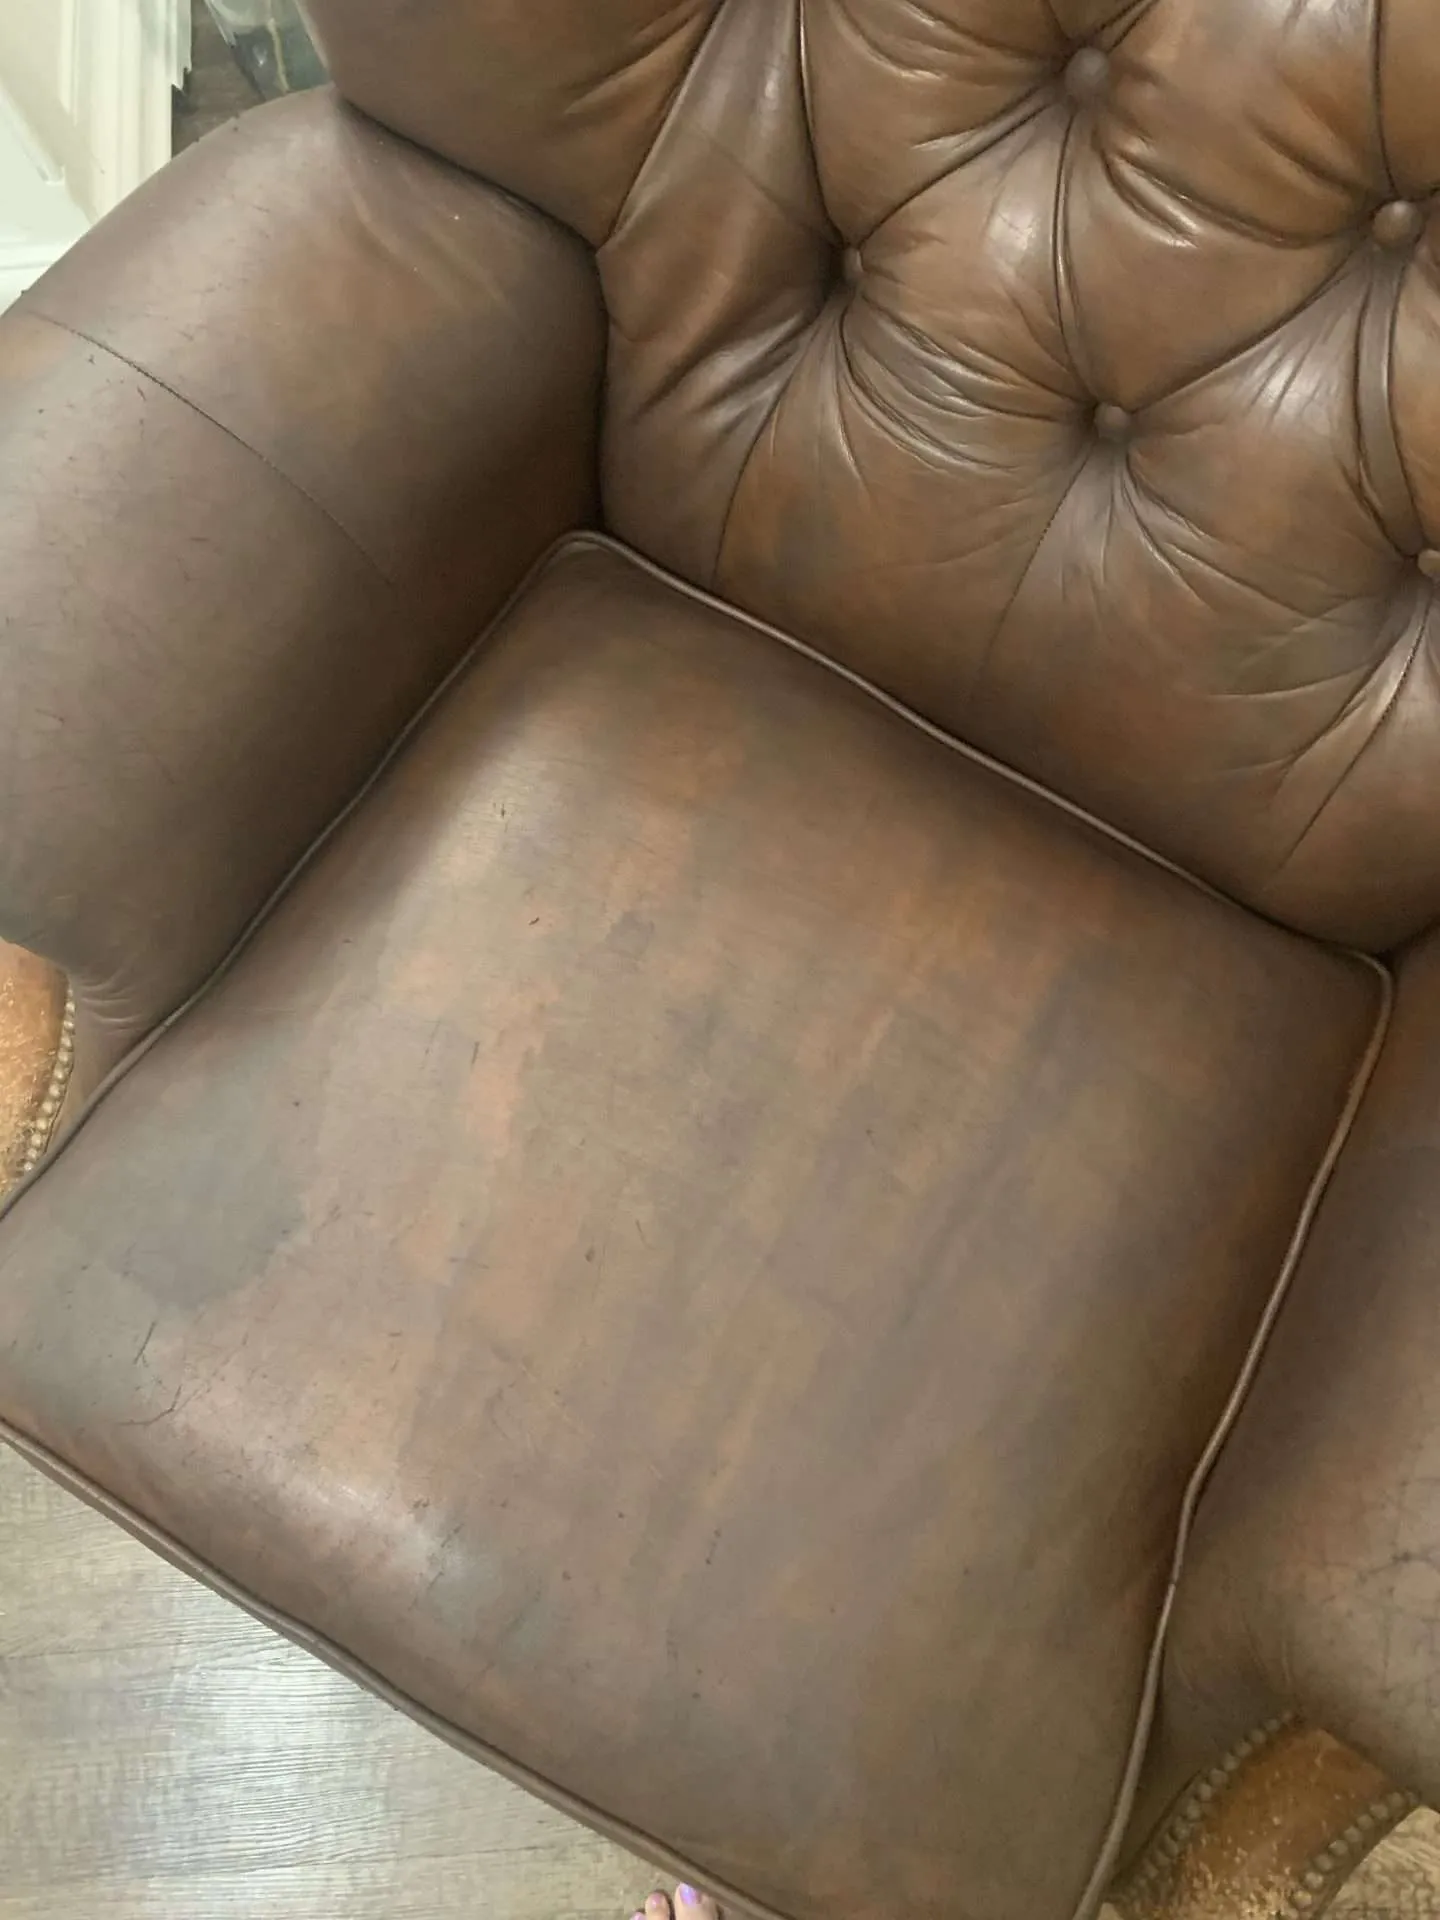
Leather naturally has color variations so that you won’t get a perfectly uniform color across the whole piece.
I did one coat of Recoloring Balm over everything, working in small sections. I let that coat sit for an hour or two, then did another coat.
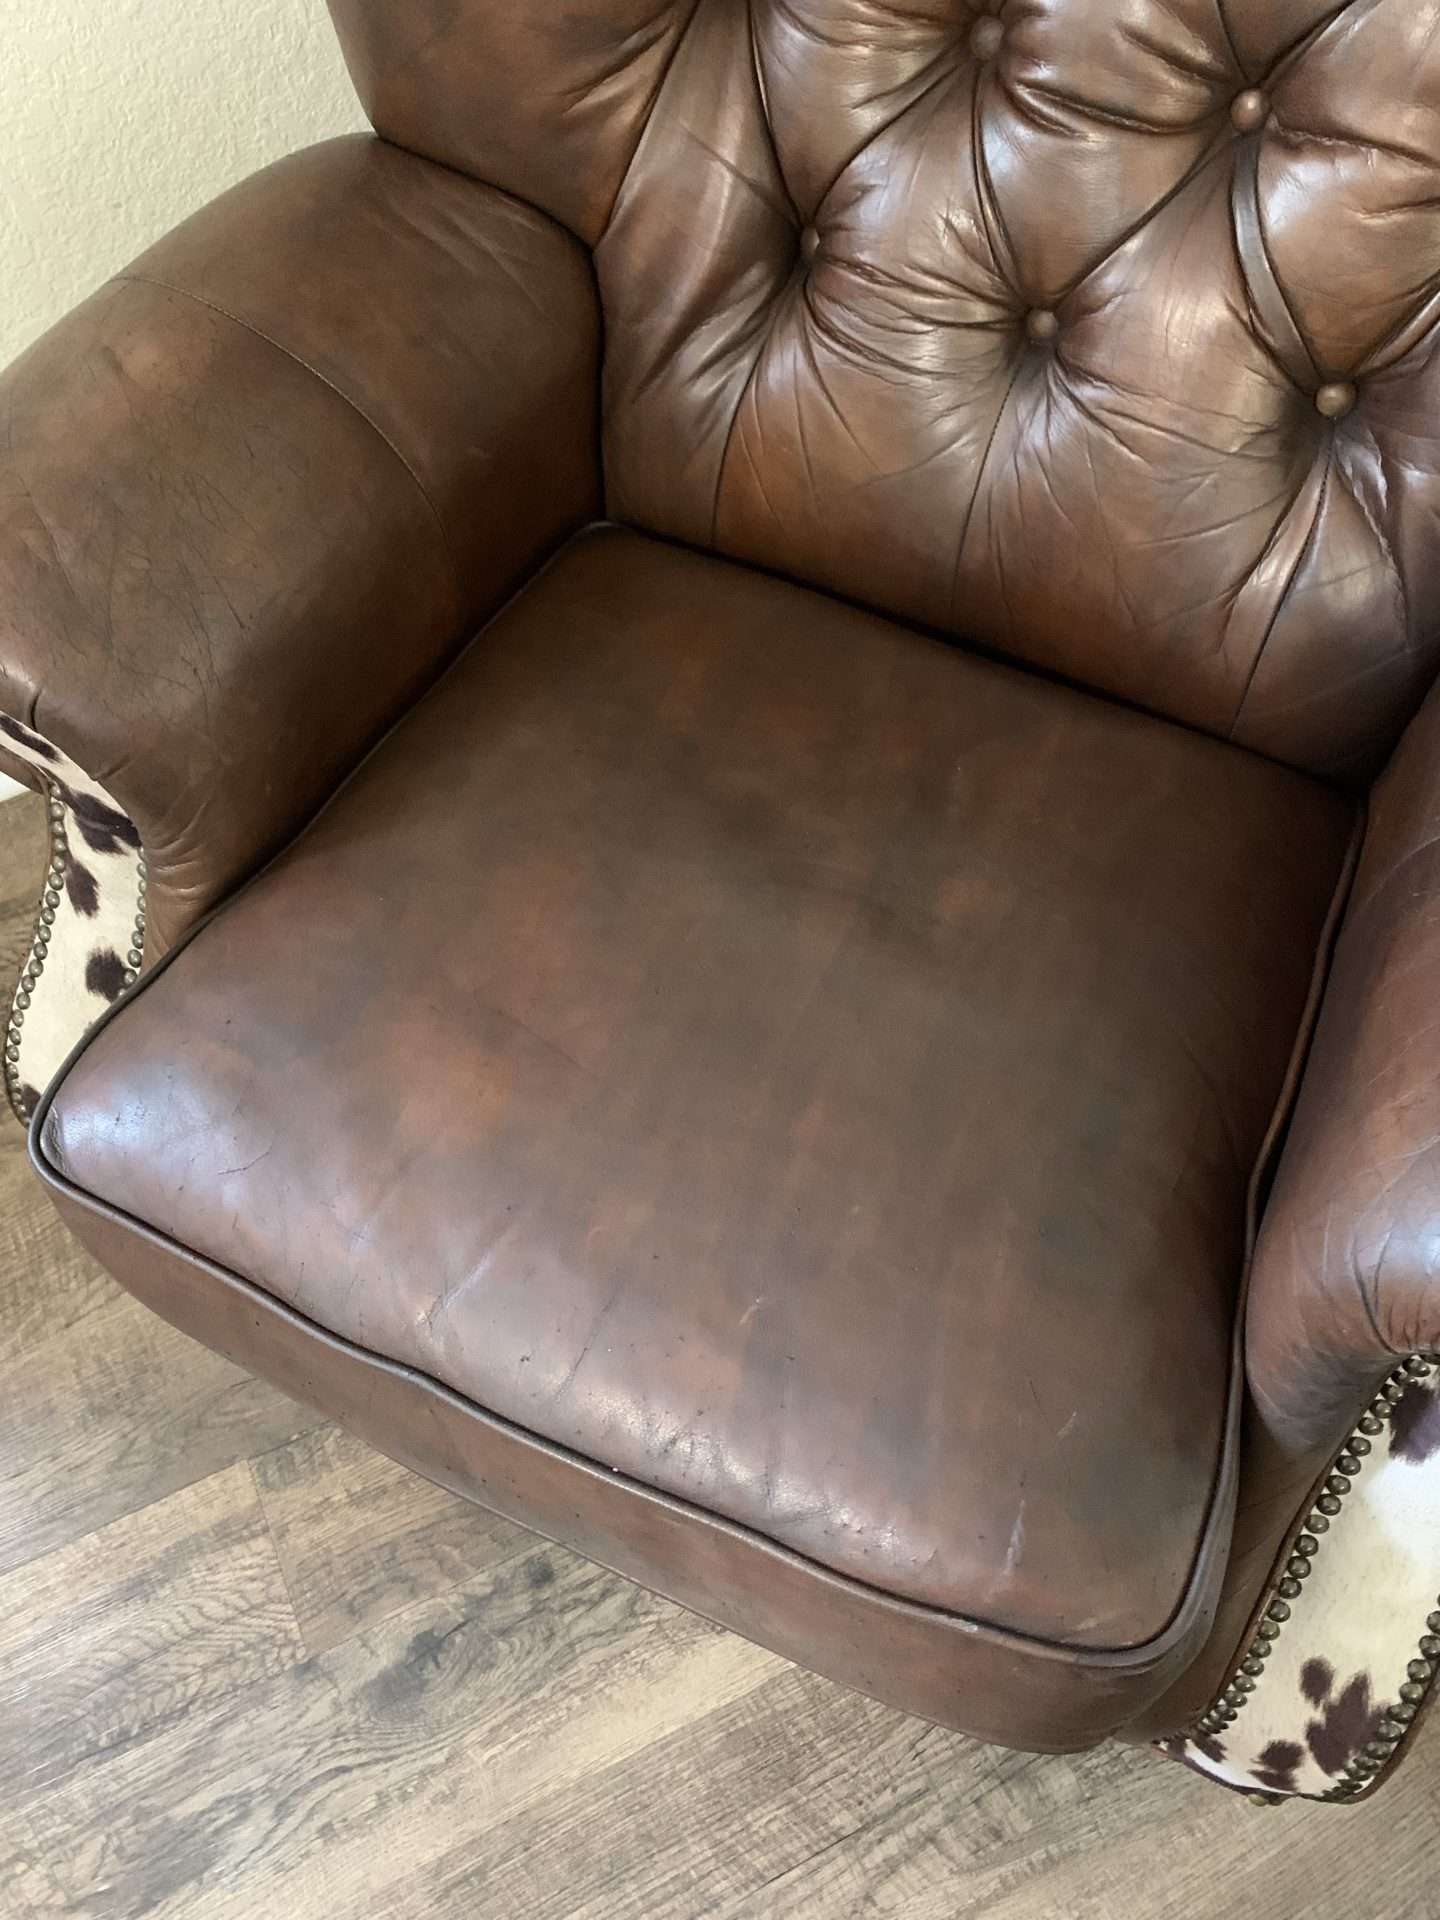
After the second coat, everything was looking pretty good, except for one spot on the corner of the seat. So, I touched it up with a third coat.
After everything was dry, we sat in it to make sure that the color transfer. It didn’t stain our clothes at all!
Furniture Clinic Leather Easy Restoration Kit | Includes Leather Recoloring Balm & Leather Cleaner, Sponge & Cloth | Restore & Repair Sofas, Car Seats & More (Dark Brown)Furniture Clinic Leather Complete Restoration Kit | Includes Leather Recoloring Balm, Leather Cleaner, Protection Cream, Sponge & Cloth | Restores & Repairs (Dark Brown)

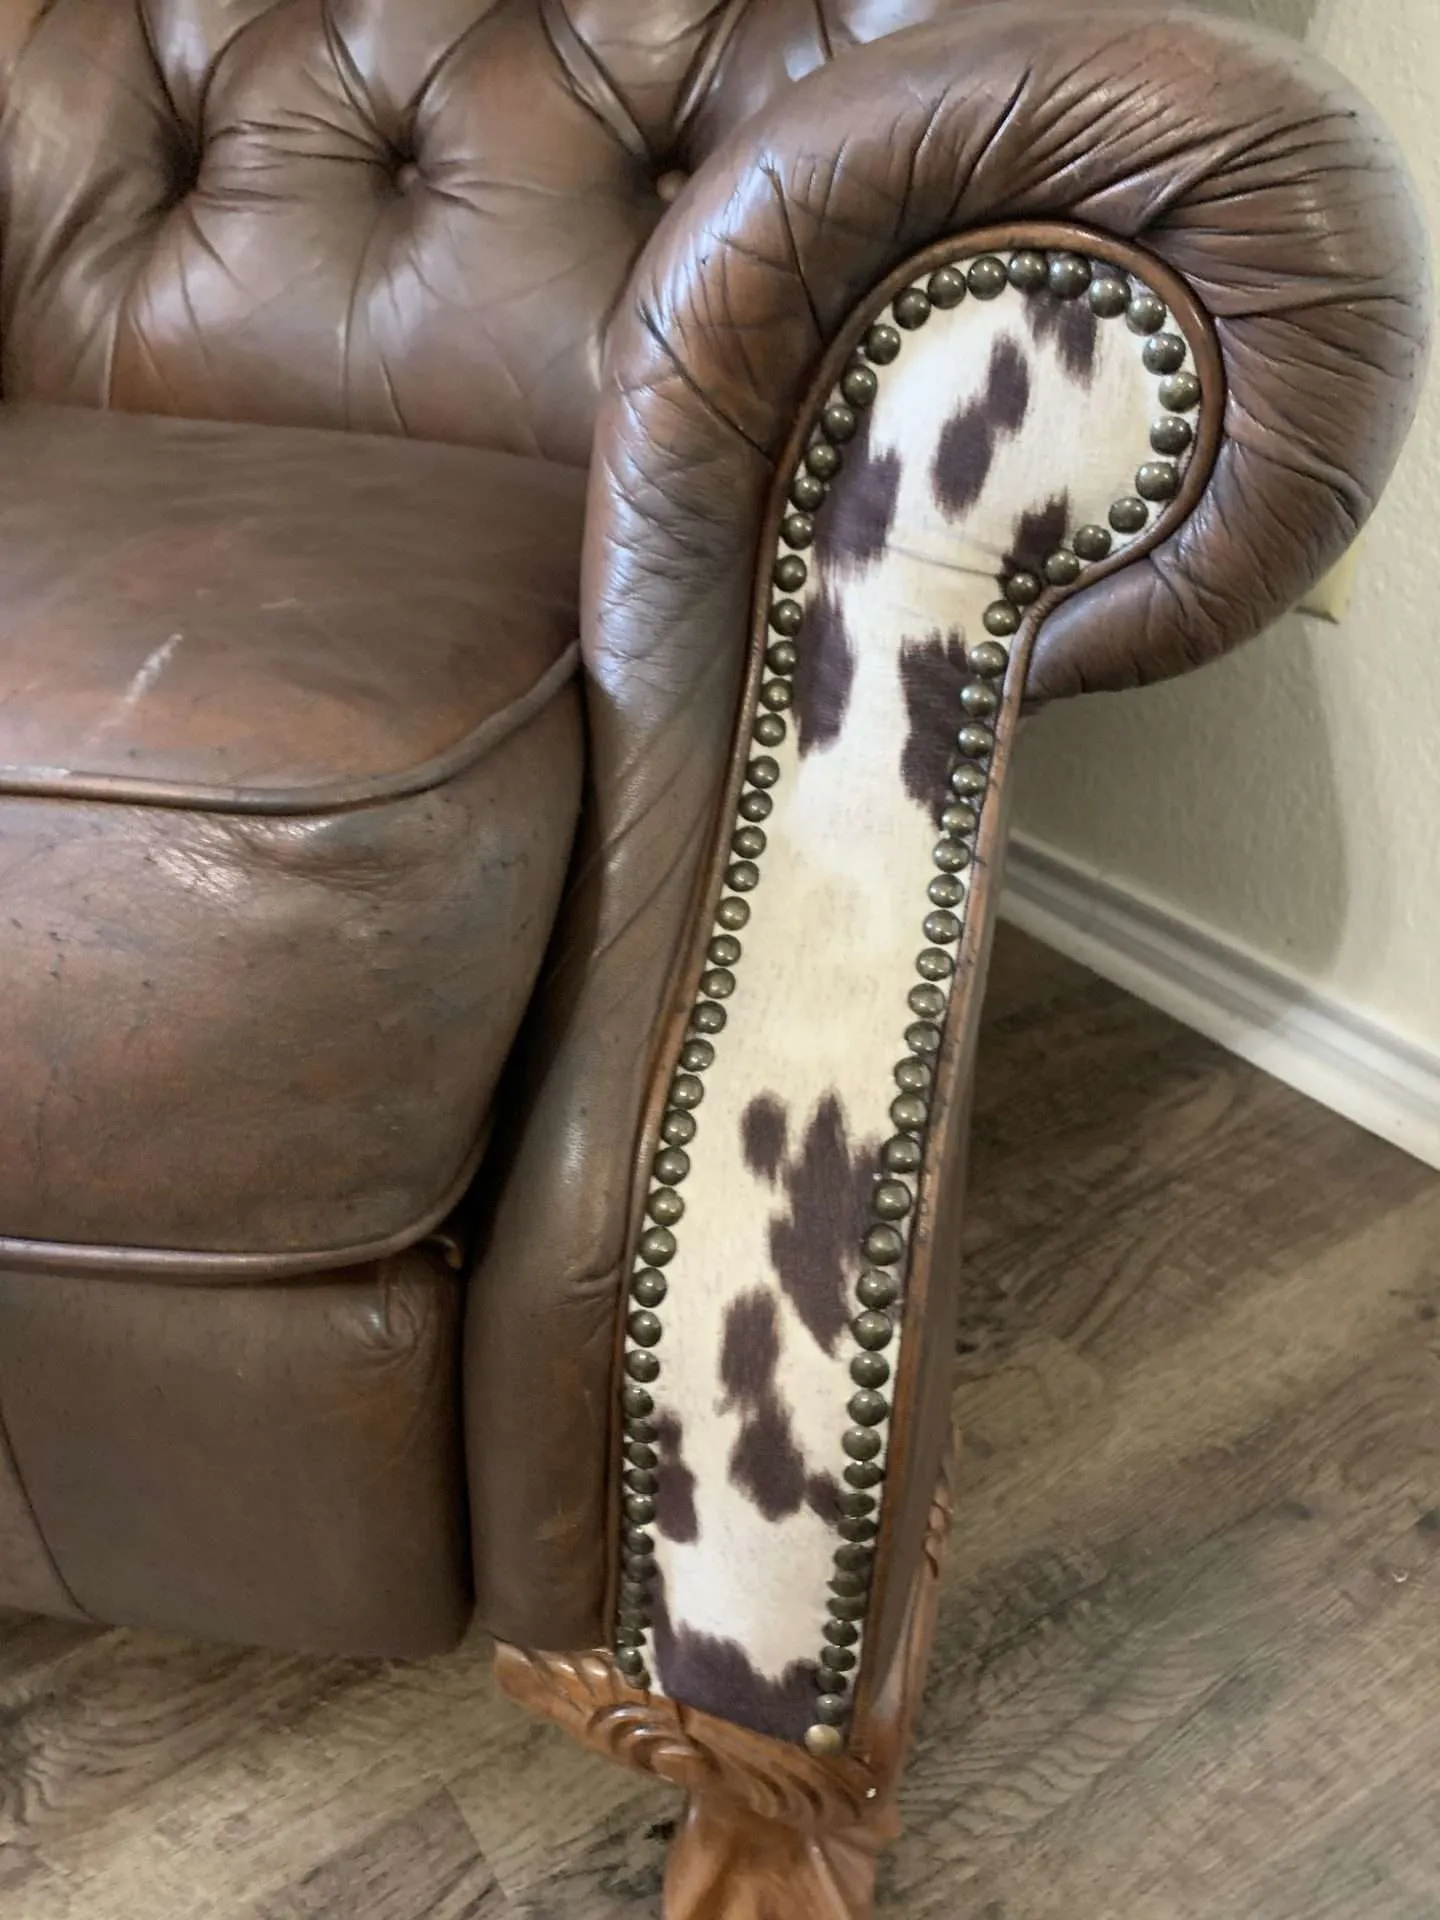
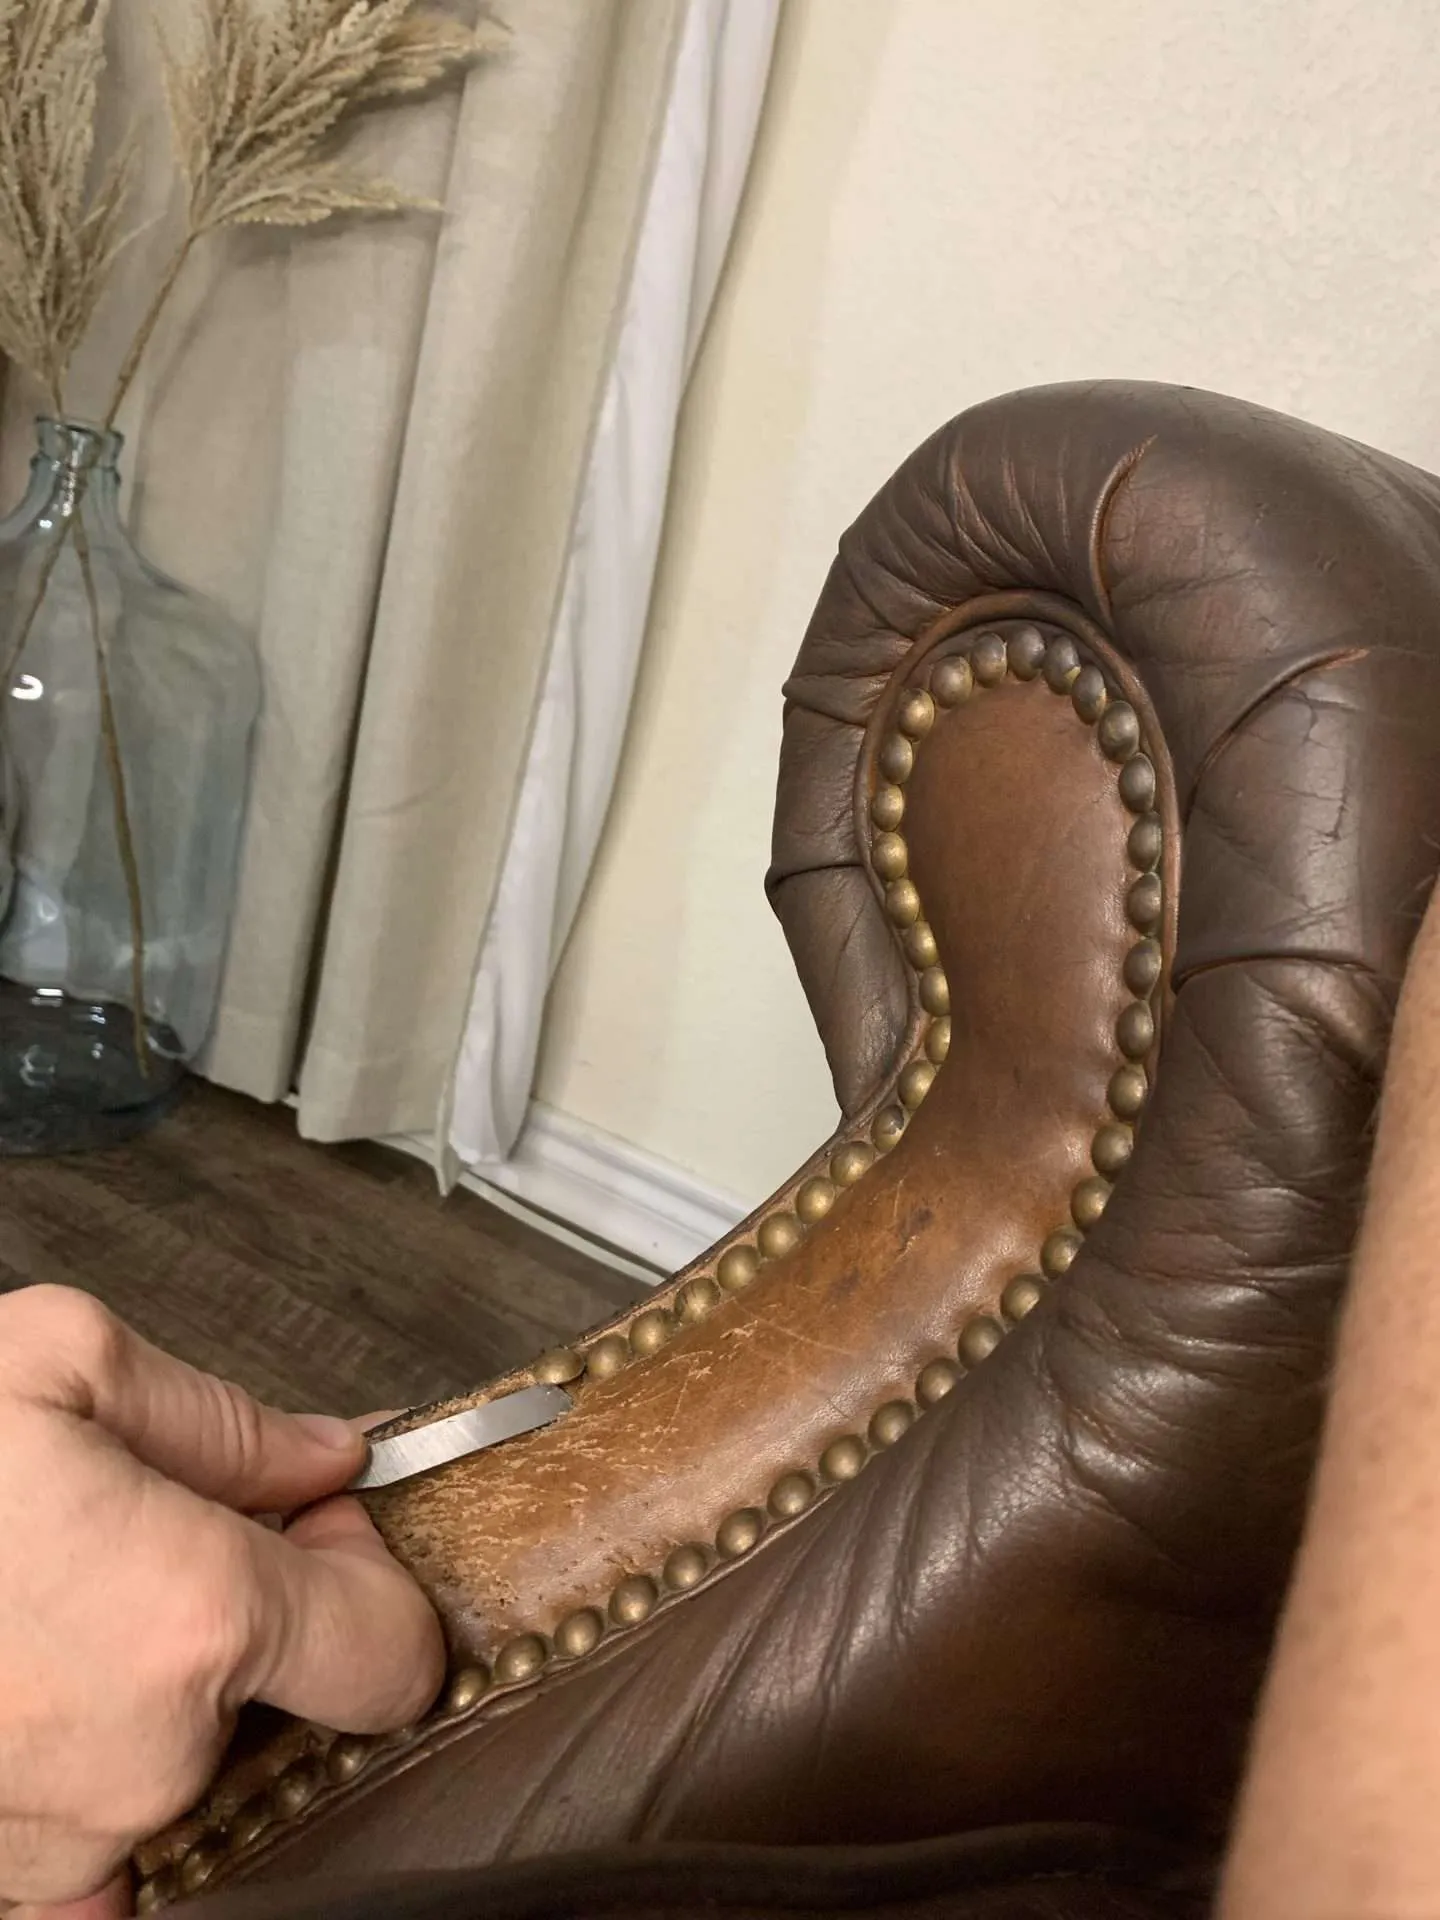
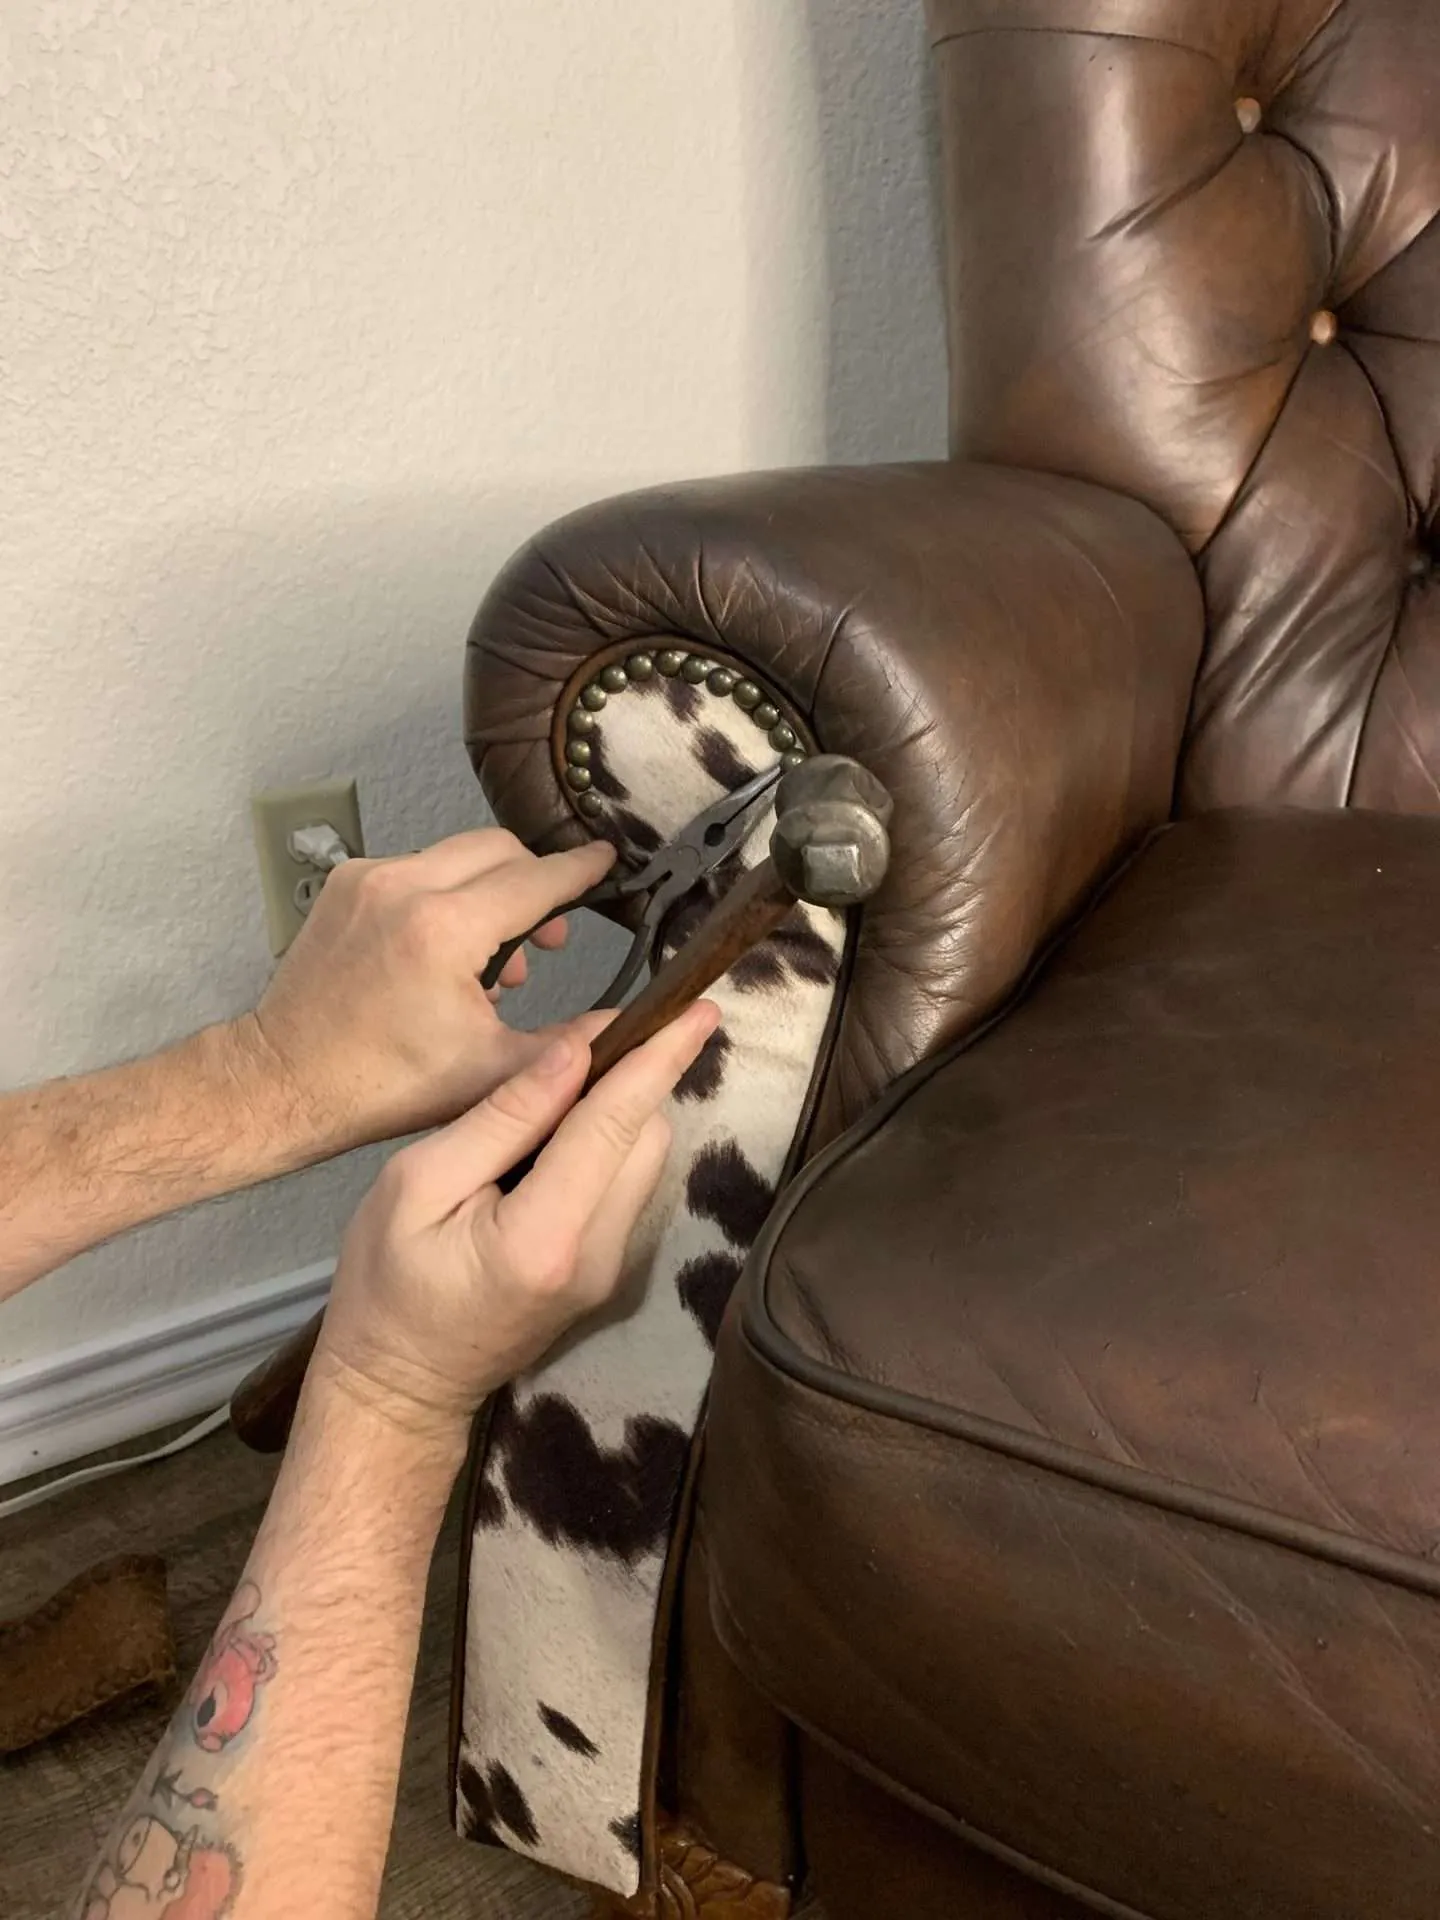
Step 5: Remove & Reupholster the Front Panels
The panels on the front of the chair were shredded beyond repair. Leather filler wasn’t going to help this mess.
Since those panels were attached by upholstery tacks, we were able to pry up the tacks and pull the whole panel off. We pried up the tacks using one of Heff’s chisels, but a flathead screwdriver would work as well. Taking all the tacks out was tedious, but not difficult.
Underneath the shredded leather was a piece of foam and cardboard. Removing the panel also released the leather piping around the edge, which I saved. It had a few small tears and scratches in it, but it was still salvageable.
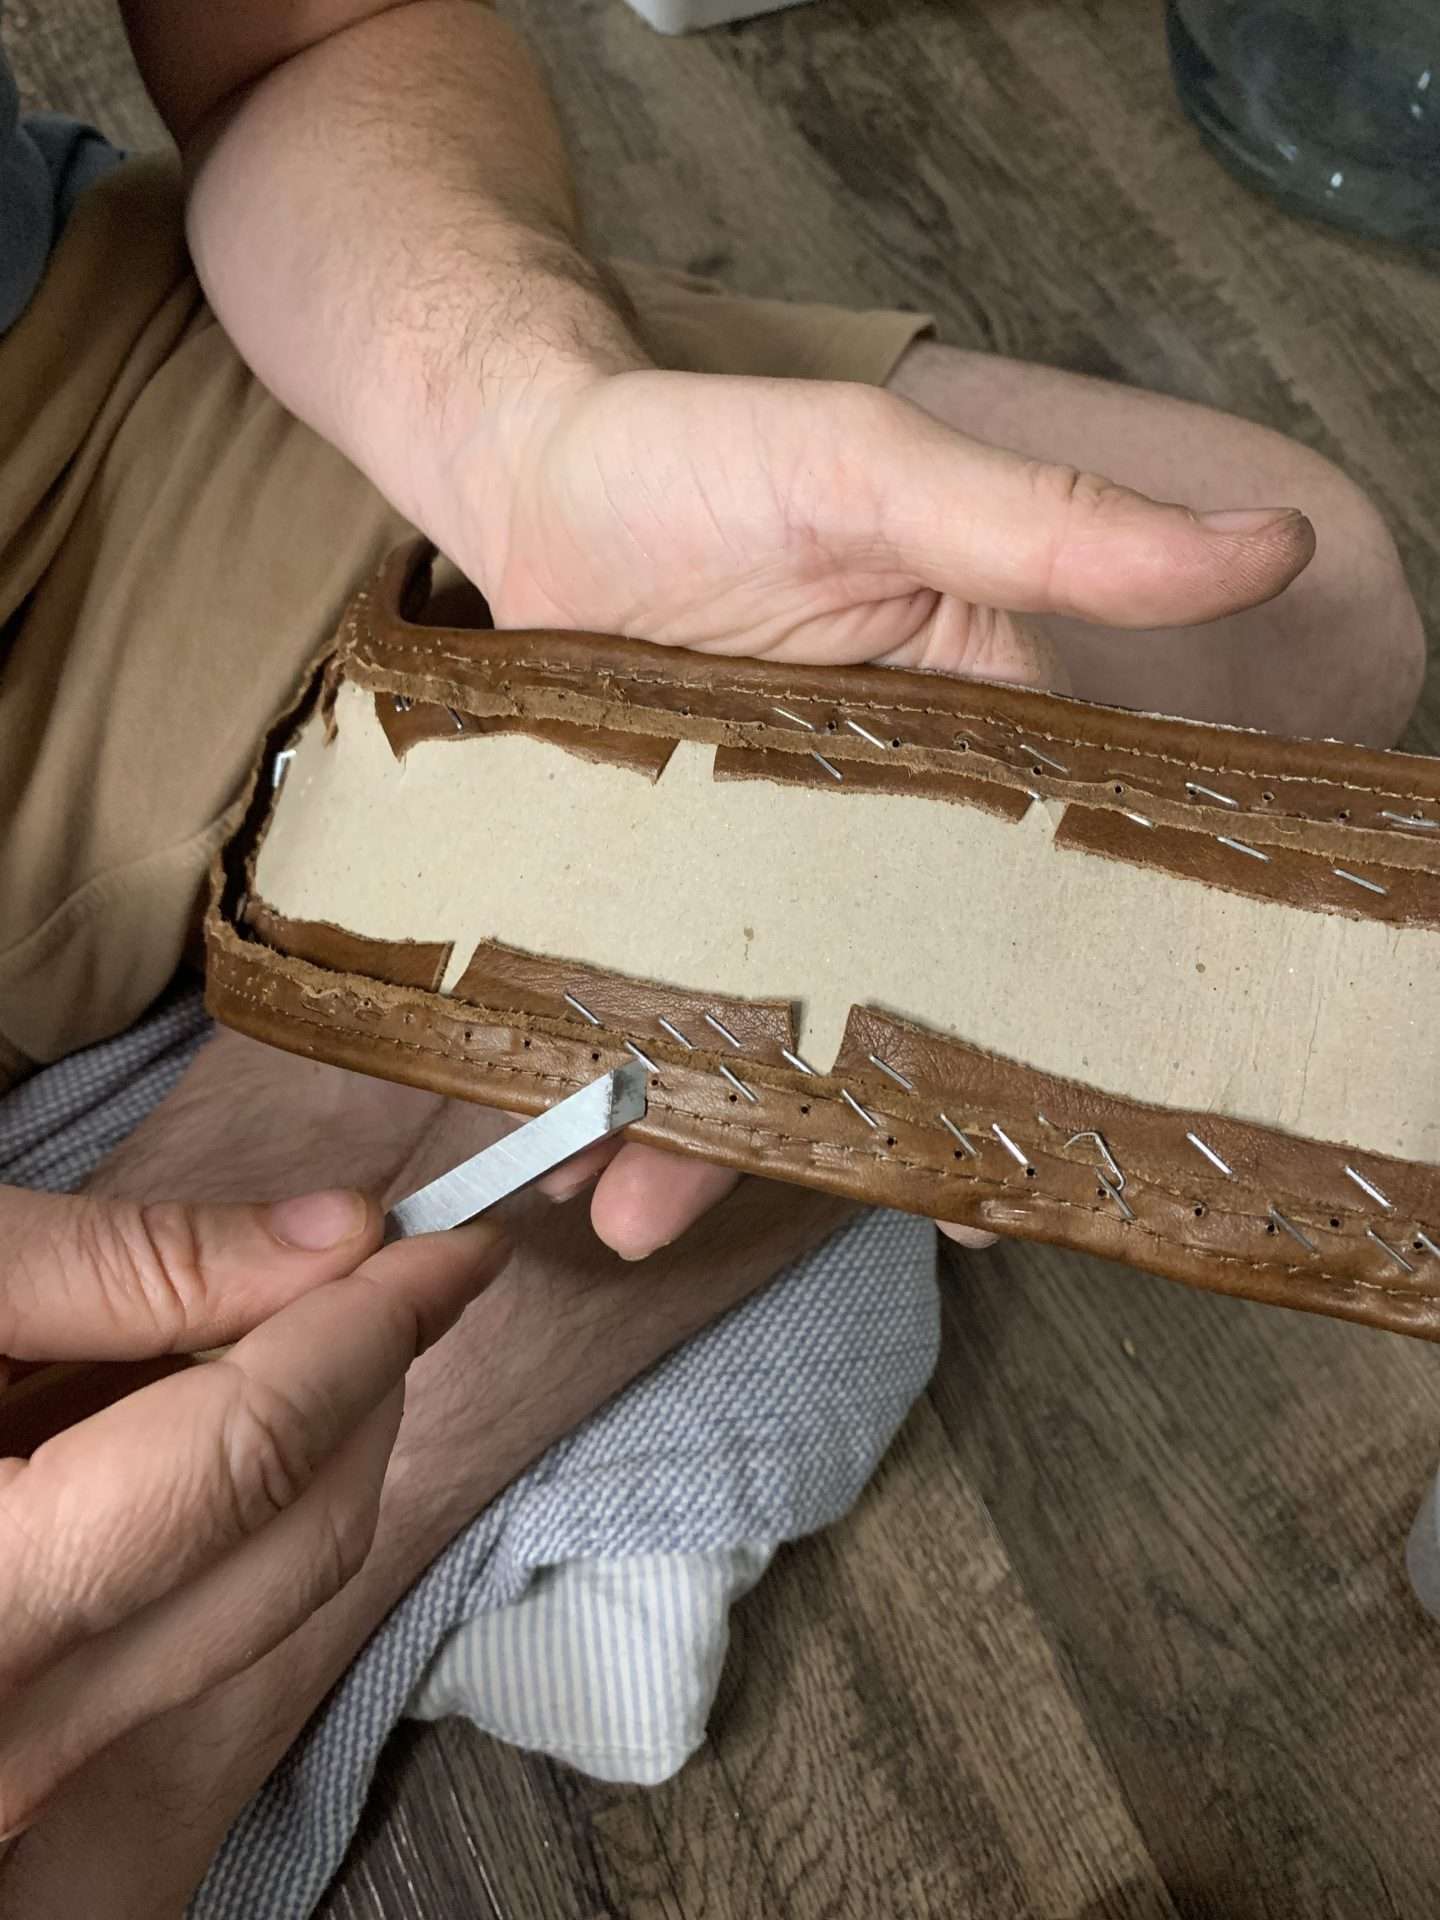
We had to pull staples out of the panel to remove the damaged leather. They also came out easily.
Underneath was a piece of cardboard covered with foam. Don’t throw this away, you can still use it!
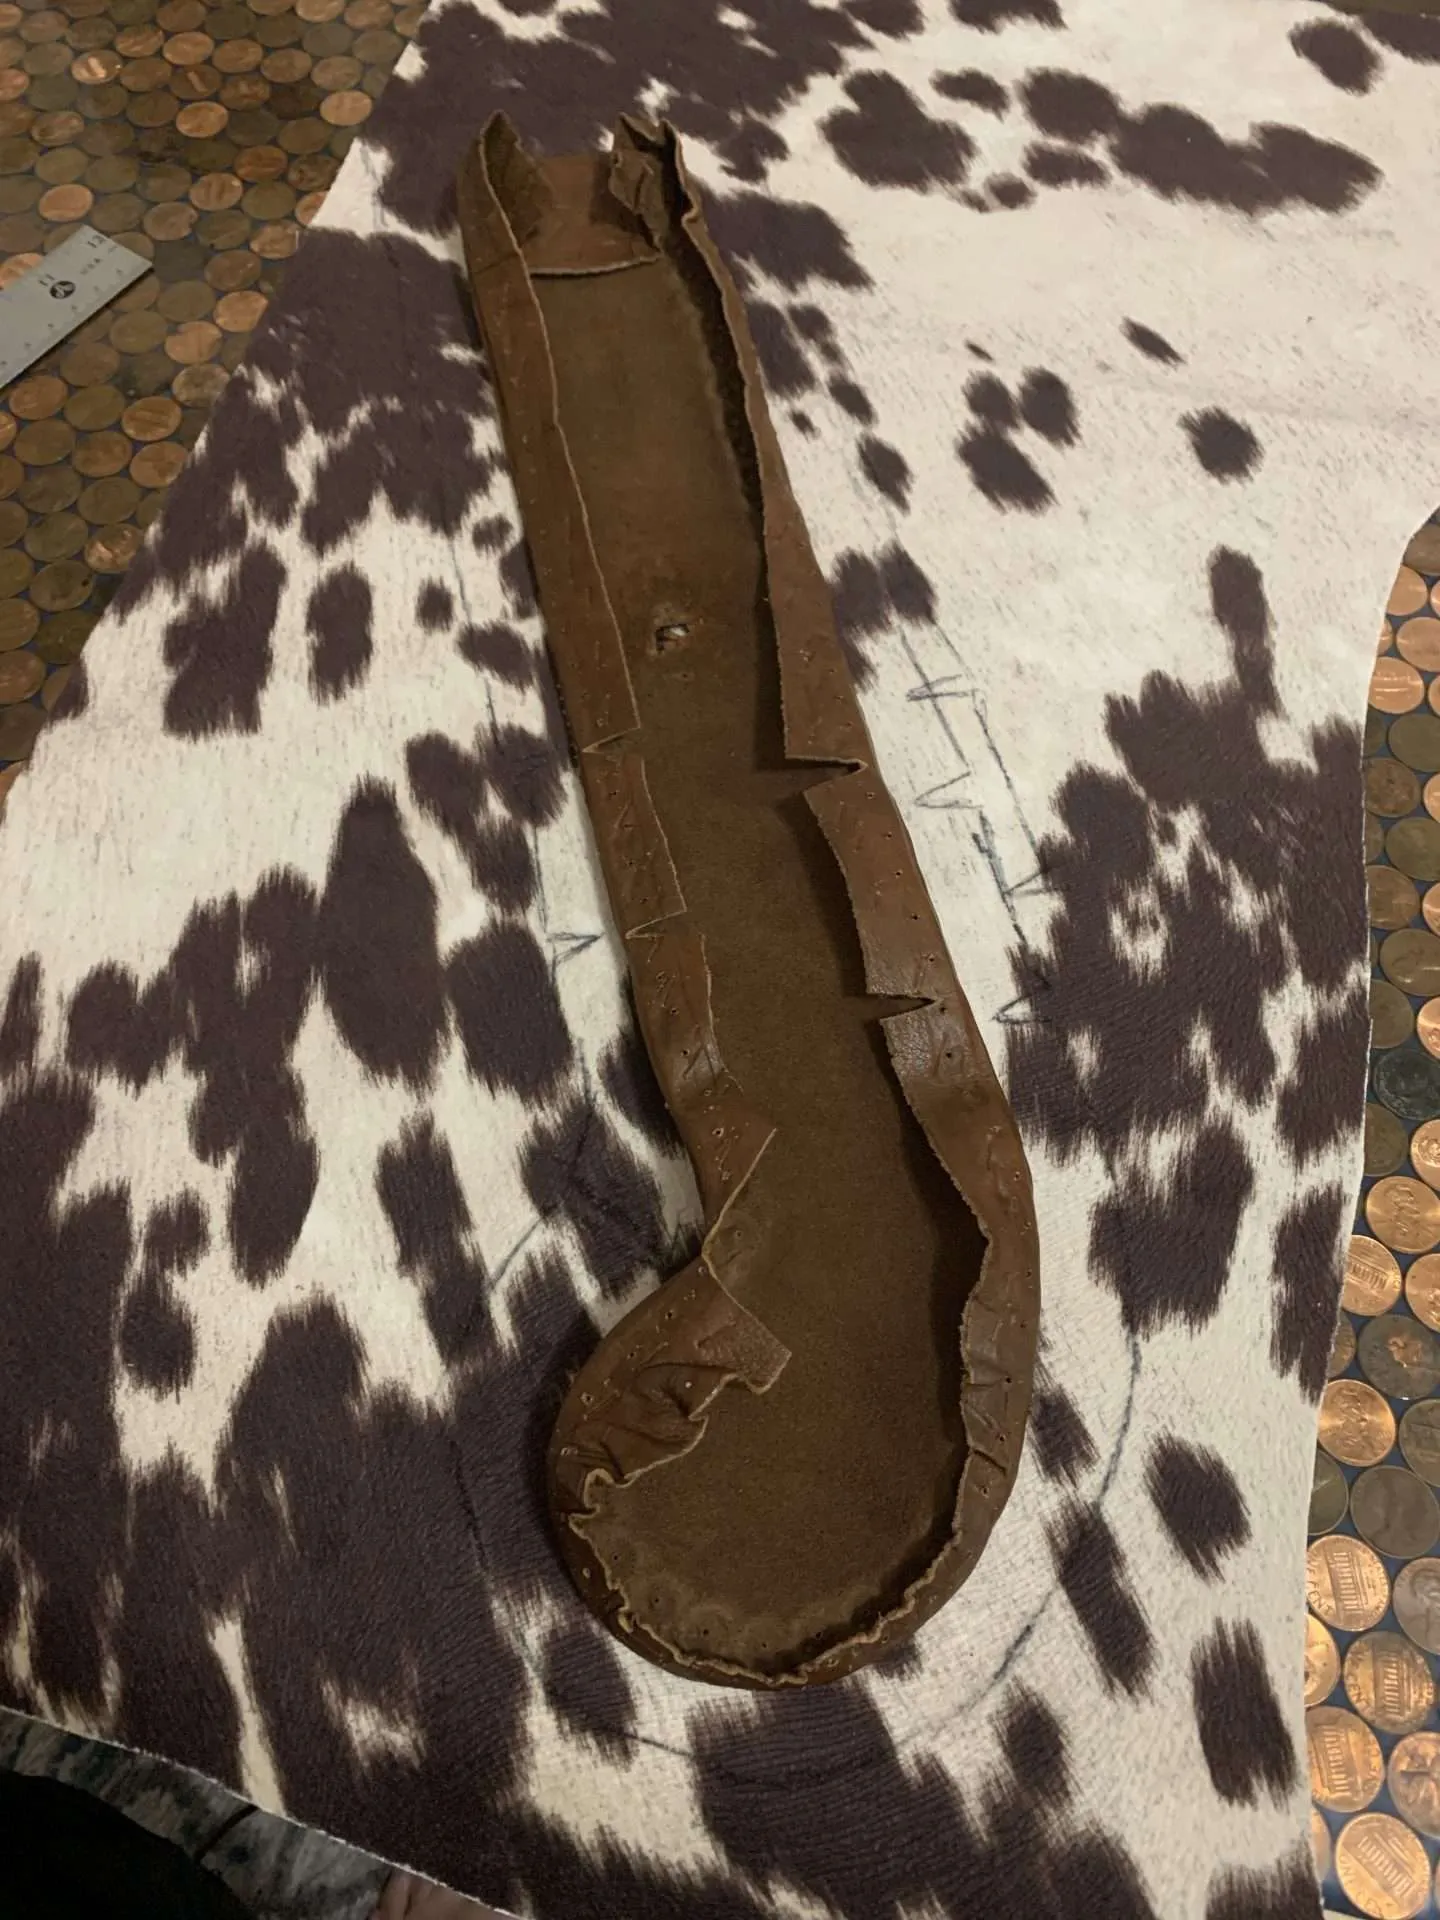
Next, we traced the outline of the removed leather onto the fabric. The photos show me tracing onto the printed side of the fabric, but I traced one panel while Heff was still removing the other one.
So, I traced it on the printed side and the non-printed side to get the pattern for both the left and the right side.
Suede Velvet Cow Print Udder Madness Upholstery Fabric 54Mr. Pen- Upholstery Tacks, 100 Pack, Furniture Tacks, Decorative Nail Heads, Upholstery Tacks for Furniture, Decorative Tacks, Upholstery Pins, Upholstery Nails, Antique Furniture Brass Tacks

After cutting the fabric, we stapled it onto the cardboard and foam panels that we saved using a basic staple gun and 1/4″ staples.
Once the panels were re-covered in new fabric, putting them back on the chair was a little tricky. I held the piping and panel in place while Heff put in a few upholstery tacks in it to attach it to the chair.
During our antique bed reupholstery, we learned that the easiest way to put a tack in is to hold it in place with needle-nose pliers with one hand while tapping it in with a hammer with the other.
Then repeat that process a hundred more times until the outer edges of those panels are completely lined with upholstery tacks.
Allied Tools Mini Pliers, Needle NoseAmazon Basics 8-Ounce Hammer, Turquoise


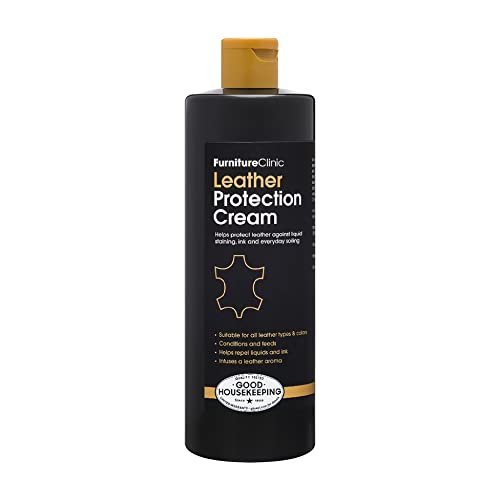
Step 6: Add Leather Protection Cream
The final step of this makeover was to add leather protection cream.
According to the Furniture Clinic website, their leather protection cream conditions and protects the leather. Not only does it make the leather last longer, but it also helps repel liquid and ink stains.
Using a microfiber rag, I worked the cream into the leather all over the chair. I did 2 coats and it made the chair look and smell great!
There are tons of leather conditioners out on the market that probably work wonderfully. I bought this one just because it was the same brand as the Recoloring Balm that I used.
No matter what kind of conditioner you buy, make sure you don’t skip this step.
Dry leather is more likely to crack and tear and you want it to last as long as possible after all the work you’ve put into it.
Furniture Clinic Leather Protection Cream | Leather Conditioner & Protector for Car Seats, Leather Furniture, Shoes, & More, 17oz/ 500mlFurniture Clinic Leather Applicator Sponges | 2 Microfiber Cloth Applicator Pads for Cleaning Leather, Applying Wax, Balms, Oils & More

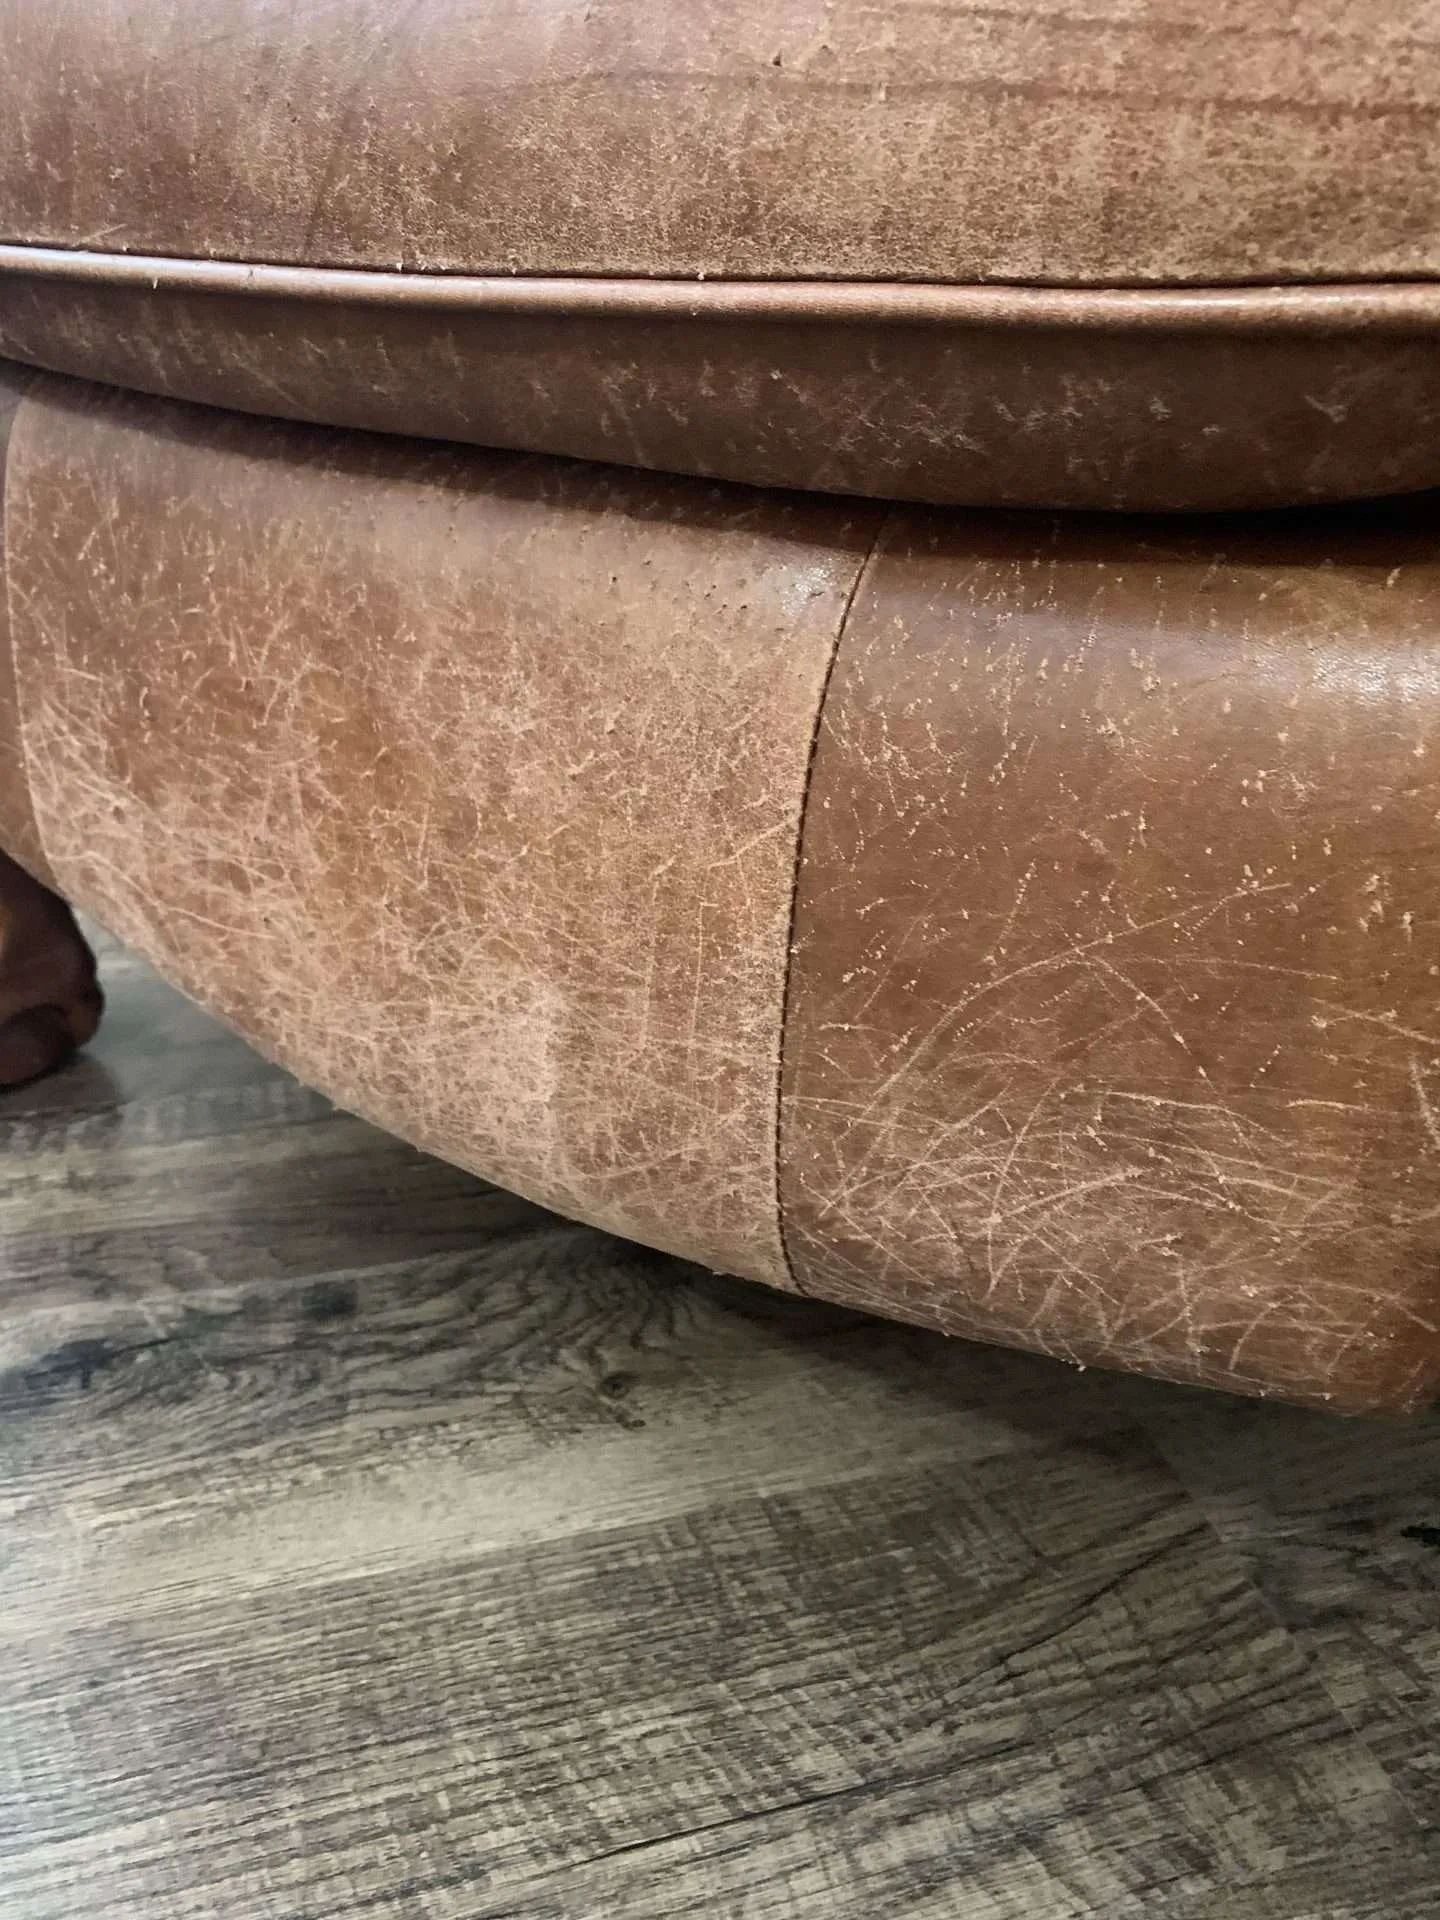
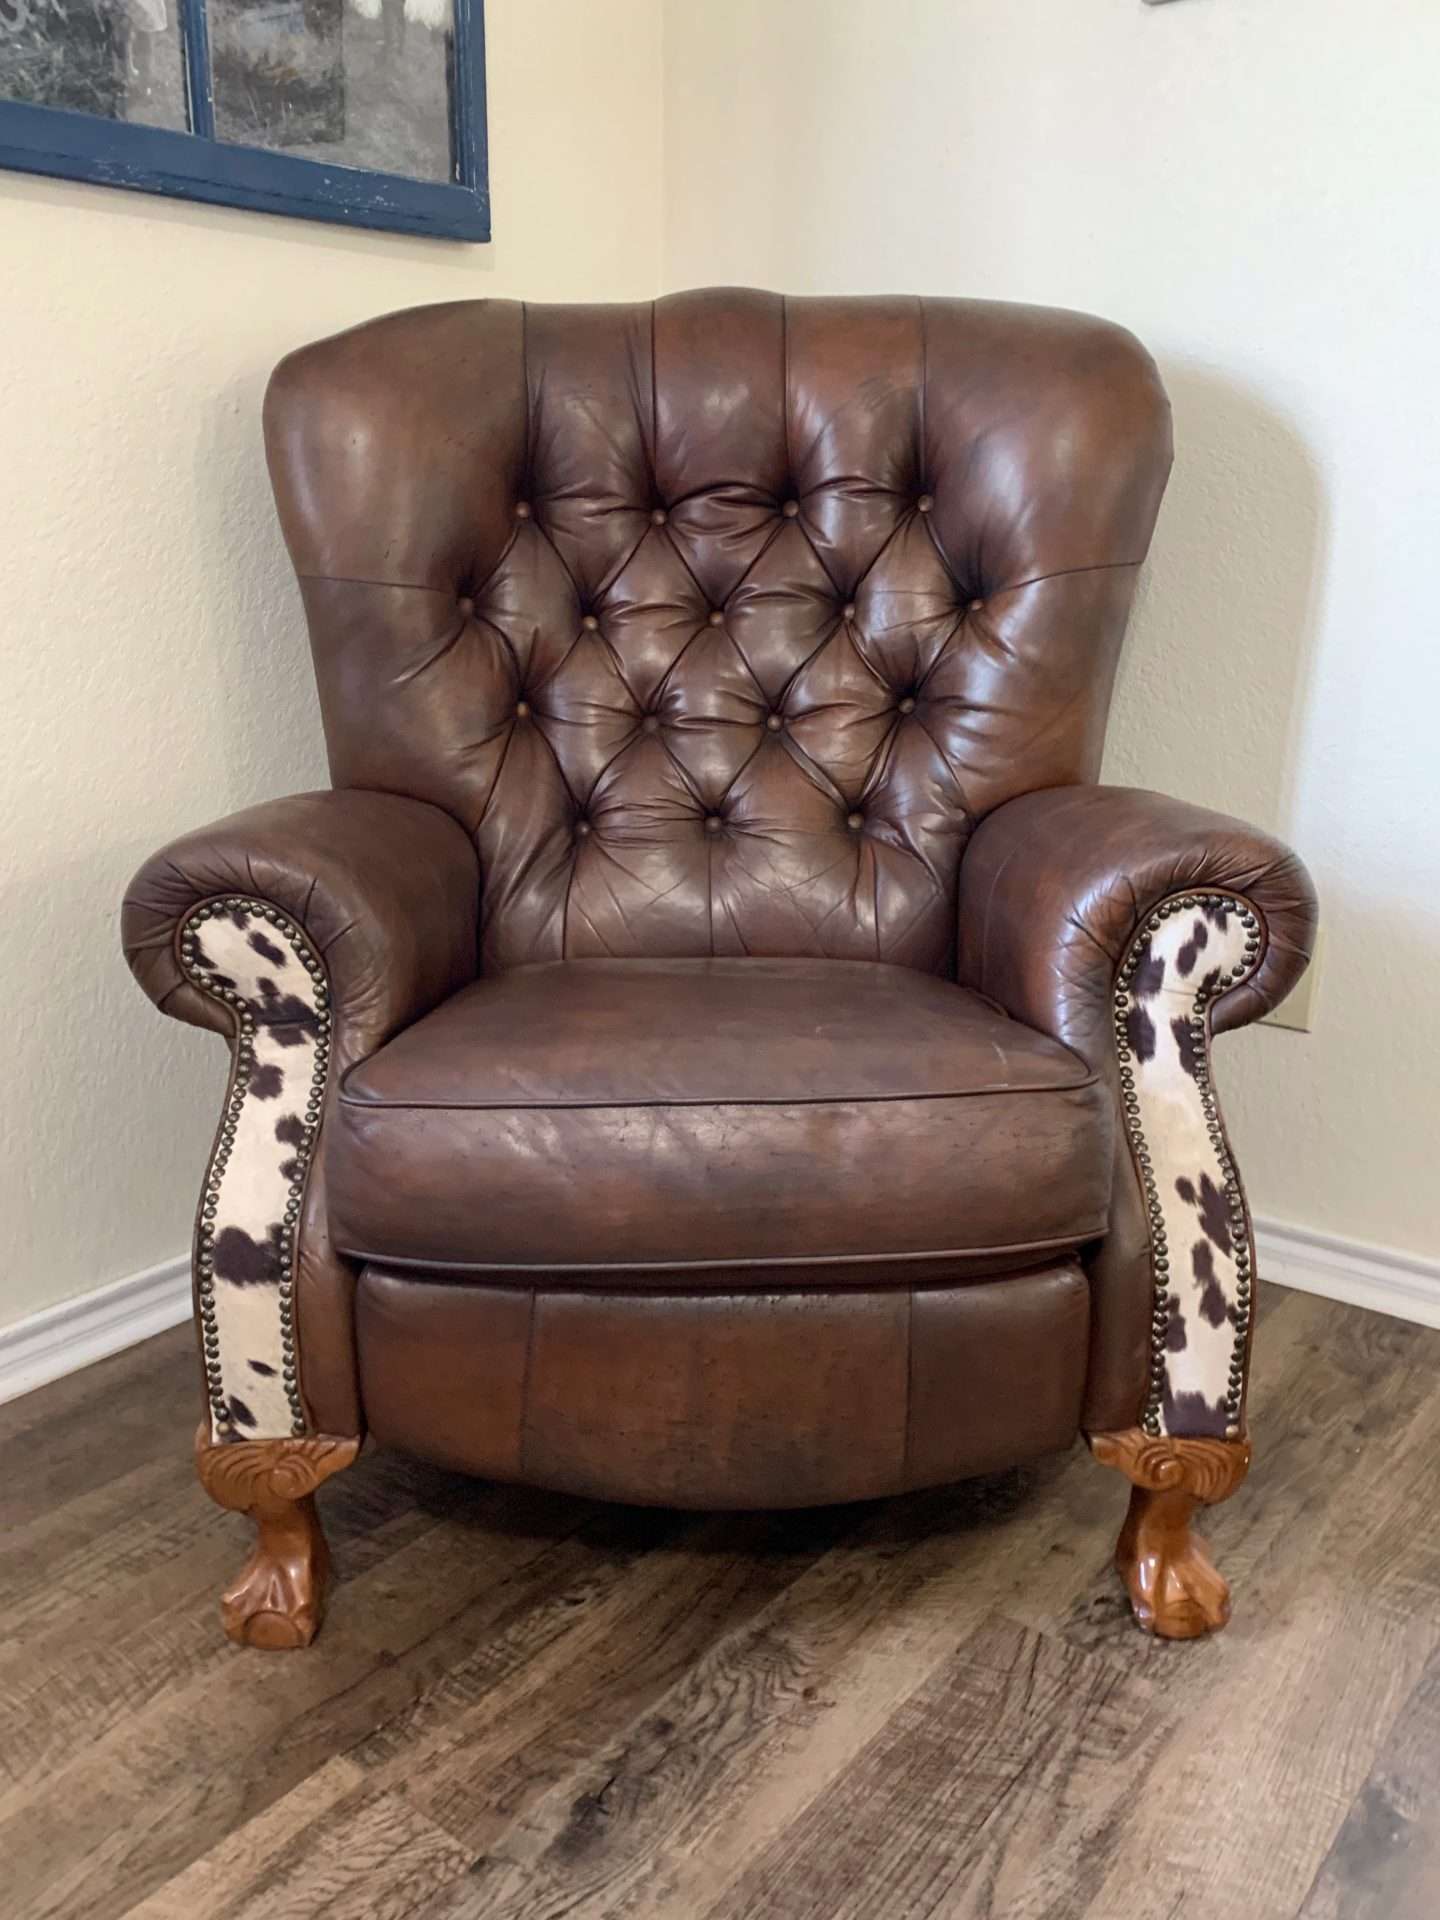
I am beyond happy with how this chair turned out!
There are still areas where the scratches are obvious, like on the footrest, but it’s 100 times better than when I started!
It’s still crazy to me that I acquired such an expensive piece of furniture for less than $100!
To dye leather furniture is to make it {almost} new again!