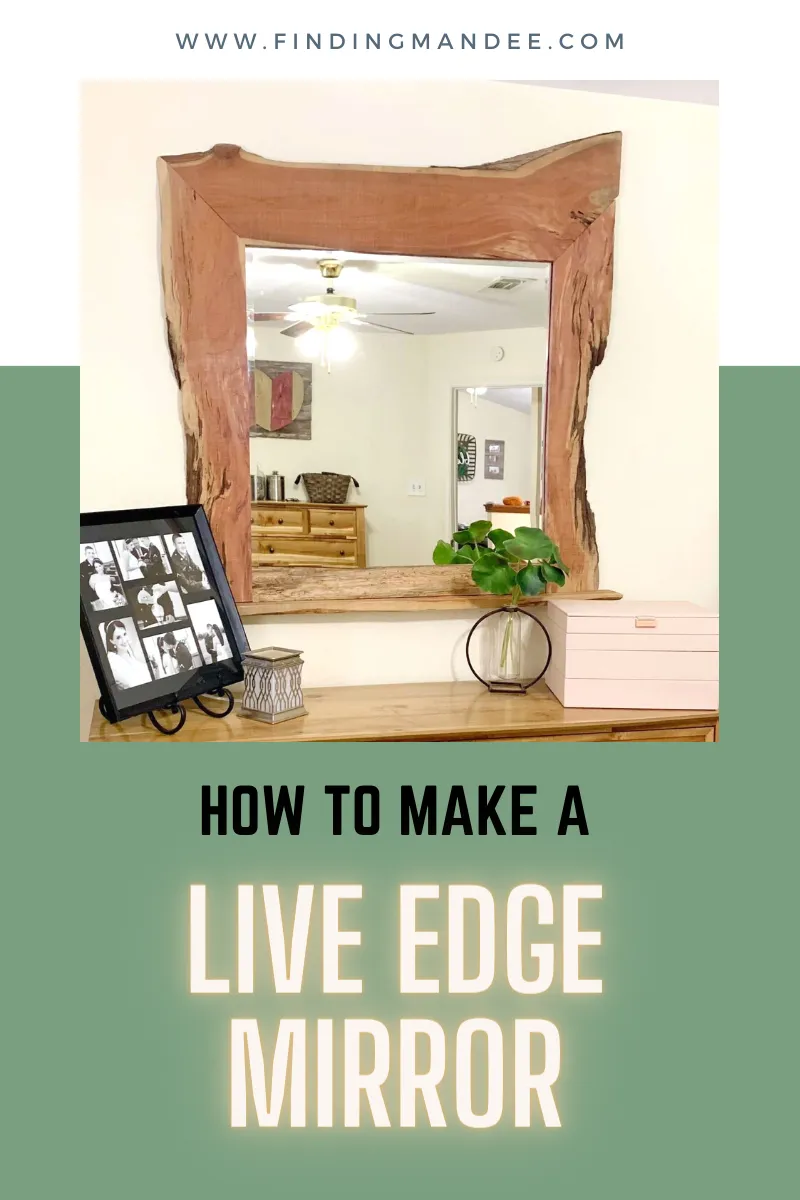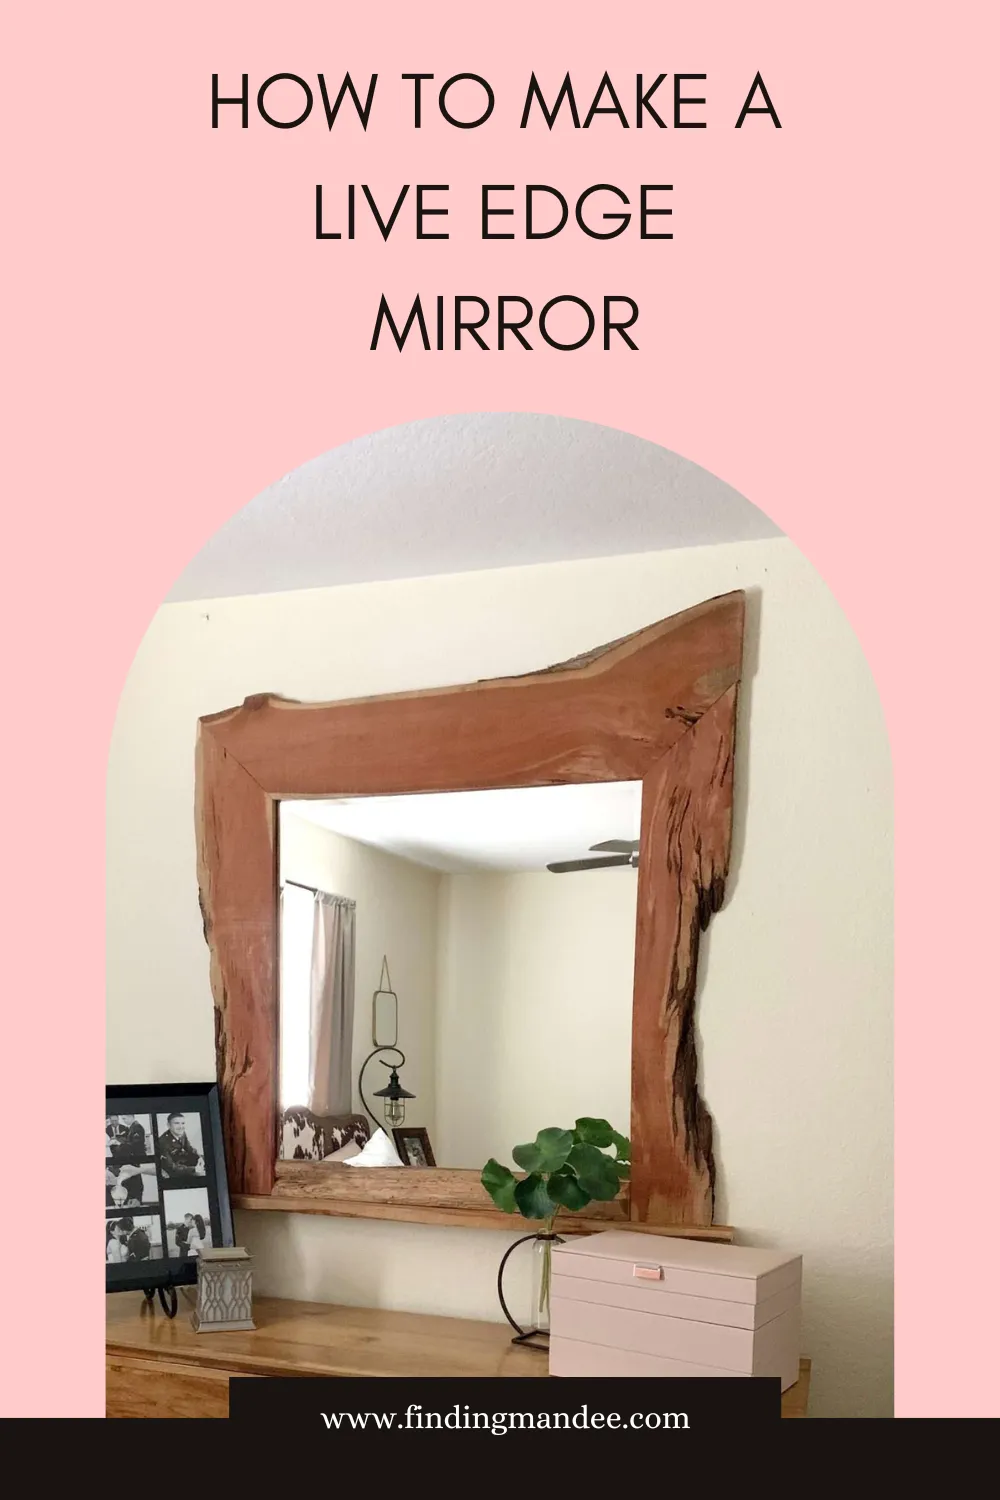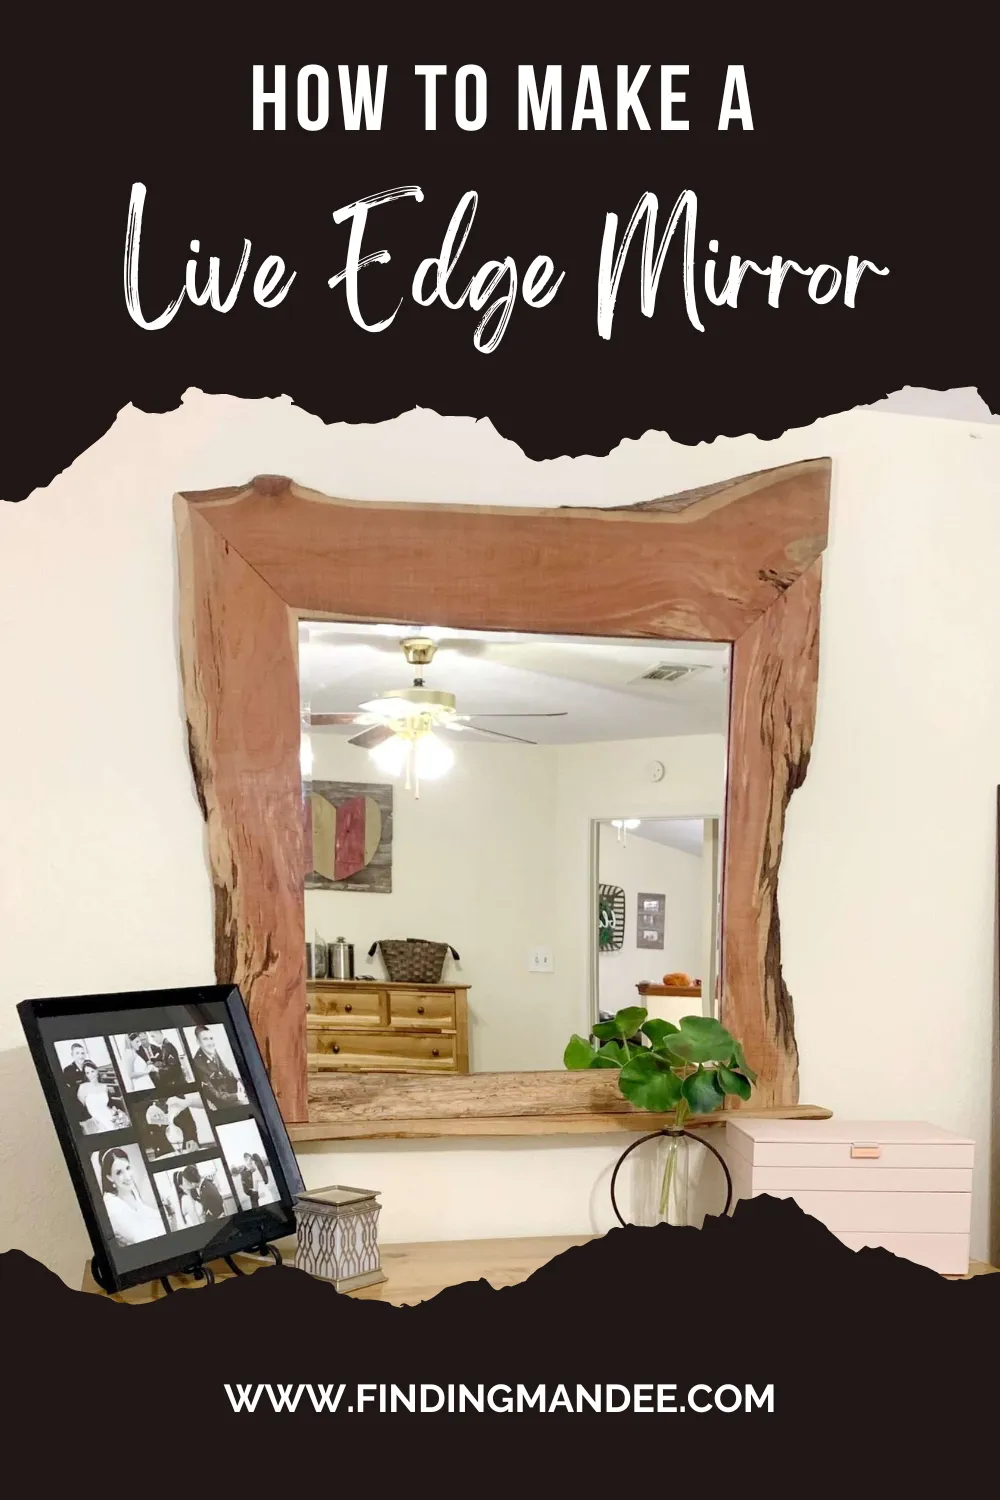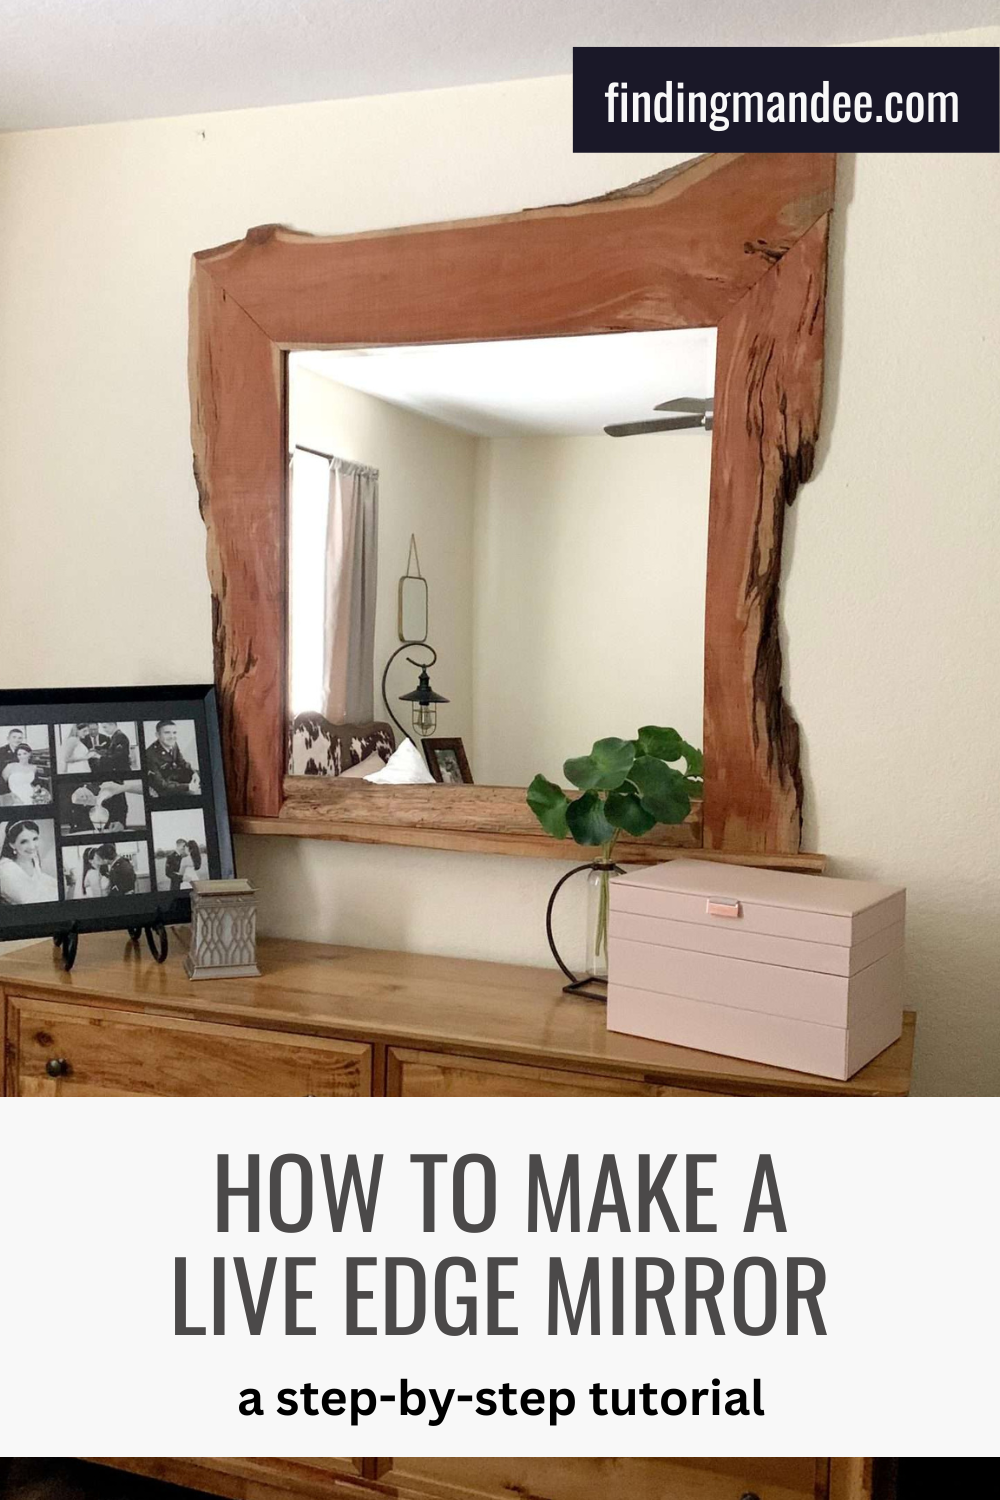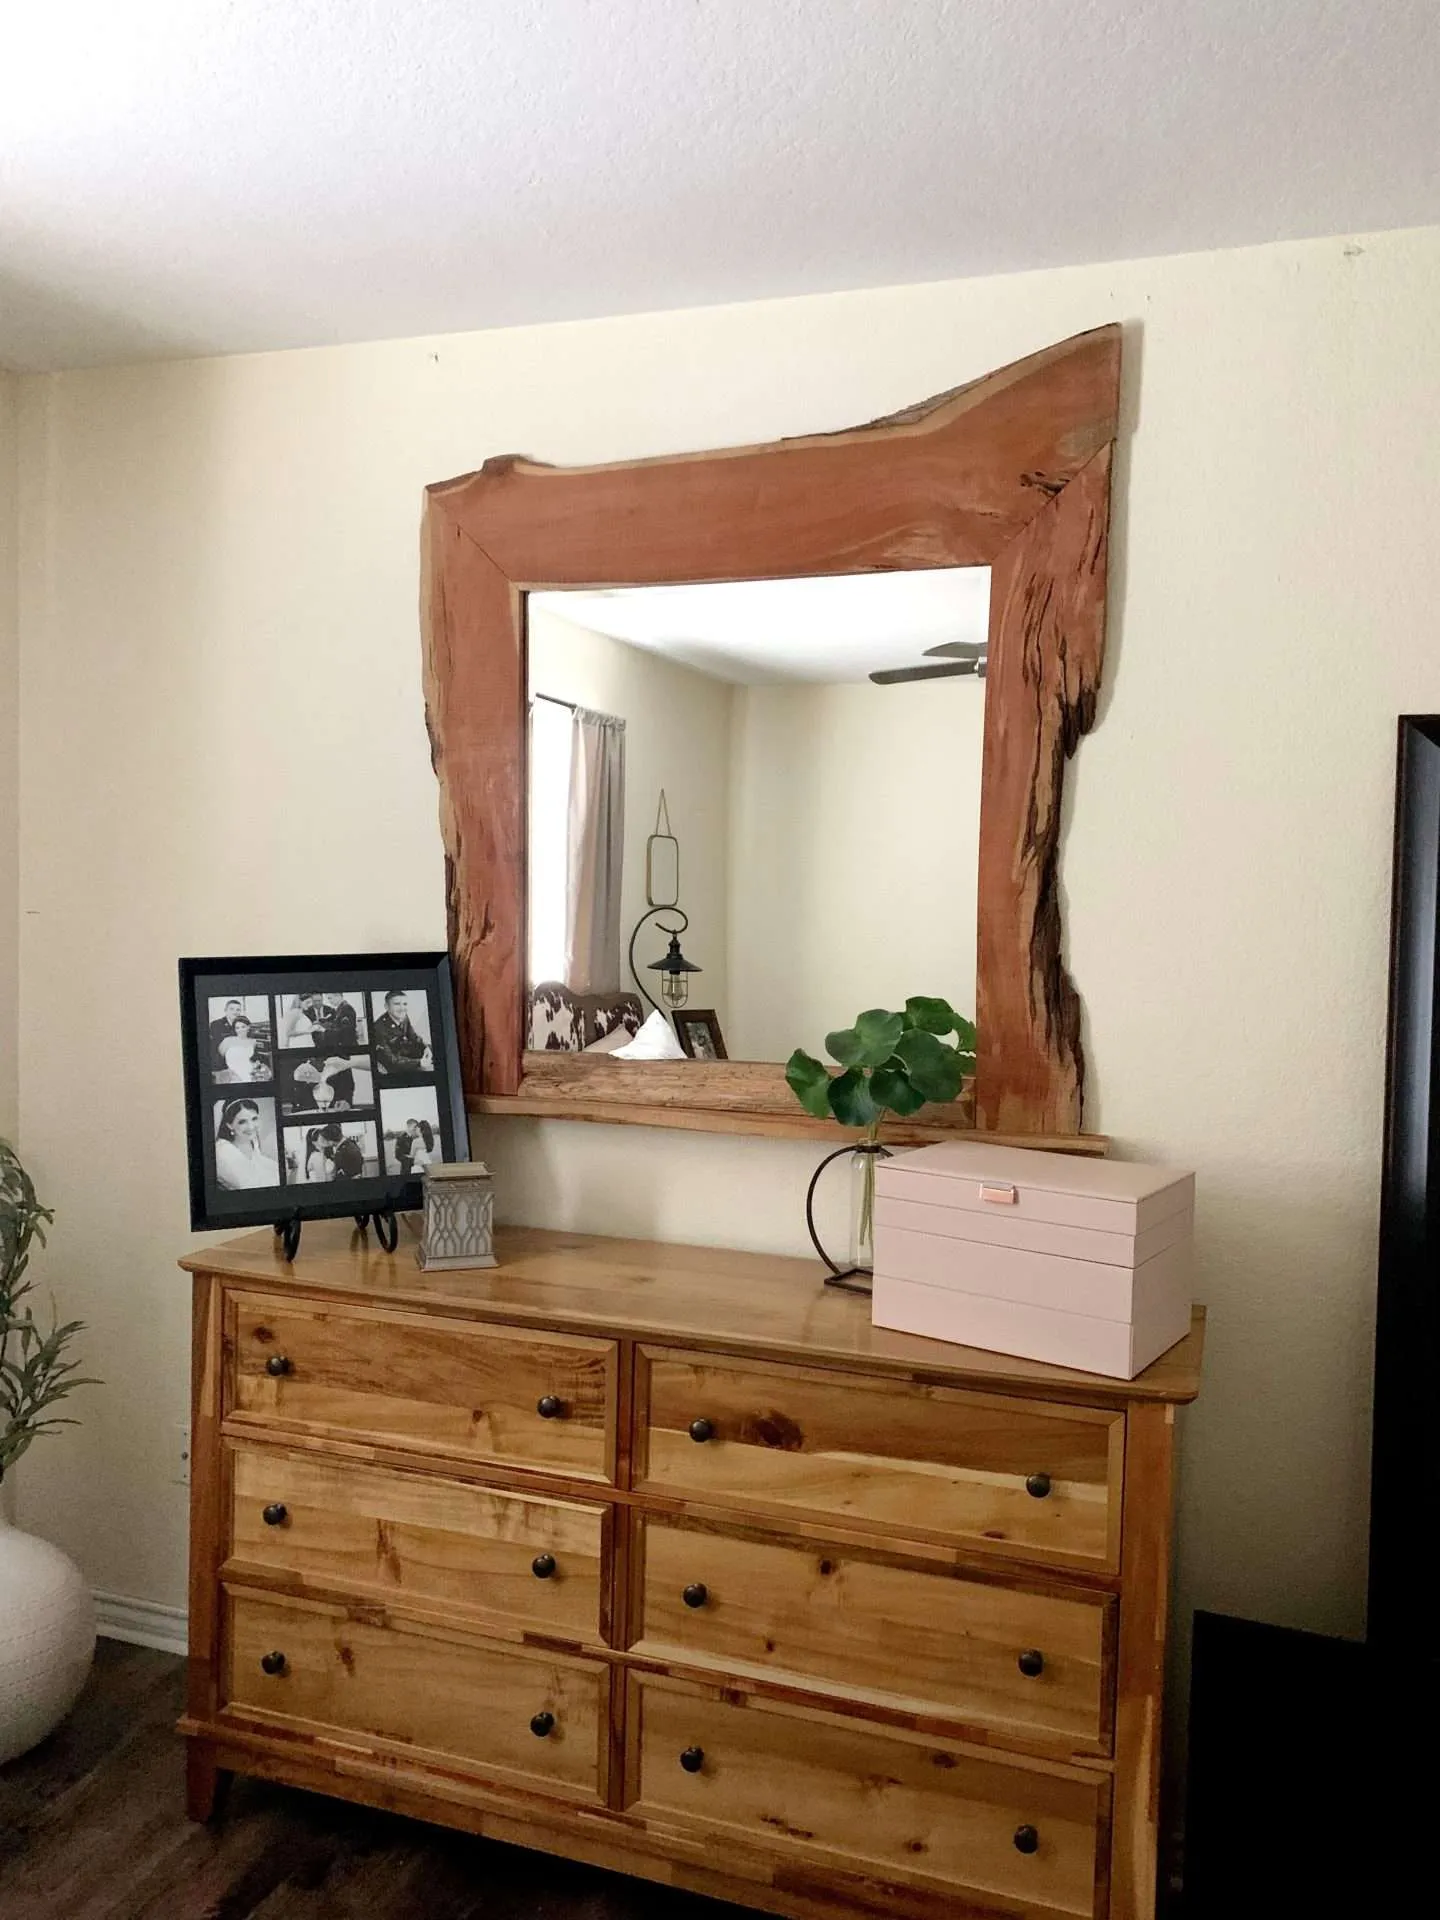
I think that a live edge mirror is absolutely stunning, but I simply can’t justify spending hundreds of dollars on one.
My Papa has a sawmill and a whole stack of cedar planks that he isn’t using. He told me that I could have as much of it as I want….best grandpa ever!
Since the wood was secured, I just needed a big mirror. And thankfully, I still had the one attached to the dresser in my bedroom.
Here’s how we made a big, beautiful live edge mirror:
Supplies
- mirror
- live edge wood (at least 5 pieces)
- measuring tape
- pocket-hole jig
- 1 1/2″ screws
- glazier points
- clear silicone caulk
- table saw
- miter saw
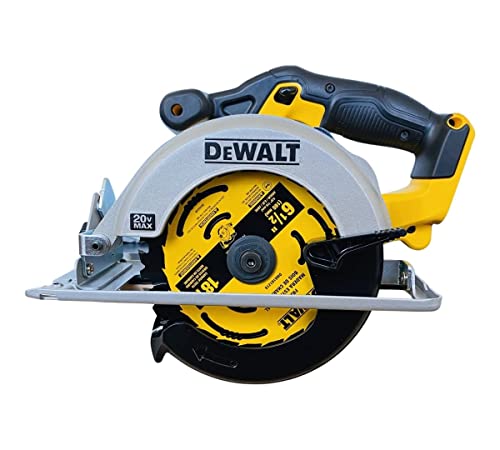
- circular saw
- chalk line reel
Black Walnut Live Edge Slabs, Craft Single Piece, Walnut Wood Chucks, Live Edge Slab, River Tables, Great for crafting or DIY Cutting Boards (12-14Walnut Hollow Basswood, Thick Live Edge Country Plank, Large (42257)


Step 1: Remove Mirror from Old Frame
Our first step in making this live edge mirror was to remove the mirror from its old frame.
We unscrewed the backing, pulled off some of the clear adhesives around the edges, and carefully pried the mirror out of the frame.
We saved the thin sheet of backing to use on the new mirror frame.
Alaterre Furniture Alpine Natural Live Edge Wood 48Deco 79 Wood Handmade Live Edge Wall Mirror, Set of 2 14


Step 2: Measure the Mirror
It’s imperative to make very accurate measurements of your mirror. When you eventually make a lip on the inside of the live edge frame, it will only be around 1/4″ wide. So, there’s not much room for error.
Our measurements were 32 1/16″ wide and 34 5/8″ long.
Amazon Basics Tape Measure – 16 Feet, PinkFASTPRO Pink Tool Set, 220-Piece Lady’s Home Repairing Tool Kit with 12-Inch Wide Mouth Open Storage Tool Bag


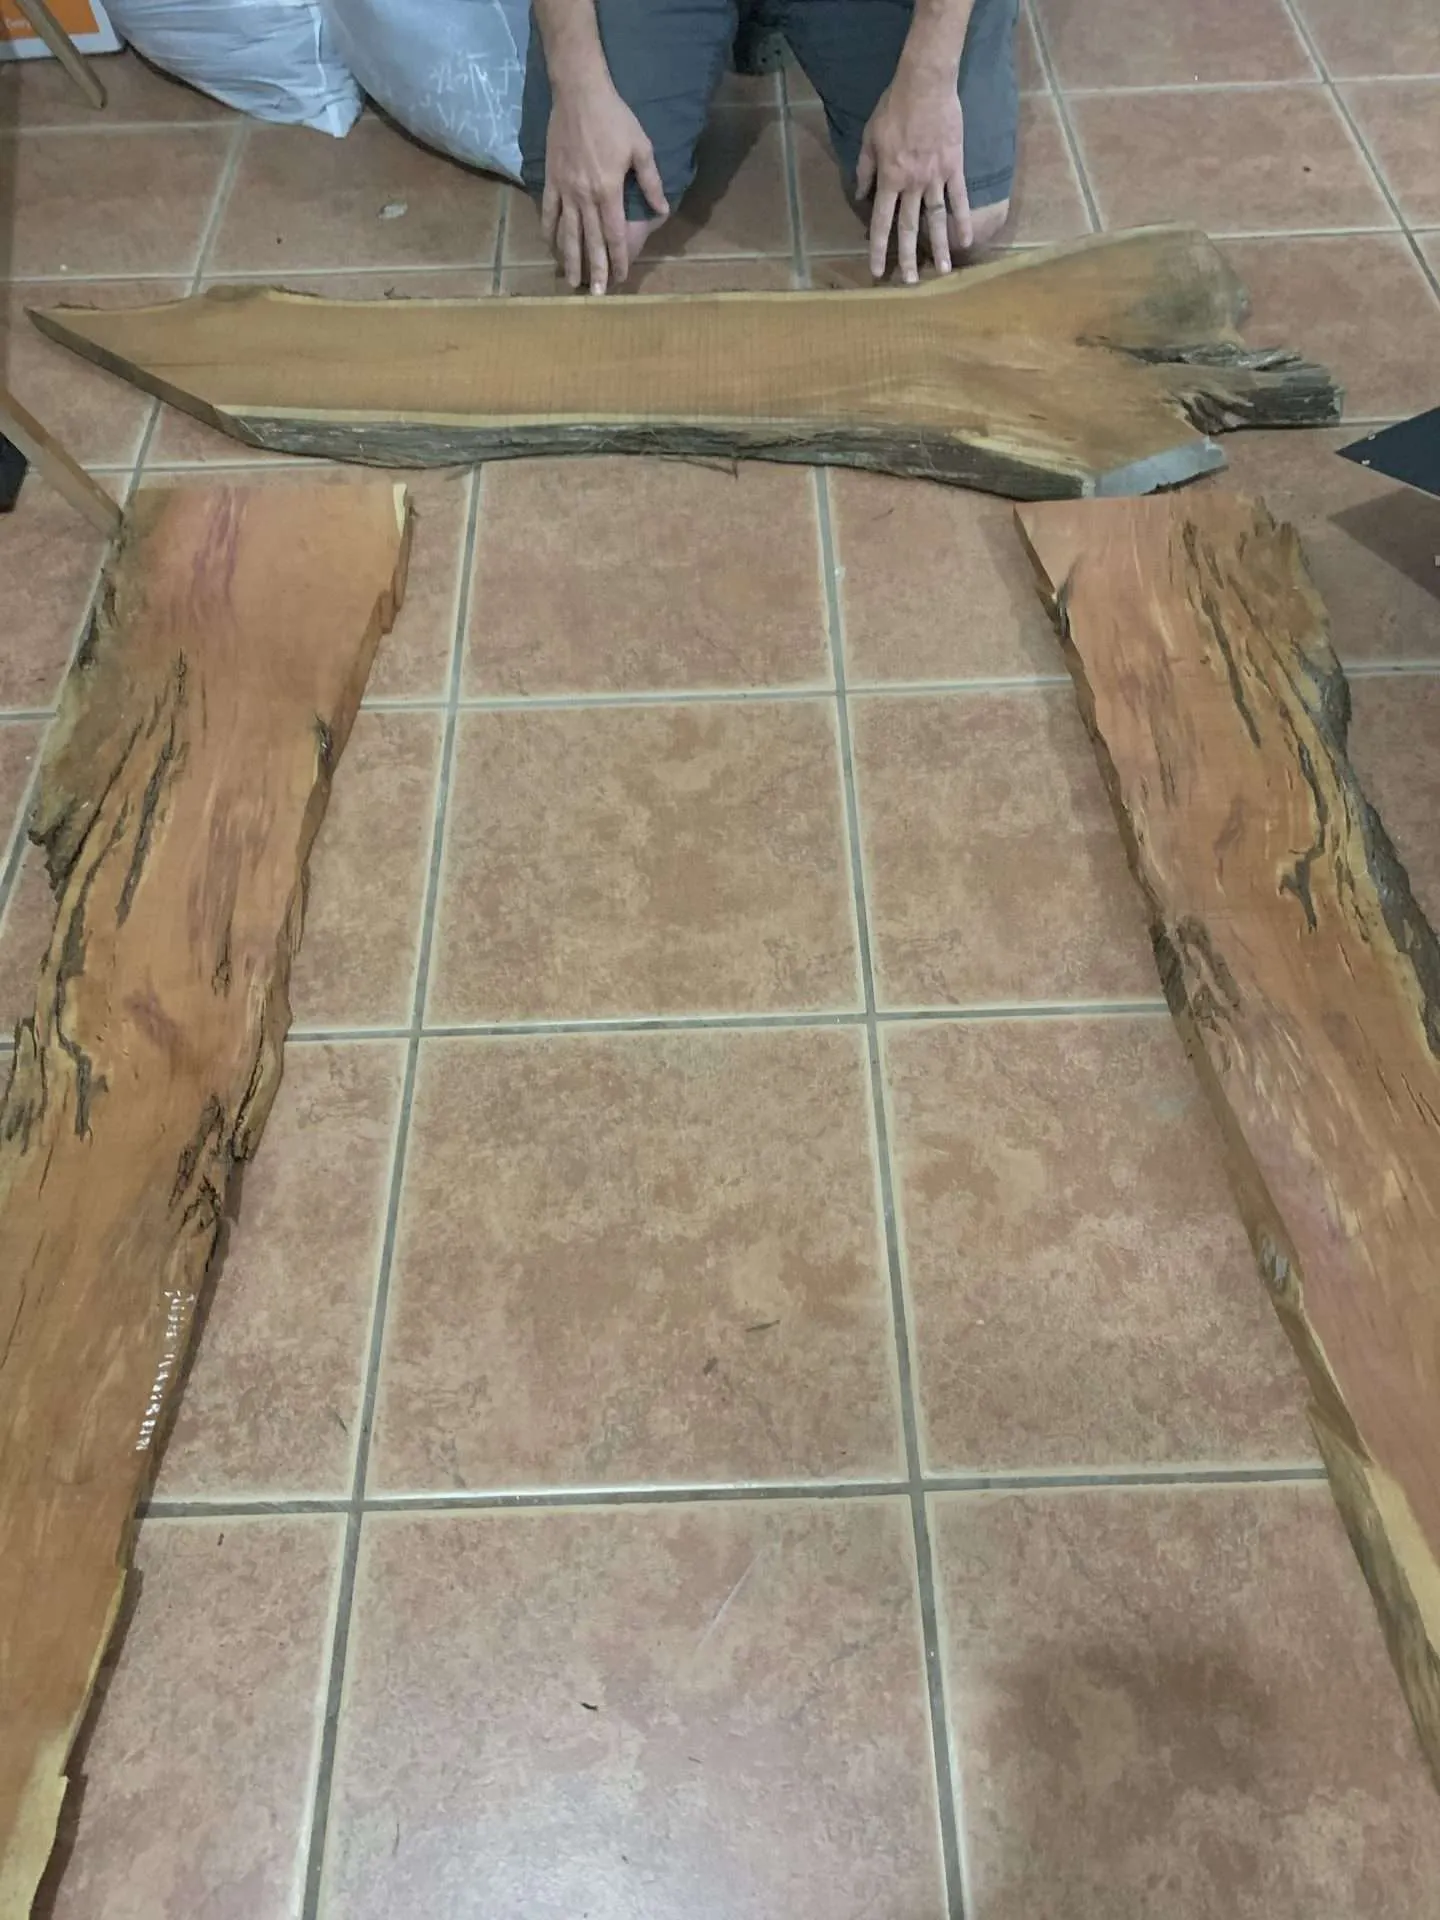
Step 3: Cut a Straight Edge on Each Board
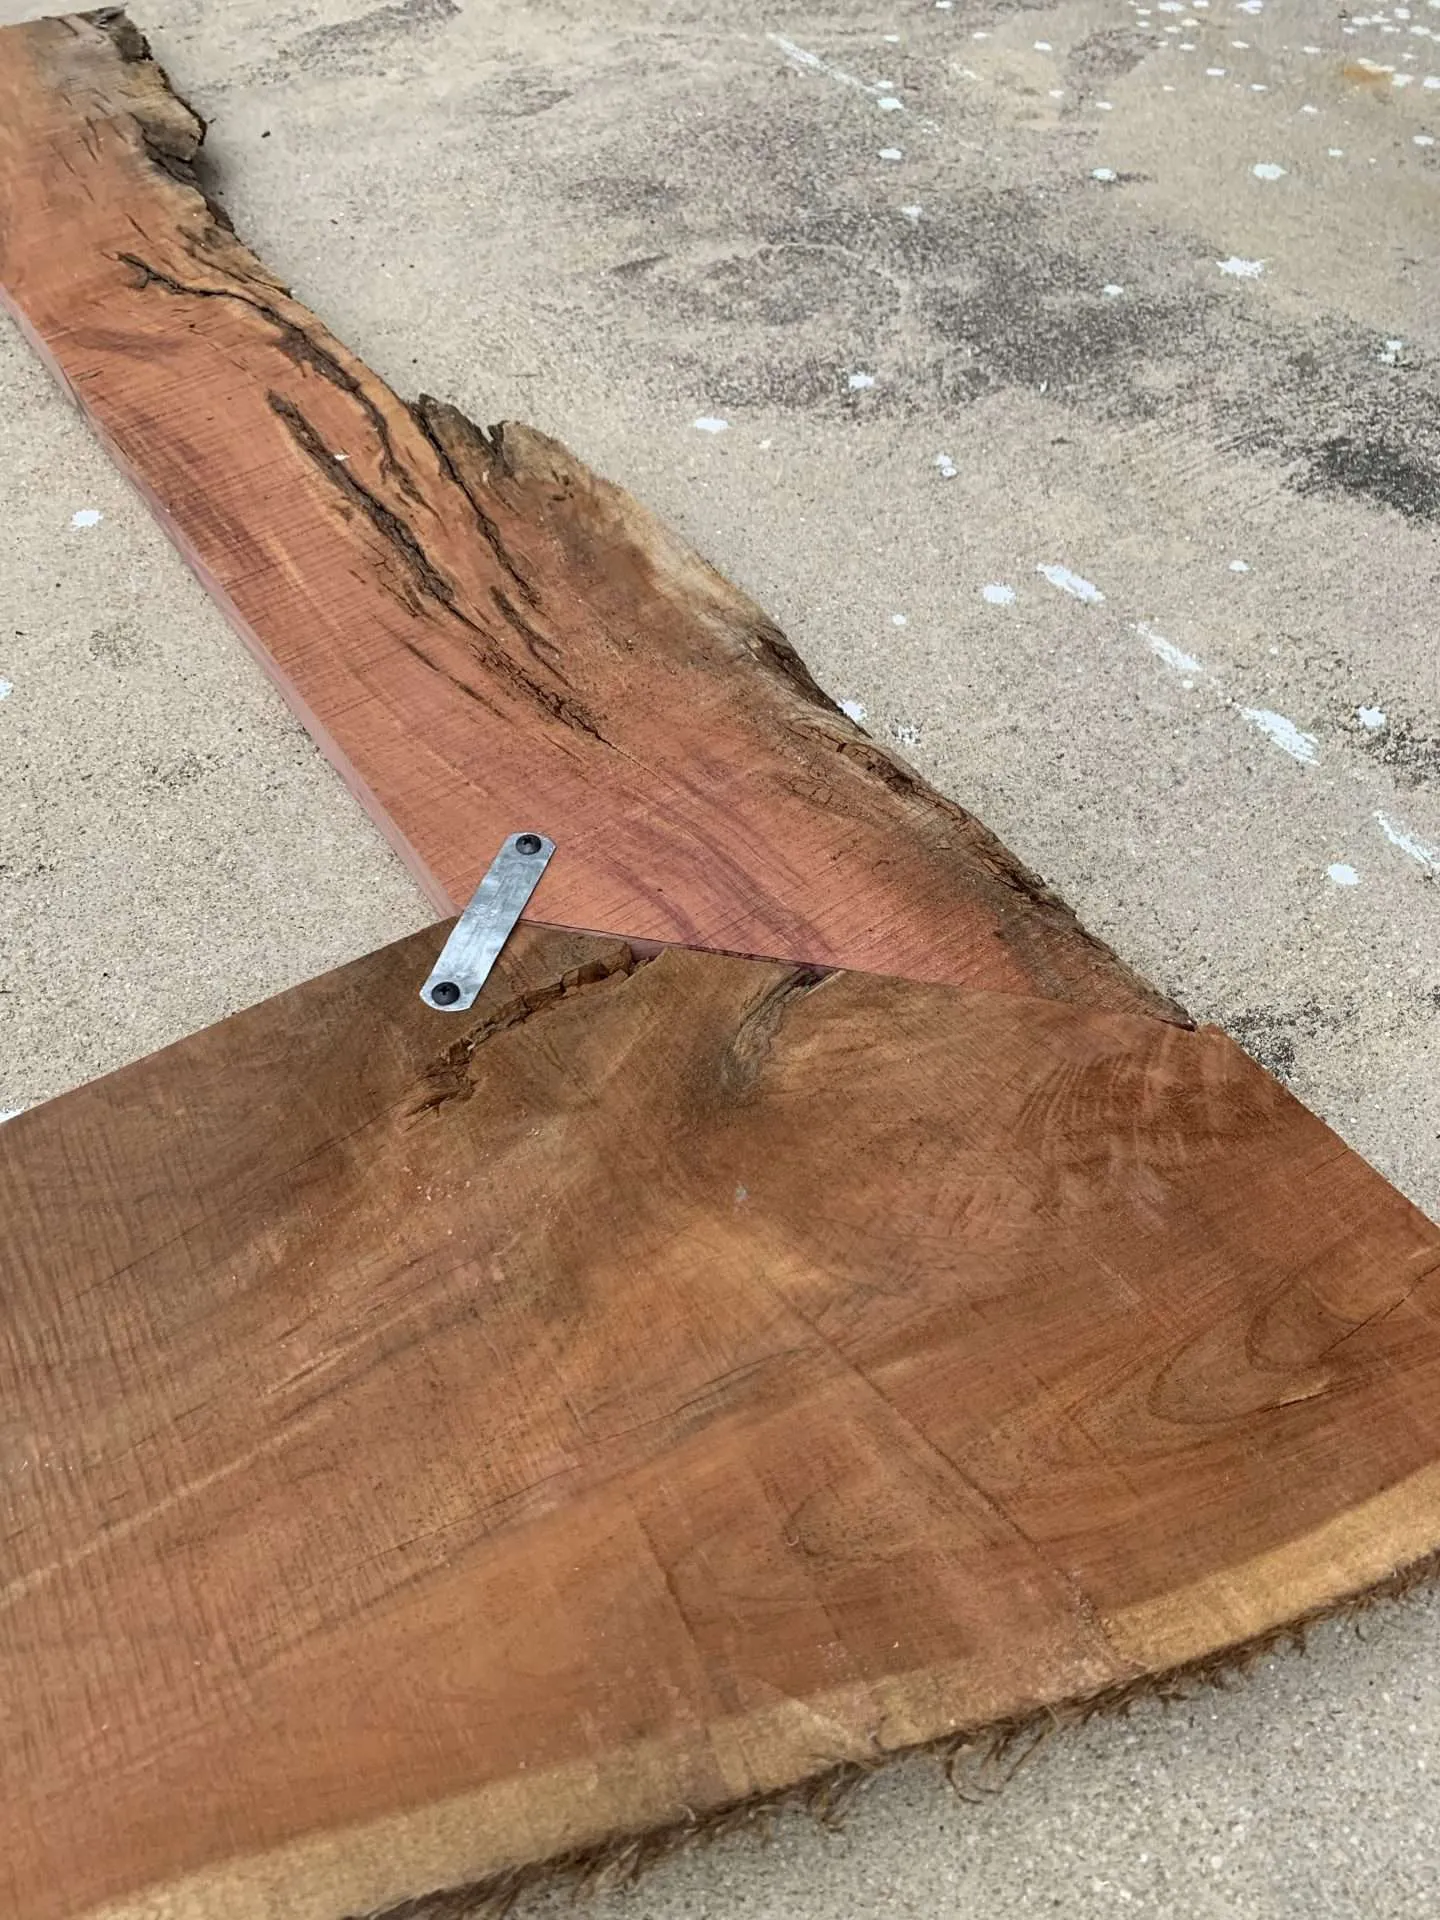
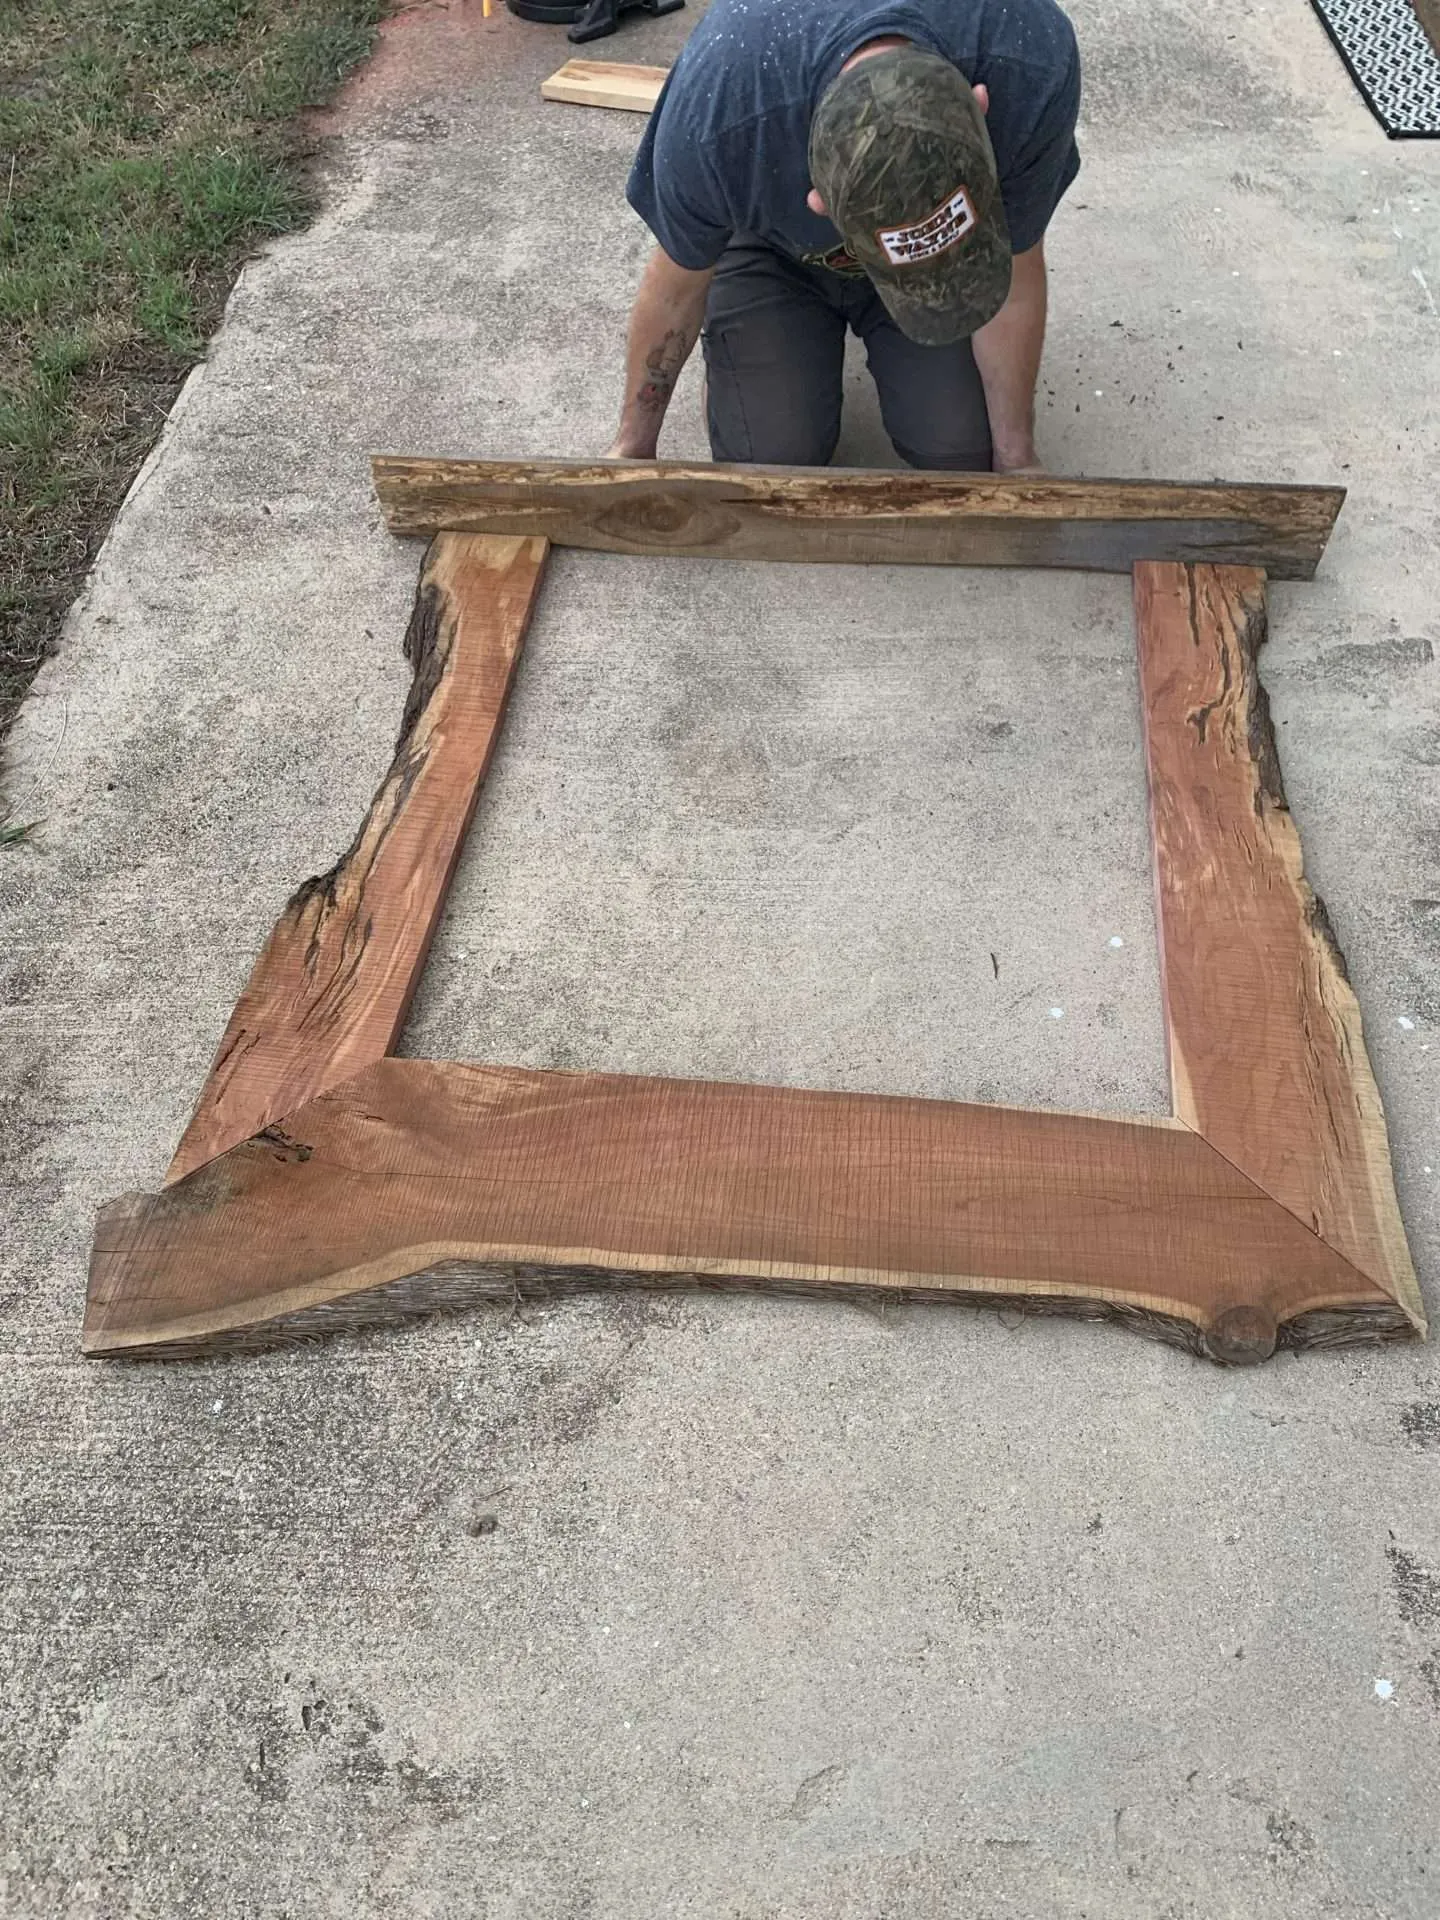
Before making any cuts, we laid out 3 boards to decide which would be the top and which ones would be the sides of the live edge mirror.
Using our circular saw, we cut a straight edge on just one side (length-wise) of the live edge boards. I chose to cut off the side of each board that had the ‘least amount of character’.
Before cutting, a guide of a straight line was made on each board with a chalk line reel. This sounds easy, but the boards were all a little warped and there was no way to make sure our chalk guide was perfectly straight. We just had to eyeball it.
IRWIN STRAIT-LINE COMPACT Chalk Reel, 100 ft. (IWHT48440)Dewalt DCS393 bare tool 20V MAX 6 1/2

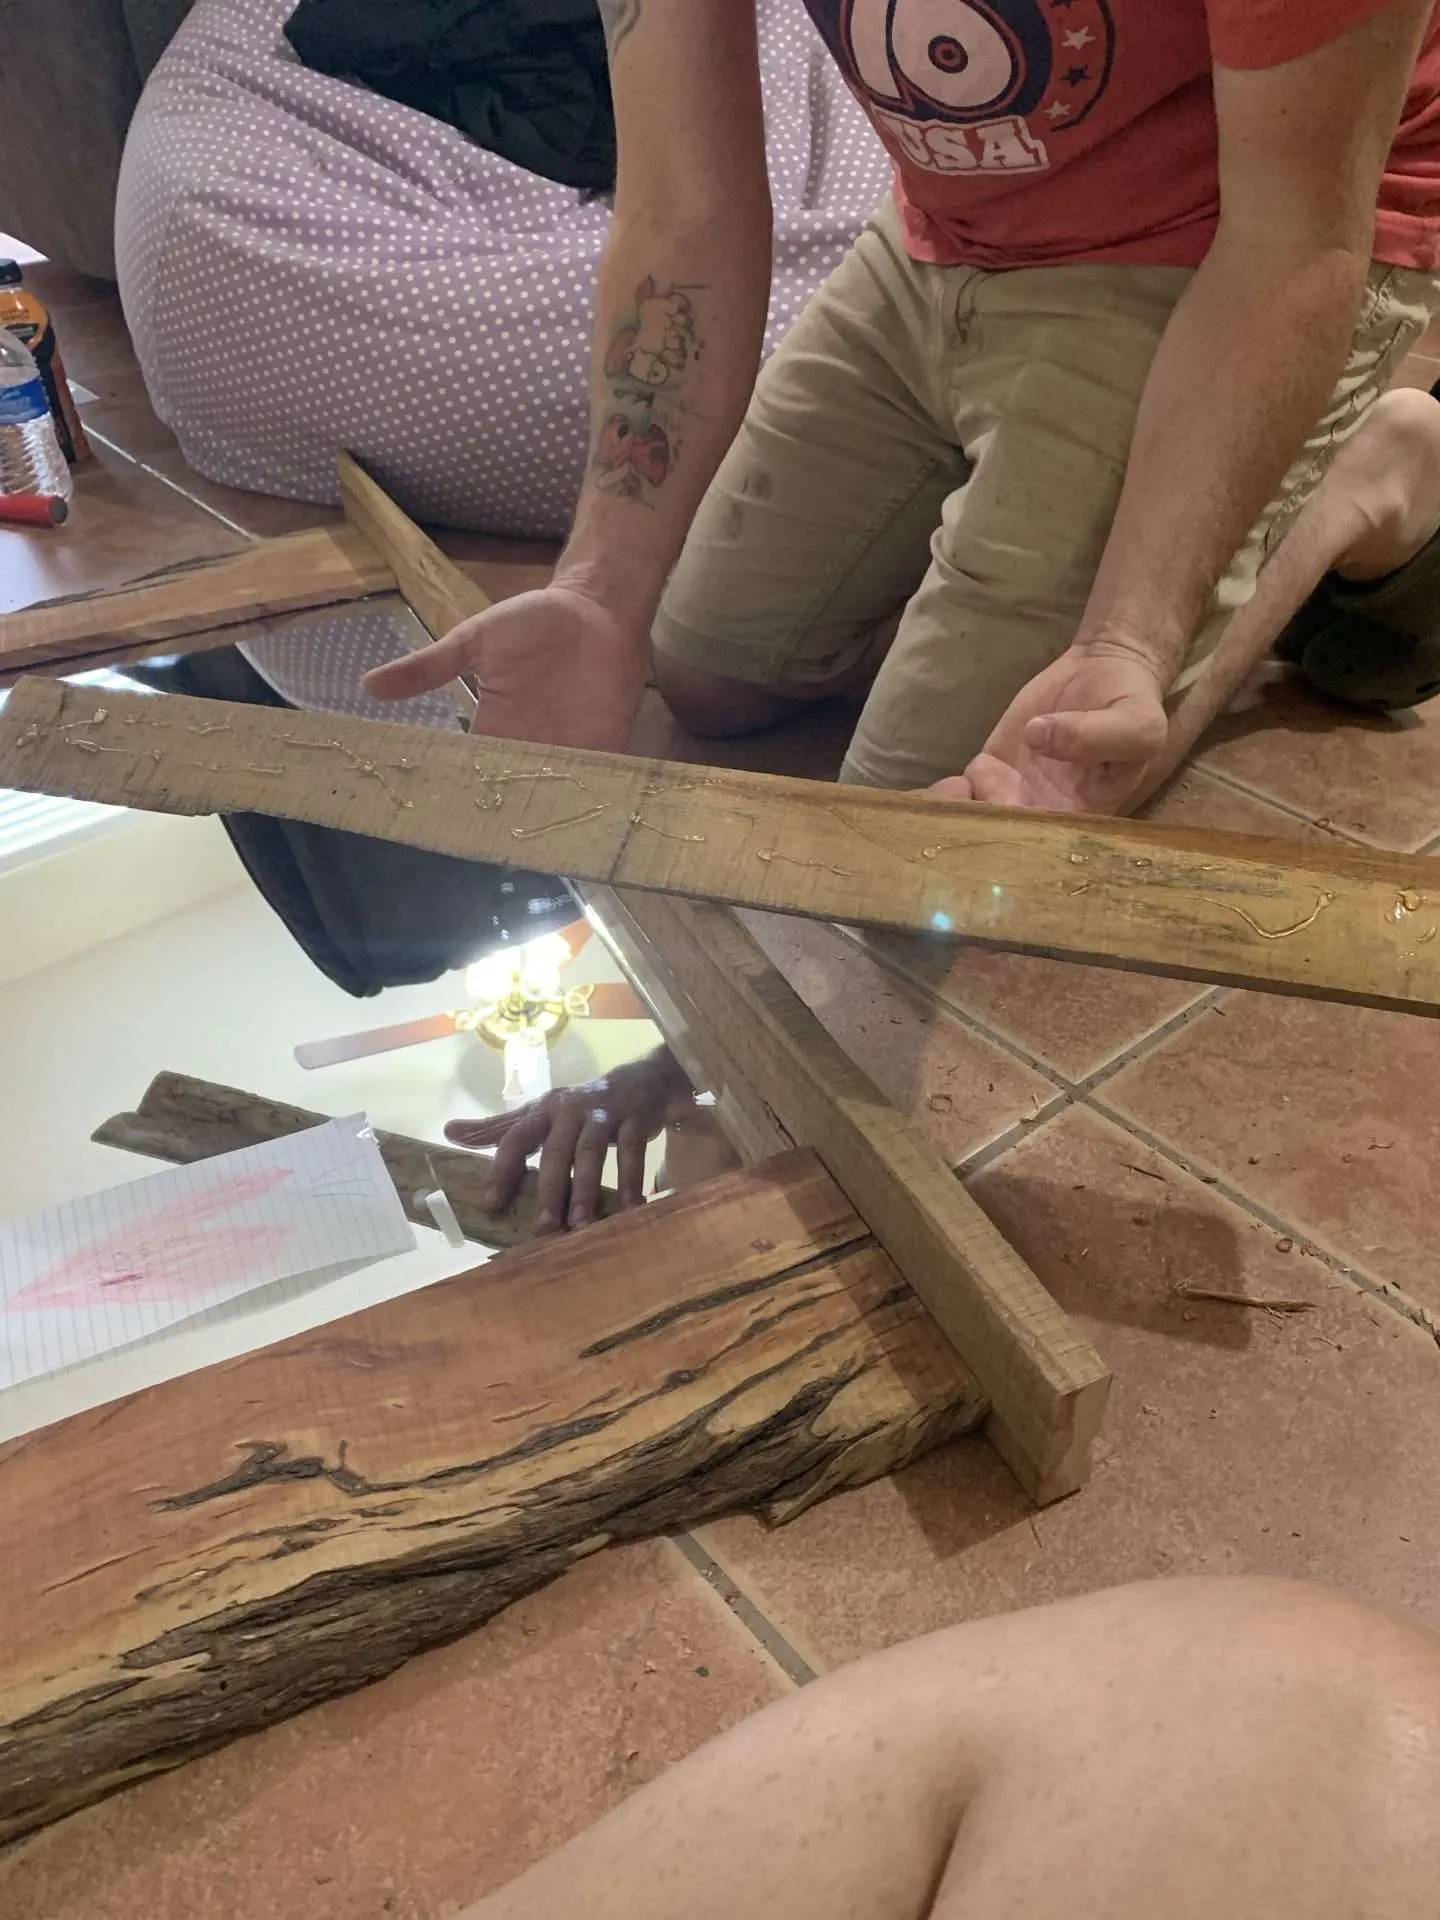
Step 4: Make the 45-Degree Corner Cuts
We only used 45-degree angles on the top 2 corners of our frame.
To make the 45-degree cuts needed, you must make sure that the inside of the cuts (the part touching the mirror) are the length/width of the mirror.
The outside (the side not touching the mirror) of the 45-degree cut will be longer, due to the width of the board.
DEWALT Miter Saw, 12 Inch, 15 Amp, 3,800 RPM, Double Bevel Capacity, With Sliding Compound, Corded (DWS780)RYOBI 7-1/4 in. Miter Saw 9 AMP. Light Weight With Blade

Step 5: Cut Lip for Mirror to Set In
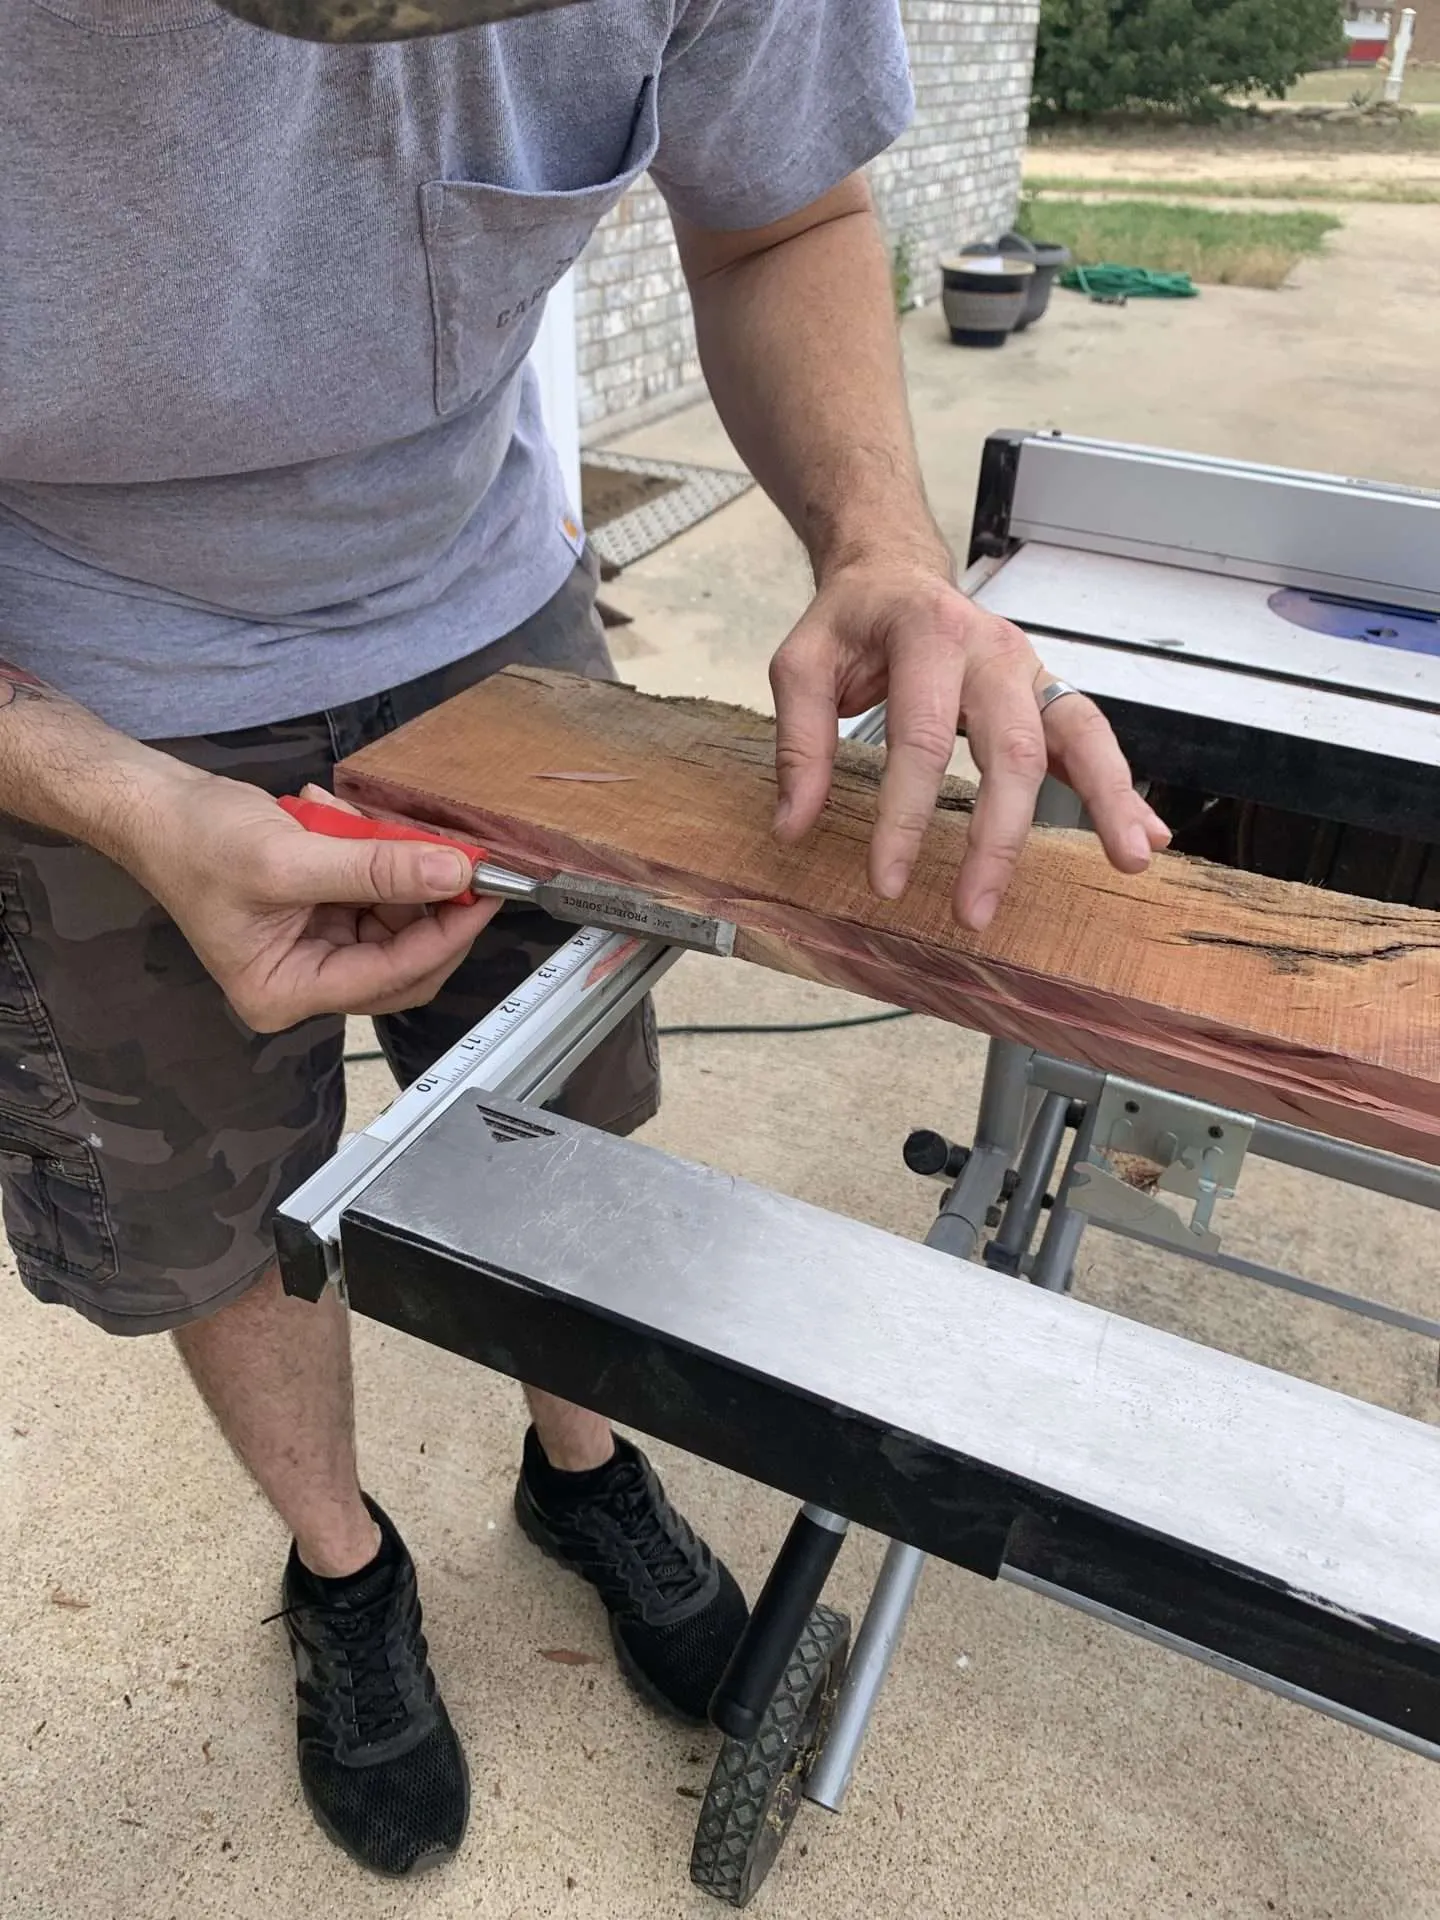
To make a lip to inset the mirror into the frame, you’ll need a table saw.
Adjust the height of the saw blade to roughly half the thickness of your boards. Our live edge boards were 1″ thick, so we set the height of the blade to 1/2″.
Adjust the fence of the table saw to what you want the width of the lip to be. We weren’t sure exactly how wide it needed to be, so we cut 1/8″ at a time until we got it right.
Make sure you are cutting the lip on the straight edge side of each board.
We had to use a chisel to clean up a few little slivers of wood left between the cuts.
BOSCH 10 In. Worksite Table Saw with Gravity-Rise Wheeled Stand 4100XC-10DEWALT Table Saw, 10 Inch, 32-1/2 Inch Rip Capacity, 15 Amp Motor, With Rolling/Collapsible Stand (DWE7491RS)

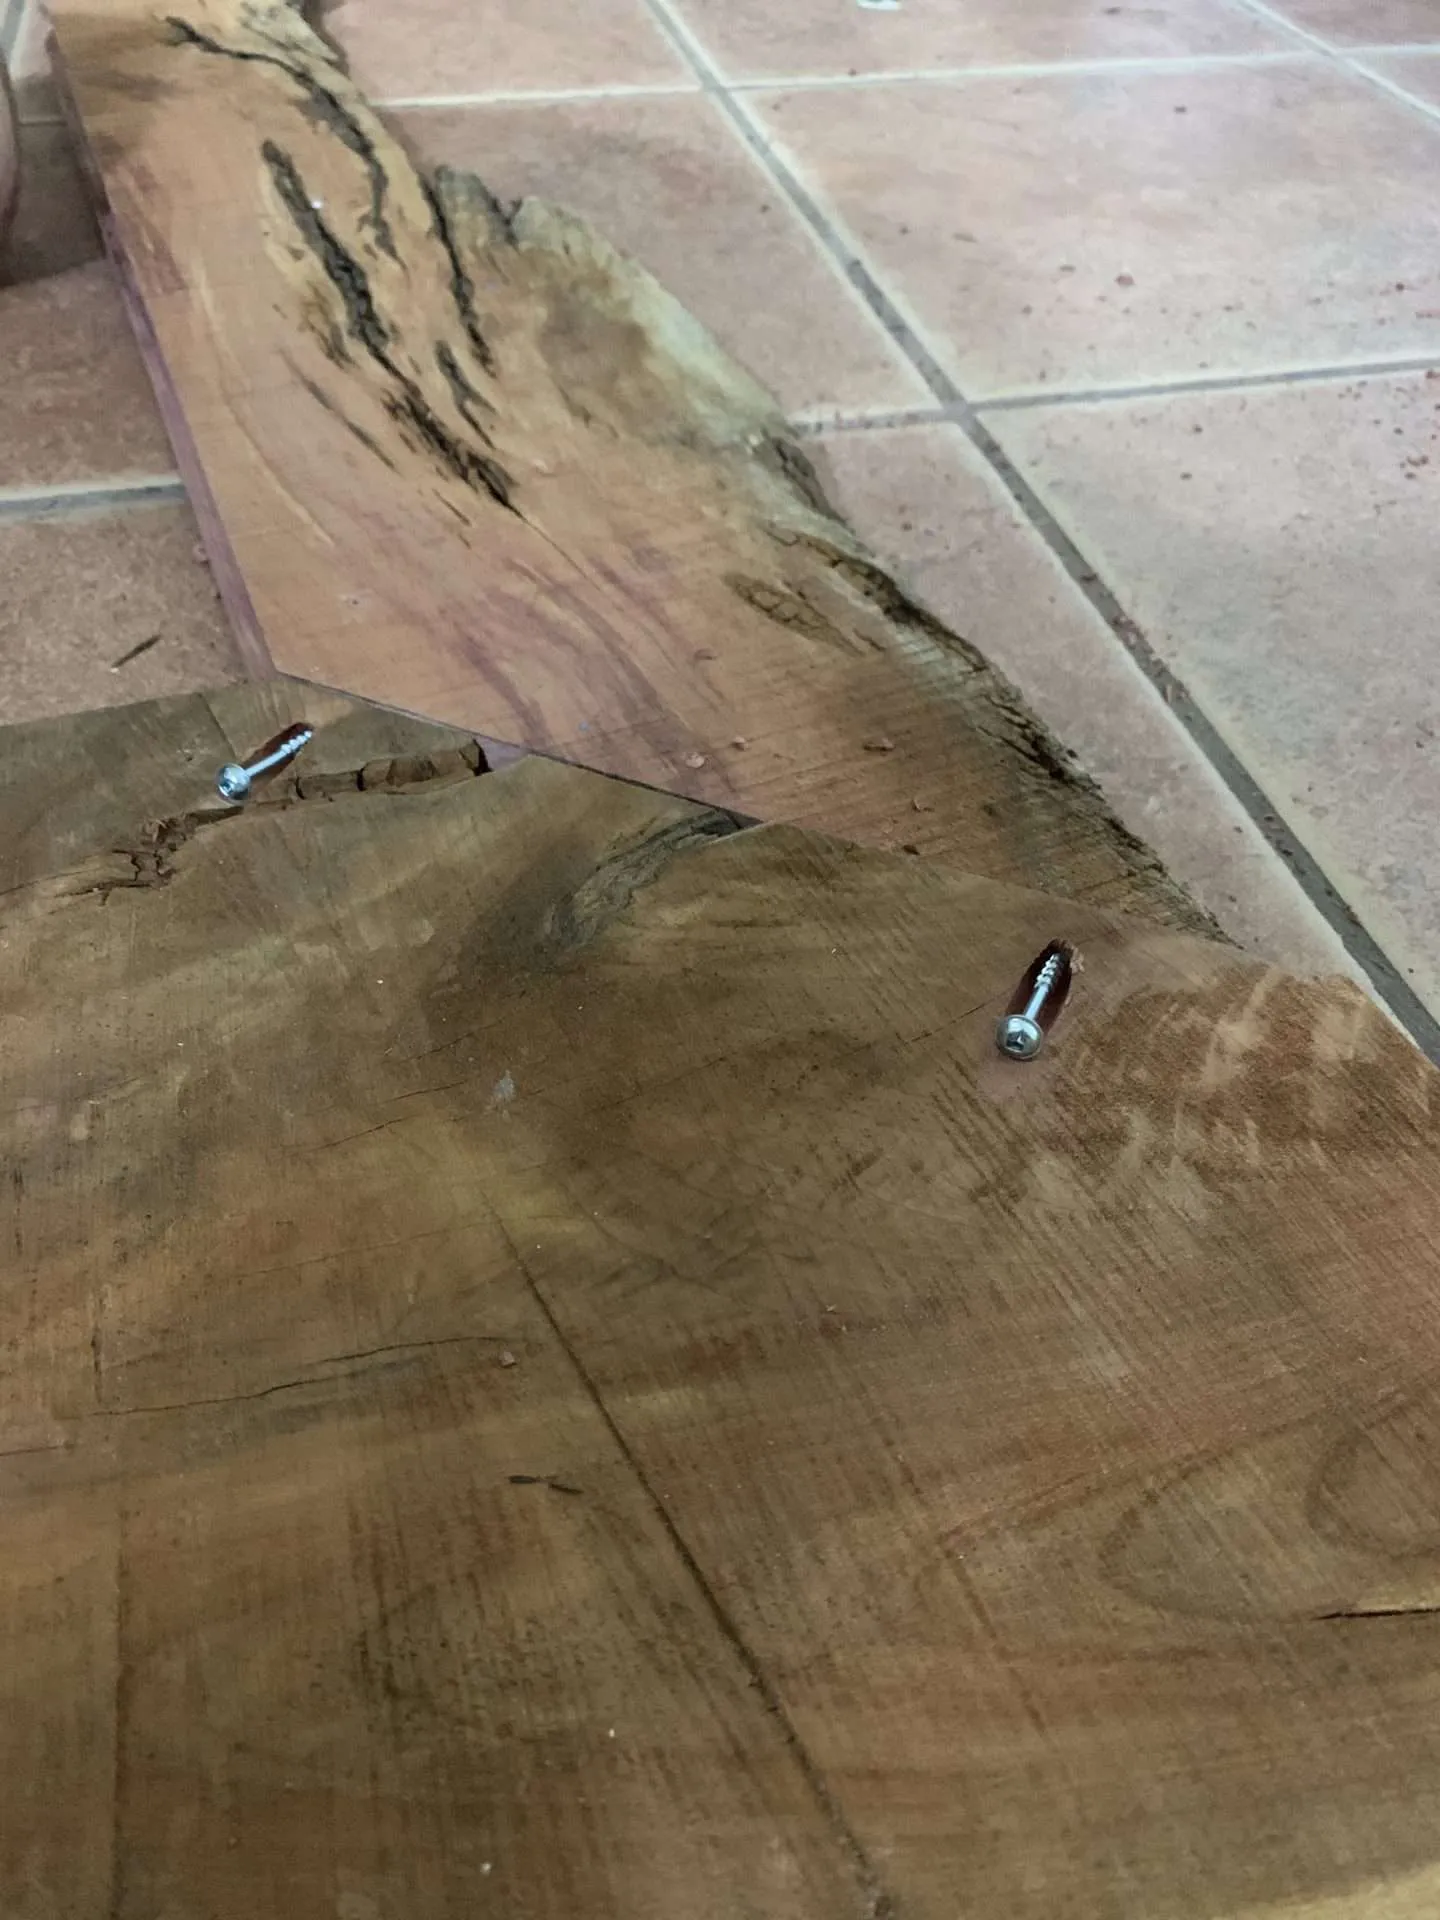
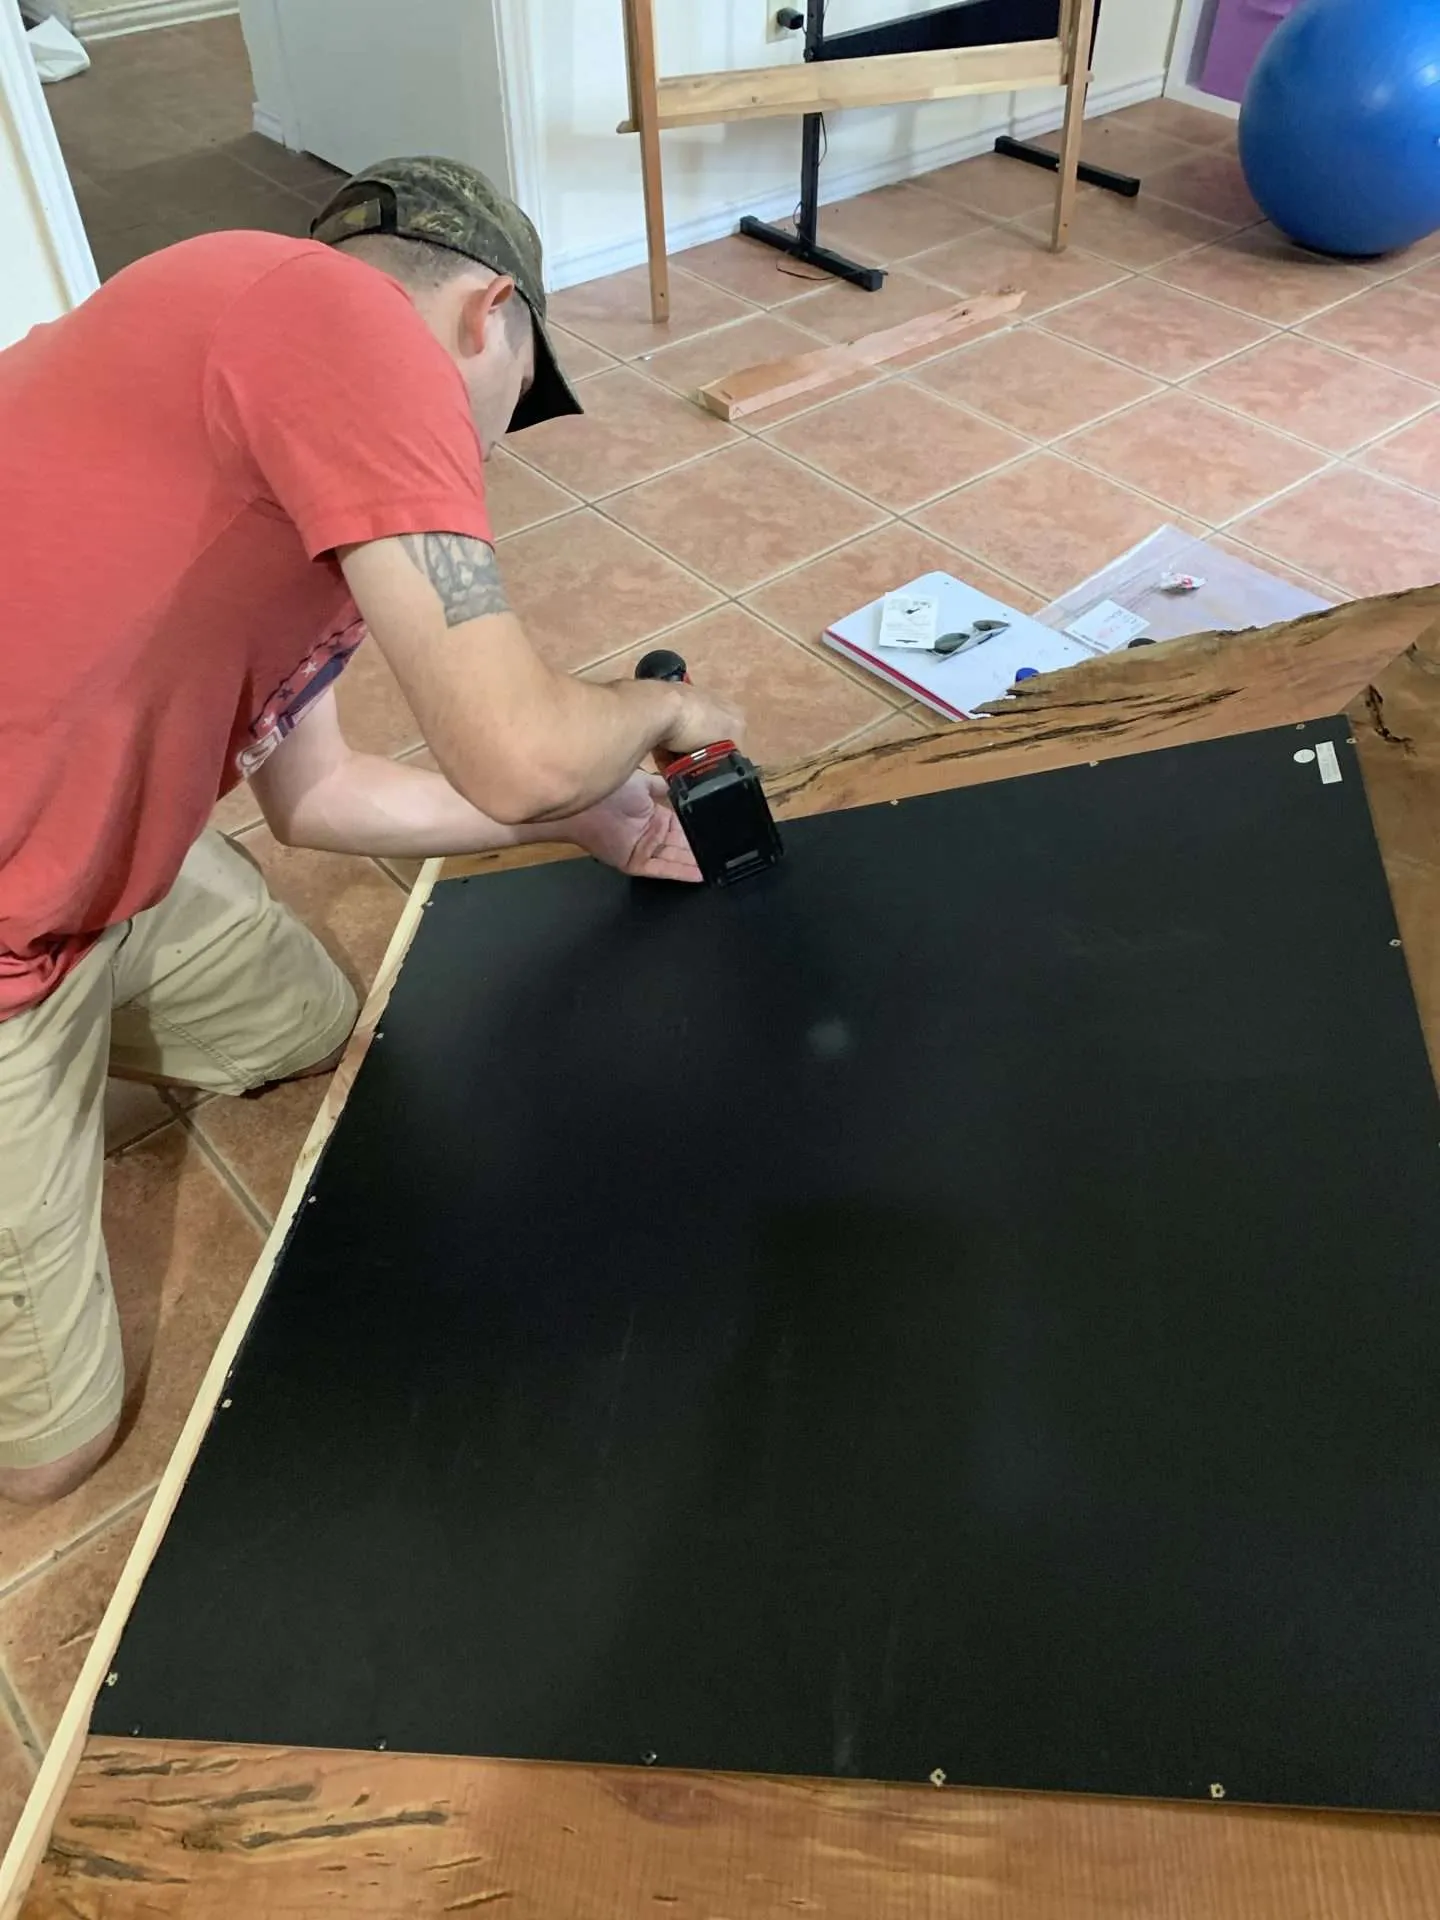
Step 6: Cut Bottom Board & Put Frame Together
Once the lip was done, we laid the frame together on the ground and picked out the board we wanted to use for the bottom piece.
The bottom piece is not cut with 45-degree angles, but is straight across and turned on its side to create a little shelf. We cut this board a little longer to leave a little edge sticking out on both sides (maybe about an inch).
**Note** If you want to sand your boards or add any kind of top coat, this is when you would do that. We decided not to do any sanding or make the wood more ‘finished’ in any way. I like that you can see all the marks from my Papa’s sawmill on them!
To join the top of the frame, we used a pocket-hole jig to drill our pilot holes, then screwed them together. The bottom board was screwed in without the use of the pocket-hole jig since it would be on the bottom of the shelf anyway.
Kreg MKJKIT Mini Jig Kit – Simple, Compact Kreg Pocket-Hole Jig – Create Strong Joints Without Glue – For Tight Spaces & Small Projects – Unlimited Material ThicknessKreg R3 Jr. Pocket-Hole Jig System – Portable Kreg Pocket-Hole Jig – Easy Clamping & Adjusting – Includes Positioning Sliders – For Materials 1/2


Step 7: Put the Mirror in the Frame
Very carefully, place your mirror into the frame.
The first time we tried to put the mirror in our frame, there was one section on one of the sides where the mirror wouldn’t fit. The straight edge wasn’t very straight, but remember, we eyeballed it with our chalk line.
We took the frame apart and ran the wonky board through the table saw again to shave off just a tiny bit to get the mirror to fit.
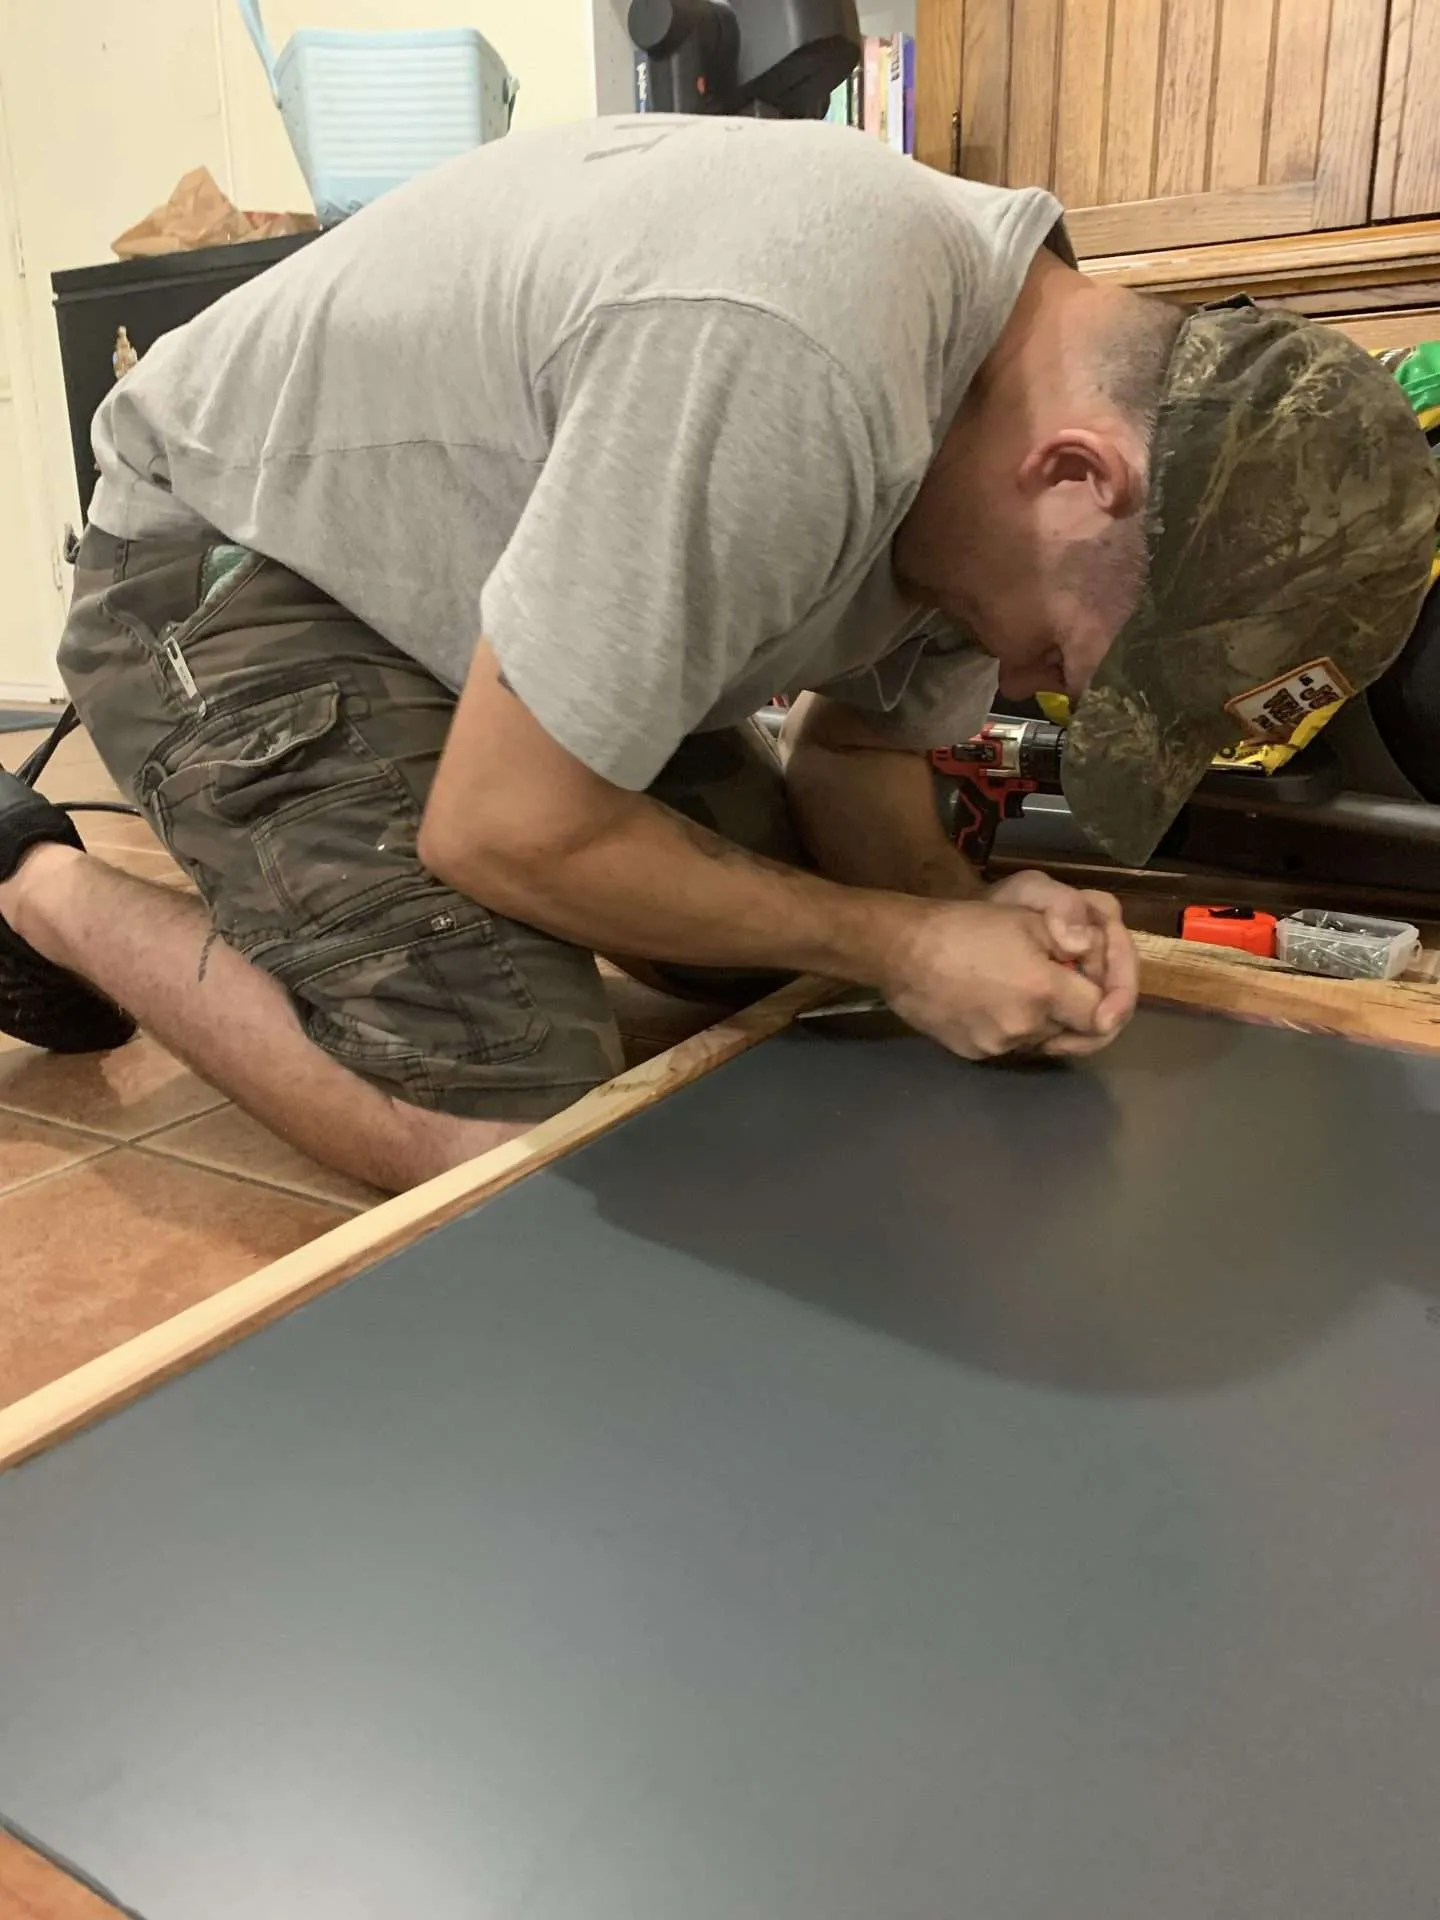
After the mirror is snuggly in its new frame, add glazier points behind the mirror into the lip of the frame.
We were too nervous to tap the glazier points in with a hammer, in case we accidentally tapped the mirror and broke it. So, Heff used a wide-tipped chisel to work the glazier points into the wood.
He pressed the chisel firmly against the glazier point and rocked the chisel side-to-side until they sank into the wood. It was a tedious process, but better than breaking the mirror.
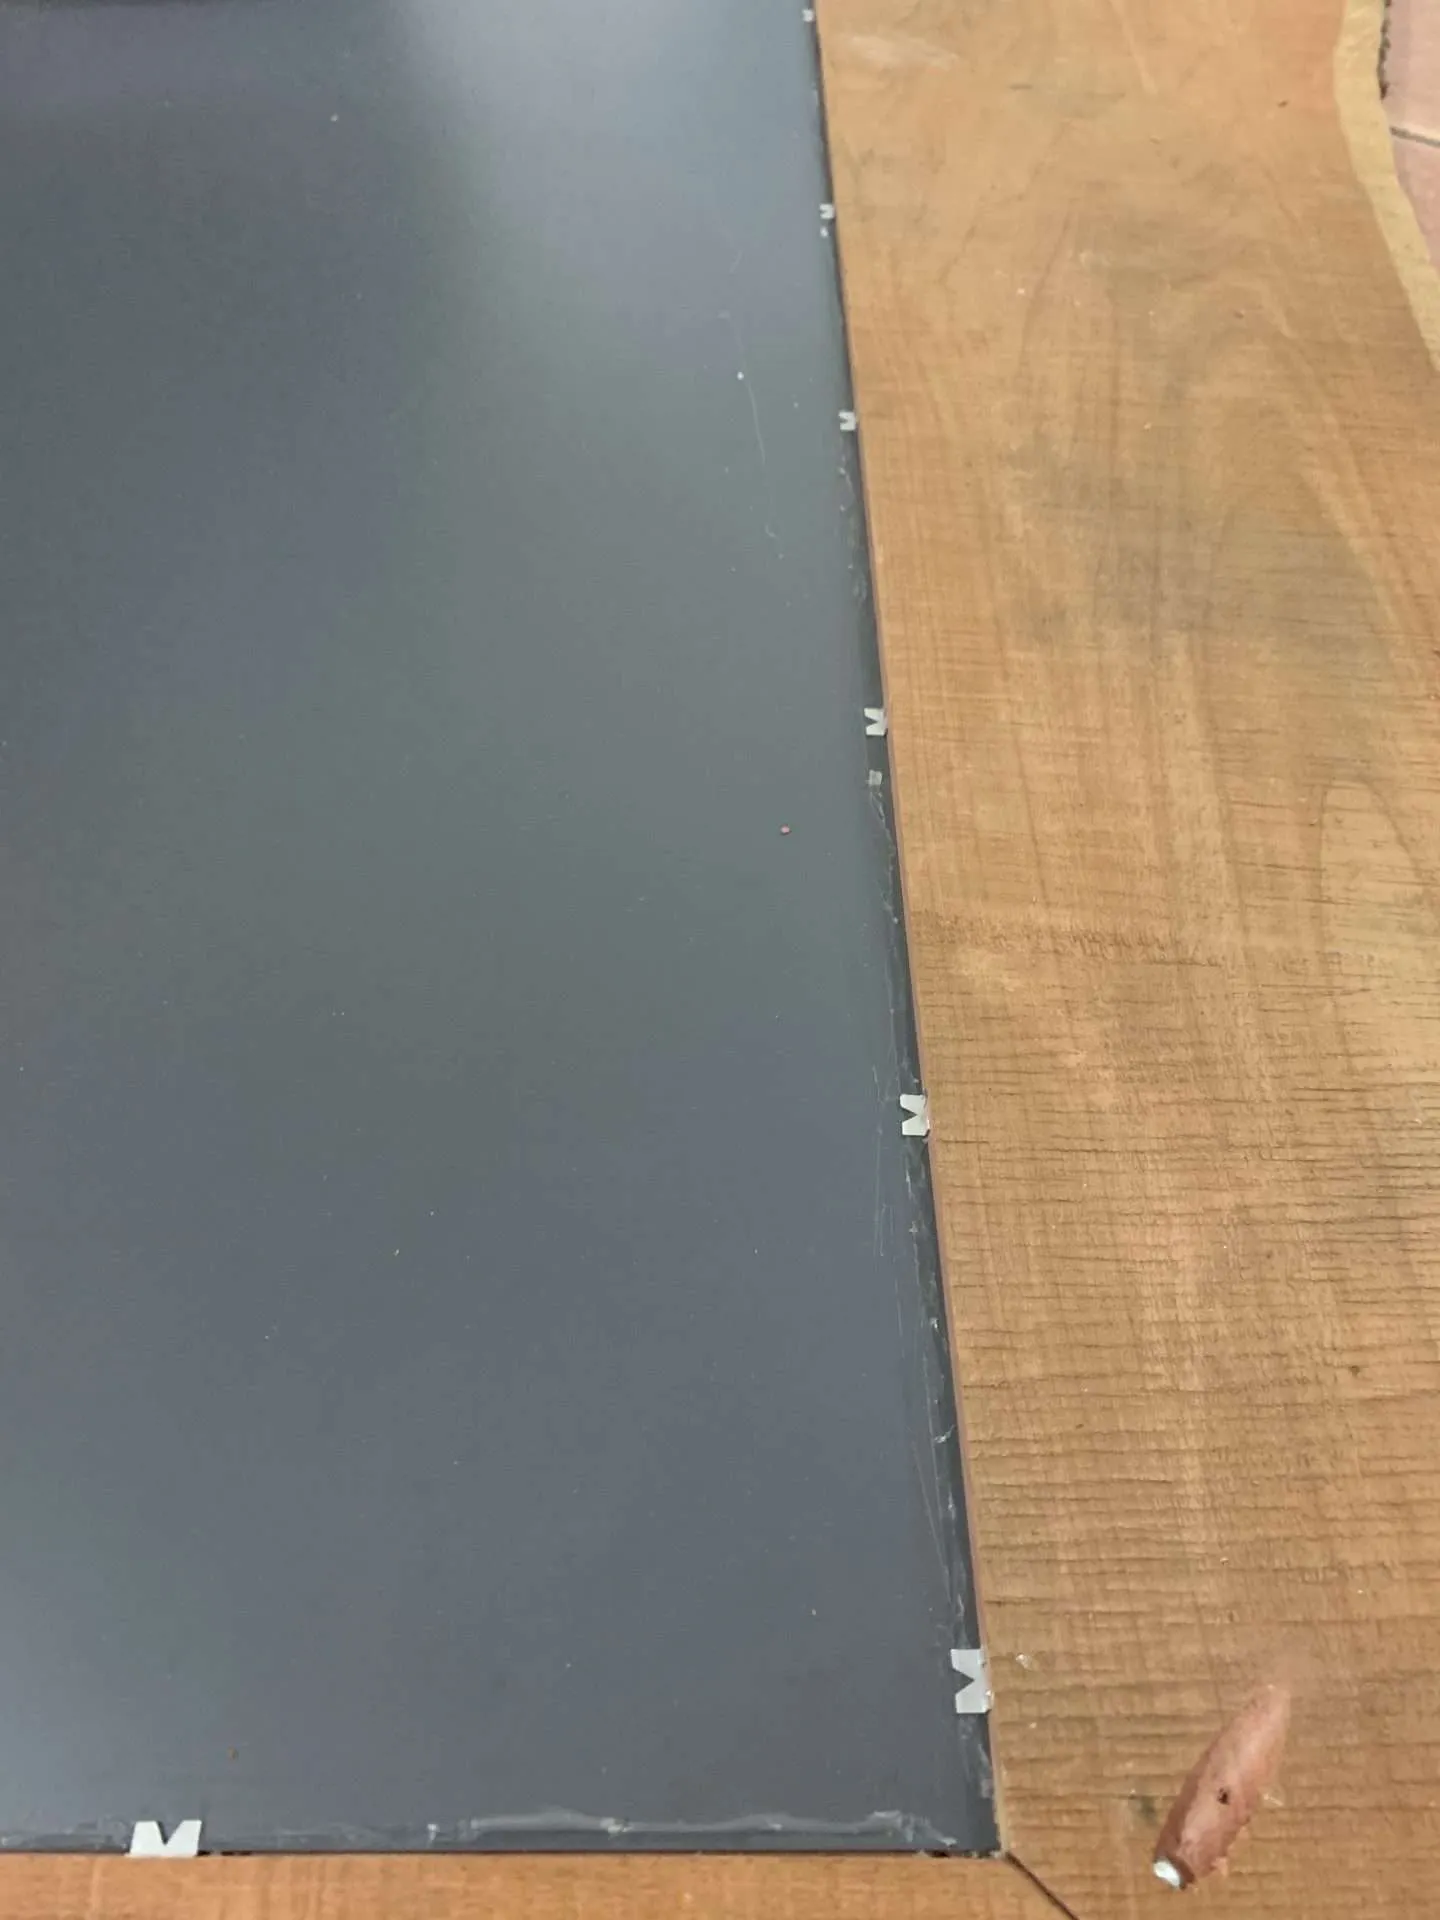
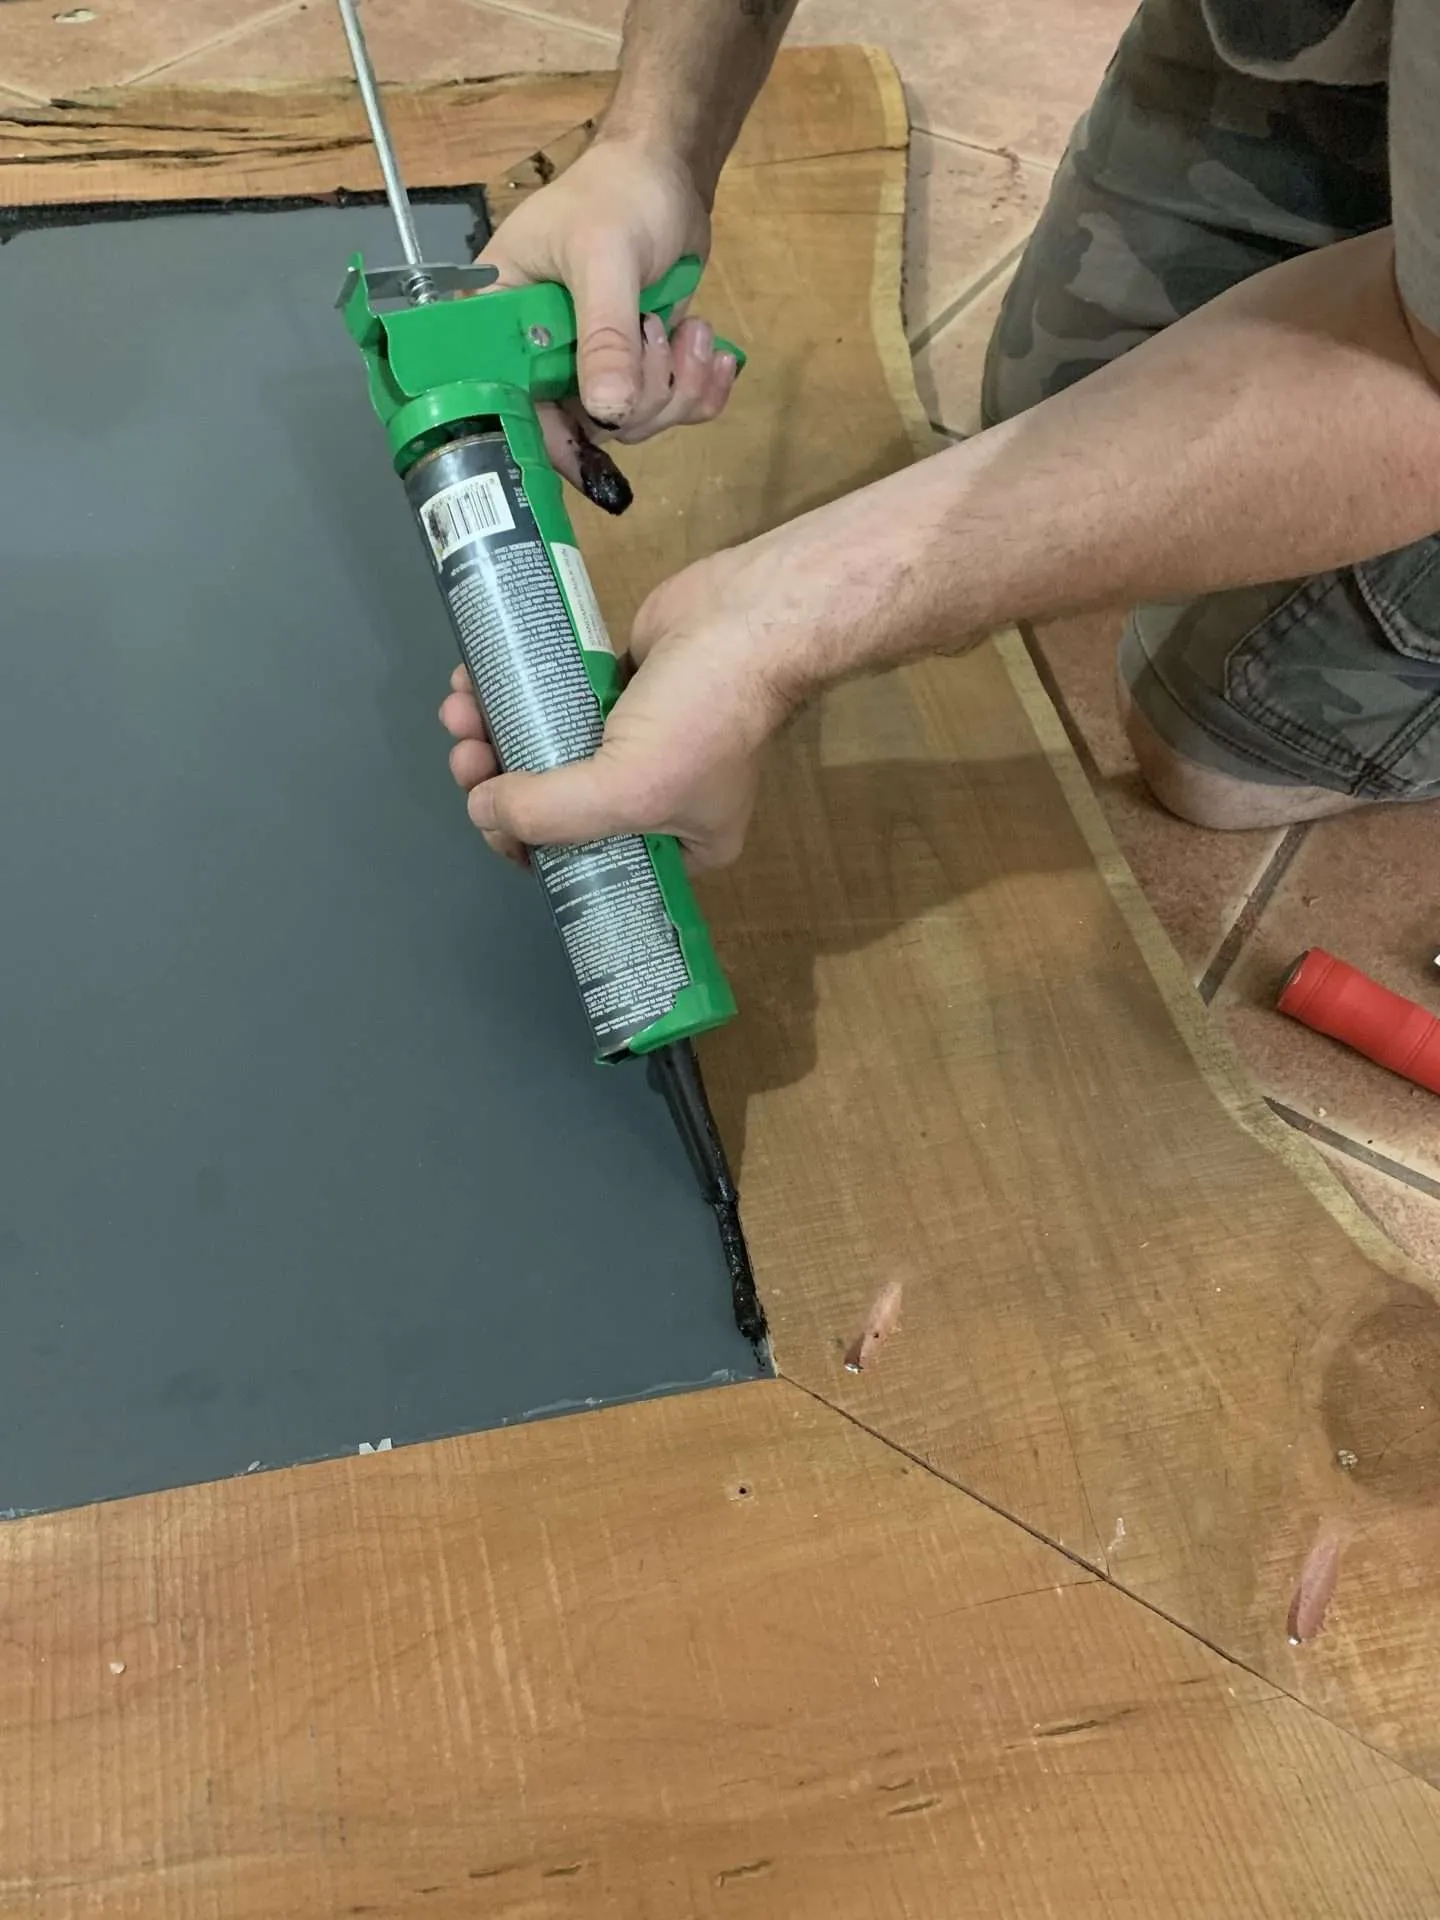
After all the glazier points are in, add a bead of caulk around the mirror. You could probably skip this step, but I wanted to make extra sure that the mirror wasn’t going to drop out of the frame.
We let the caulk dry overnight and then screwed on the backing from the old mirror.
GE GE012A Silicone 1 All Purpose Sealant Caulk, 10.1oz, Clear – 12 PackGlazier Push Points


Step 8: Add Decorative Piece to Bottom
The bottom of the frame looked weird to me. It needed something more substantial because it looked too thin compared to the rest of the live edge mirror.
We added another piece of a live edge board over the shelf. It was thin and fit in there perfectly. Plus, it has a lot of damage from worms that just looks cool to me.
Because we didn’t want to take the mirror apart to nail in this little piece of ‘trim’, we attached it directly to the glass with Gorilla Glue instead.
Gorilla Max Strength Clear Construction Adhesive, 2.5 Ounce Squeeze Tube, Clear, (Pack of 1)DEWALT 20V MAX Cordless Drill and Impact Driver, Power Tool Combo Kit with 2 Batteries and Charger, Yellow/Black (DCK240C2)


Step 9: Add Hanger & Hang on Wall
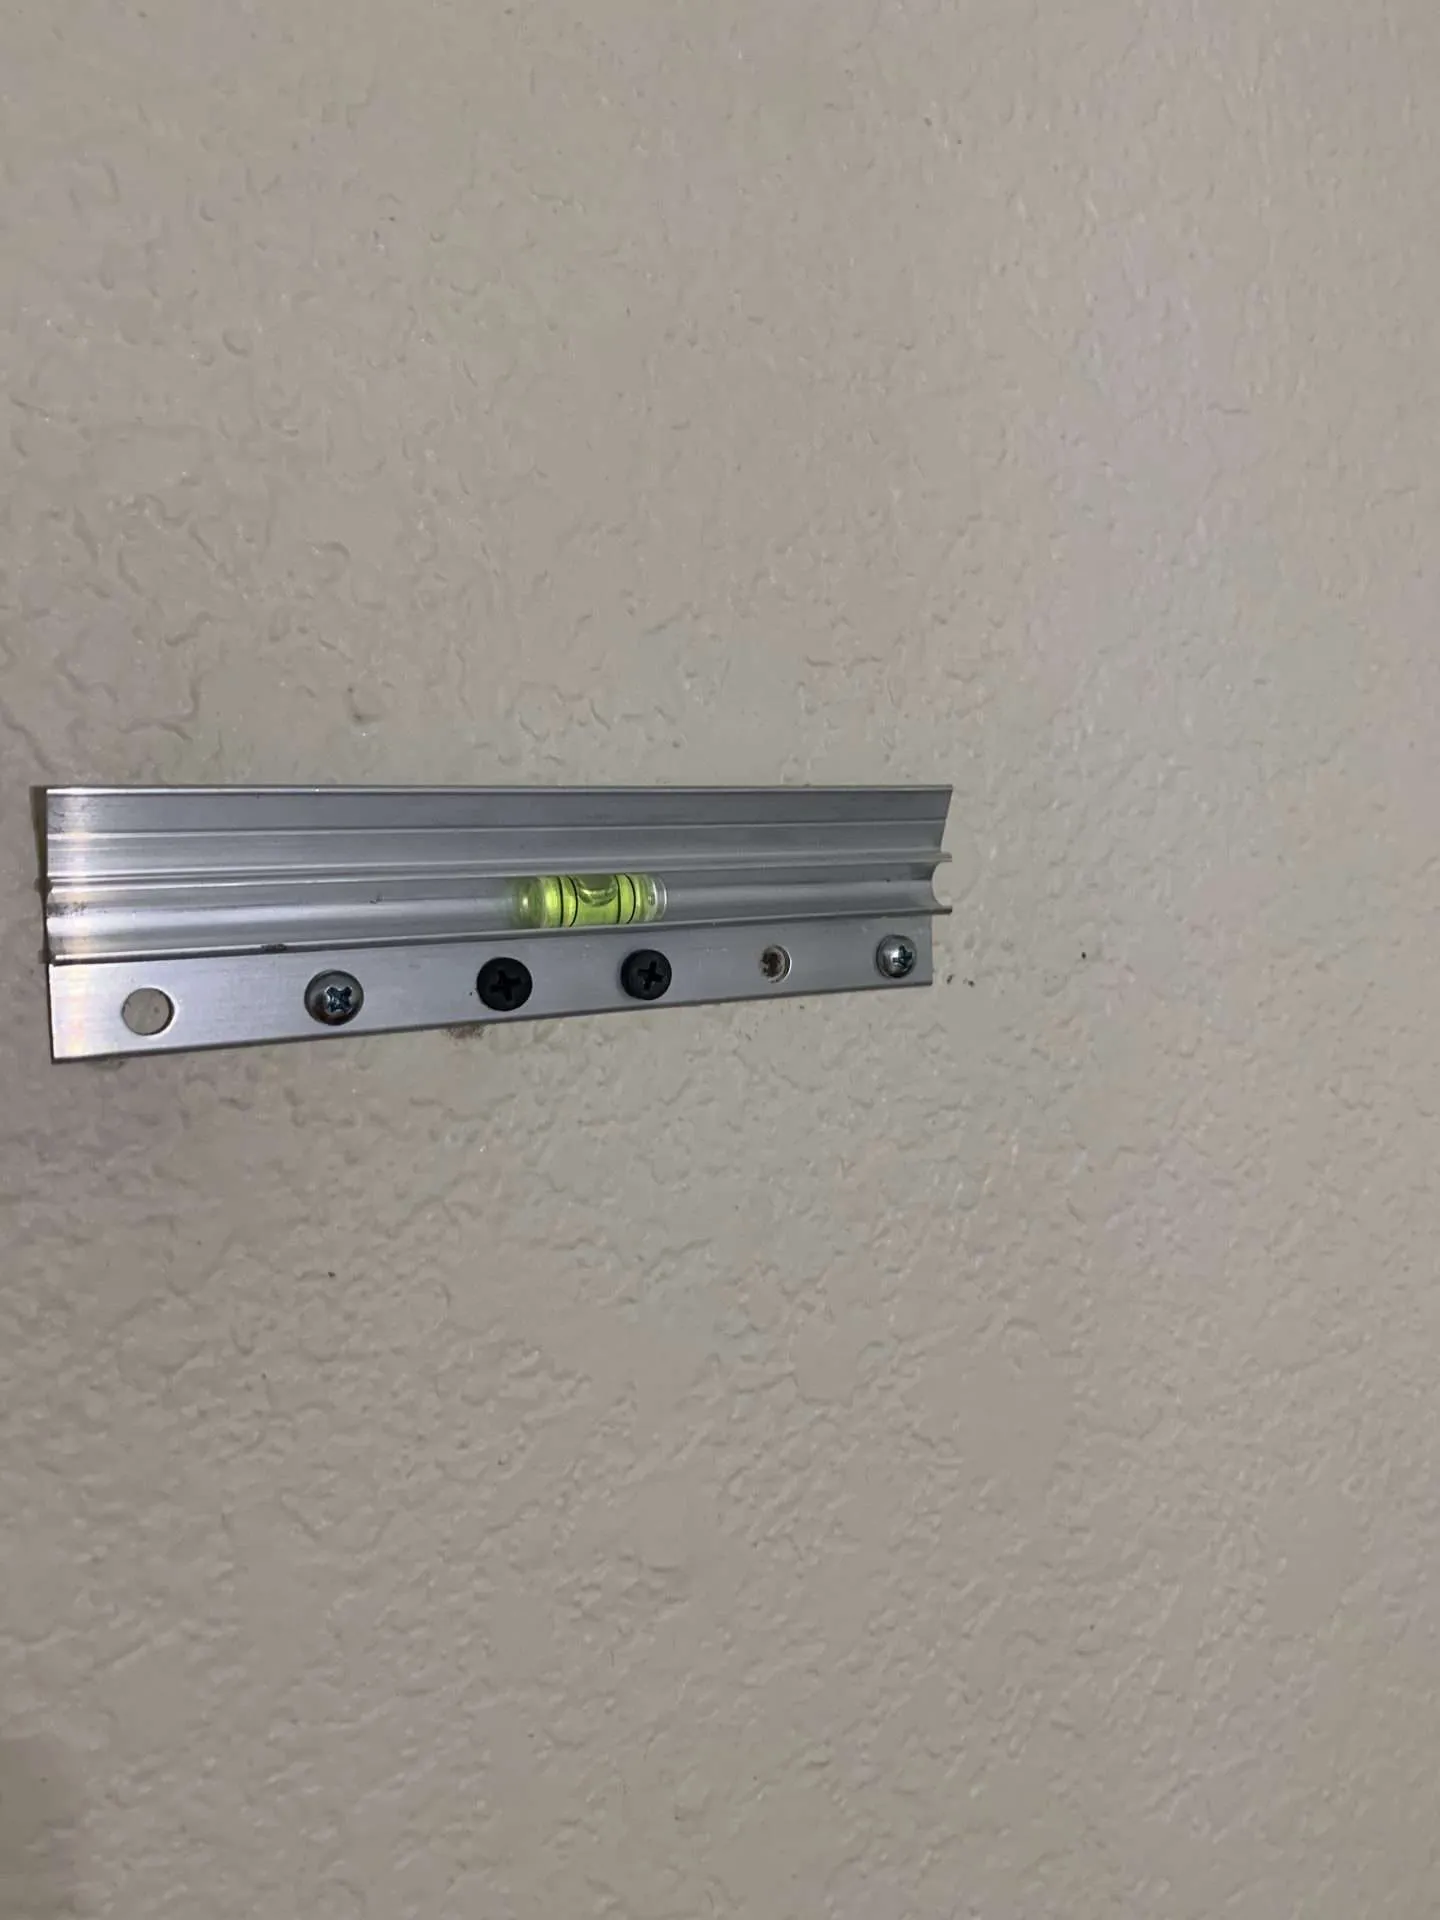
There are so many types of hangers and mirror mounting kits out there. We chose one from the hardware store that would hold up to 25 pounds. I’m not sure exactly how heavy the mirror is, but it’s not light, so make sure you choose a heavy-duty hanger.
Using the level that came in the kit, we attached one portion of the hanger to the back of the mirror and one portion to the wall. (We also used a stud finder to make sure we were hanging it on a stud and not just trusting a sheetrock anchor.)
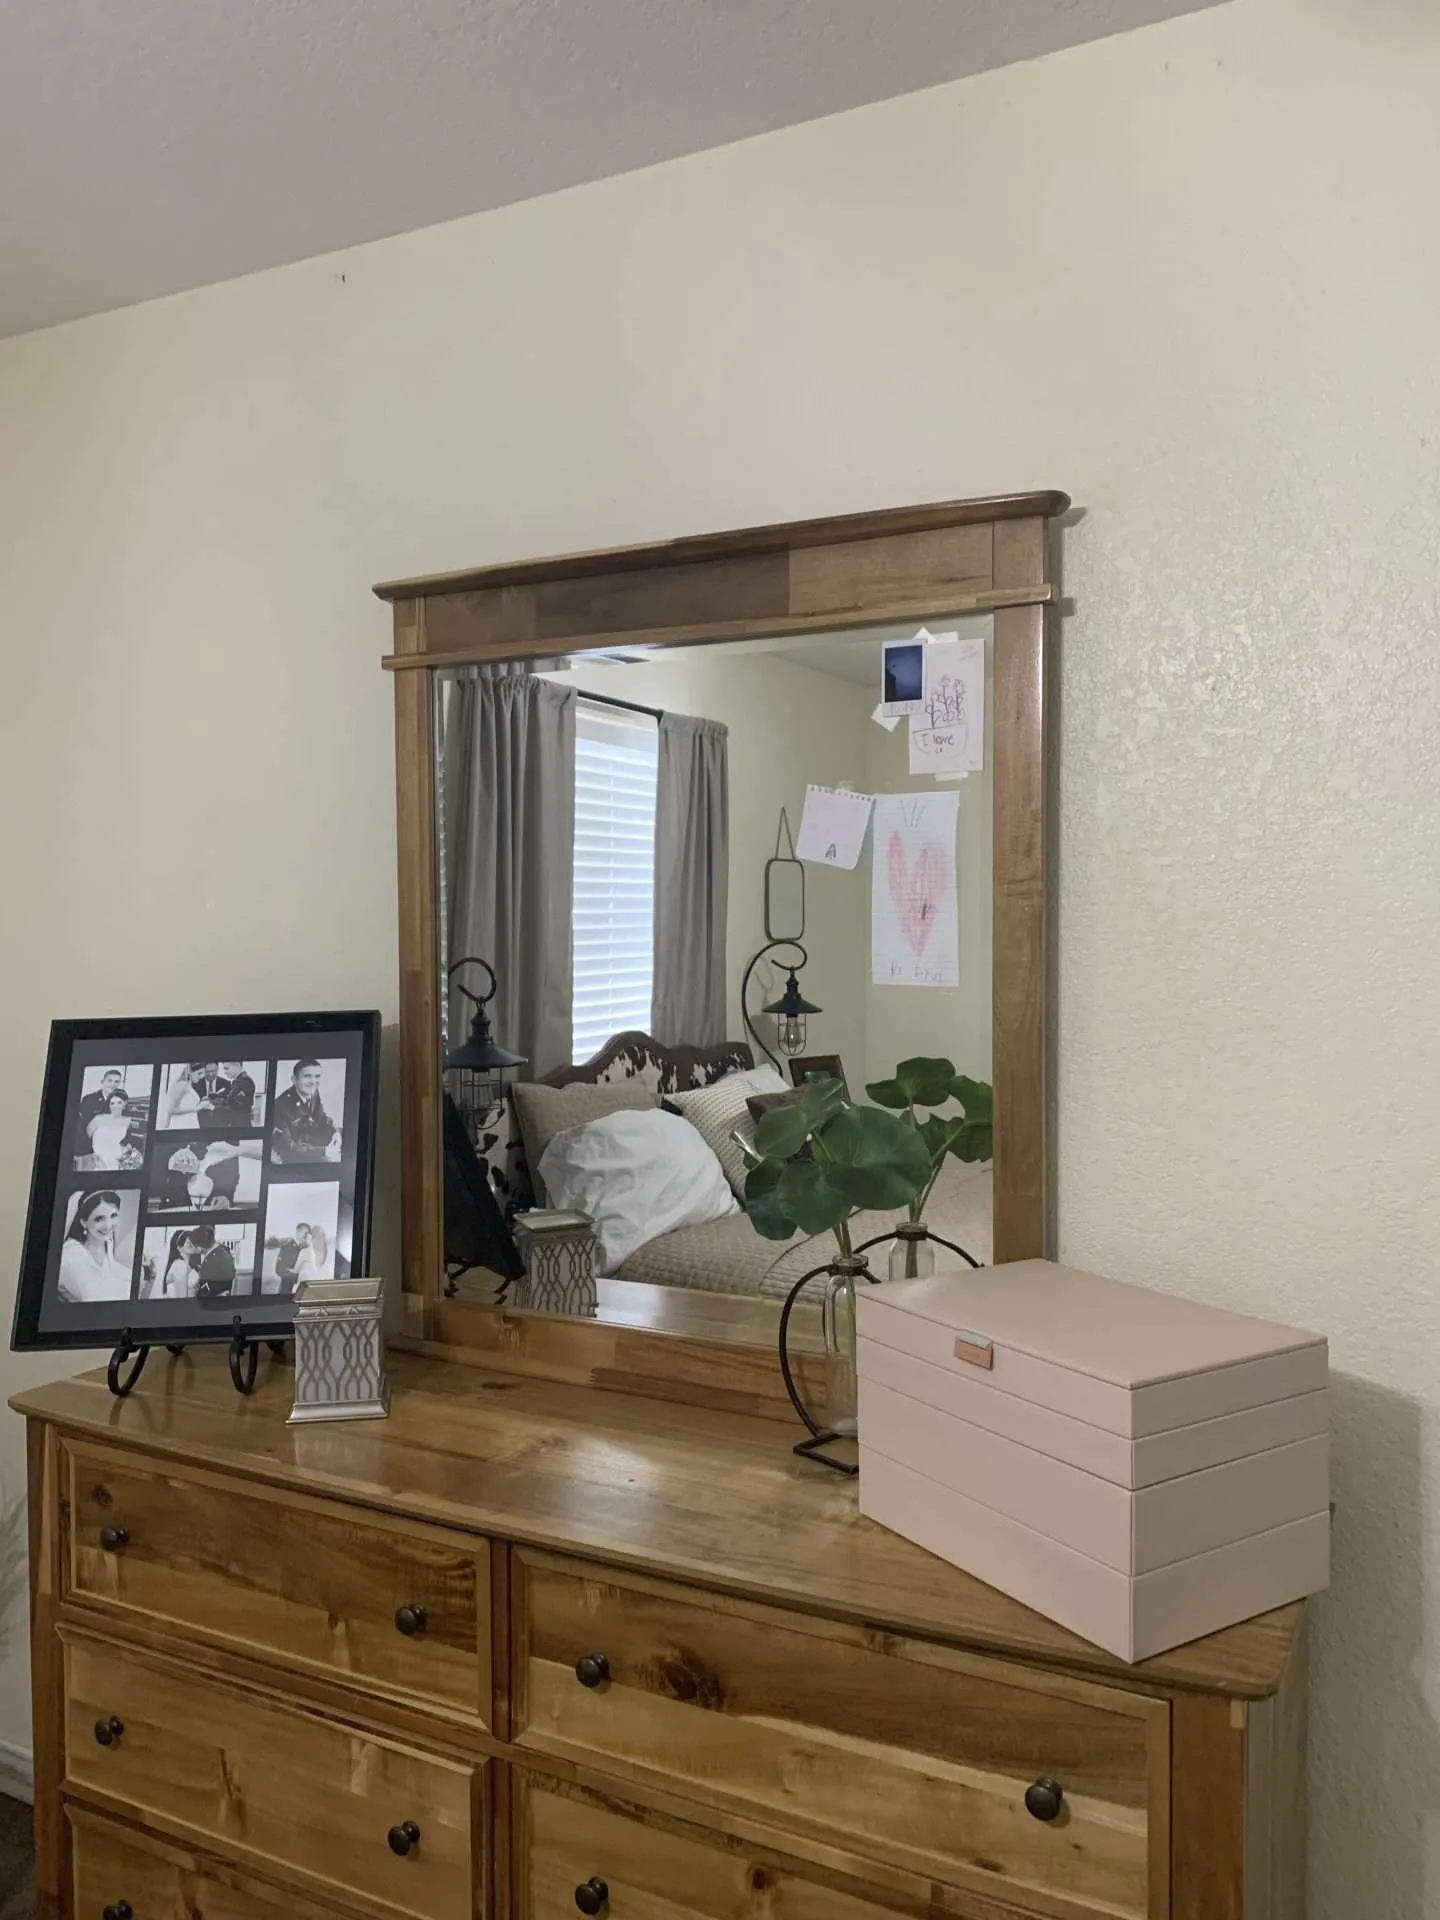
Finally, it was time to hang it on the wall.
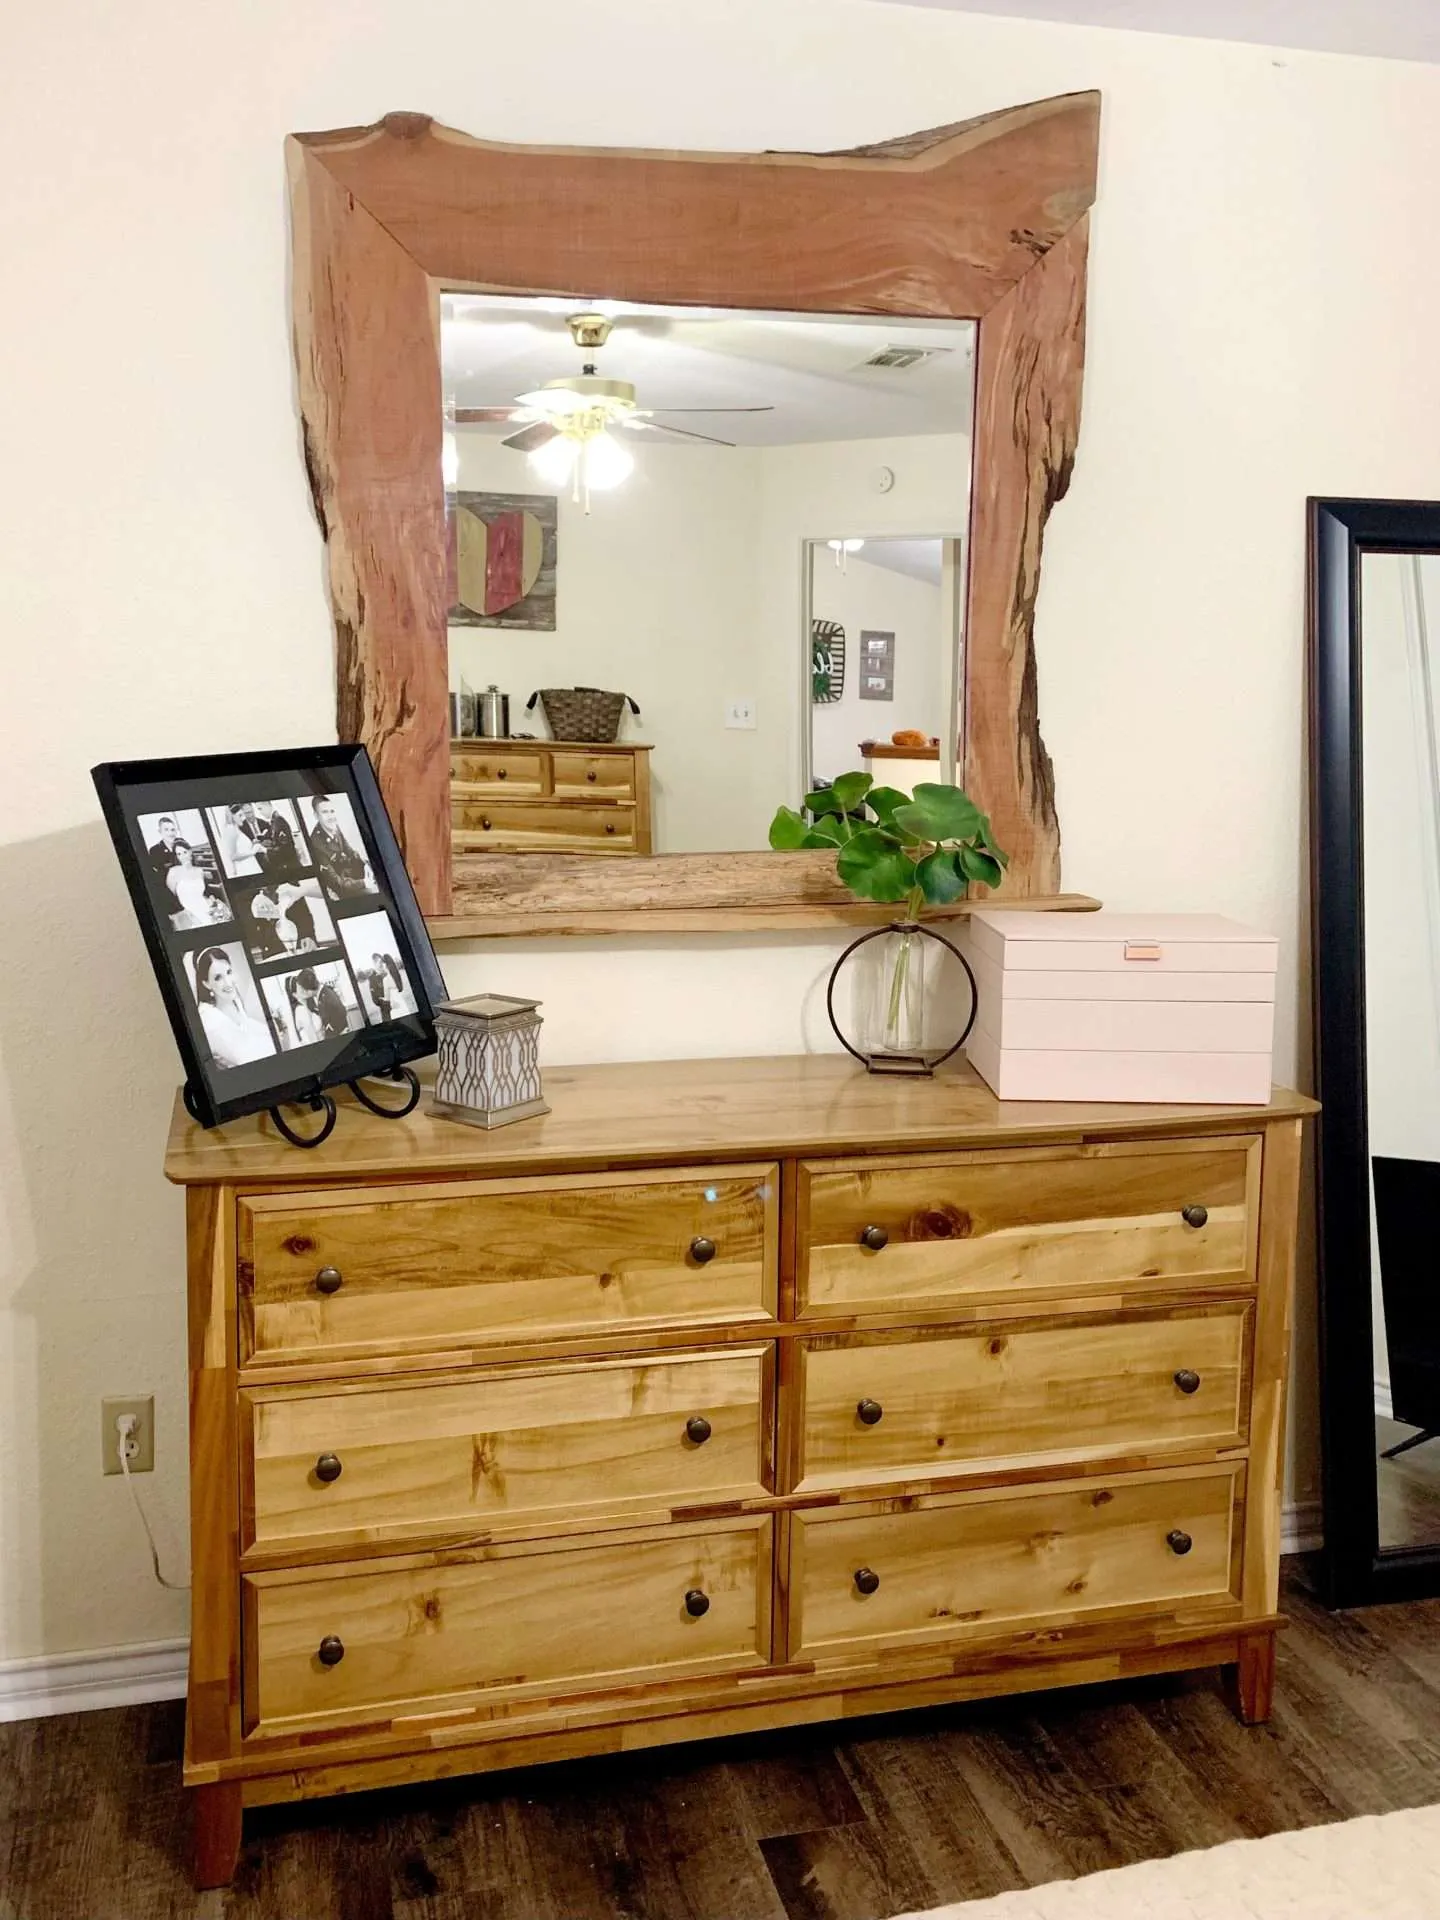
I am in love!
It’s hanging in my bedroom now, but in our next house, this live edge mirror is going in the living or dining room so that everyone can see it!
Honestly, this mirror only took us 2 afternoons of work and it is absolutely stunning. One of my favorite projects ever and one that will hang on our walls for years and years to come!