[Disclaimer: Finding Mandee is reader-supported, if you purchase through links on my site I may earn an affiliate commission at no additional cost to you. As an Amazon Associate, I earn from qualifying purchases.]
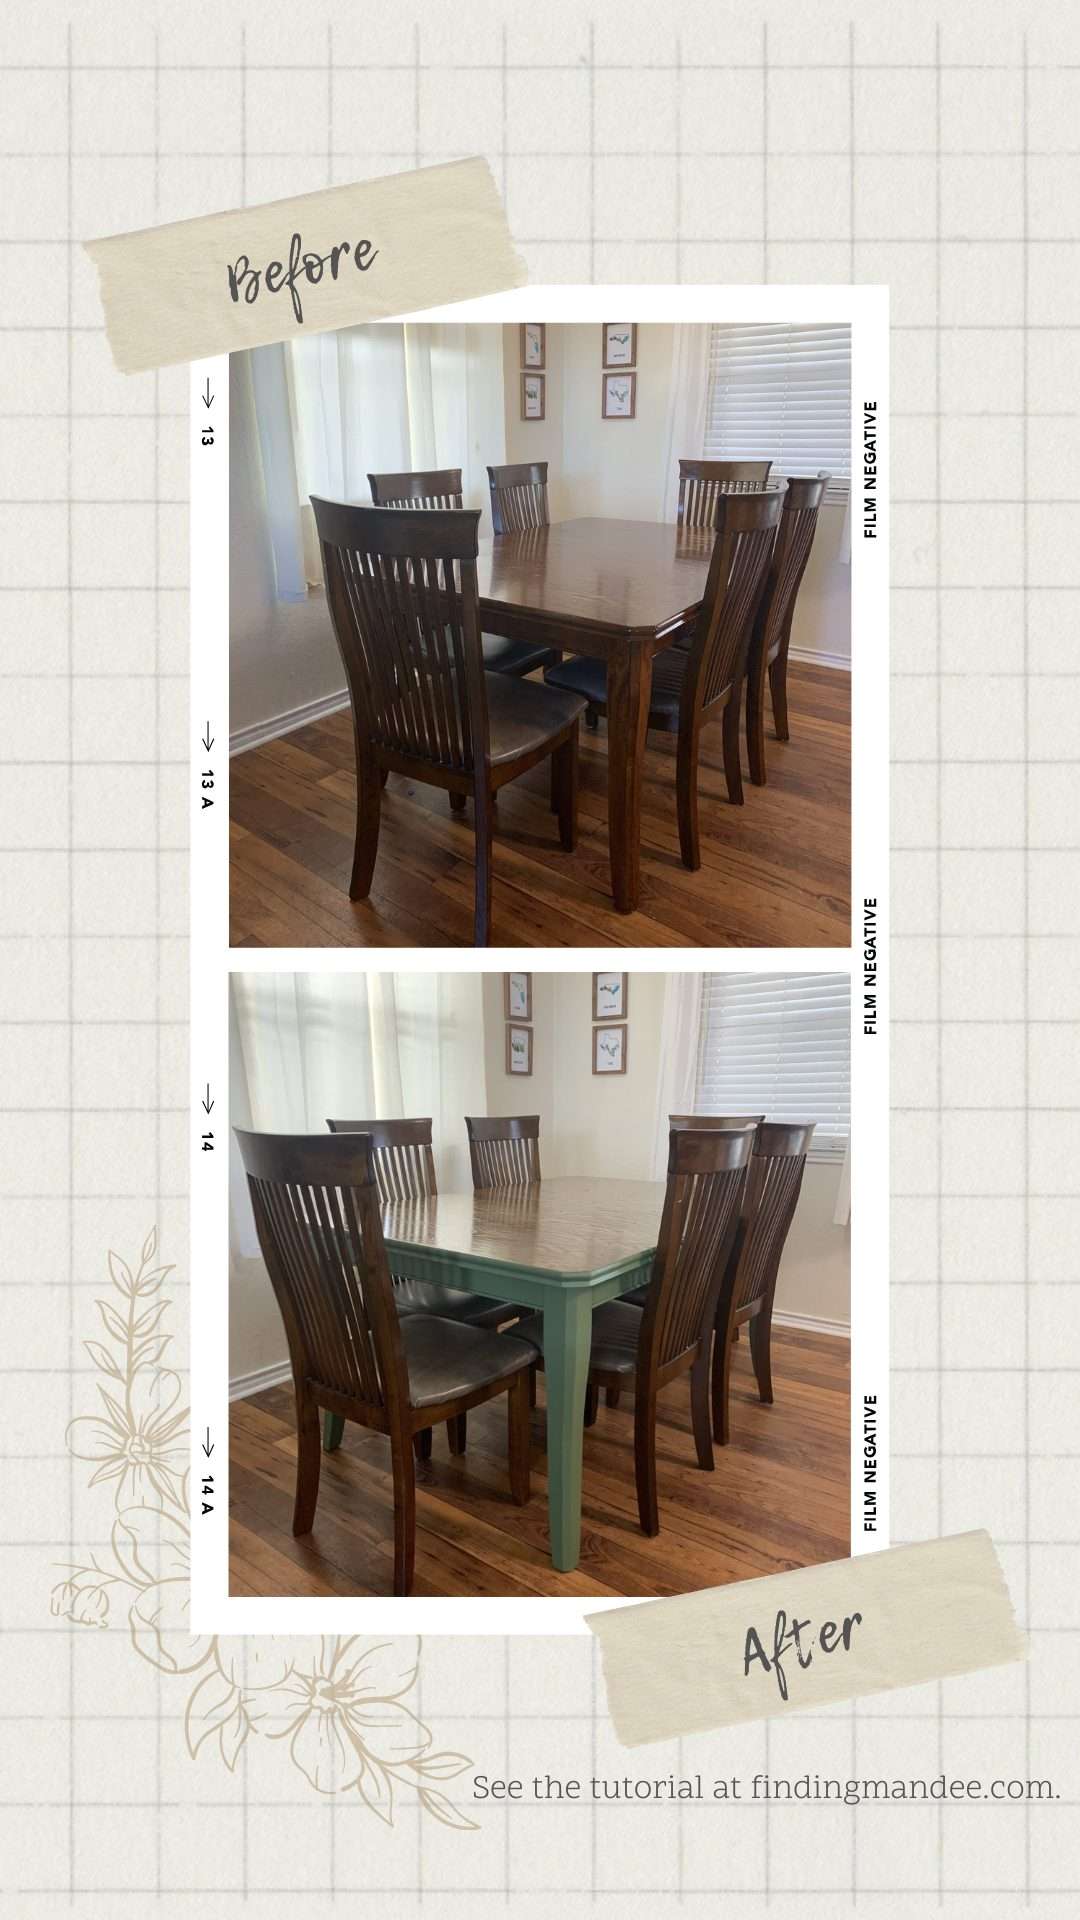
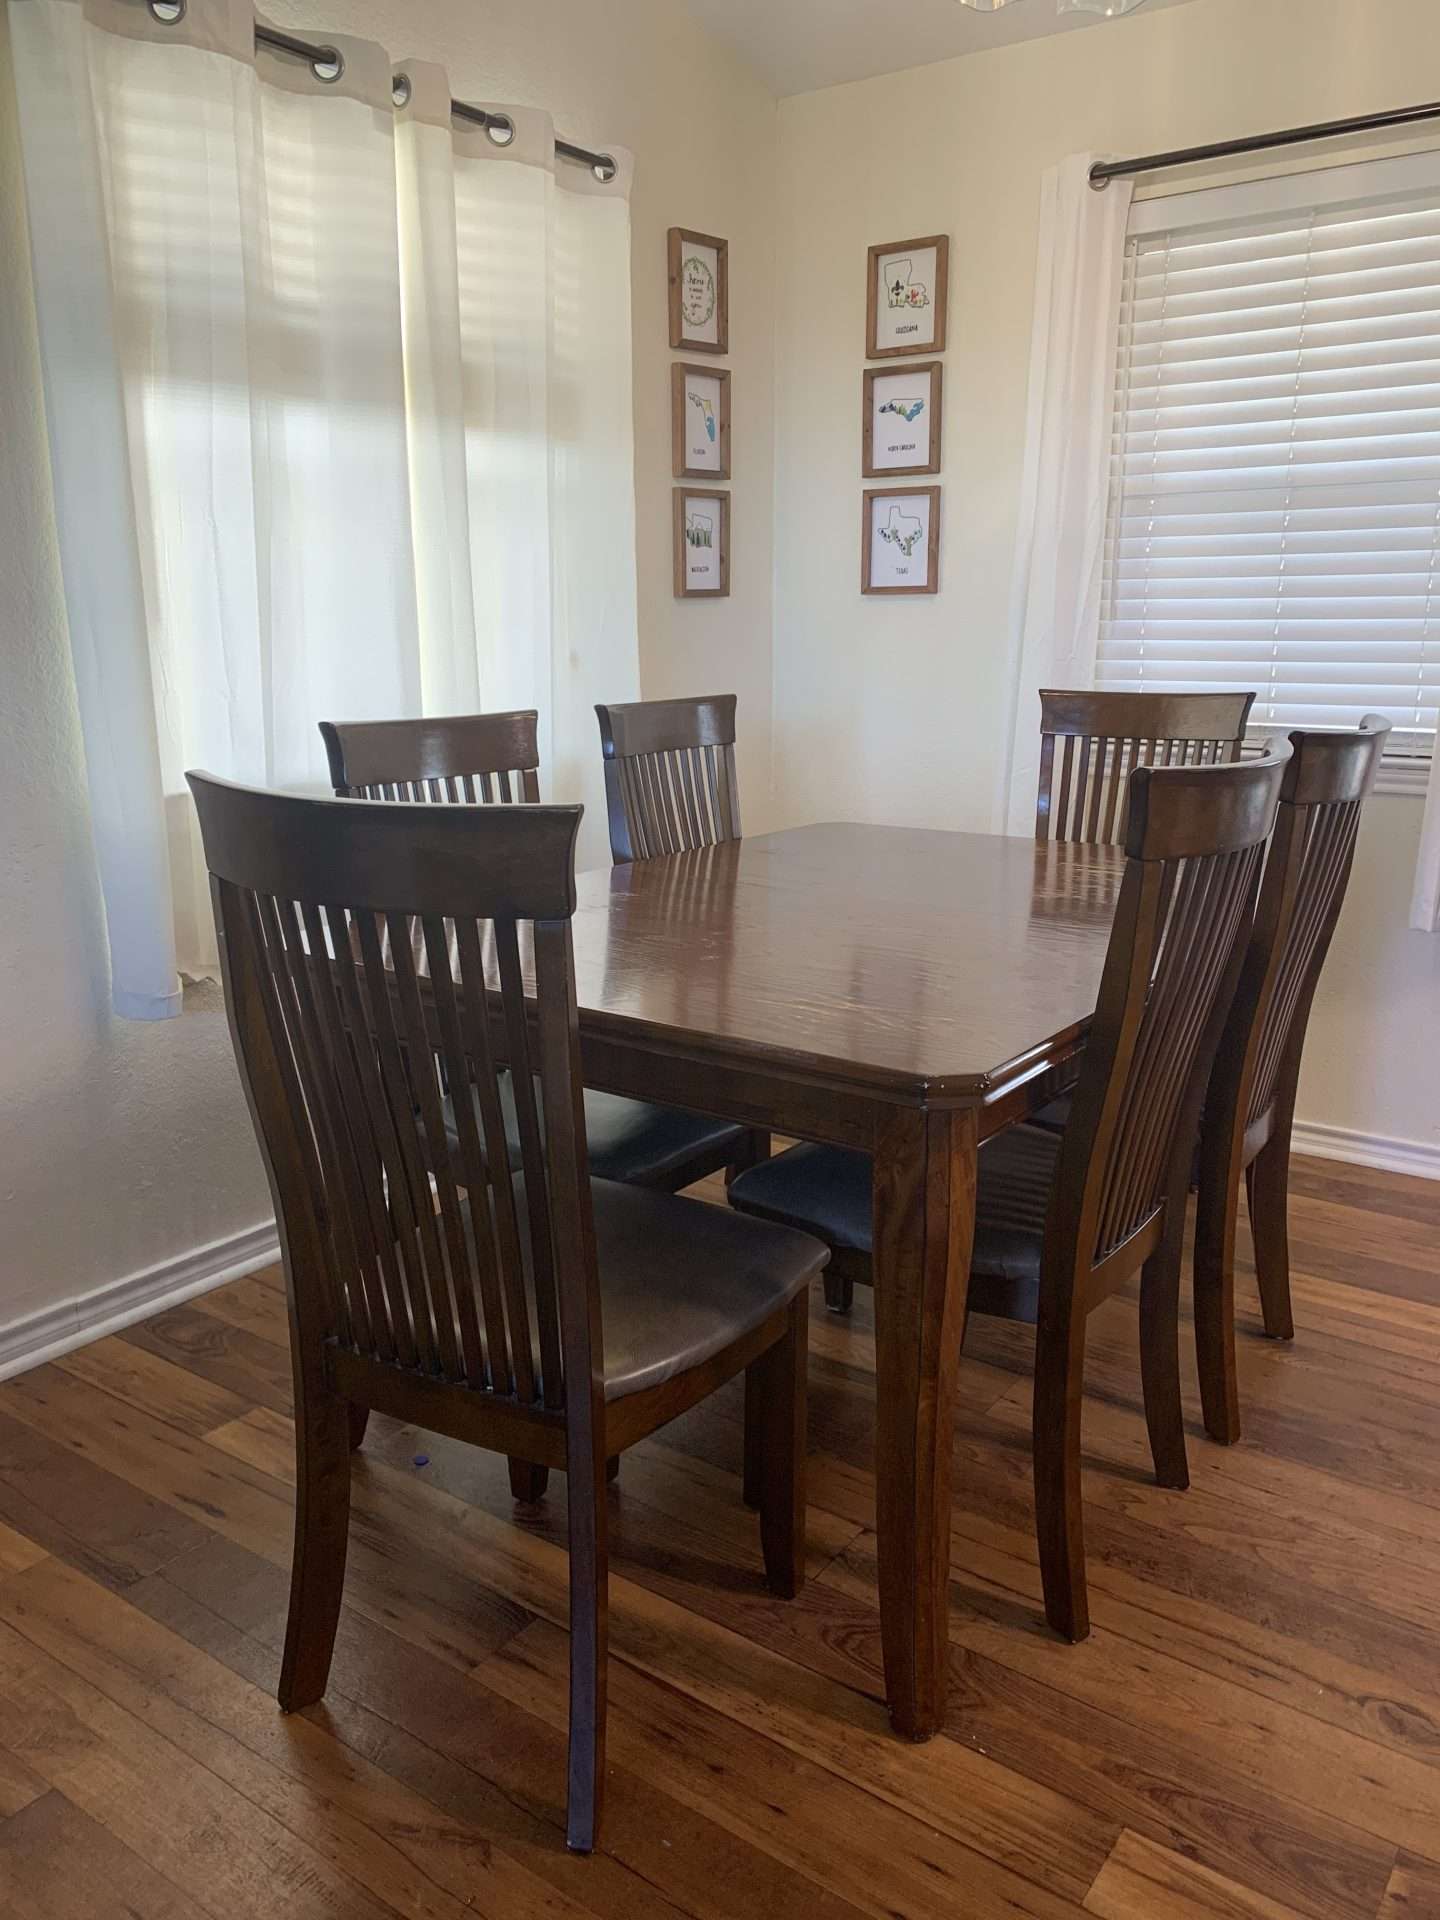
Our dining room set is one of the few pieces of furniture that we bought new. Most of our stuff is second-hand from family members, flea markets, and thrift stores.
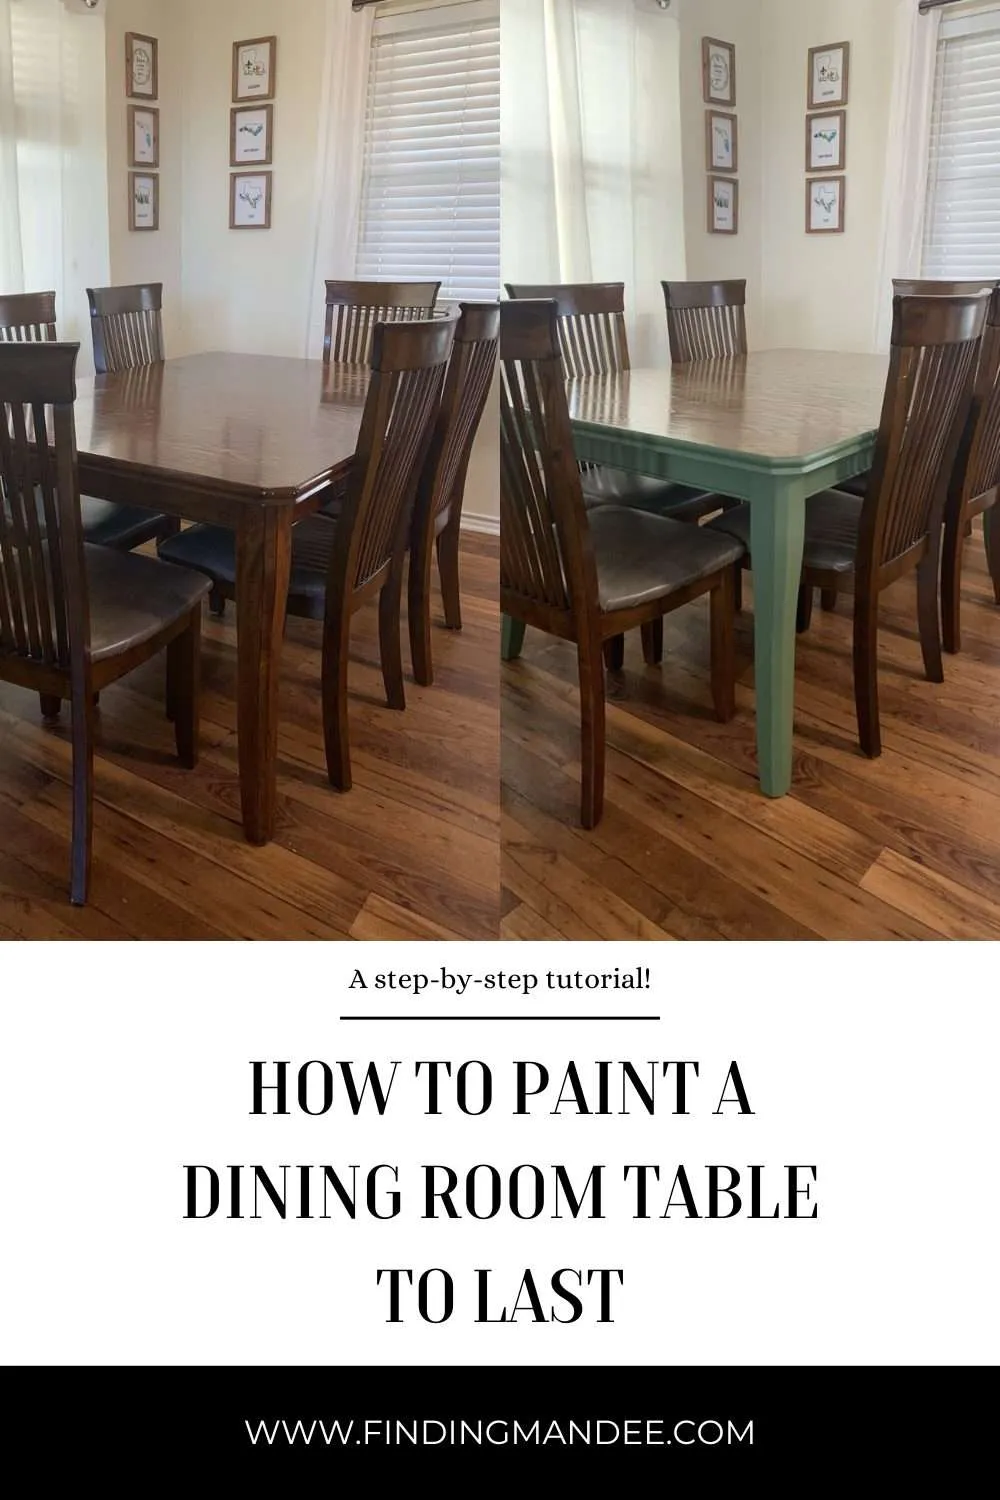
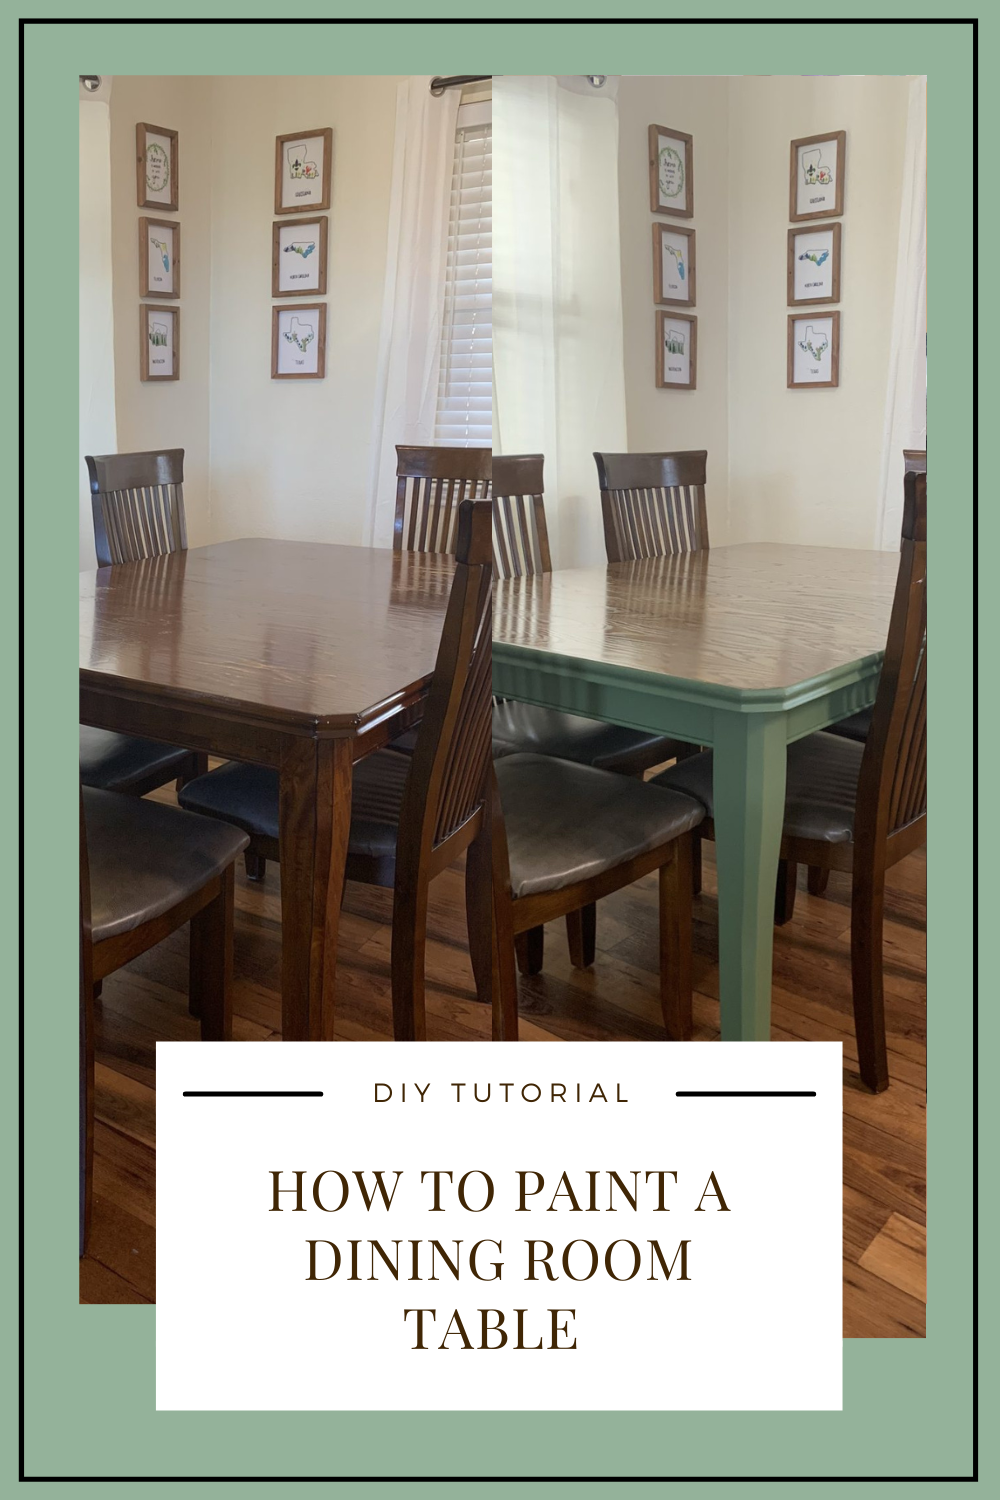
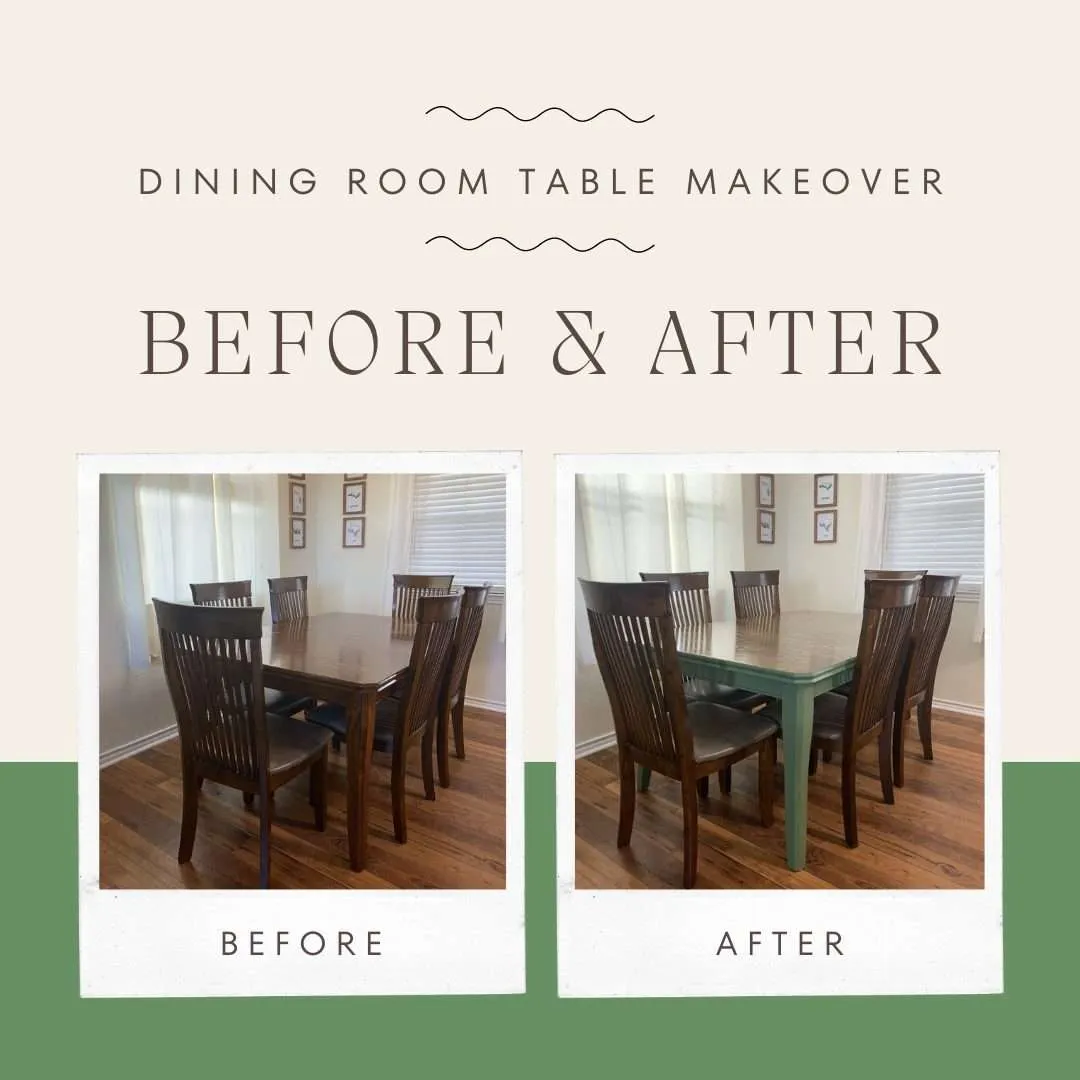
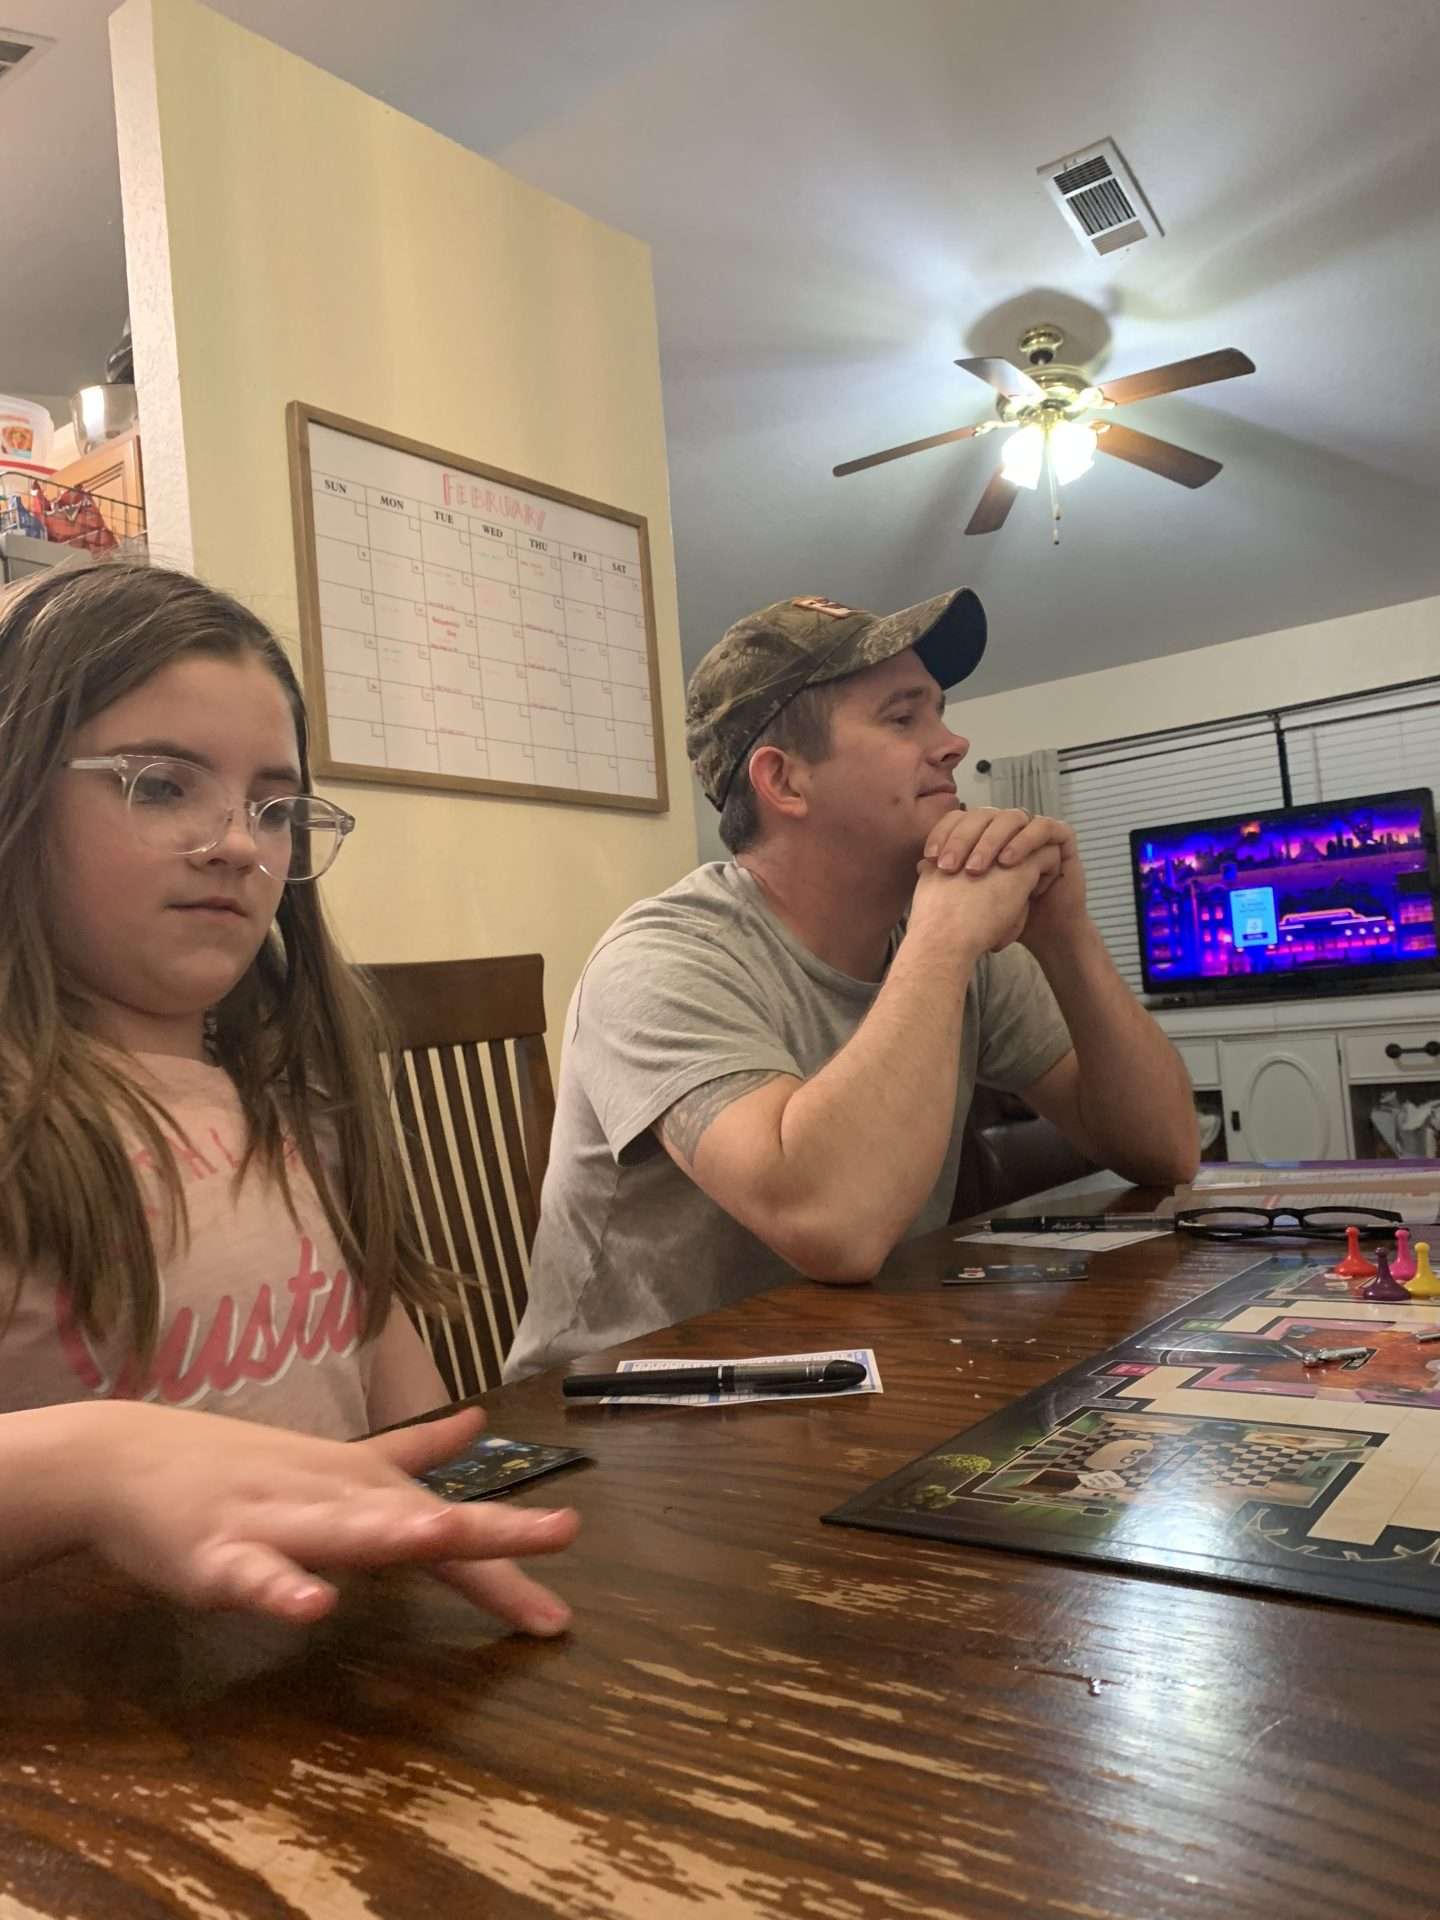
Over the past 9 years of daily use and multiple military moves, it was looking a little worn out. Structurally, the table is still in great shape, but the finish on the tabletop was flaking off. And it was driving me crazy.
I would gladly pick up my paintbrush and get to work with any other piece of furniture, but so many furniture flippers on social media say that they avoid dining room sets. 1) Because of the amount of work required to refurbish a table and chairs and 2) dining room sets are used so much that the paint doesn’t always hold up well.
So, I have put this project off for years!
After taking these pictures during a game night, I was cringing at that flaky wood top. I moved the table outside the next day and got to work.
Here’s how I painted my dining room table:
Dining Room Table Painting Supplies:
- orbital sander
- sanding nets (80- to 220-grit)
- rags
- Zinsser Bullseye 1-2-3 primer
- Glidden Premium Paint (color: Dark Sage)
- paint brush
- small paint foam roller
- paint trays
- paint edger
- fine grit sanding sponge
- Behr Rustic Wood Effects Stain (color: Rustic Brown)
- painter’s tape
- Minwax Polycrylic (finish: satin)
- Minwax Polycryclic (finish: gloss)
Step 1: Sand the Dining Room Table
The first and most crucial step to any furniture flip is getting a smooth surface.
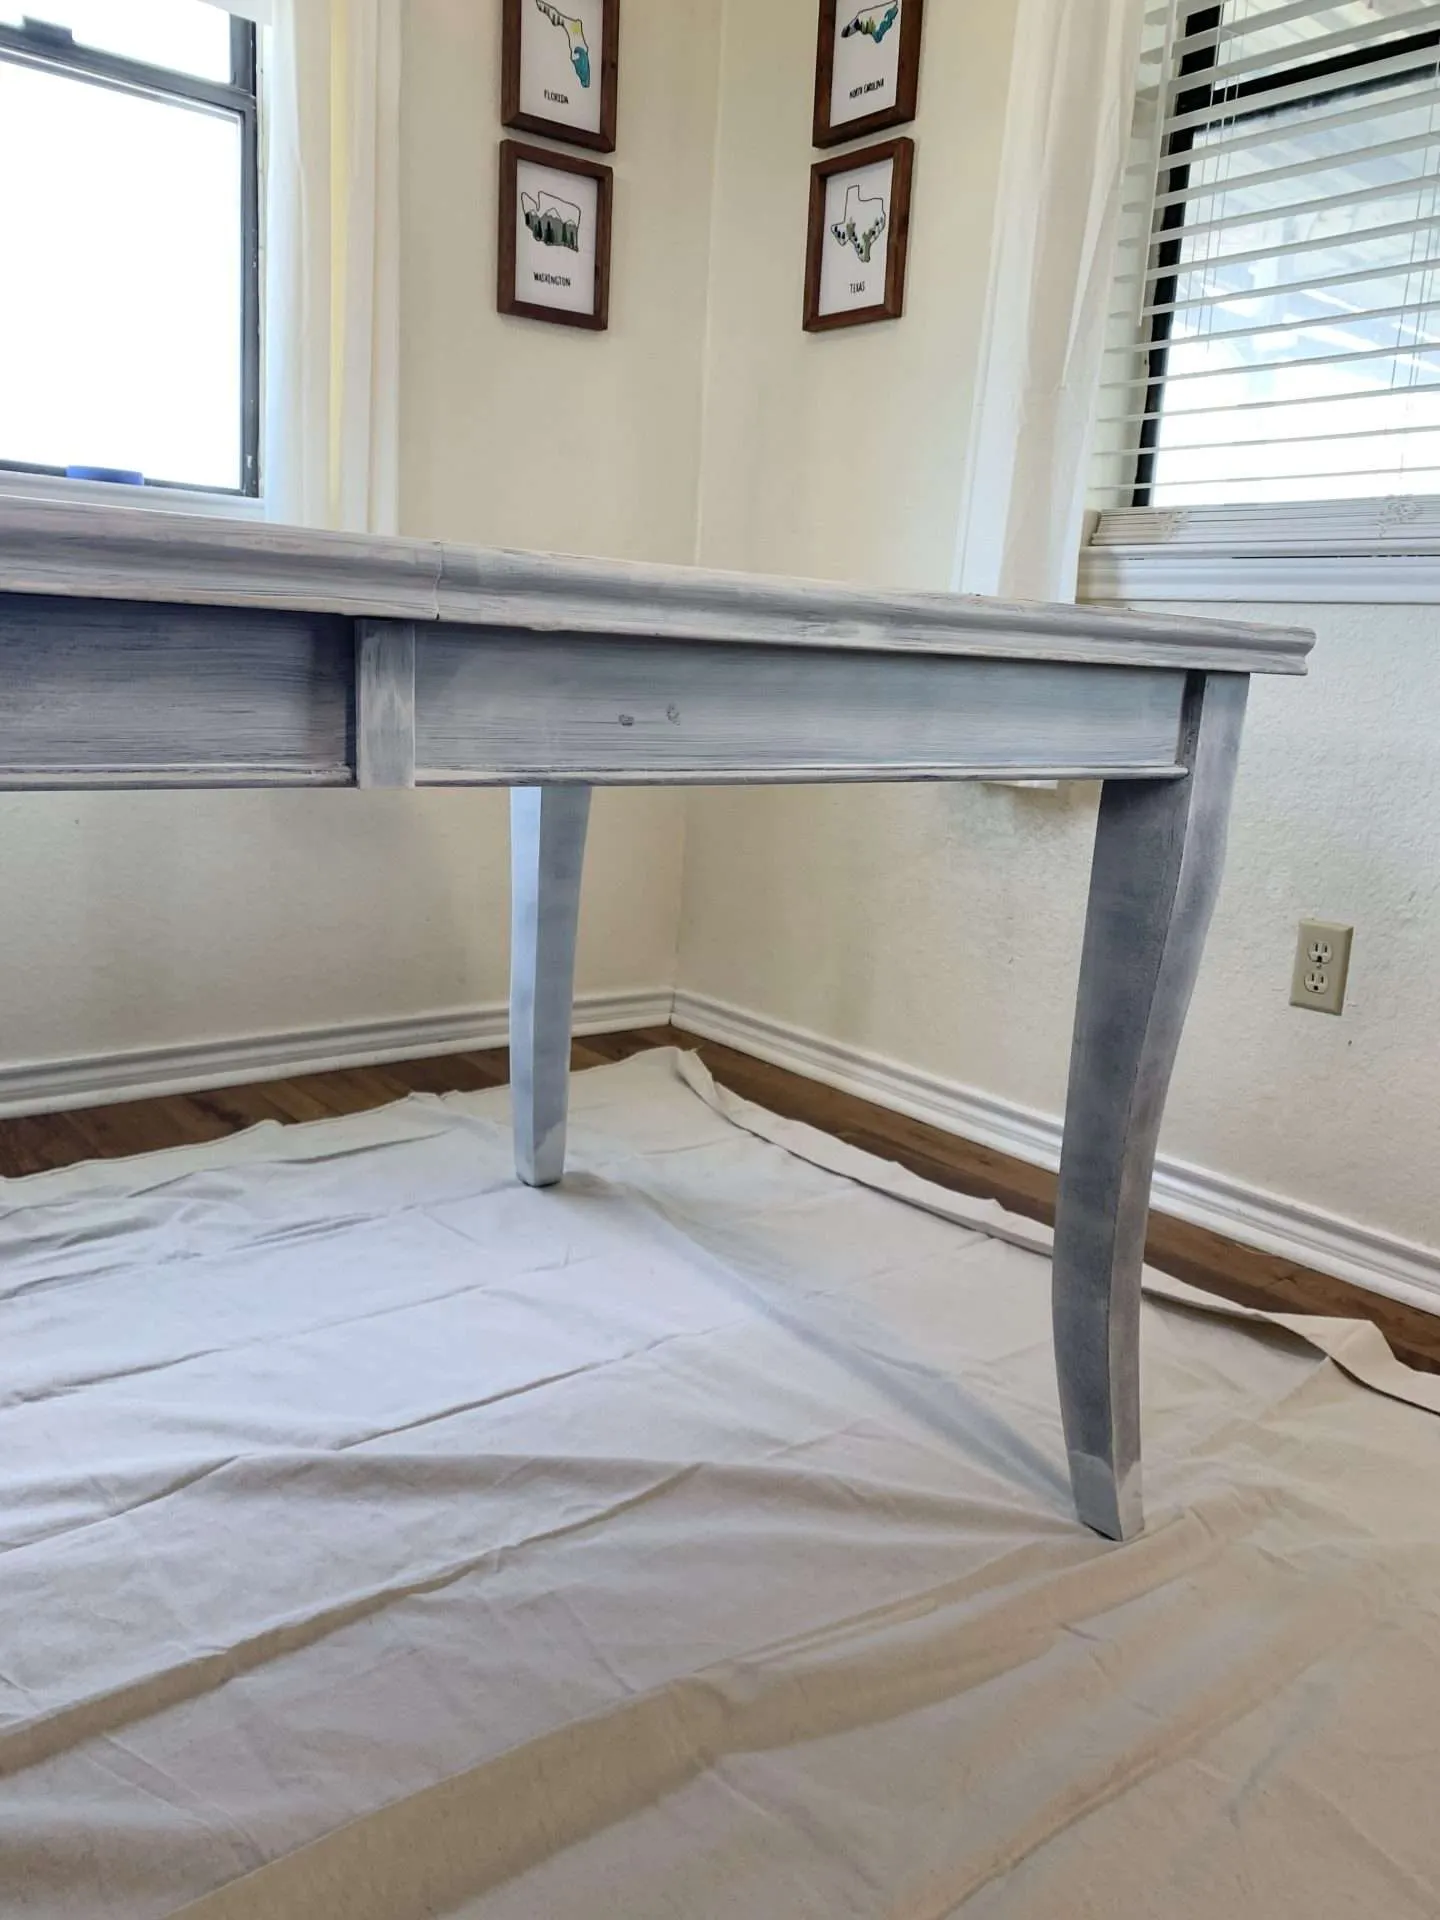
I only needed to scuff sand the legs and sides of the table. So, I used an 80-grit sanding net. (I prefer sanding nets to regular sanding pads because they tend to last longer.)
**For Clarity** Scuff sanding means lightly sanding a surface. You don’t have to remove ALL of the paint or varnish, you just need to make the surface rough to give the primer something to stick to.
However, the top of the dining room table required more sanding. I wanted it to have a wood finish and not be painted.
It was a delicate process because it was not solid wood. The top of our dining room table is pressed wood covered by a thin layer of veneer.
The trick to sanding veneer is to use a light hand. Don’t press down hard or tilt the sander on its side. I made that mistake and blew through the veneer in a couple of places. (Thankfully, after adding the stain it’s hardly noticeable.)
**For Clarity** Blowing through the veneer means that you sanded all the way through the thin sheet of veneer and exposed the pressed wood.
After getting off all of the stain/varnish from the tabletop, I cleaned the dust off with a damp rag.

CRAFTSMAN Orbital Sander, 5 inch, 12,000 OPM, 3 Amp, Corded (CMEW231)30PCS 5 Inch Mesh Hook & Loop Sanding Discs 80 100 120 150 320 600 Assort Grit Dust Free Abrasive Net Sander Disc Anti-Blocking Long-Lasting Mesh Sanding Pads, Sandpaper for Wood Furniture Floor


Step 2: Tape
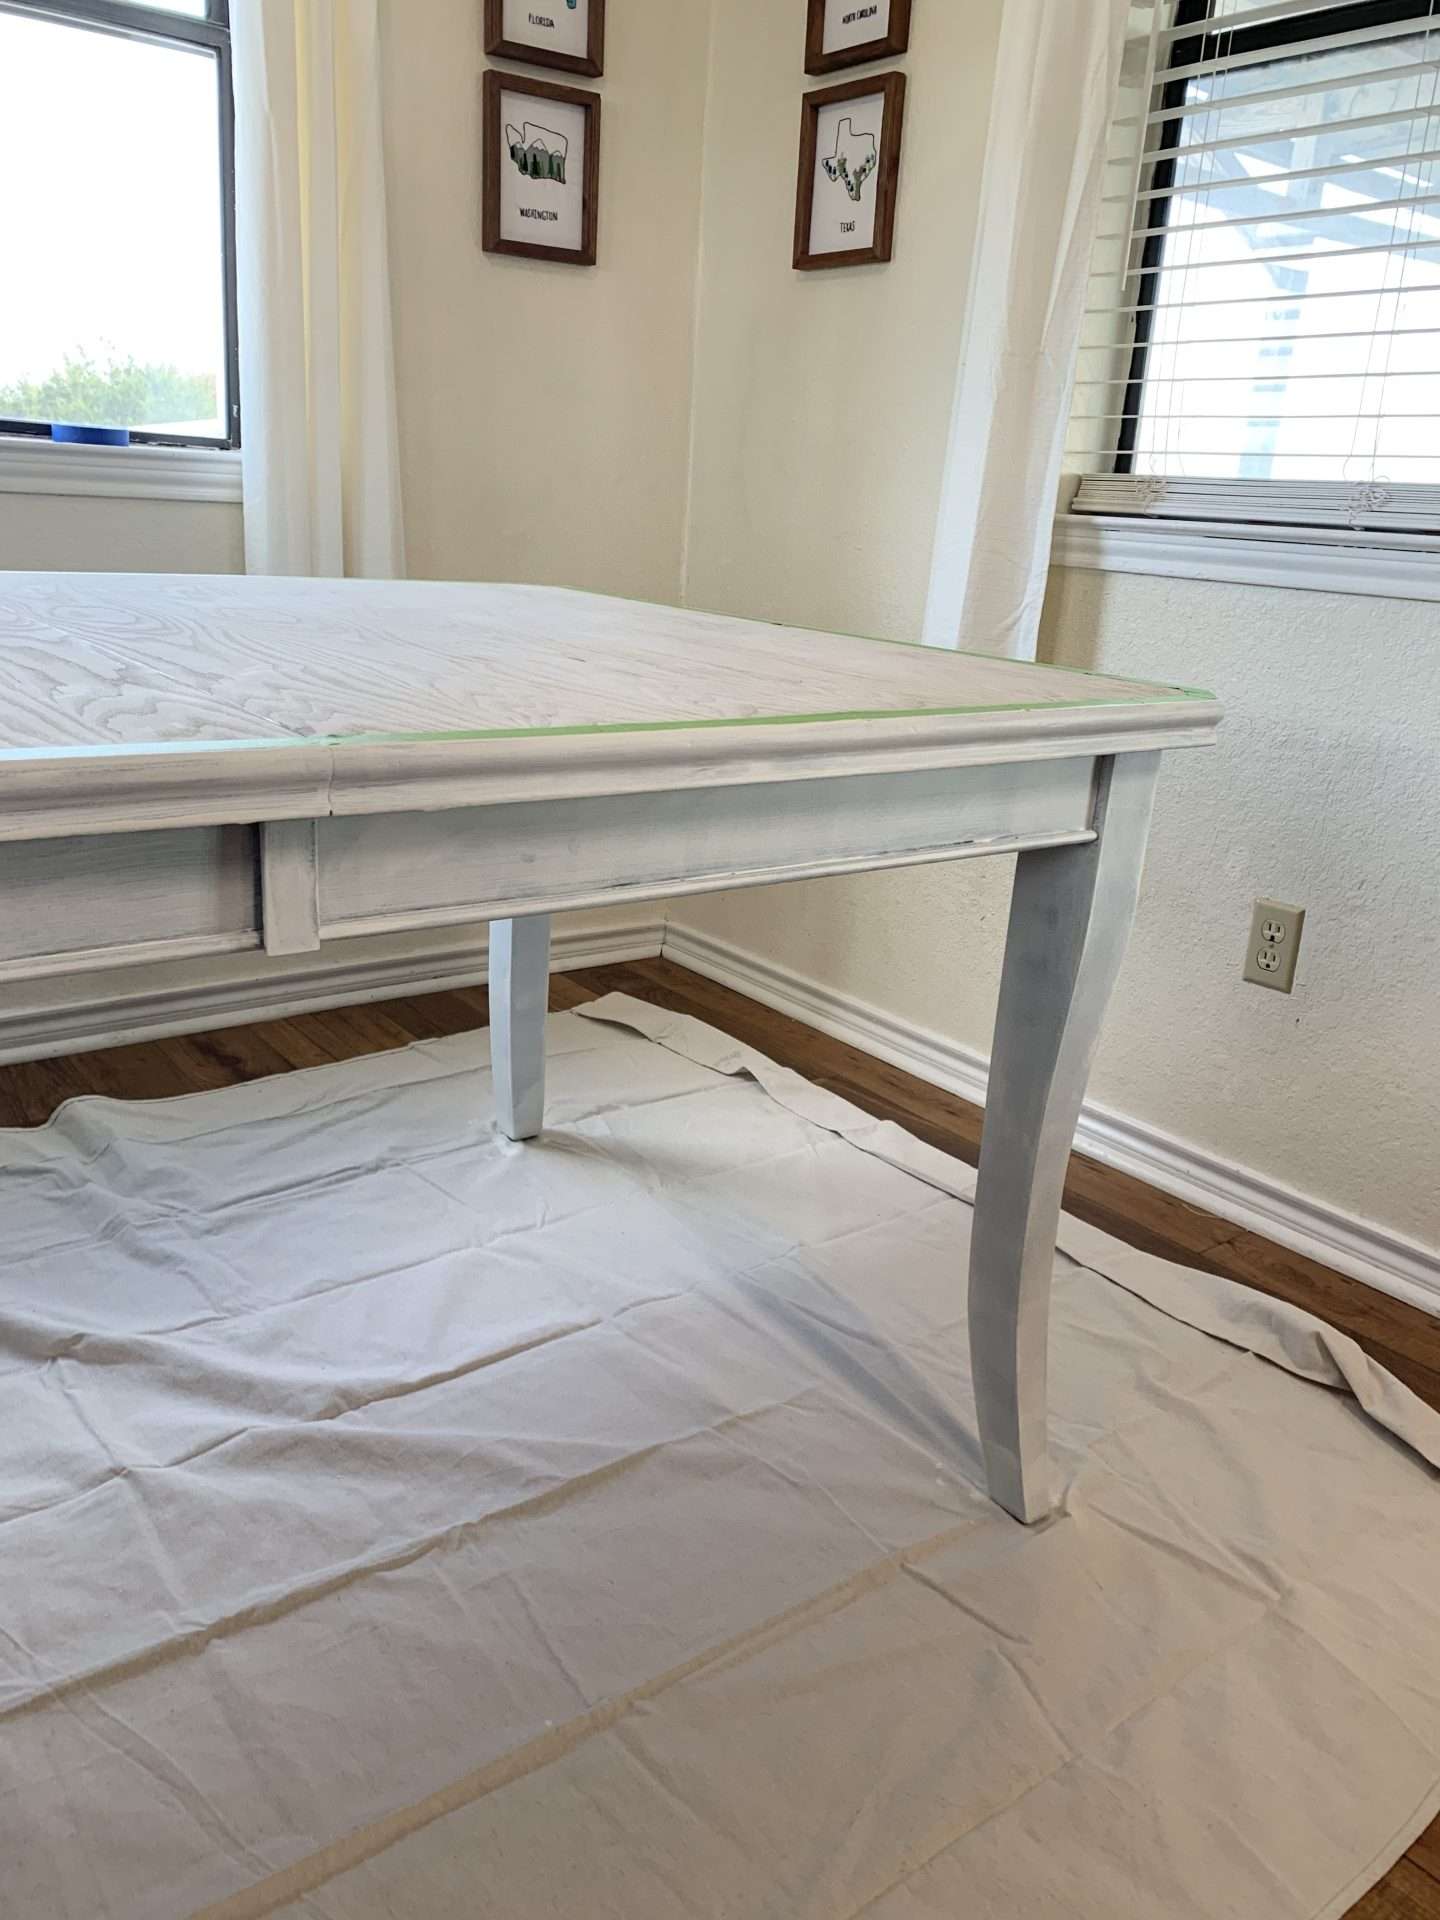
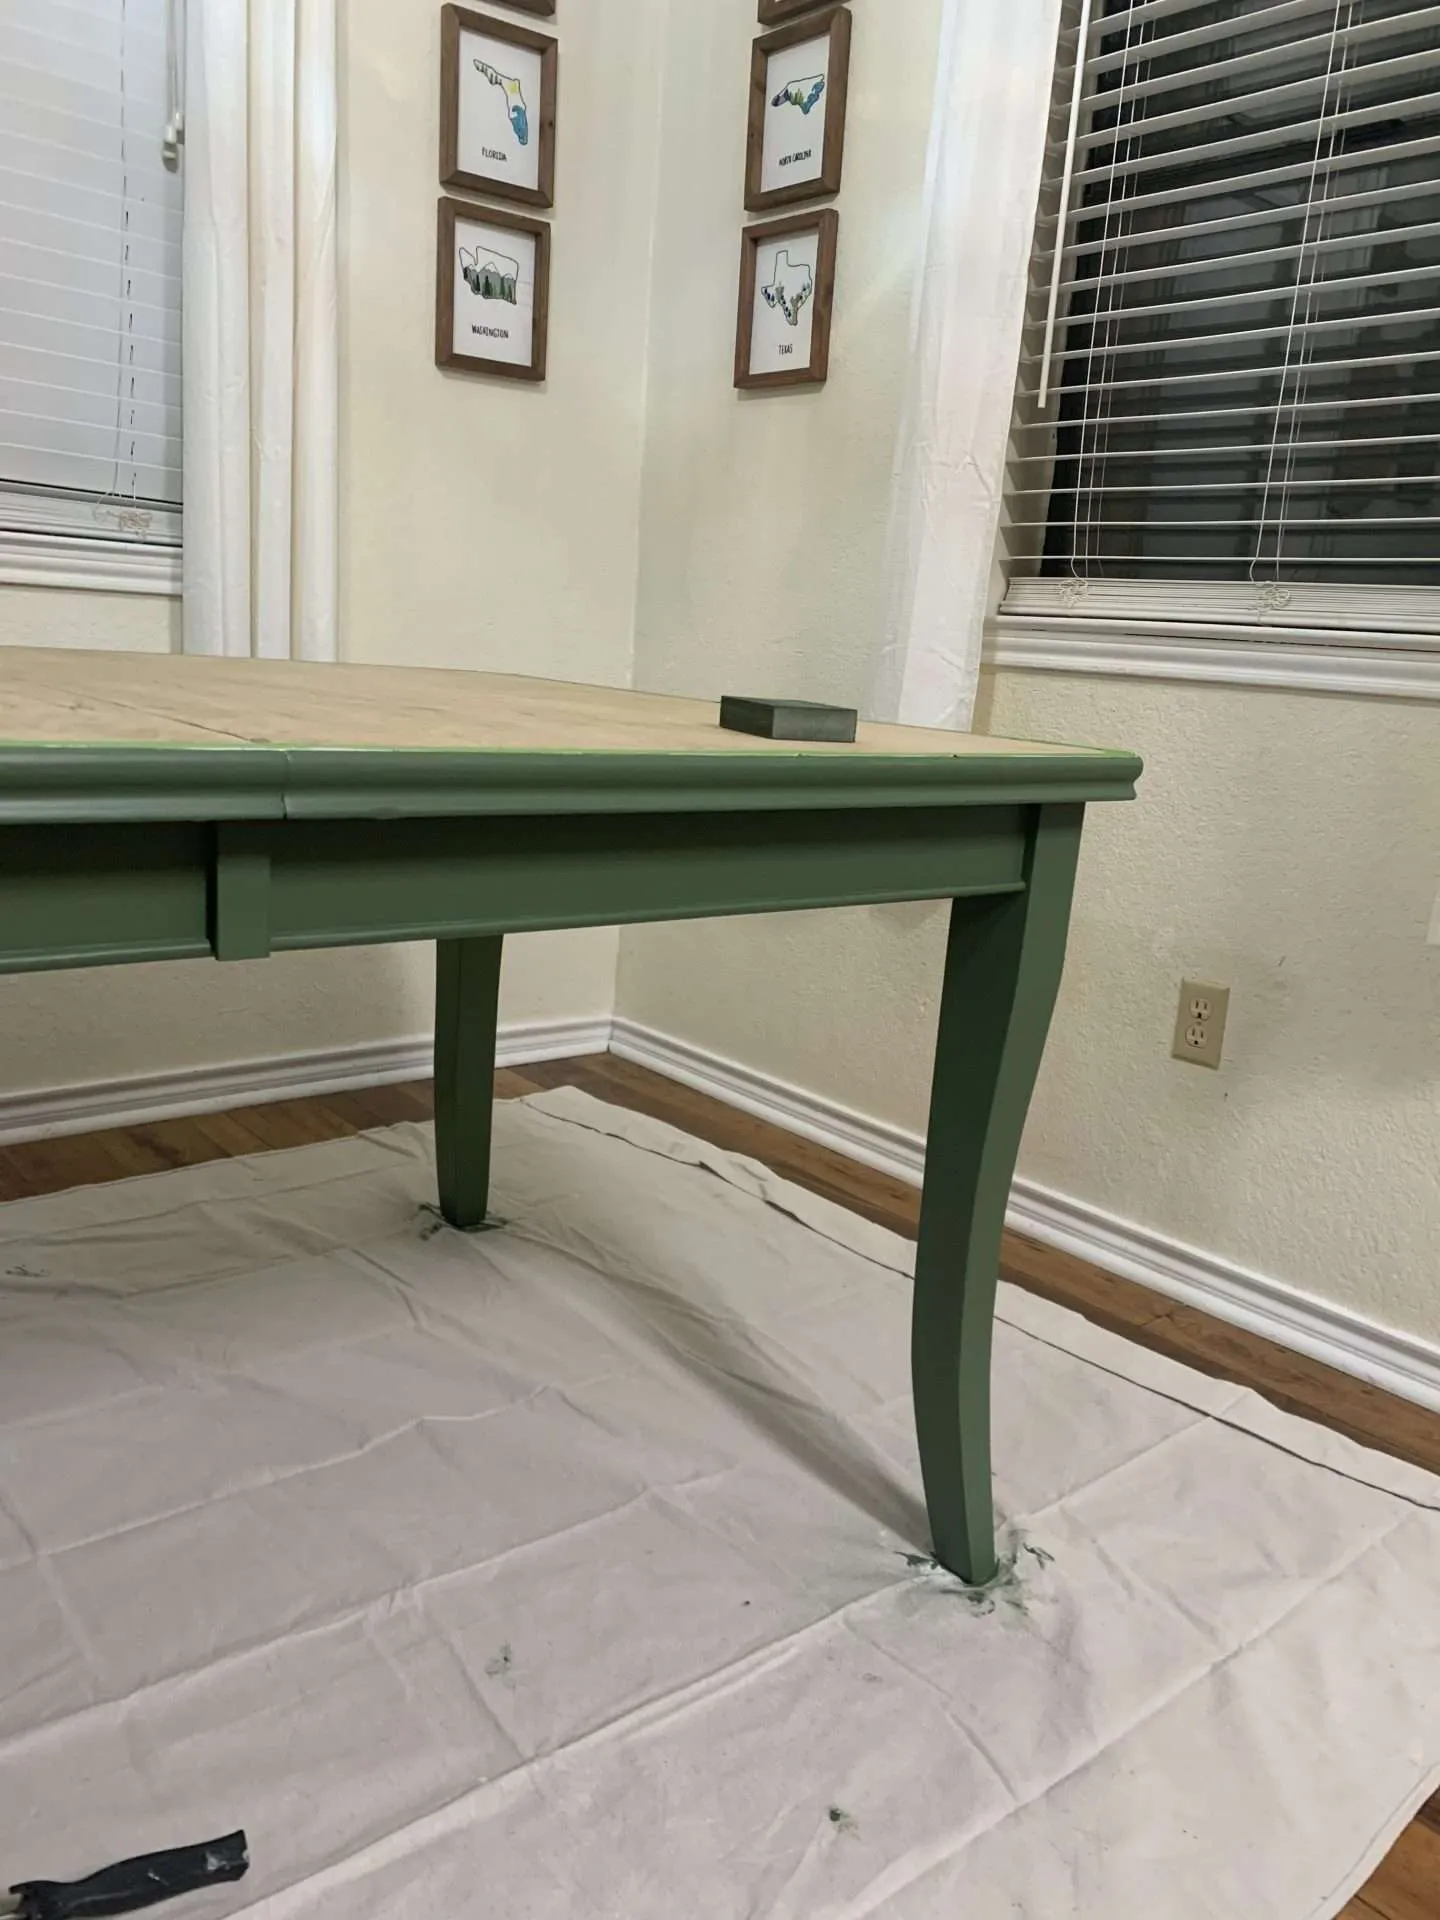
There was no way to salvage the veneer around the edge of the tabletop. It was pretty dinged up and the sander blew through the veneer every time it even touched the side.
So, I decided to paint it to match the legs. I taped around the edge of the flat part of the tabletop.
It was tedious to make sure I got the tape lined up as perfectly as possible, but it wasn’t as time-consuming as I feared. In less than 30 minutes the table was ready to paint.
The trick was using short pieces of tape, instead of trying to cover more area faster with long pieces. Just make sure that each piece overlaps and doesn’t leave any gaps.
FrogTape (2-Pack) Delicate Surface Frog Tape .94 inch x 60 Yard 280220Simpli-Magic 79170 Shop Towels, White, 500 Pack


Step 3: Prime
The next step in painting the dining room table was to prime it.
Using my favorite Zinsser primer, I rolled it everywhere that I could, using a small paint roller. Then I covered the areas that the roller couldn’t reach with a paintbrush. I let it dry for about an hour.
**Pro Tip** I prefer foam rollers over knit polyester because they don’t leave stray fibers in the paint and give a smoother finish.
After the primer was dry, I took a 220-grit sanding sponge and lightly sanded the coat of primer I had just put on. There were a few areas, especially on the edge of the legs where the sanding sponge took the primer completely off, but mostly it helped smooth out any brush strokes or texture in the primer.
I did this process 2 more times.
Rust-Oleum 2004 286258 Zinsser Bulls Eye 1-2-3 Primer, 31.5 oz, GrayMister Rui Paint Roller Kit, 9 Pack, 6 Inch High Density Foam Paint Roller, Paint Tray with Liner, Mini Paint Rollers for Painting Walls, Small Paint Roller Tray Set


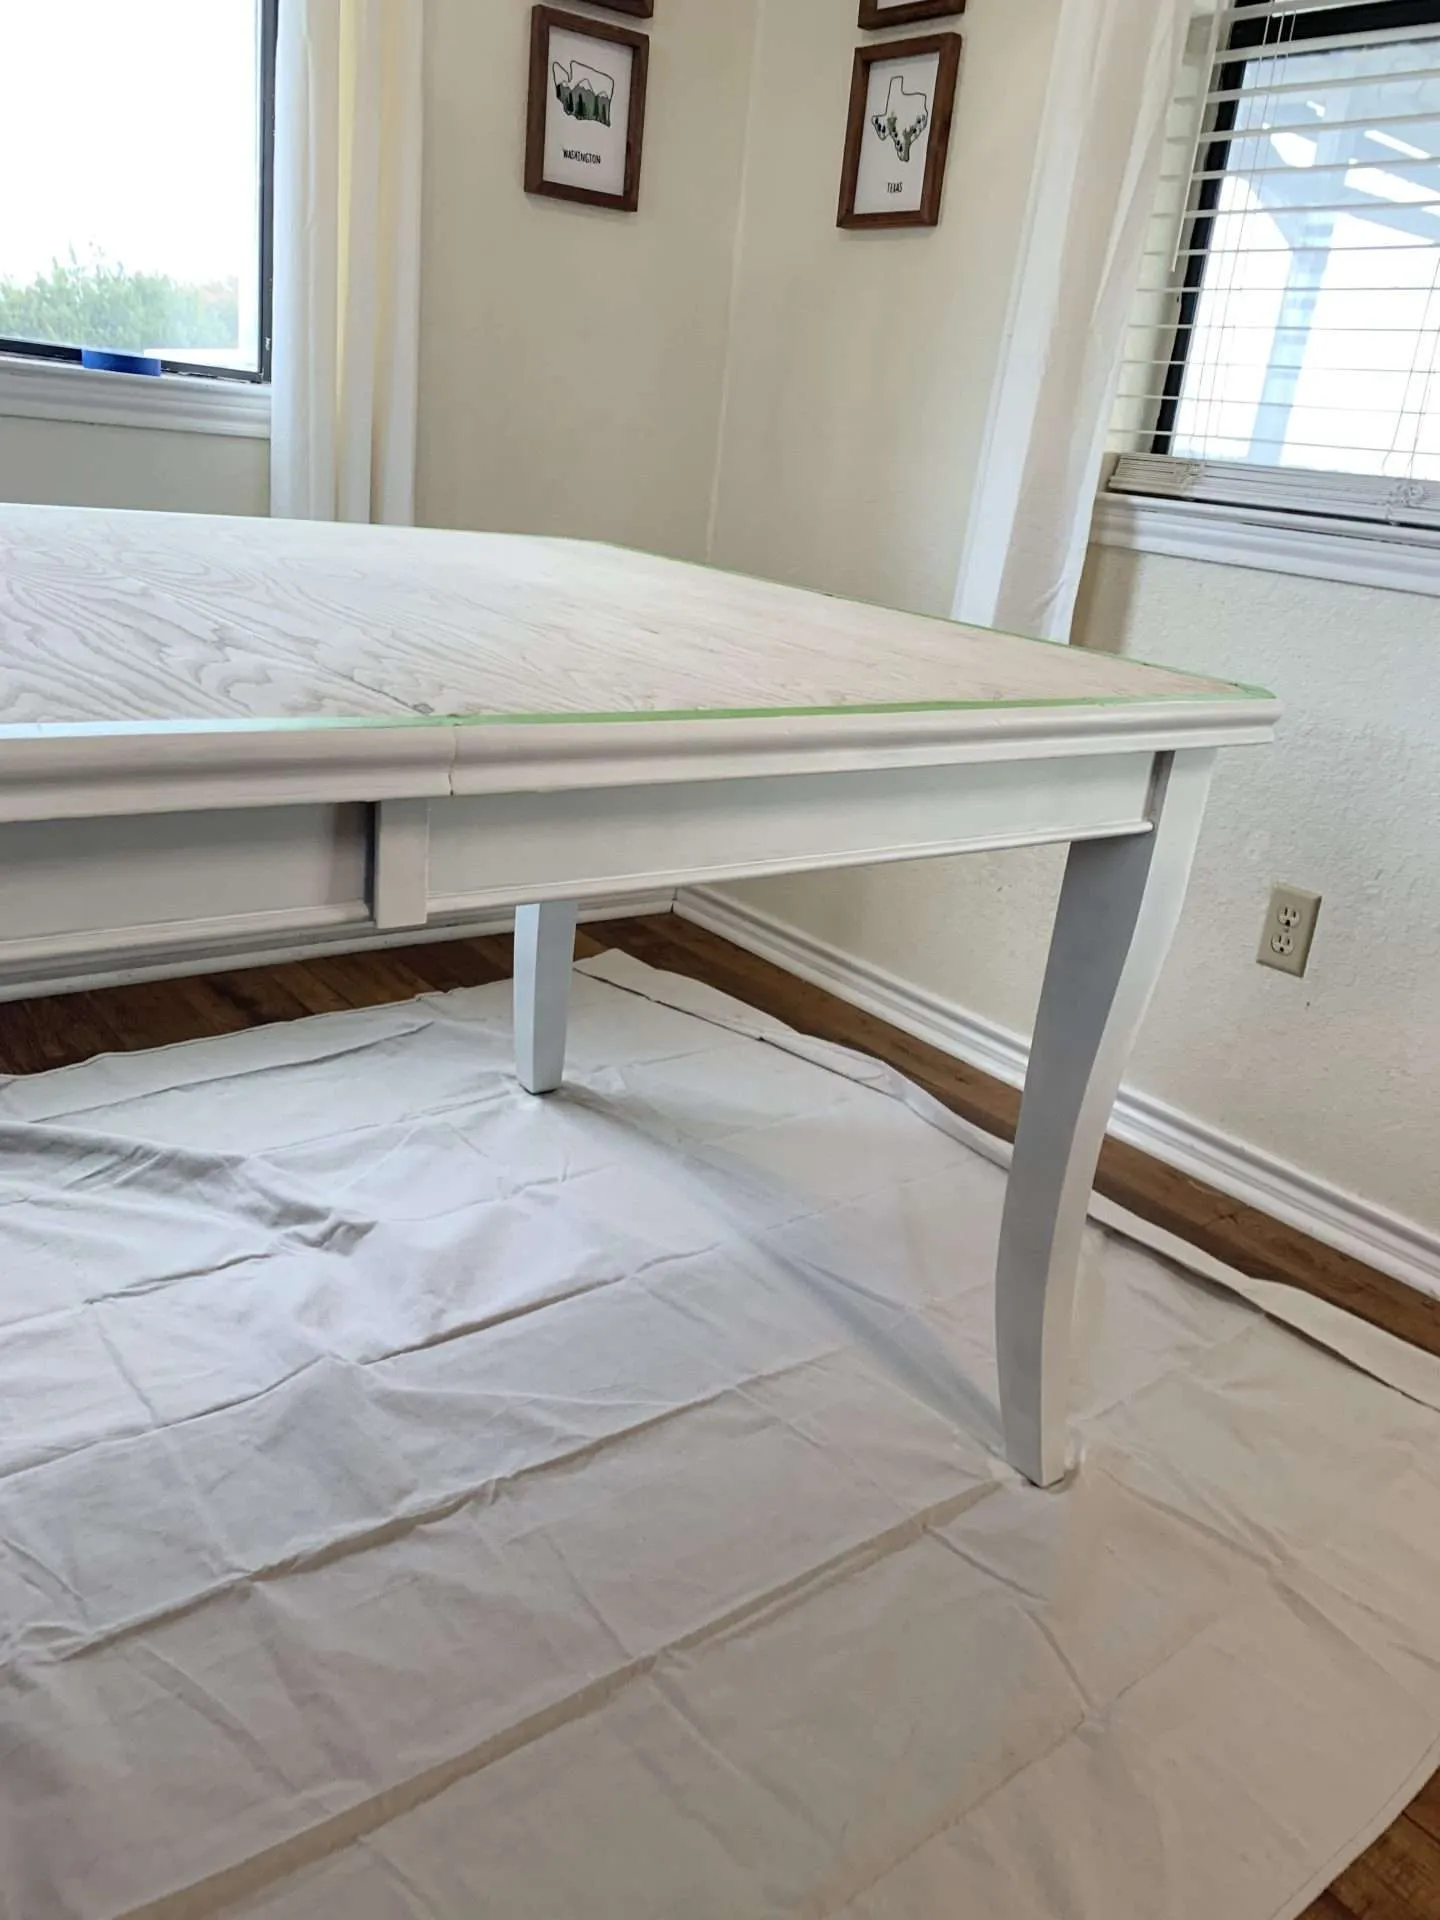
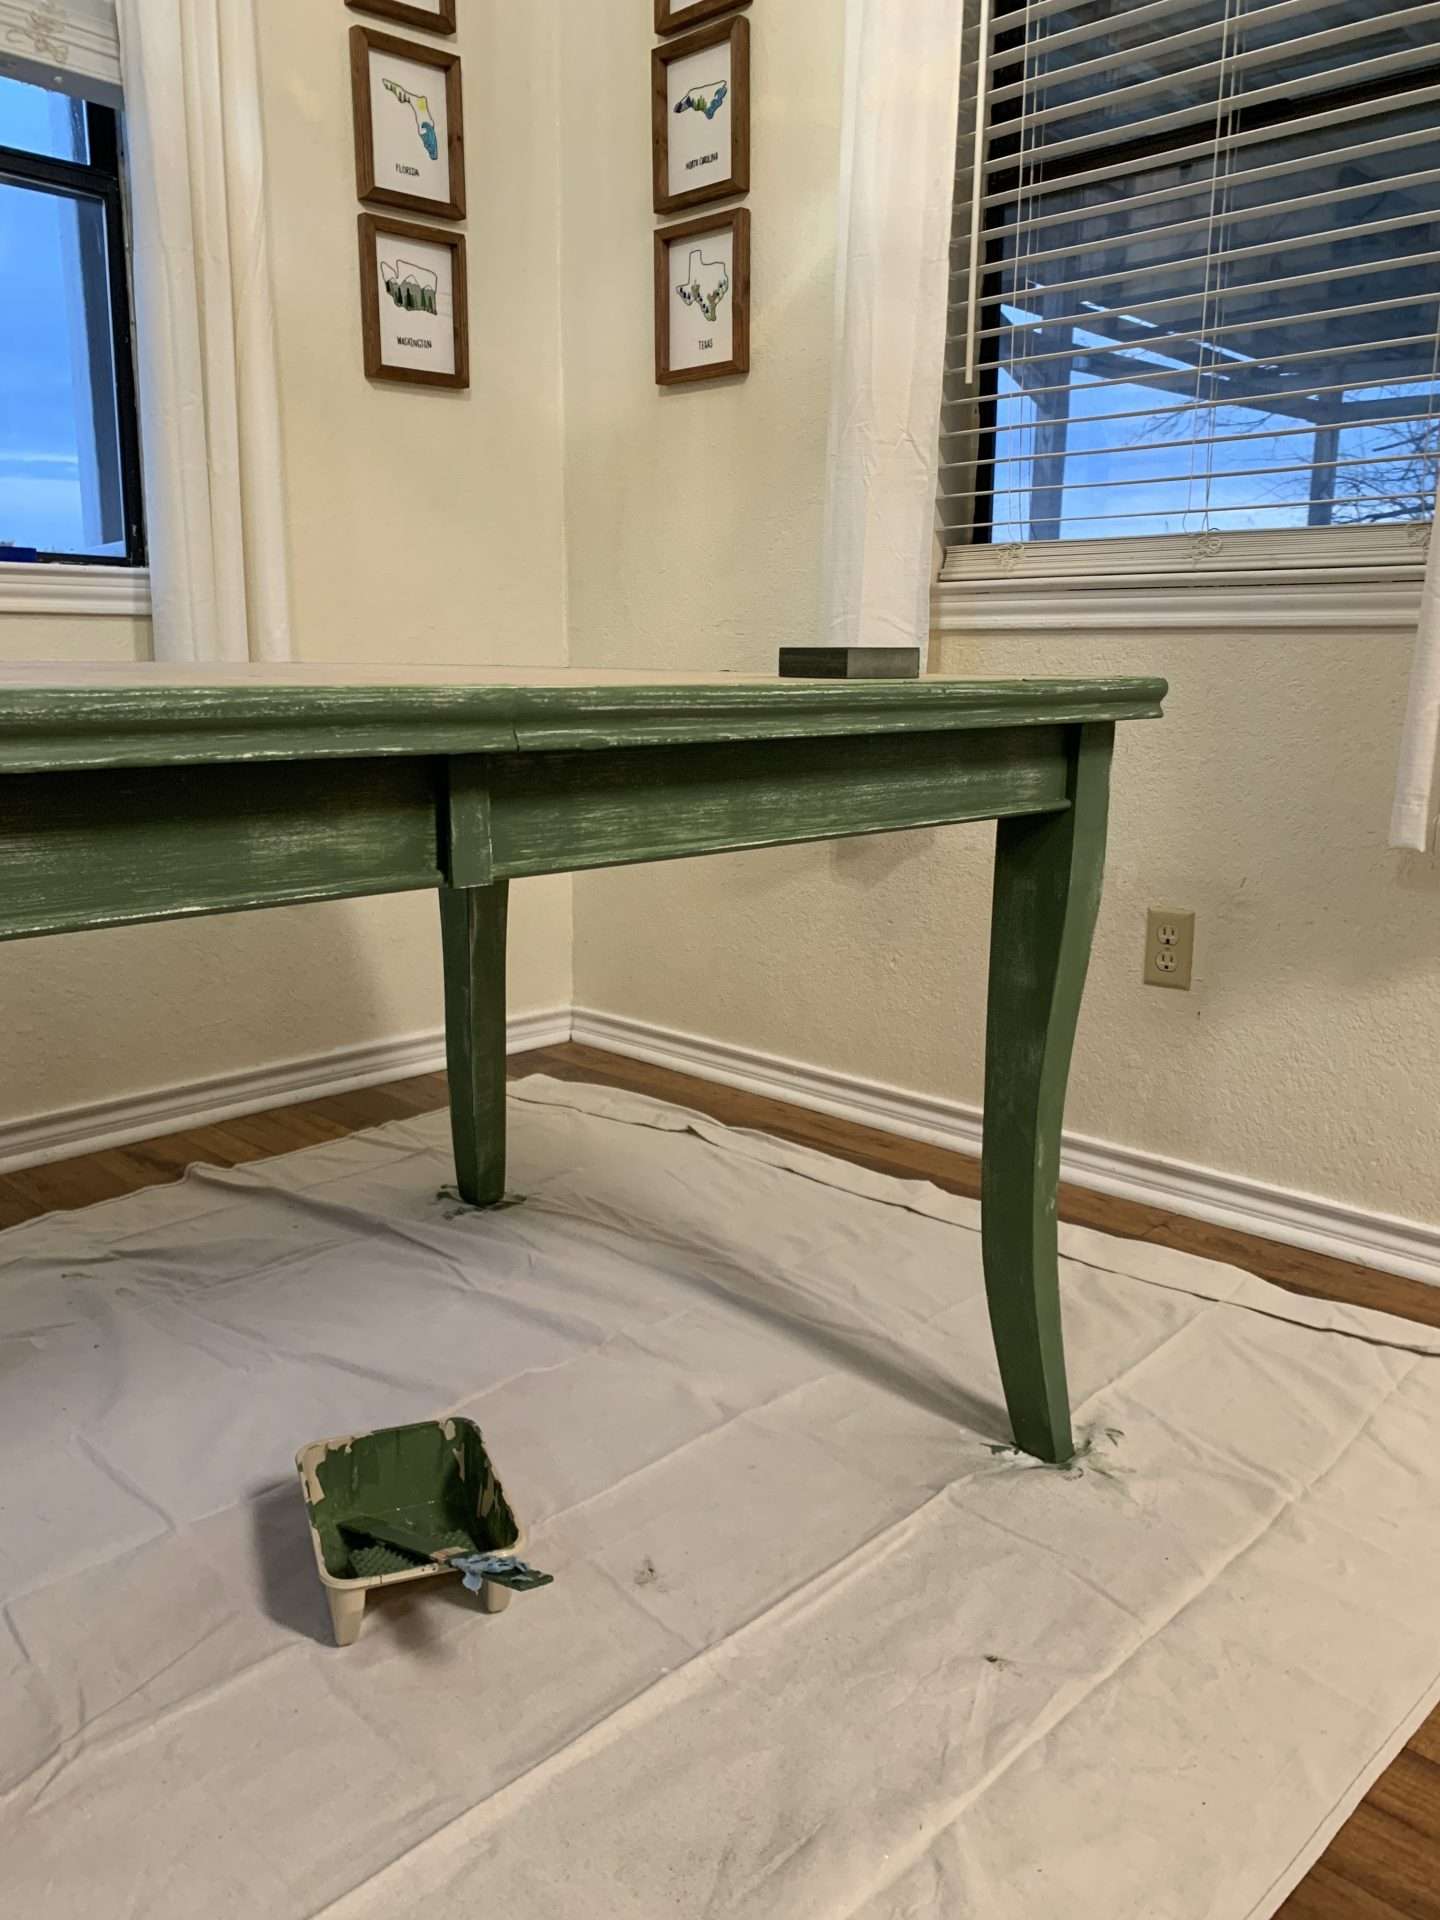
Step 4: Paint the Dining Room Table
After 3 coats of primer, it was finally time to start painting!
I applied the paint the same way that I applied the primer. I cut in using a paintbrush, then used a paint roller to cover the flat areas.
**Pro Tip** Don’t skip the light sanding between the layers of paint! Honestly, it made SUCH a huge difference in the finish. You can’t see brush strokes anywhere!
I did 3 coats of paint, letting each coat dry for 2 hours (as directed on the label).
weideer 6 Pcs Sanding Sponge 220# Fine Sanding Blocks Set for Brush Glasses Sanding Wood Sanding Metal Washable and ReusablePurdy 144080115 Clearcut Series Dale Angular Trim Paint Brush, 1-1/2 inch, Natural


Step 5: Remove Tape and Touch Up
Before the last coat of paint dried, I removed the tape from the top of the table.
Unfortunately, there were several areas where the primer or the paint bled through and had to be touched up.
We scraped the paint off of these little areas and touched them up with a tiny craft paintbrush.
Paint Brushes Set for Acrylic Painting, 20 Pcs Oil Watercolor Acrylic Paint Brush, Artist Paintbrushes for Body Face Rock Canvas, Kids Adult Drawing Arts Crafts Supplies, BlueRazor Blade Scrape with 15pcs Extra Blades, Scraper Tool, Razor Blade Retractable, Paint Stripping Tool, Cleaning Tool for Removing Labels, Stickers, Decals, Paint from Glass and Stovetop-WEGAZ


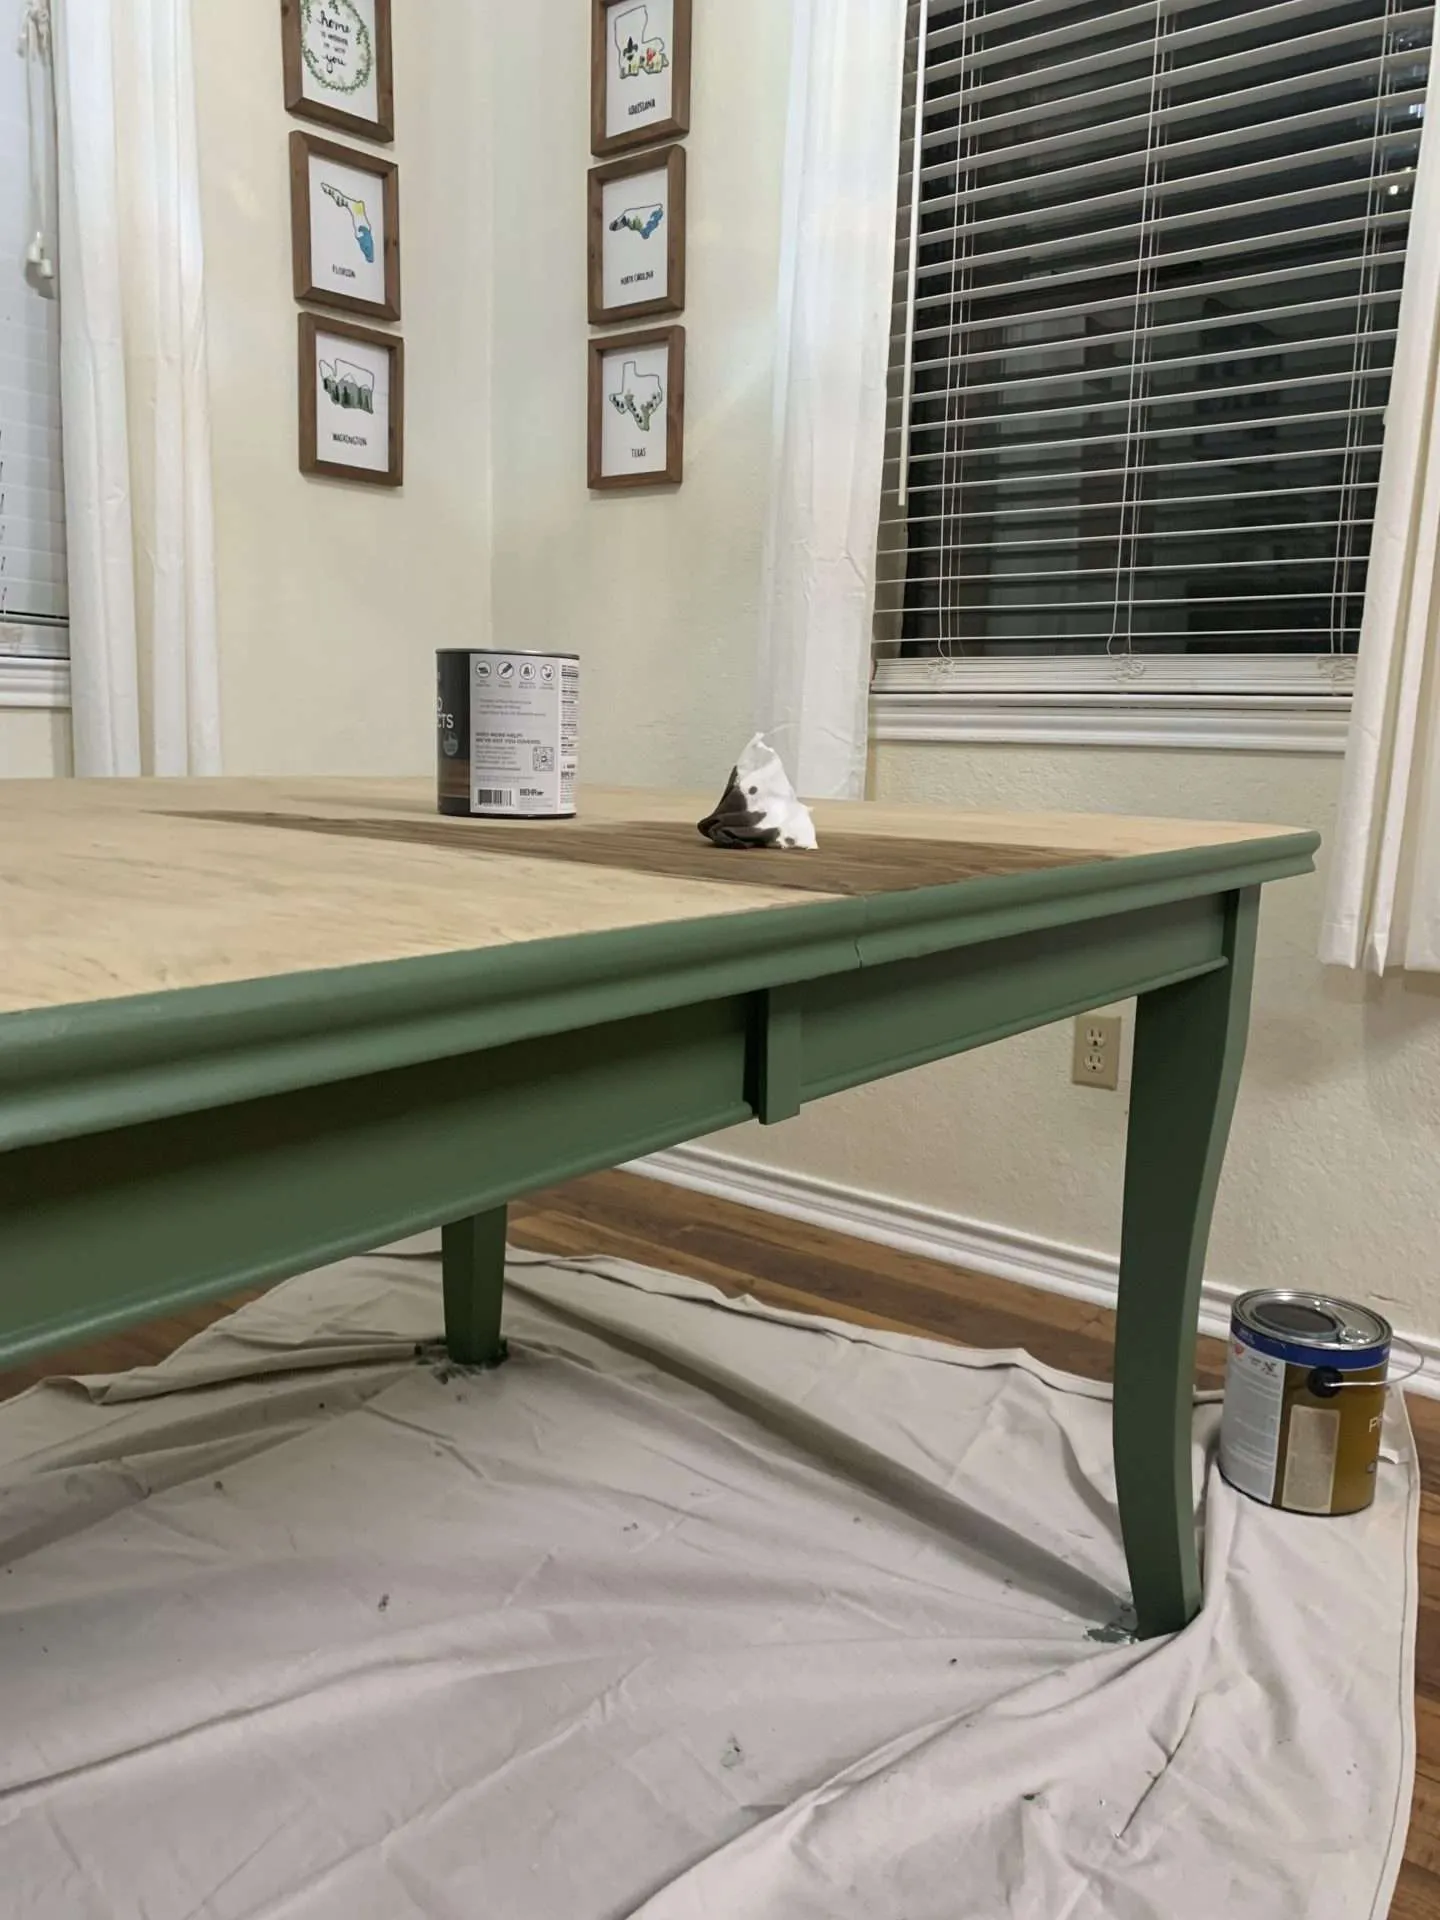
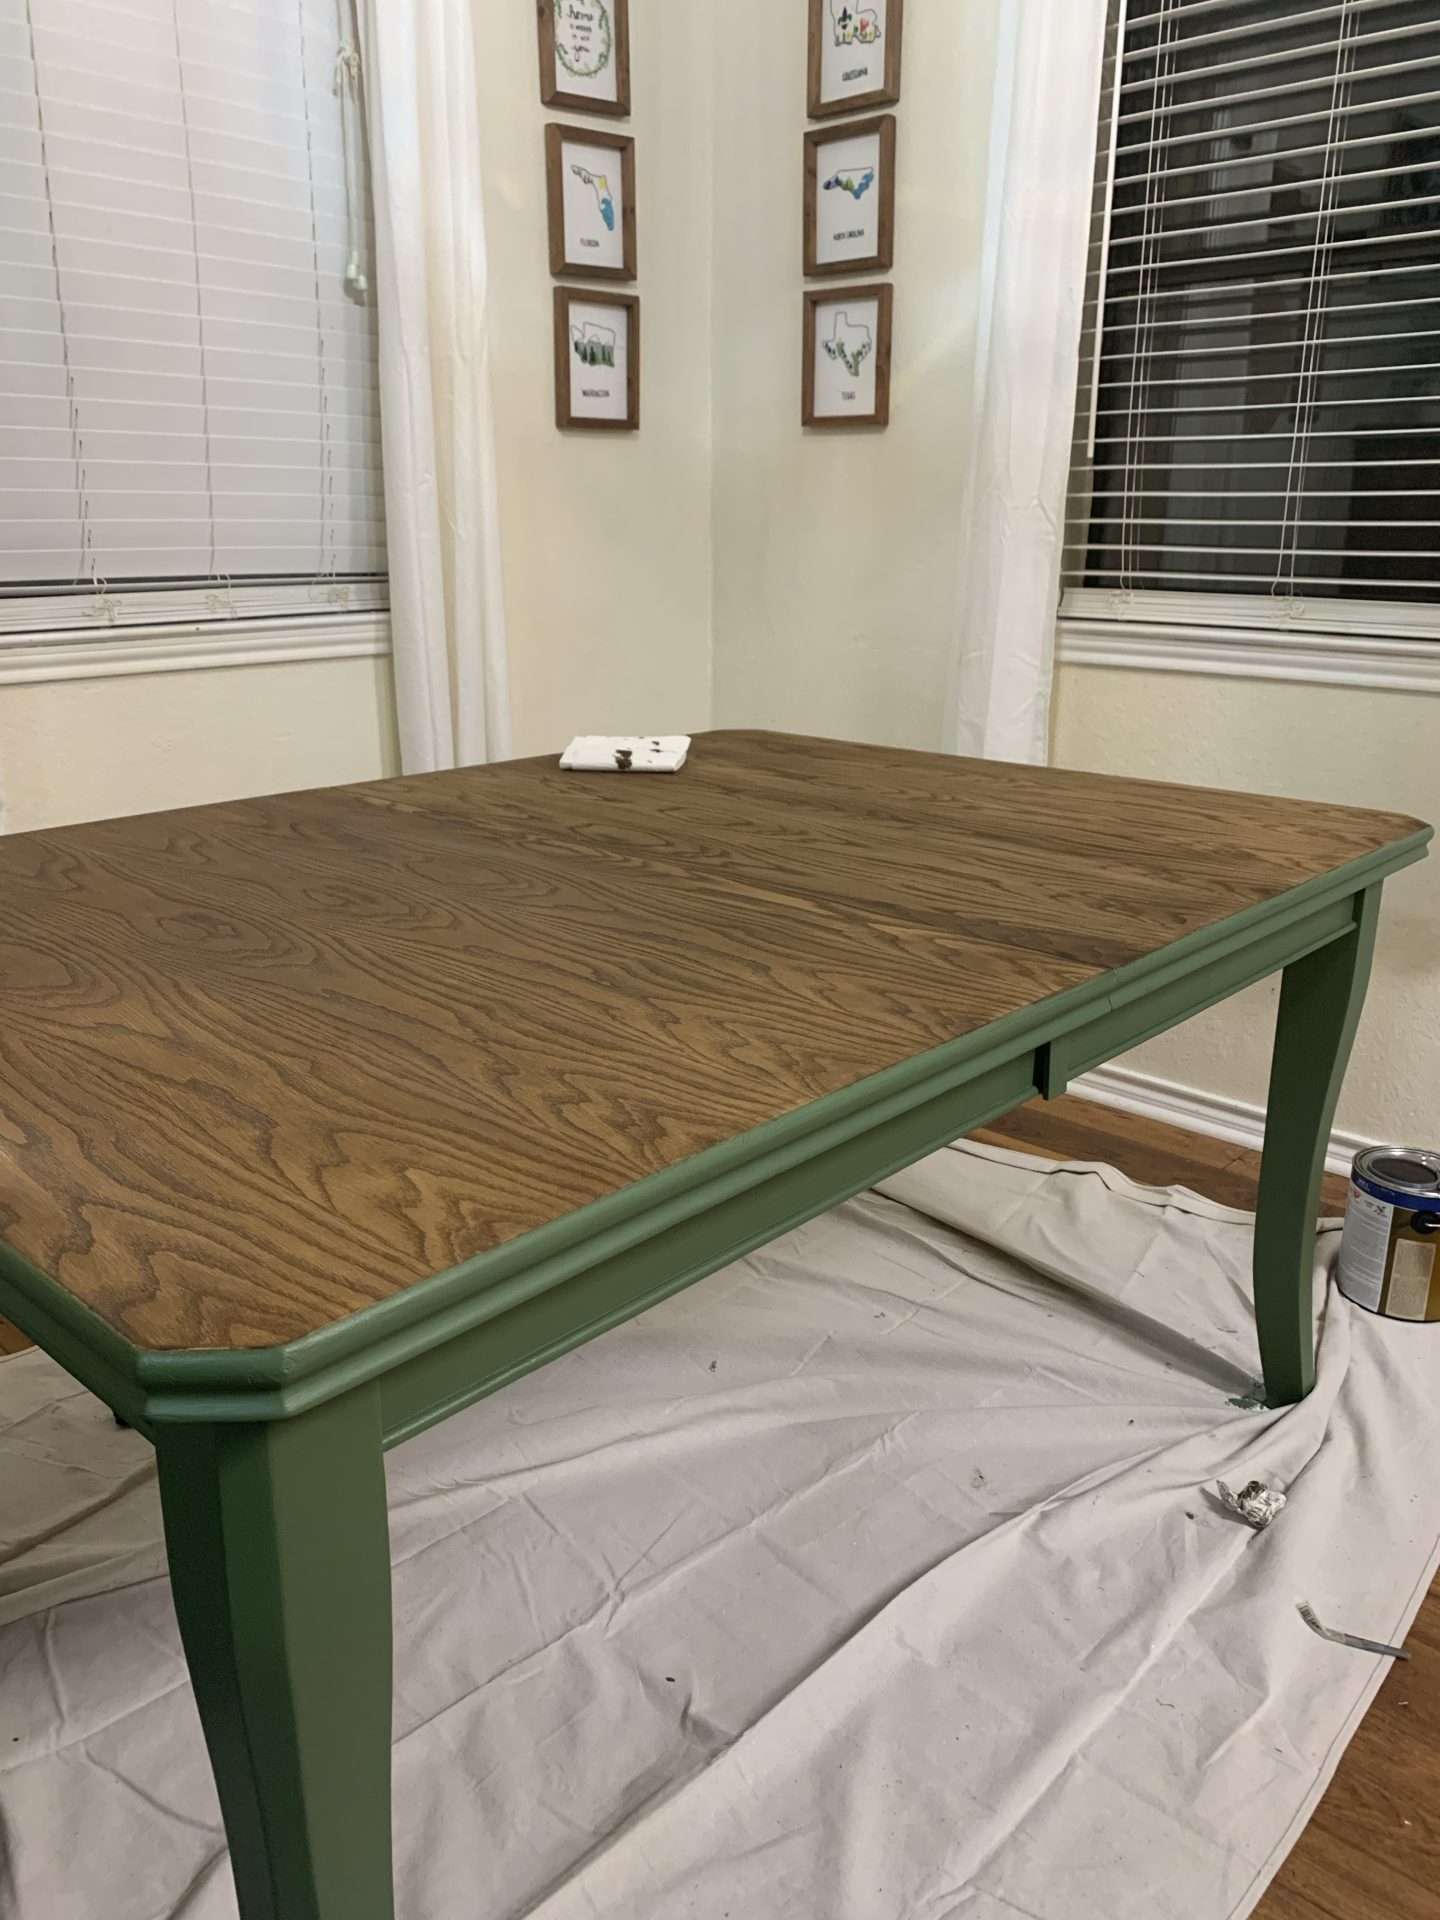
Step 6: Stain
So far, all of the painting had been done in ONE day and I was excited to finish our dining room table.
We hastily applied the stain to the top of the table using a flat spreader, but it left a lot of streaks!
The next morning we ended up sanding the top again (not completely bare, but enough to get rid of the streaks). And then we applied the stain again using rags.
This time, we took our time and it looked so much better.
5IMPRESA [6 Pack] Wood Stain Applicator Pads – Lint-Free Microfiber Applicator Staining Pads – Polishing, Cleaning, & Floor Wax Applicator Pad – 4

![IMPRESA [6 Pack] Wood Stain Applicator Pads - Lint-Free Microfiber Applicator Staining Pads - Polishing, Cleaning, & Floor Wax Applicator Pad - 4](https://m.media-amazon.com/images/I/41u9lr3i4bL._SL500_.jpg)
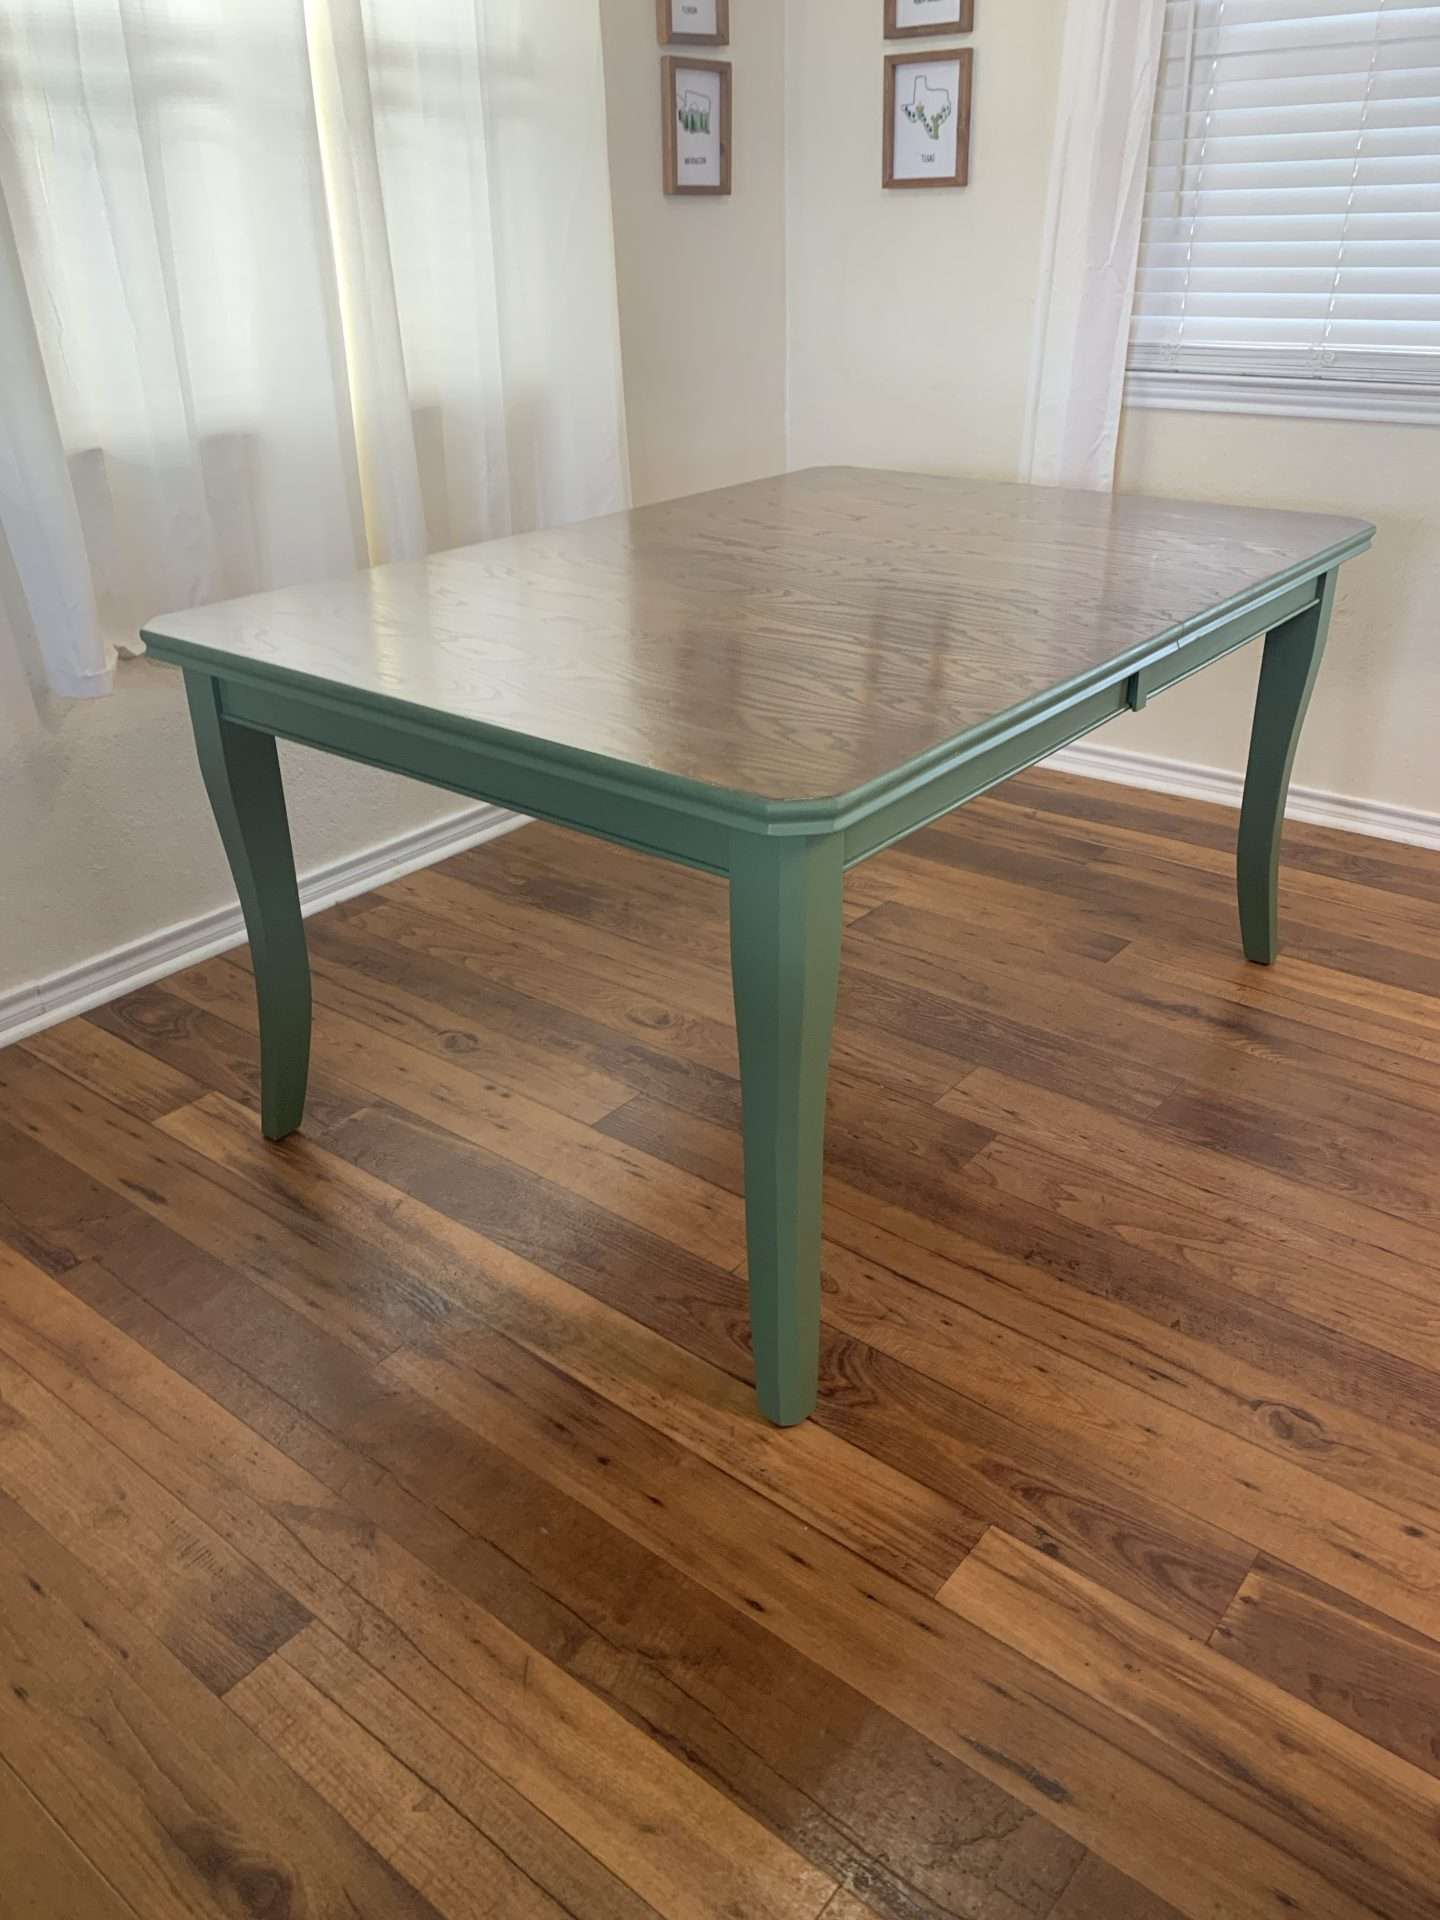
Step 7: Seal the Dining Room Table
After letting the stain dry most of the day, we applied 3 coats of polycrylic.
This is arguably the MOST IMPORTANT step in this process!
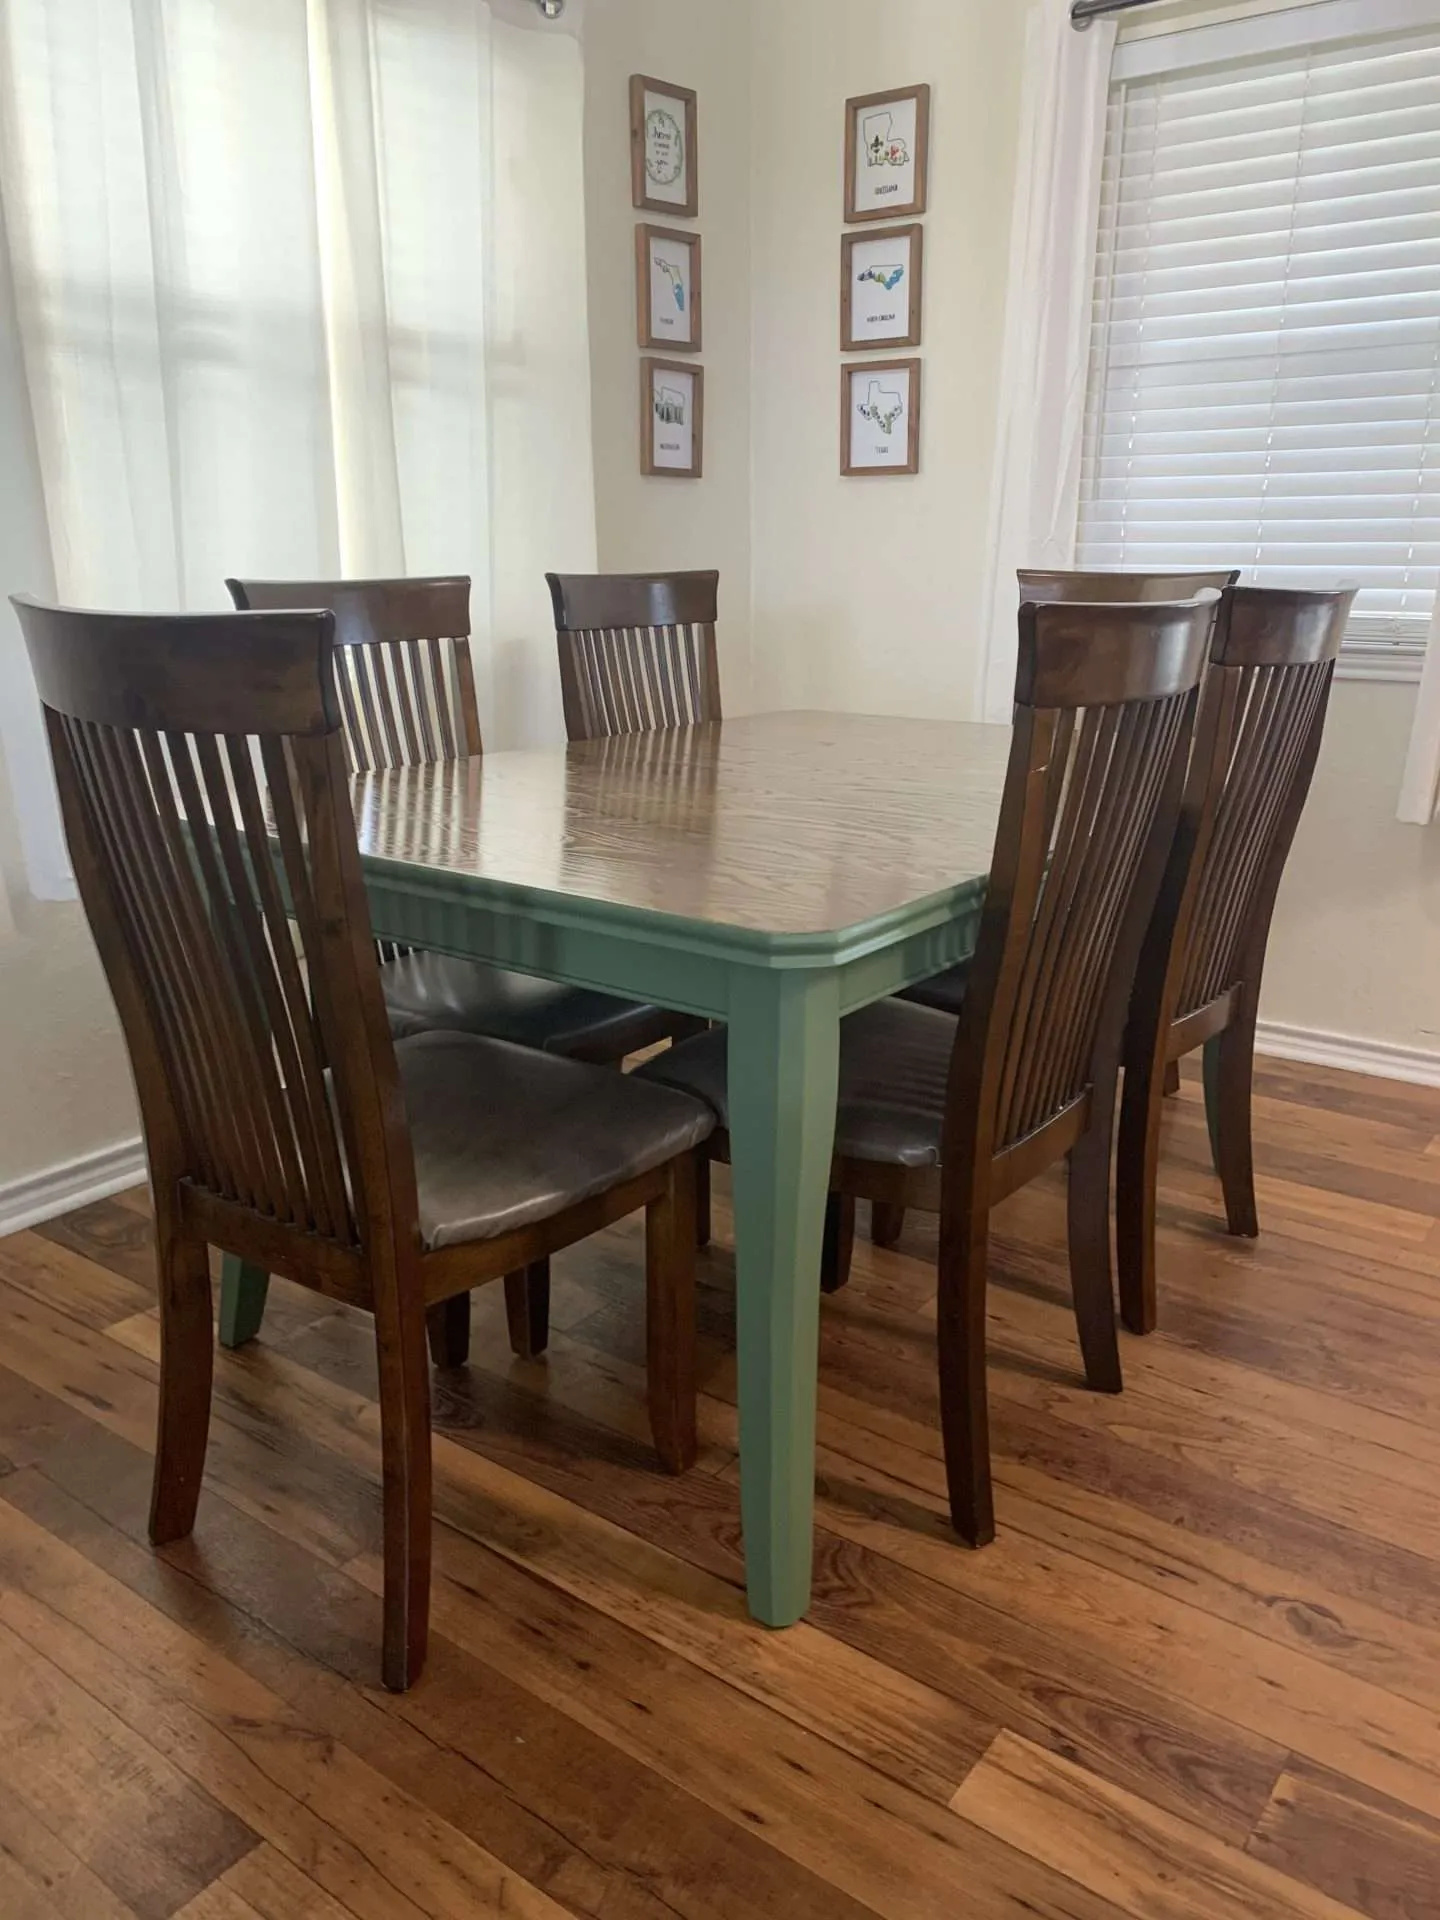
For the tabletop, we used a glossy polycrylic to make it easy to wipe and clean. However, for the legs and sides of the table, we used polycrylic with a satin finish to make the paint more durable, but not necessarily shiny.
We lightly sanded between each coat of poly, using a 320-grit sanding sponge.
Minwax 63333444 Polycrylic Protective Finish Water Based,1 Quart, Satin 2 Pack2 Pack of 1 gal Minwax 15555 Clear Polycrylic Water-Based Protective Finish Gloss


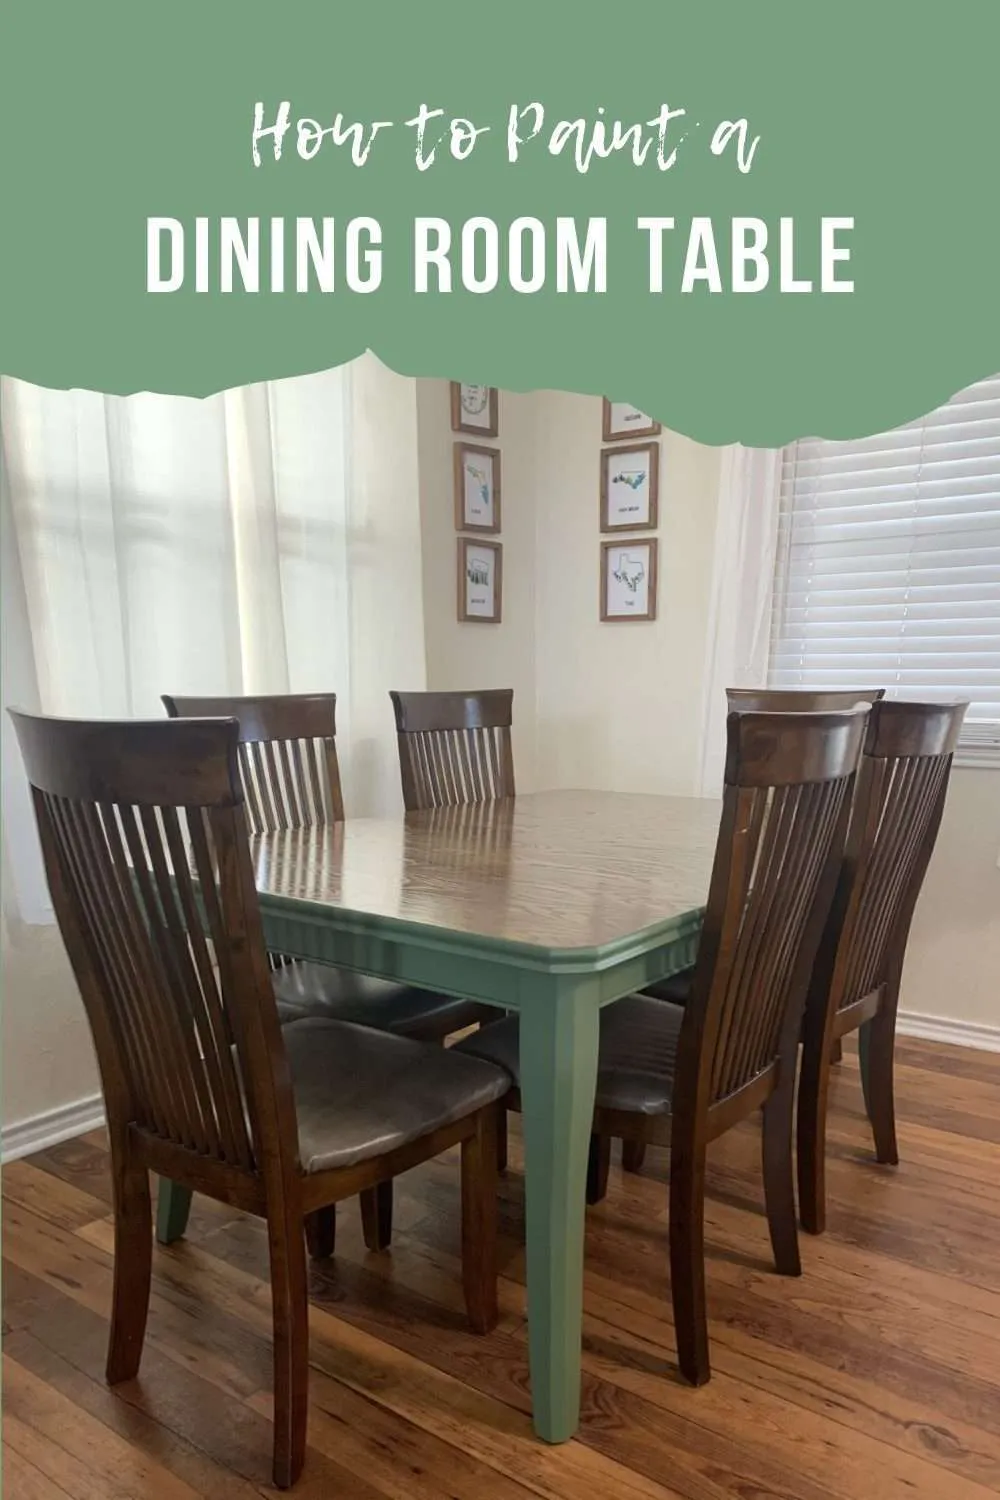
Our dining room table was FINALLY done! And it looks brand new!
I am so happy with how it turned out! The finish is flawless and the color is perfect. It is exactly what I envisioned when I started this project.
However, it’s easy to see why furniture flippers avoid dining room sets. We spent at least 16 hours working on just the table alone. And I honestly don’t know if I’ll ever get around to painting the chairs.
Even if we buy a paint sprayer, the thought of sanding all of the tiny slats on the chairs wears me out.
So, at least for now, we’re calling the mismatching chairs and table an ‘eclectic look’ and leaving it alone.
Painting our dining room table was certainly not easy, but putting all the extra time and effort into it will make it last for years to come!