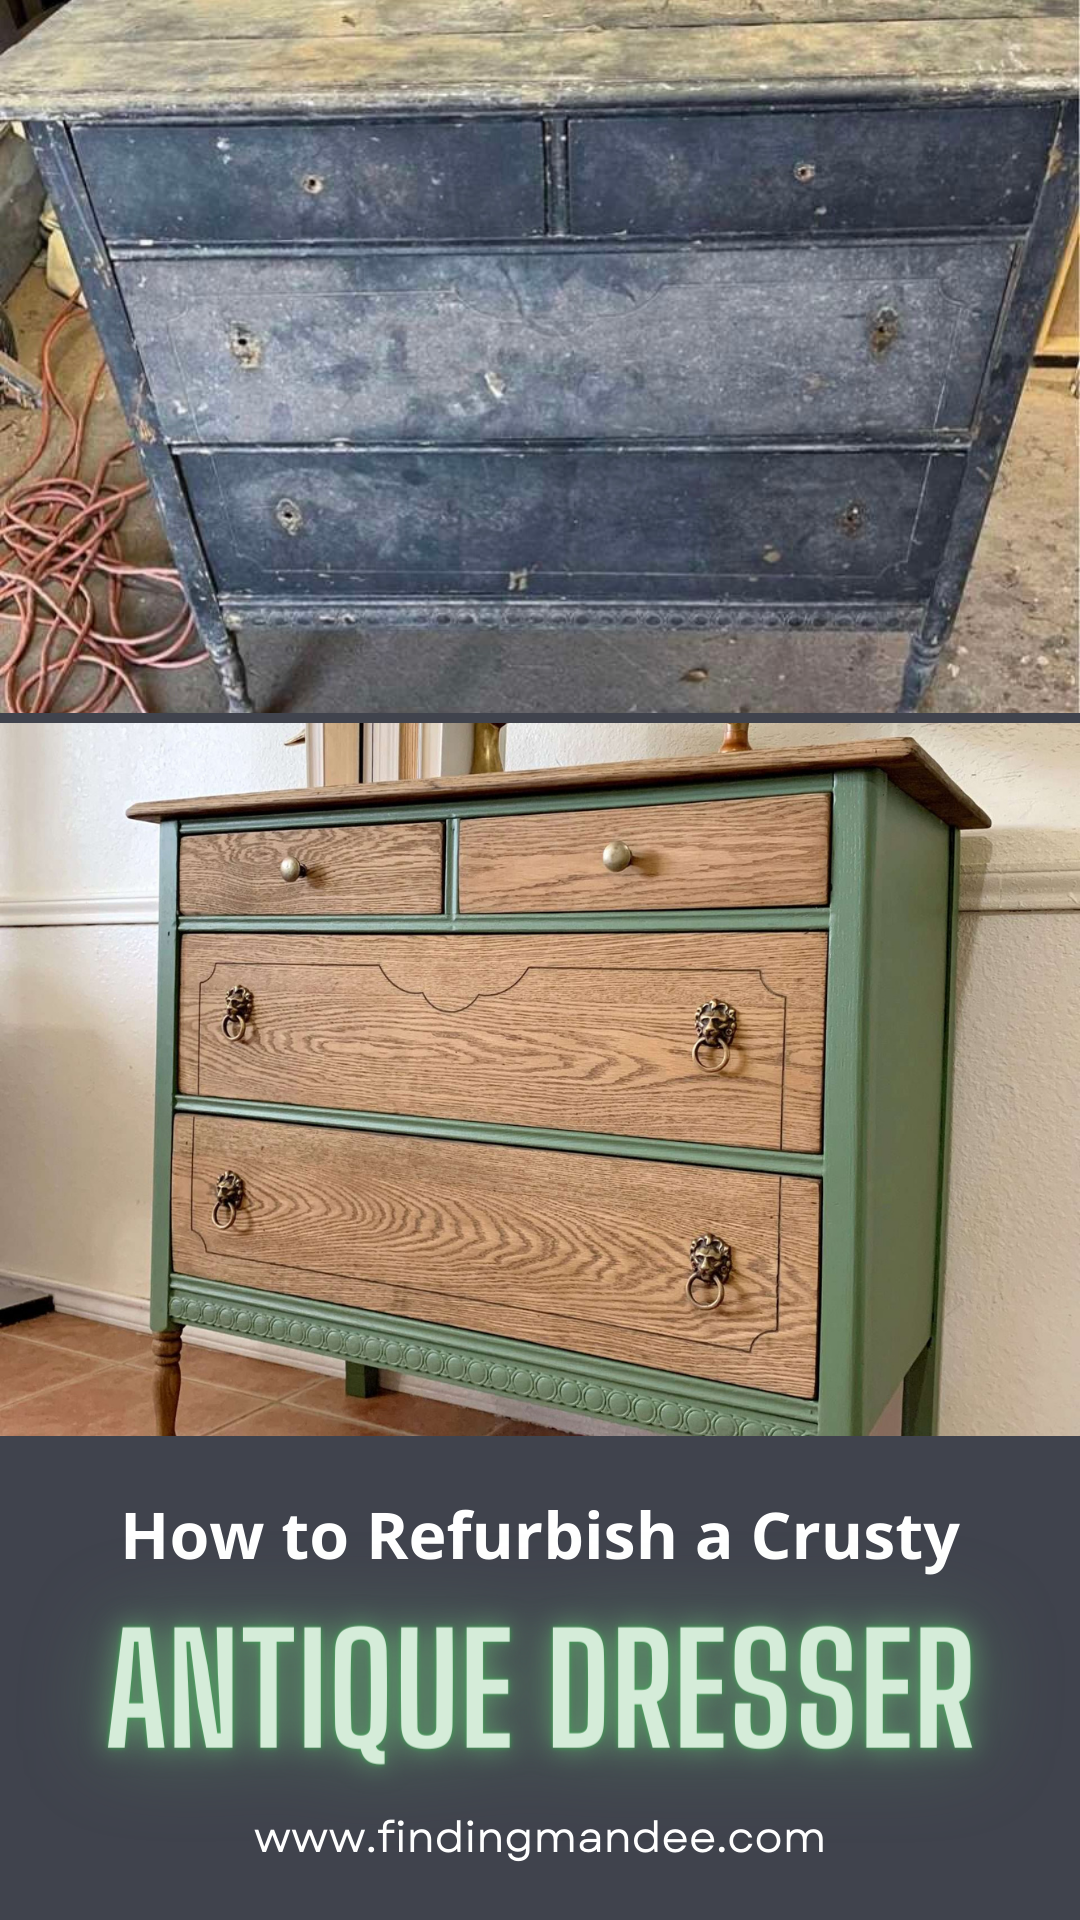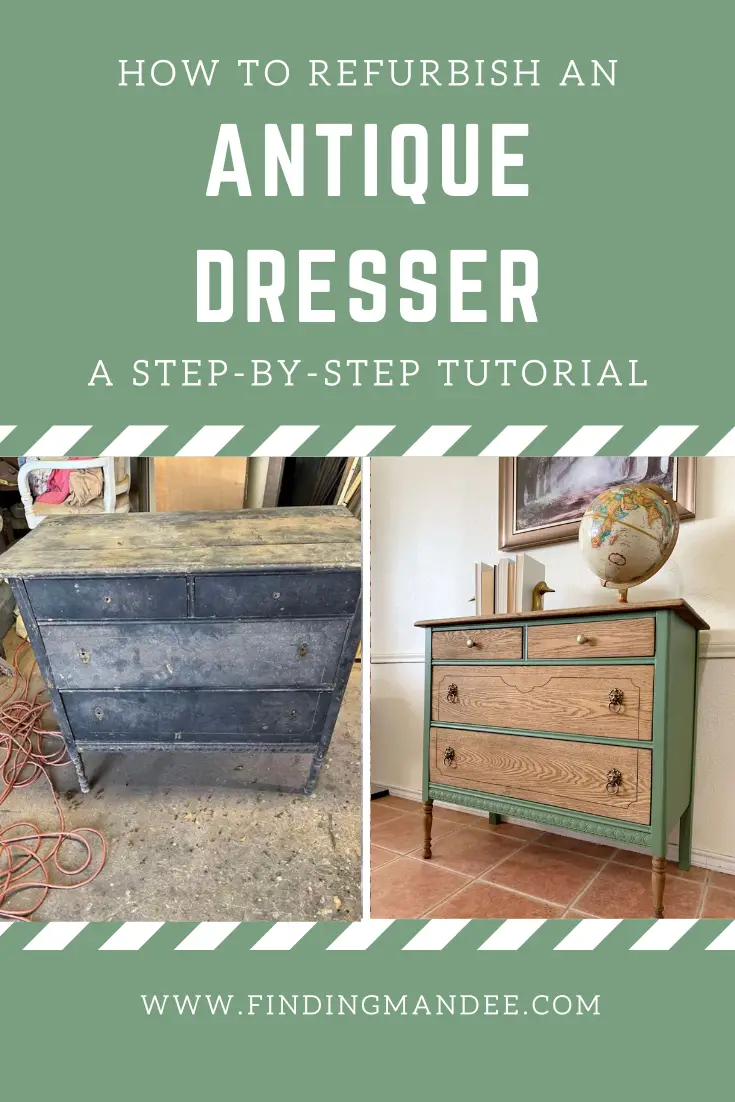
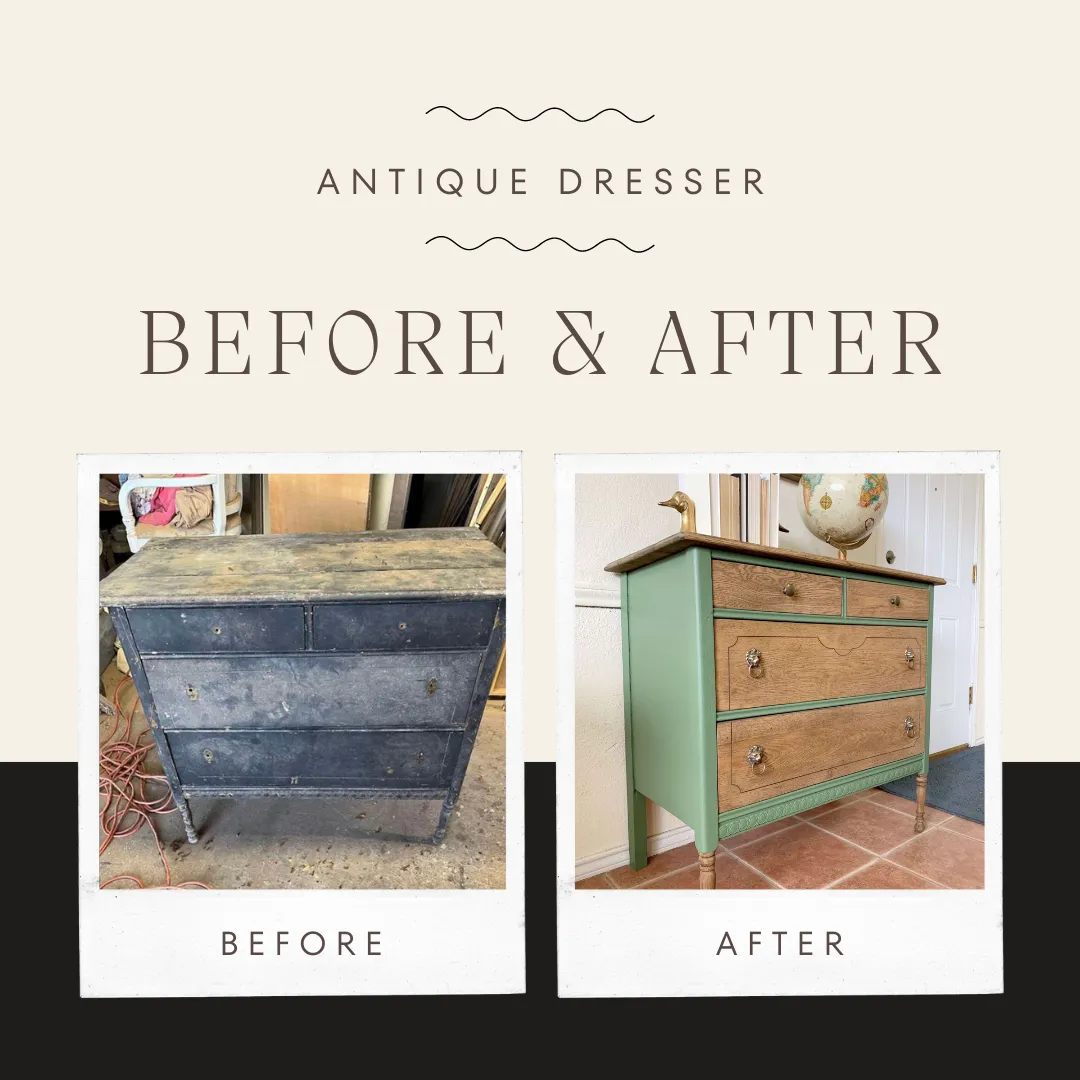
When I came across this crusty antique dresser on Facebook Marketplace, I just knew I had to have it.
The picture on the listing looked like a piece of structurally sound furniture, but one that desperately needed new paint and hardware. However, that assessment couldn’t have been further from the truth.
Not only was this dresser full of wood rot and termite damage, but the man selling it dared to tell me that he had already begun to ‘fix’ it. When it took more time and effort to remove his ‘fixes’ and gobs of unnecessary wood glue than it did to refinish everything that he (thankfully) didn’t touch.
I’m almost embarrassed to admit that I paid him $40 for it. When instead, I should have taken a good look at it and told him that I changed my mind. But against my better judgment, I brought it home and got to work giving it a makeover.
Here’s how we refurbished this antique dresser and made it the stunning entryway table it is today!
(The beautiful after pictures.)
The Tools
- circular saw
- bar clamps
- drill
- brad nailer
- orbital sander
- paint roller
- paint tray
- paint brush
Makita 5007Mg Magnesium 7-1/4-Inch Circular SawWORKPRO Bar Clamps for Woodworking, 6-Pack One-Handed Clamp/Spreader, 6-Inch (4) and 12-Inch (2) Wood Clamps Set, Light-Duty Quick-Change F Clamp with 150 lbs Load Limit Blue
DEWALT 20V MAX* Cordless Brad Nailer Kit, 18GA (DCN680D1)
Pro Grade Paint Roller Cover Set,Wall Painting Roller Naps for Professional or Home Owners with All Paints and Stains for House or Commercial Use. (10 Piece Set)
DEWALT Random Orbit Sander, Variable Speed, 5-Inch (DWE6423)


The Supplies
- a crusty antique dresser
- (4) 1×4 boards
- wood glue
- (1) 2×10 board (scrap piece)
- (2) 3.5″ lag screws
- brad nails
- sheet of 1/8″ plywood
- sanding pads
- knobs and drawer pulls
- primer: Zinsser Bullseye 1-2-3
- paint: Glidden Premium Paint (color: Dark Sage)
- stain: Behr Rustic Wood Effects Stain (color: Rustic Brown)
4 Pcs Vintage Lion Head Knobs Pulls Handles Antique Drawer Pull Ring Single Hole Decorative Hardware with Screws for Furniture Cabinet Cupboard Dresser Drawers, Red Bronze 90x51mm/3.54×2 inchRJDJ 6 Pack Kitchen Cabinet Knobs Dresser Knobs Drawer Knobs Handles, Round Drawer Pulls with Screws, Antique Brass, 1.18-inch Diameter Cabinet Door Bathroom knobs Hardware
Zinsser 02004 1 Quart Bulls Eye® 1-2-3 Primer Sealer Stain Killer
Franklin International 5064 Titebond Original Wood Glue, 16-Ounce, 2 Pack
Diablo SandNet 220 Grit 5” Sanding Disc – DND050220H10I


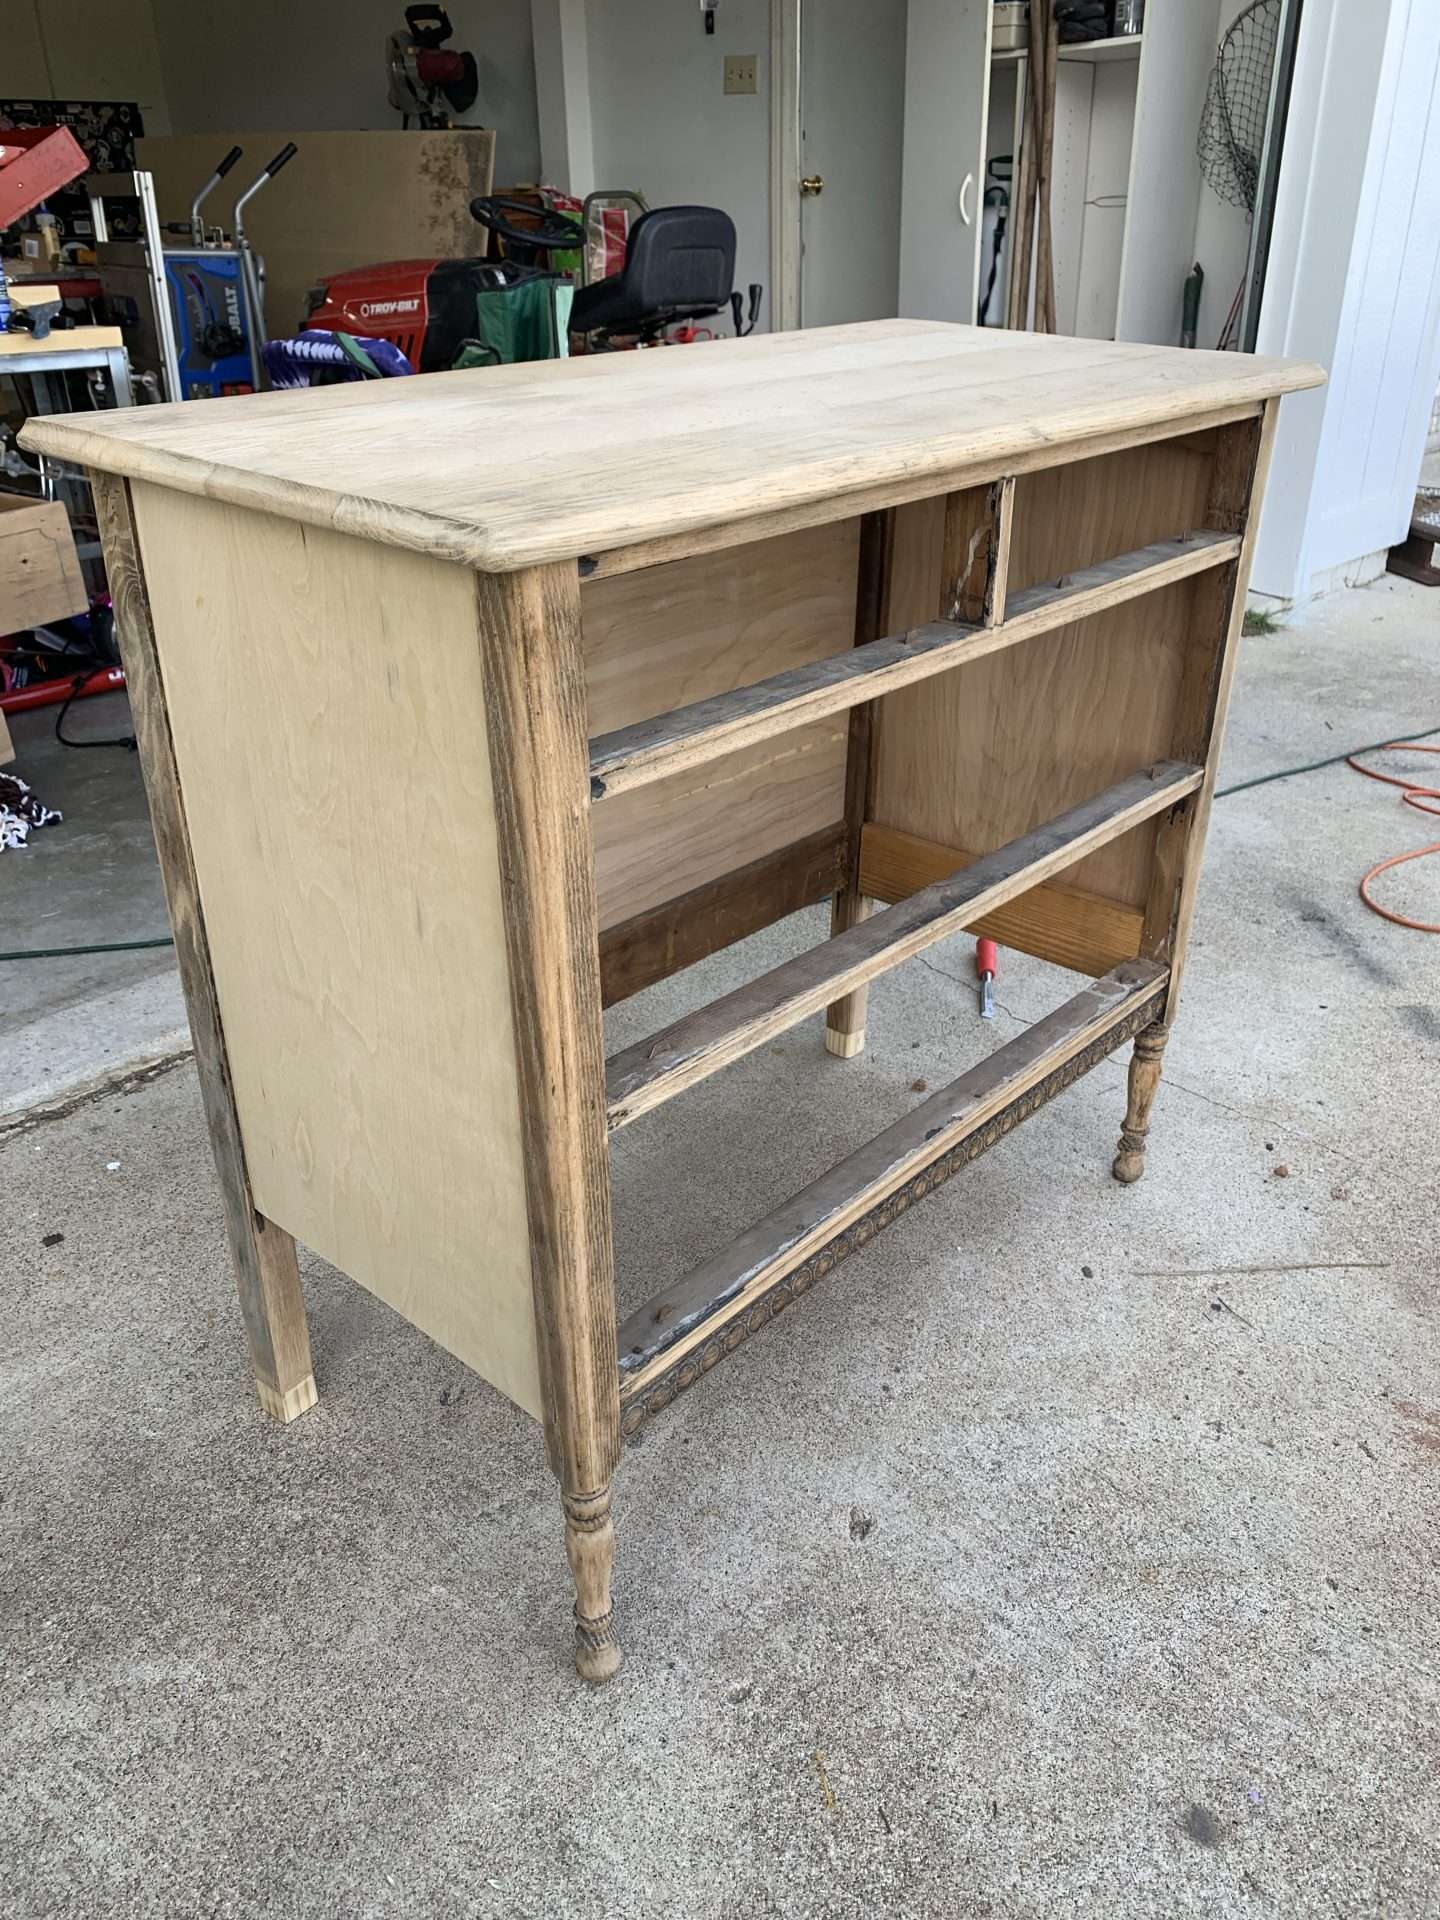
Step 1: Remove Rotten Pieces
After getting the antique dresser home and seeing what bad shape it was in, we were overwhelmed and unsure where to begin. It seemed that everywhere we looked, there was another problem.
First, we took the dresser apart to determine which pieces were rotten and which pieces were okay.
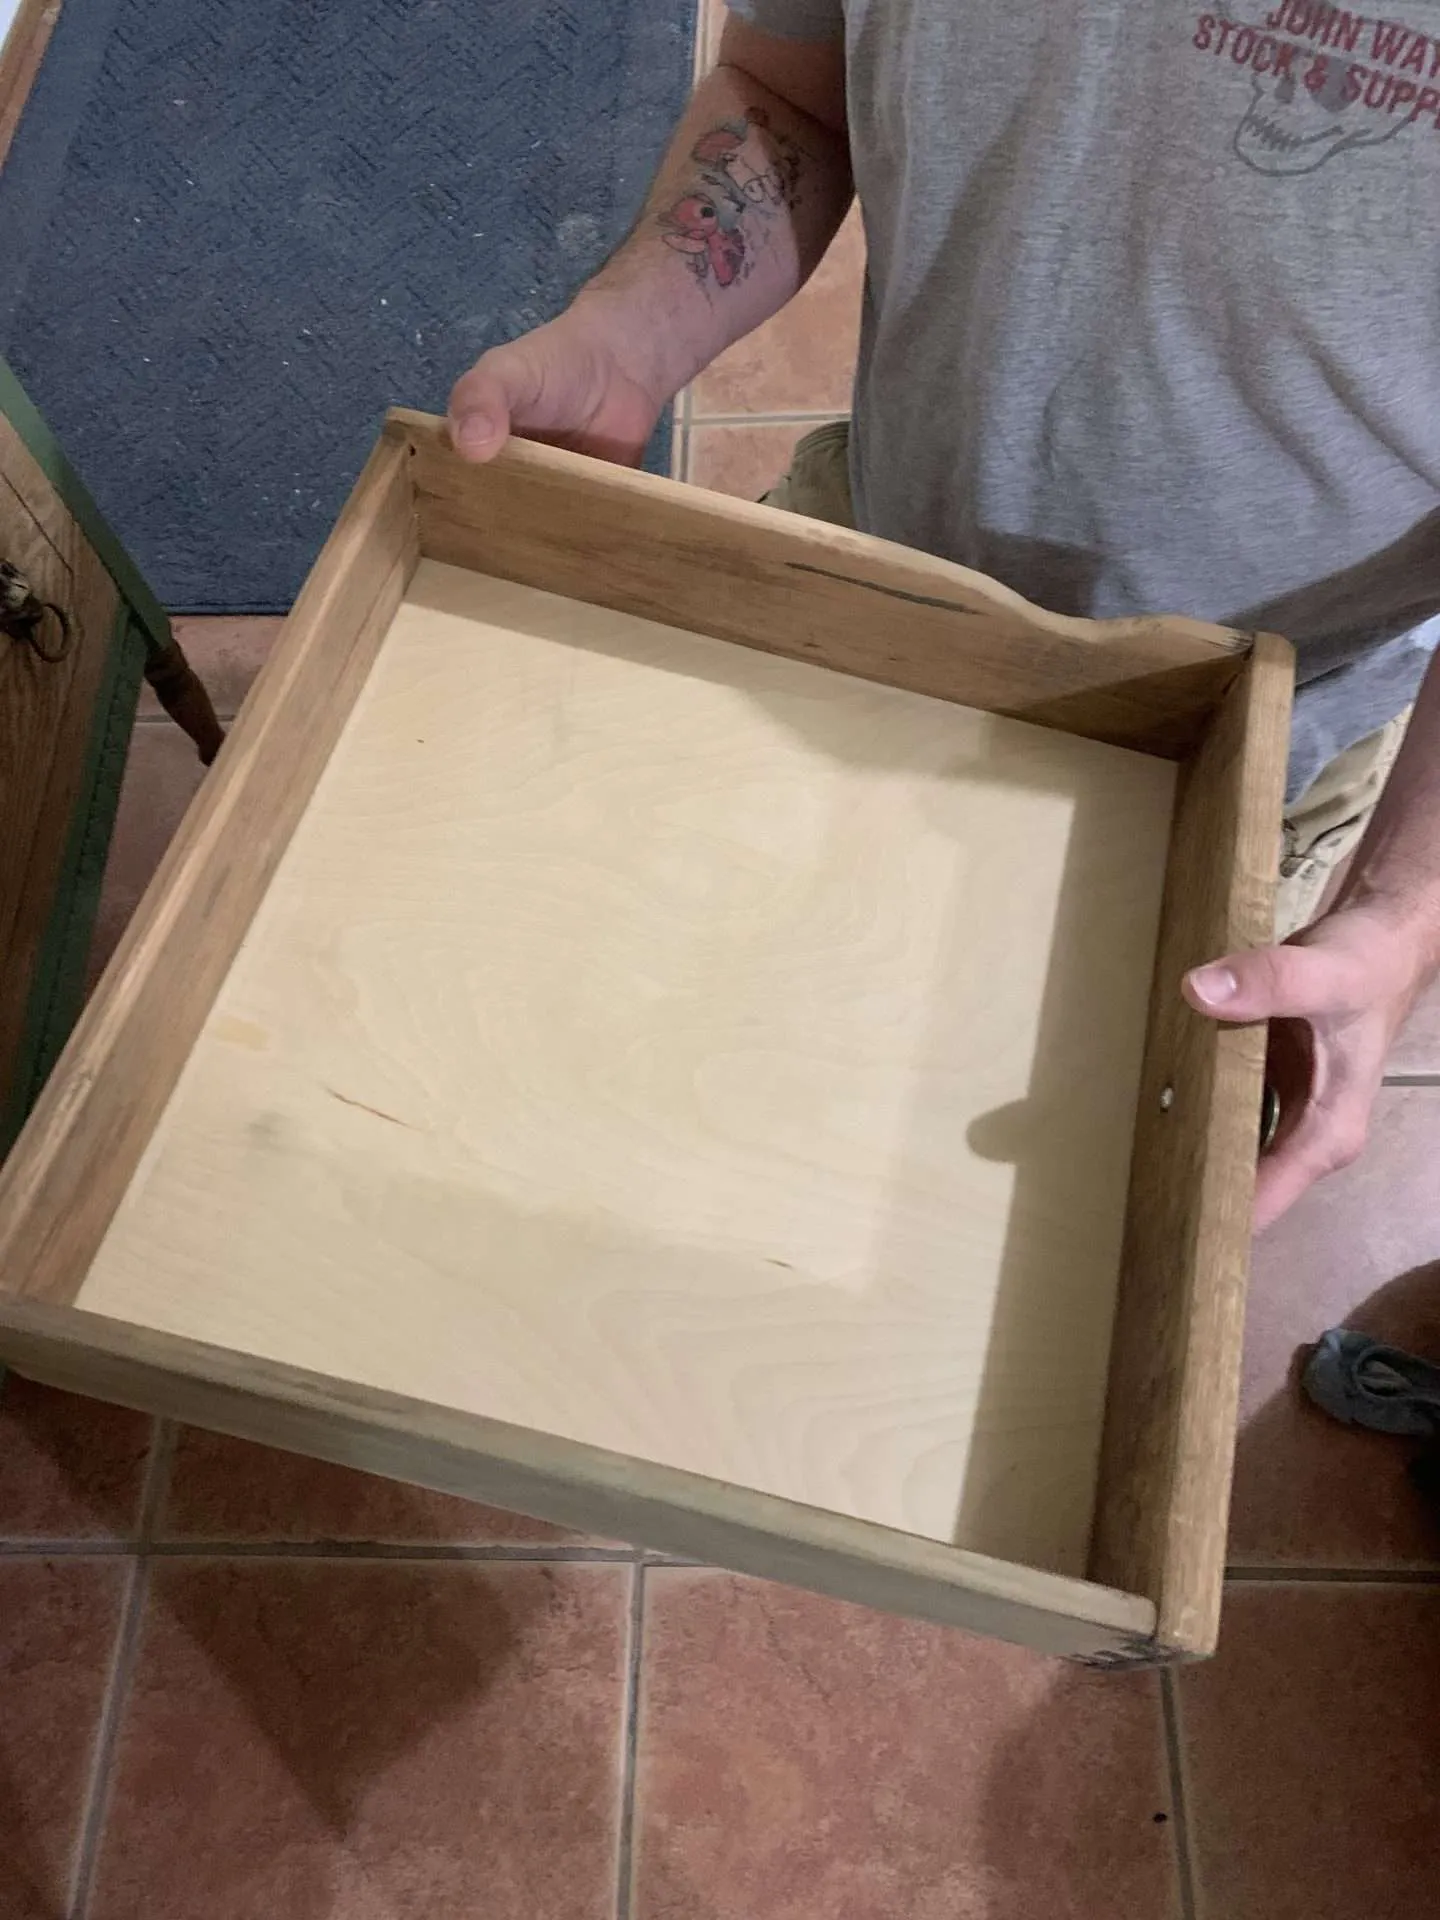
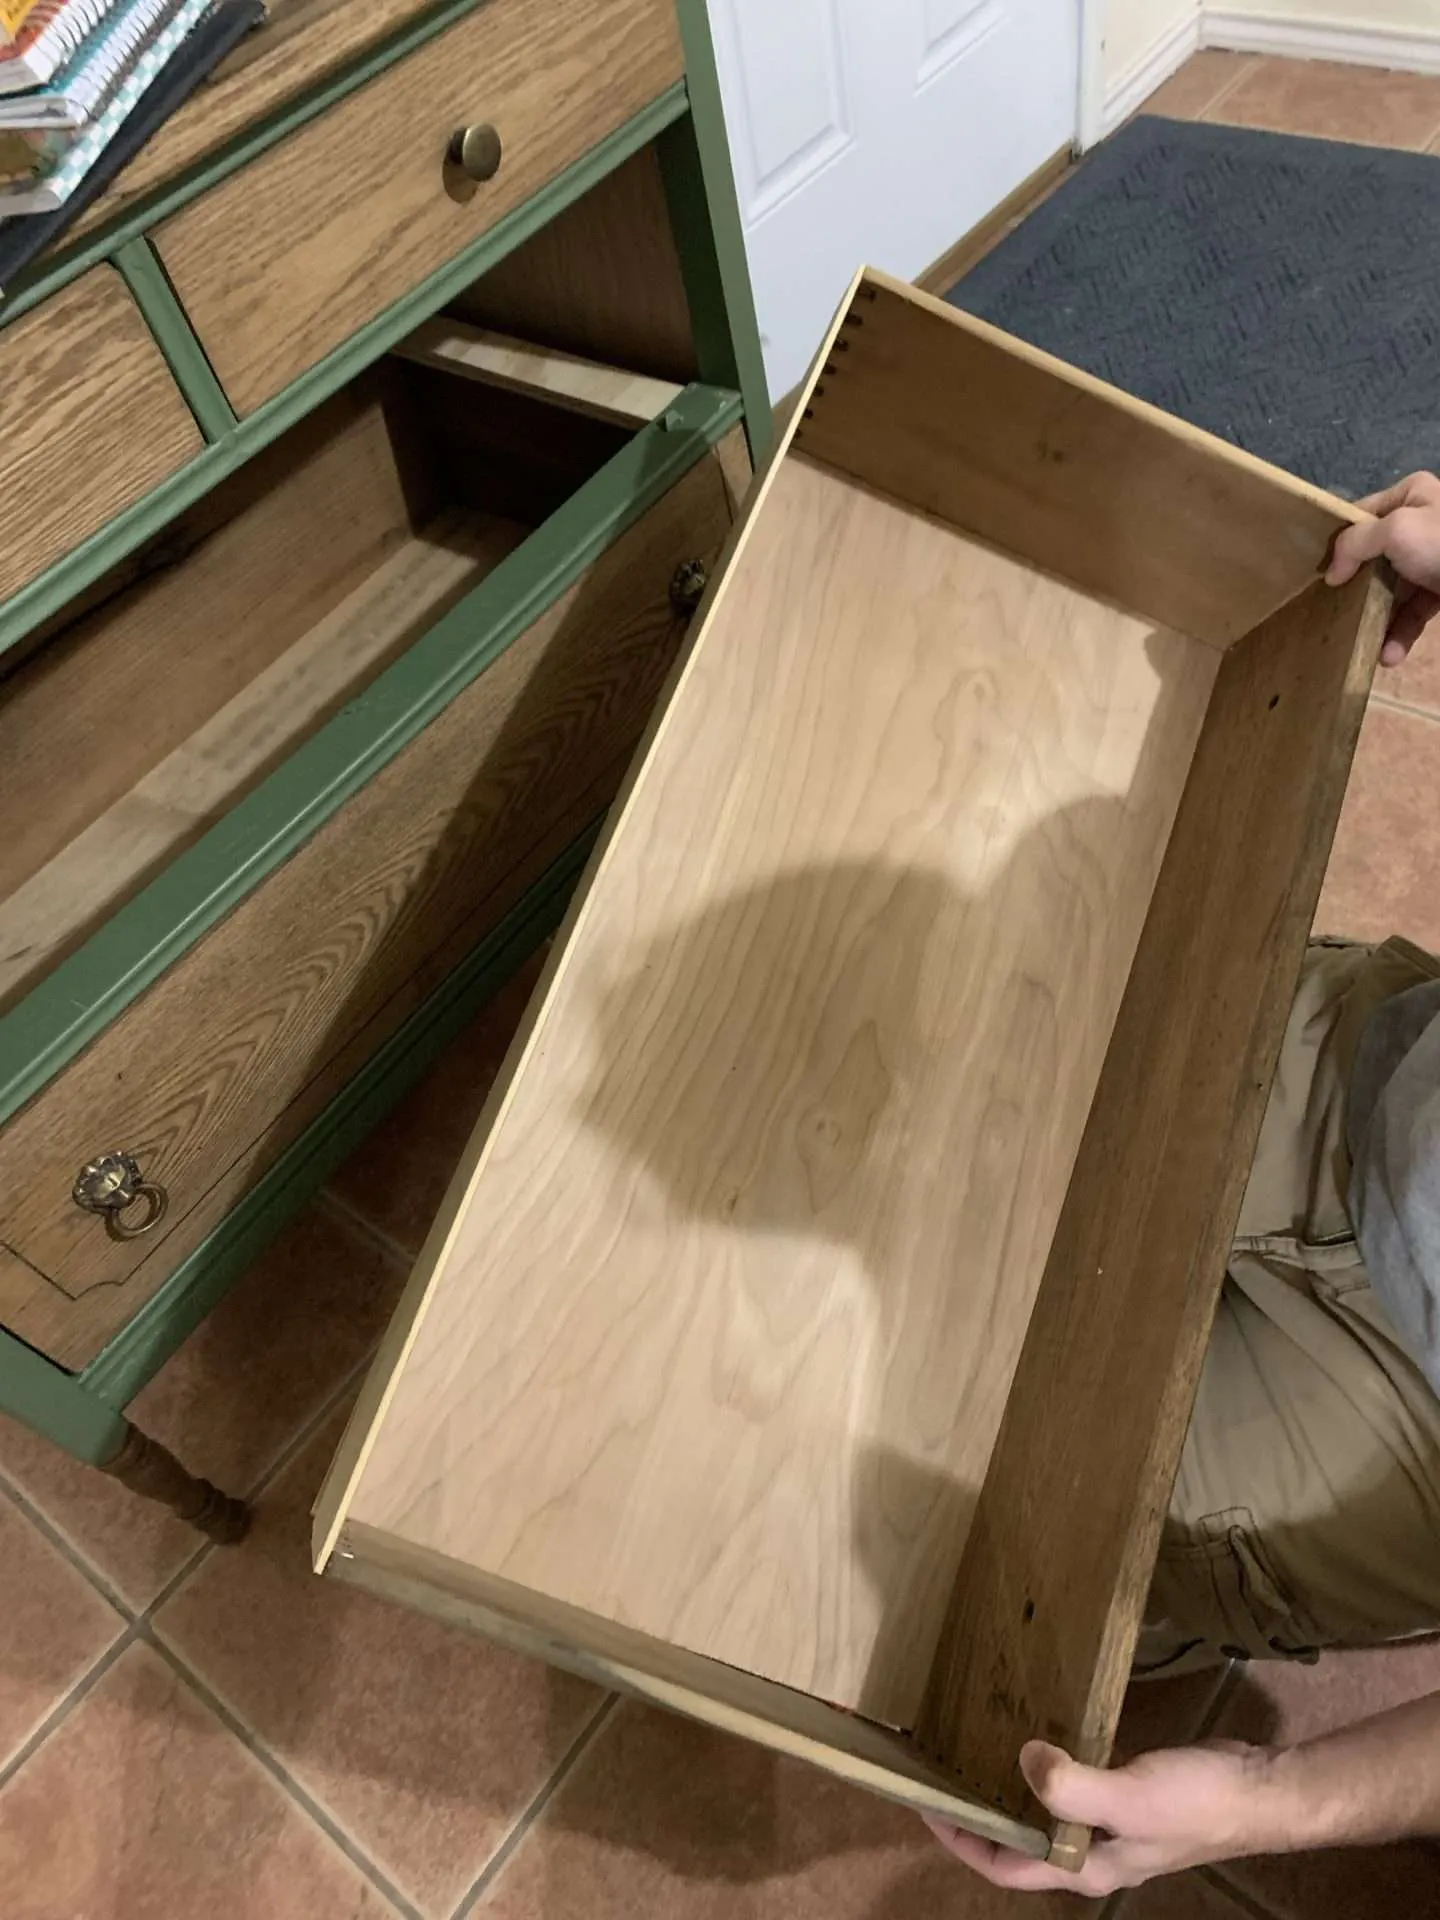
I took out all of the drawers and threw away the rotten backs and bottoms.
Then we removed the top of the dresser, which revealed structural supports that had been replaced by the seller. However, he didn’t cut them to the correct lengths, so the dresser wasn’t square. That meant that none of the drawers would open or close.
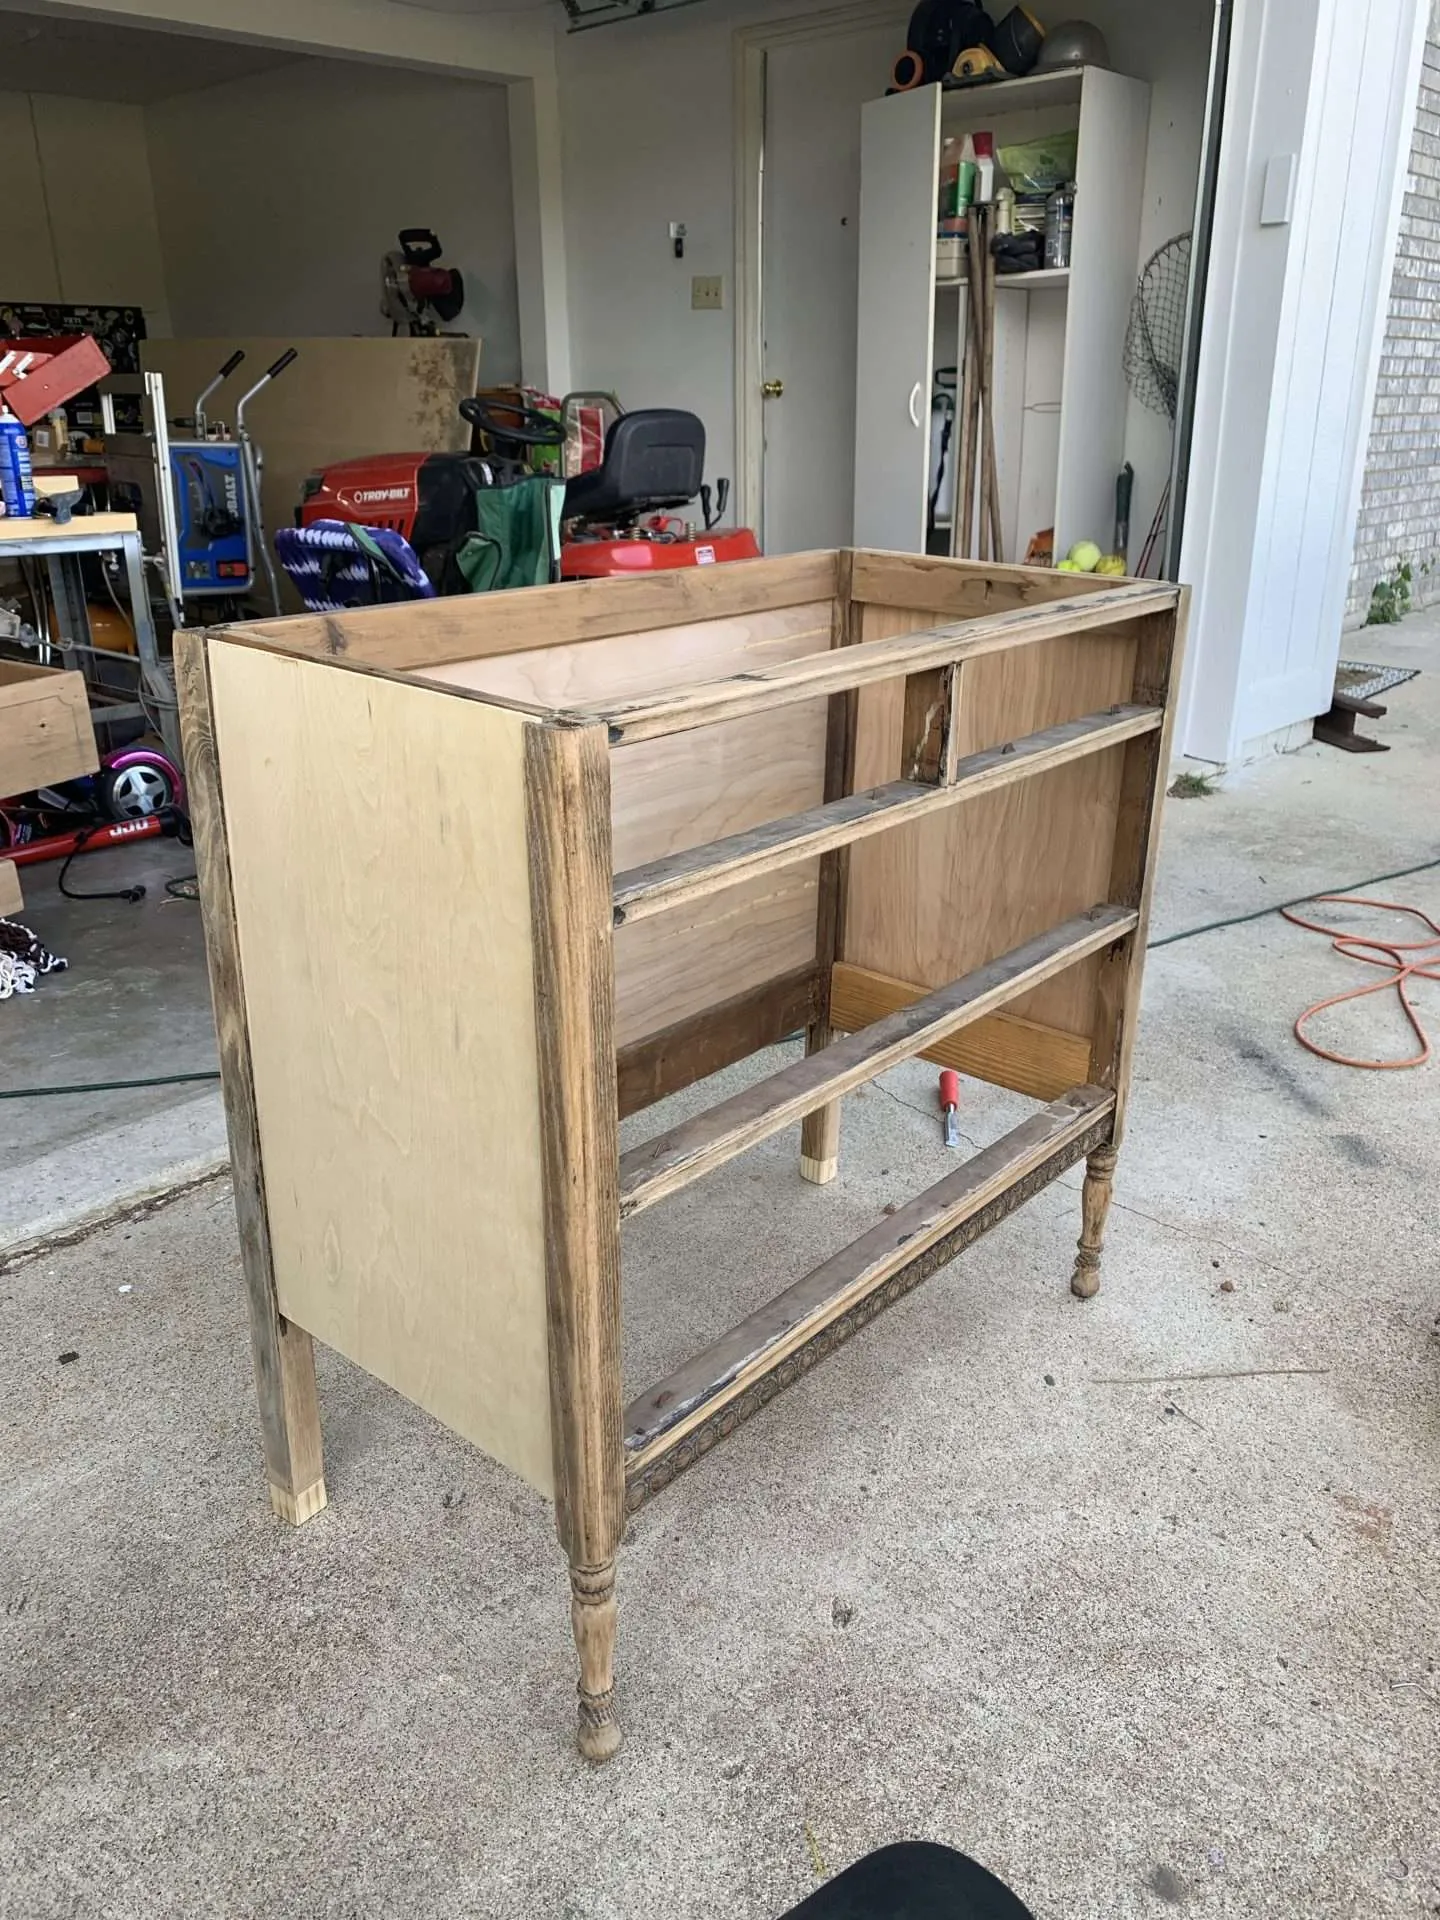
We had to cut off approximately 2 inches of the back legs due to rot. The side and back panels of the antique dresser were also rotten and we removed those as well.
After we chunked everything that wasn’t salvageable, we were left with partially put-together drawers, the drawer face, a warped top, and back legs that were too short. It was a mess!
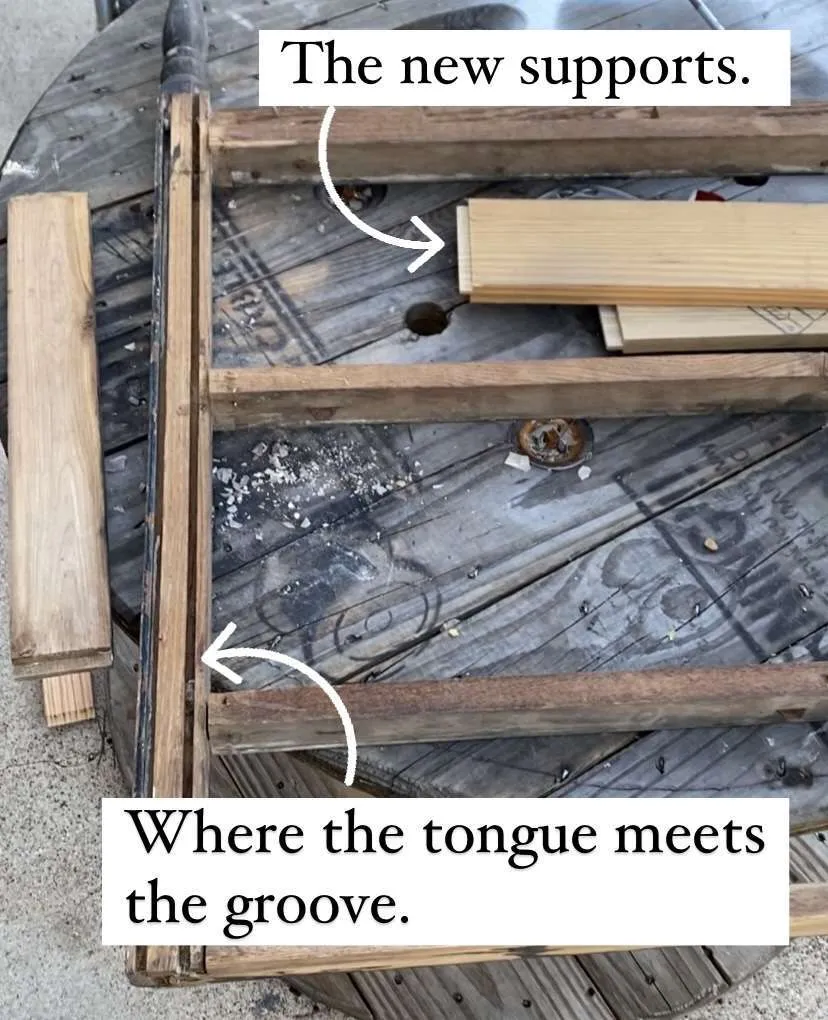
Step 2: Rebuild the Frame
After making an even bigger mess out of this dresser, it was time to start rebuilding it.
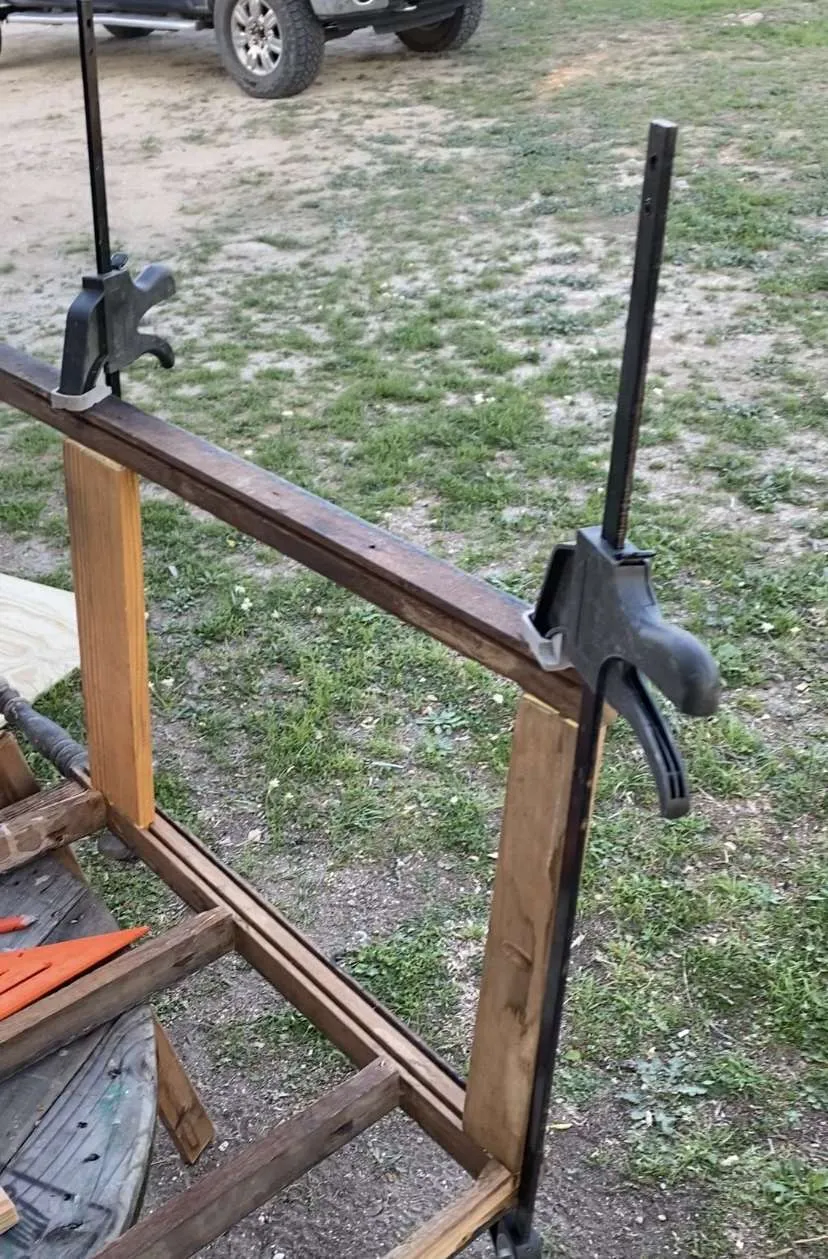
We first made new braces for the frame using scrap pieces of 1×4 pine boards. We cut 4 boards to the correct length (the depth of the dresser) and then made a tongue on each one using our radial arm saw. There are 2 of these braces on each side, one at the top and one at the bottom.
After getting the supports ready, they were placed into the grooves of the front face and the back legs, glued in, and clamped down.
Once the glue dried, this meant that the front of the dresser was once again connected to the back and we had a sturdy frame to work with.
Step 3: Fix the Back Legs
While we were waiting for the glue to dry, we worked on fixing the back legs of the dresser.
We had already cut 2 inches off of the bottom of the legs because they were rotten. Now we just had to figure out a way to add that length back.
We stripped down a scrap piece of a 2×10 board to match the size of the back legs. Then cut it into 2-inch blocks to replace what we cut off. We attached the blocks to the legs using a 3.5″ lag screw screwed in from the bottom.

Step 4: Rebuild the Drawers
While we were still waiting for the glue on the frame to dry, so we put the drawers back together.
It’s very common for the back and bottom pieces of drawers to be rotten in antique furniture. We replaced the rotten back and bottom pieces using 1/8″ plywood and brad nails to put them back together.
Step 5: Replace the Back and Side Panels
The side and back panels of the dresser were pretty rotten. We replaced them using the same 1/8″ birch plywood sheet that we used to replace the drawer bottoms.
After cutting the plywood to the right size, the new sides slid easily into the grooves that were already cut into the frame. Then we secured the new side and back panels with brad nails.
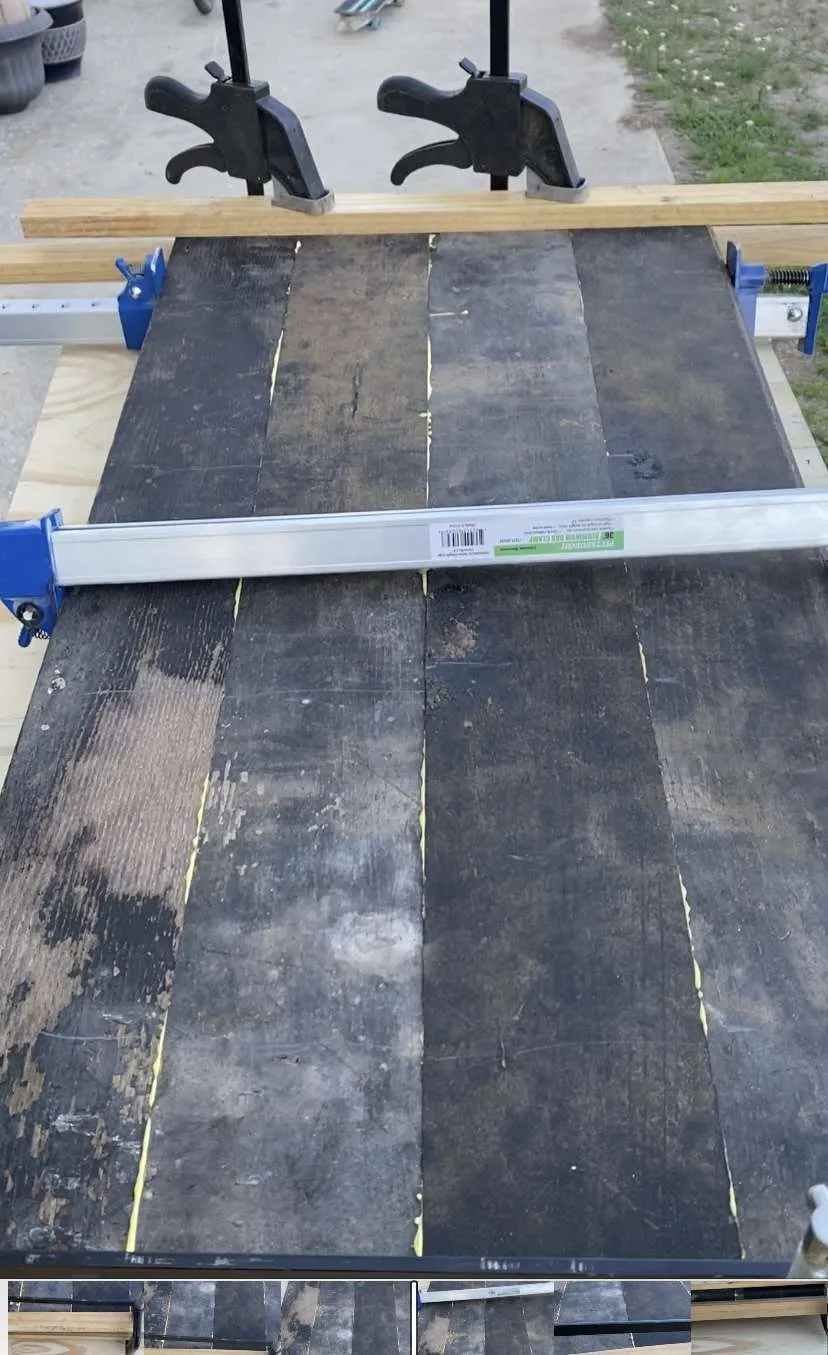
Step 6: Take Top Apart & Put Back Together
Thanks to the seller, the top of this antique dresser was a hot mess.
Originally, it was made of 4 separate boards that were expertly crafted together with tongue and groove joints. Over the years, the boards warped and were no longer flush with each other.
The seller took the boards apart and tried to join them back together with copious amounts of wood glue and screws. We had to take it apart, scrape off as much of the glue as we could, clean out the grooves, and put it back together.
The boards still weren’t perfectly flush. The easiest way to fix this would be to run them through a planer, but we don’t have a planer. So, we had to settle for sanding them down as smooth as we could.
It’s not perfect, but it’s a world better than where it started.
Step 7: Sand
Now that the antique dresser was finally structurally sound, I could finally start working on the cosmetic stuff.
Using my orbital sander, I sanded the drawer faces and front legs of the antique dresser down to the bare wood. To get in the curves and crevices of the front legs, I folded a sanding pad in half and sanded them by hand. The old black paint was flaky and came off pretty easily.
Then, I gave the rest of the dresser a good scuff sanding.
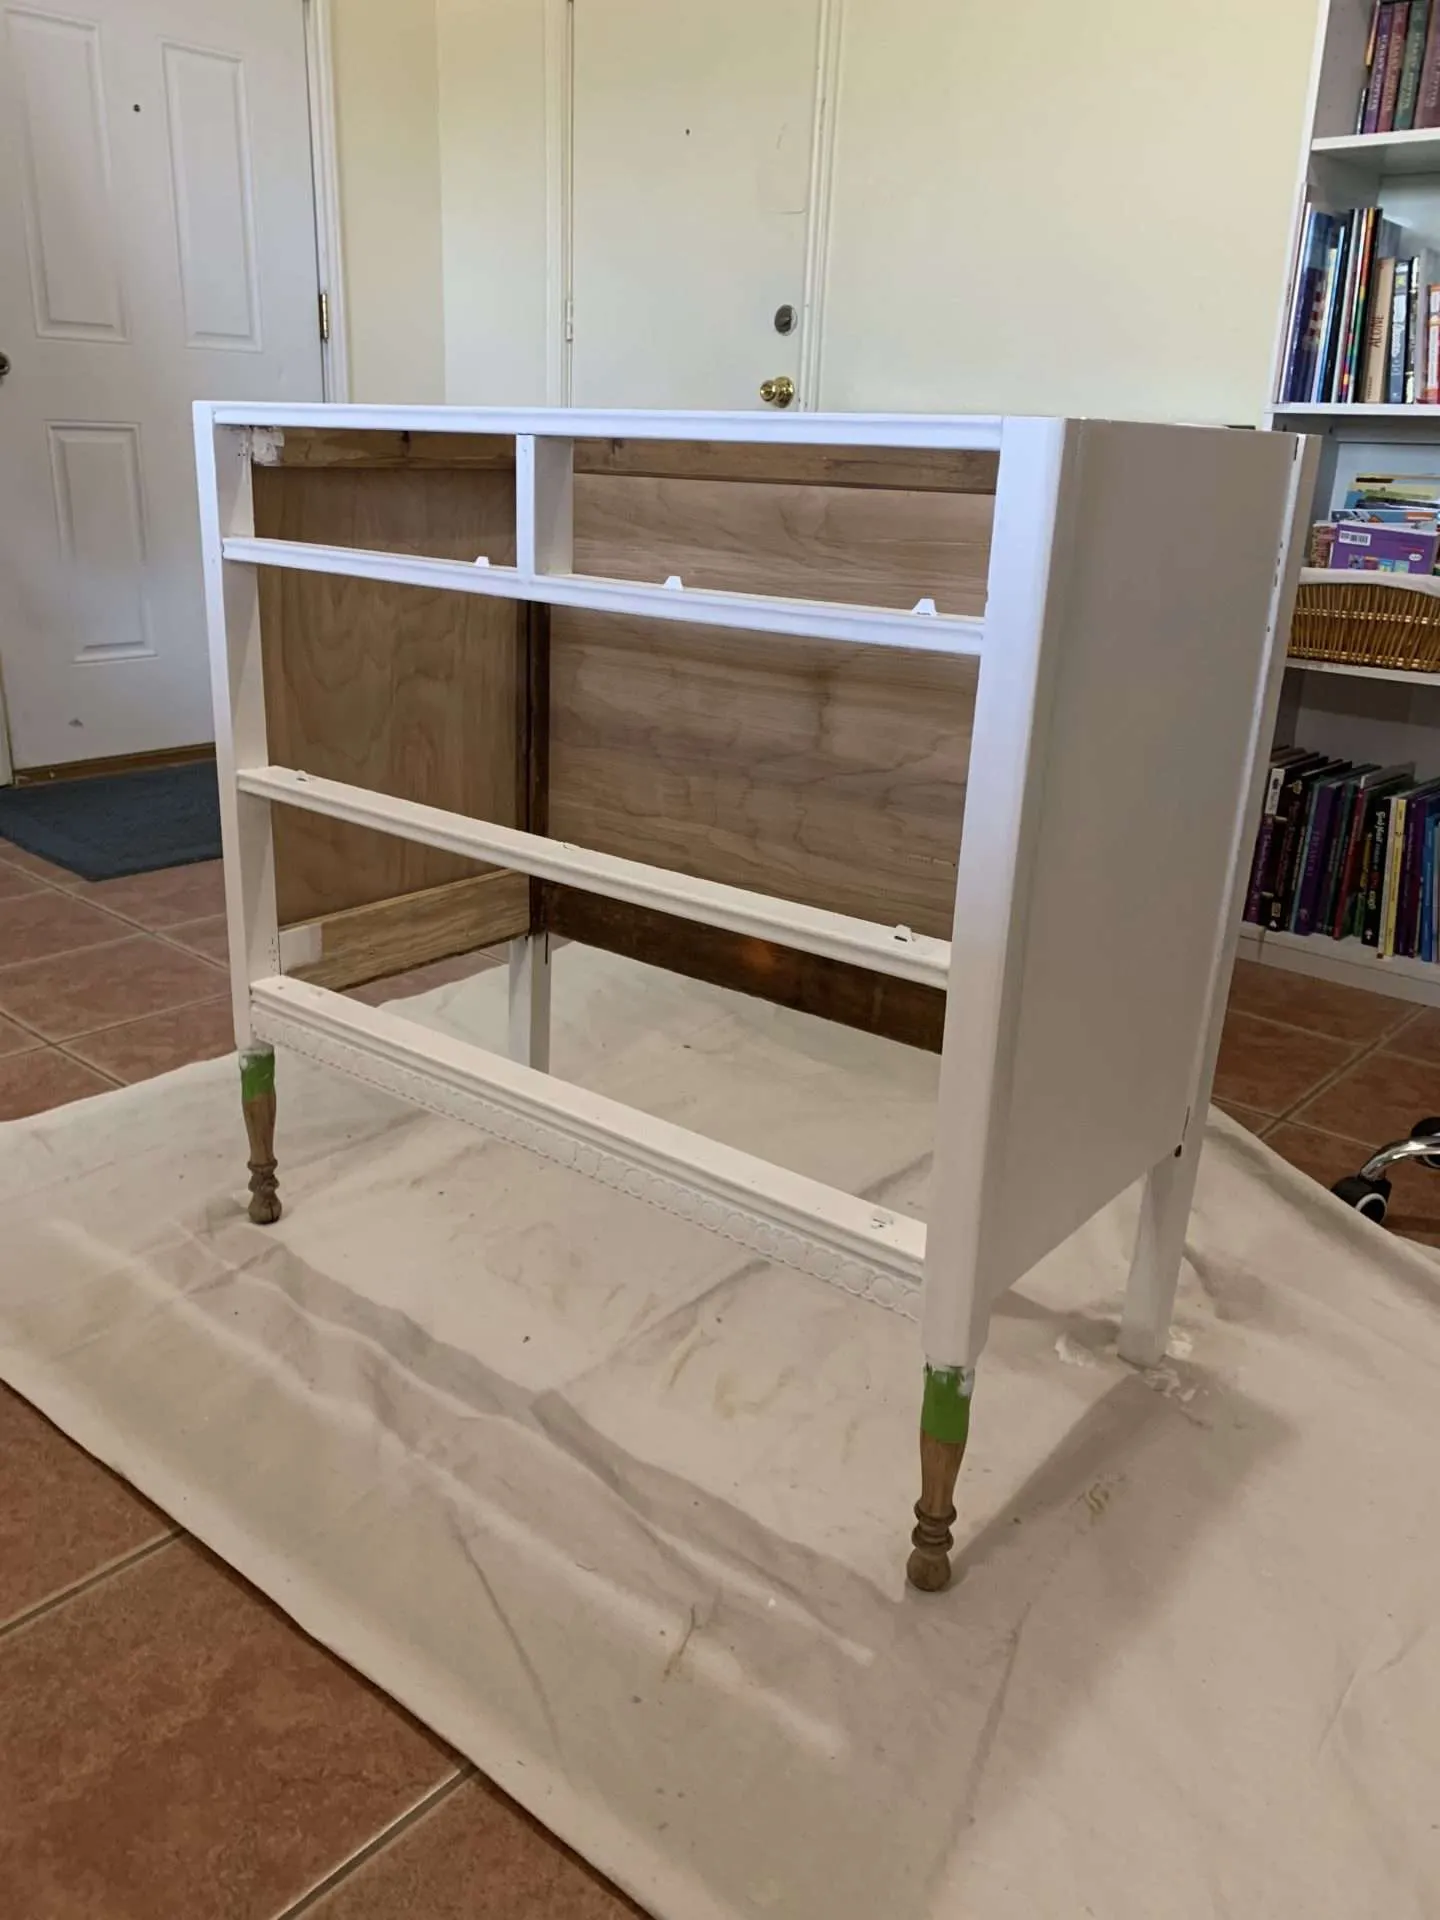
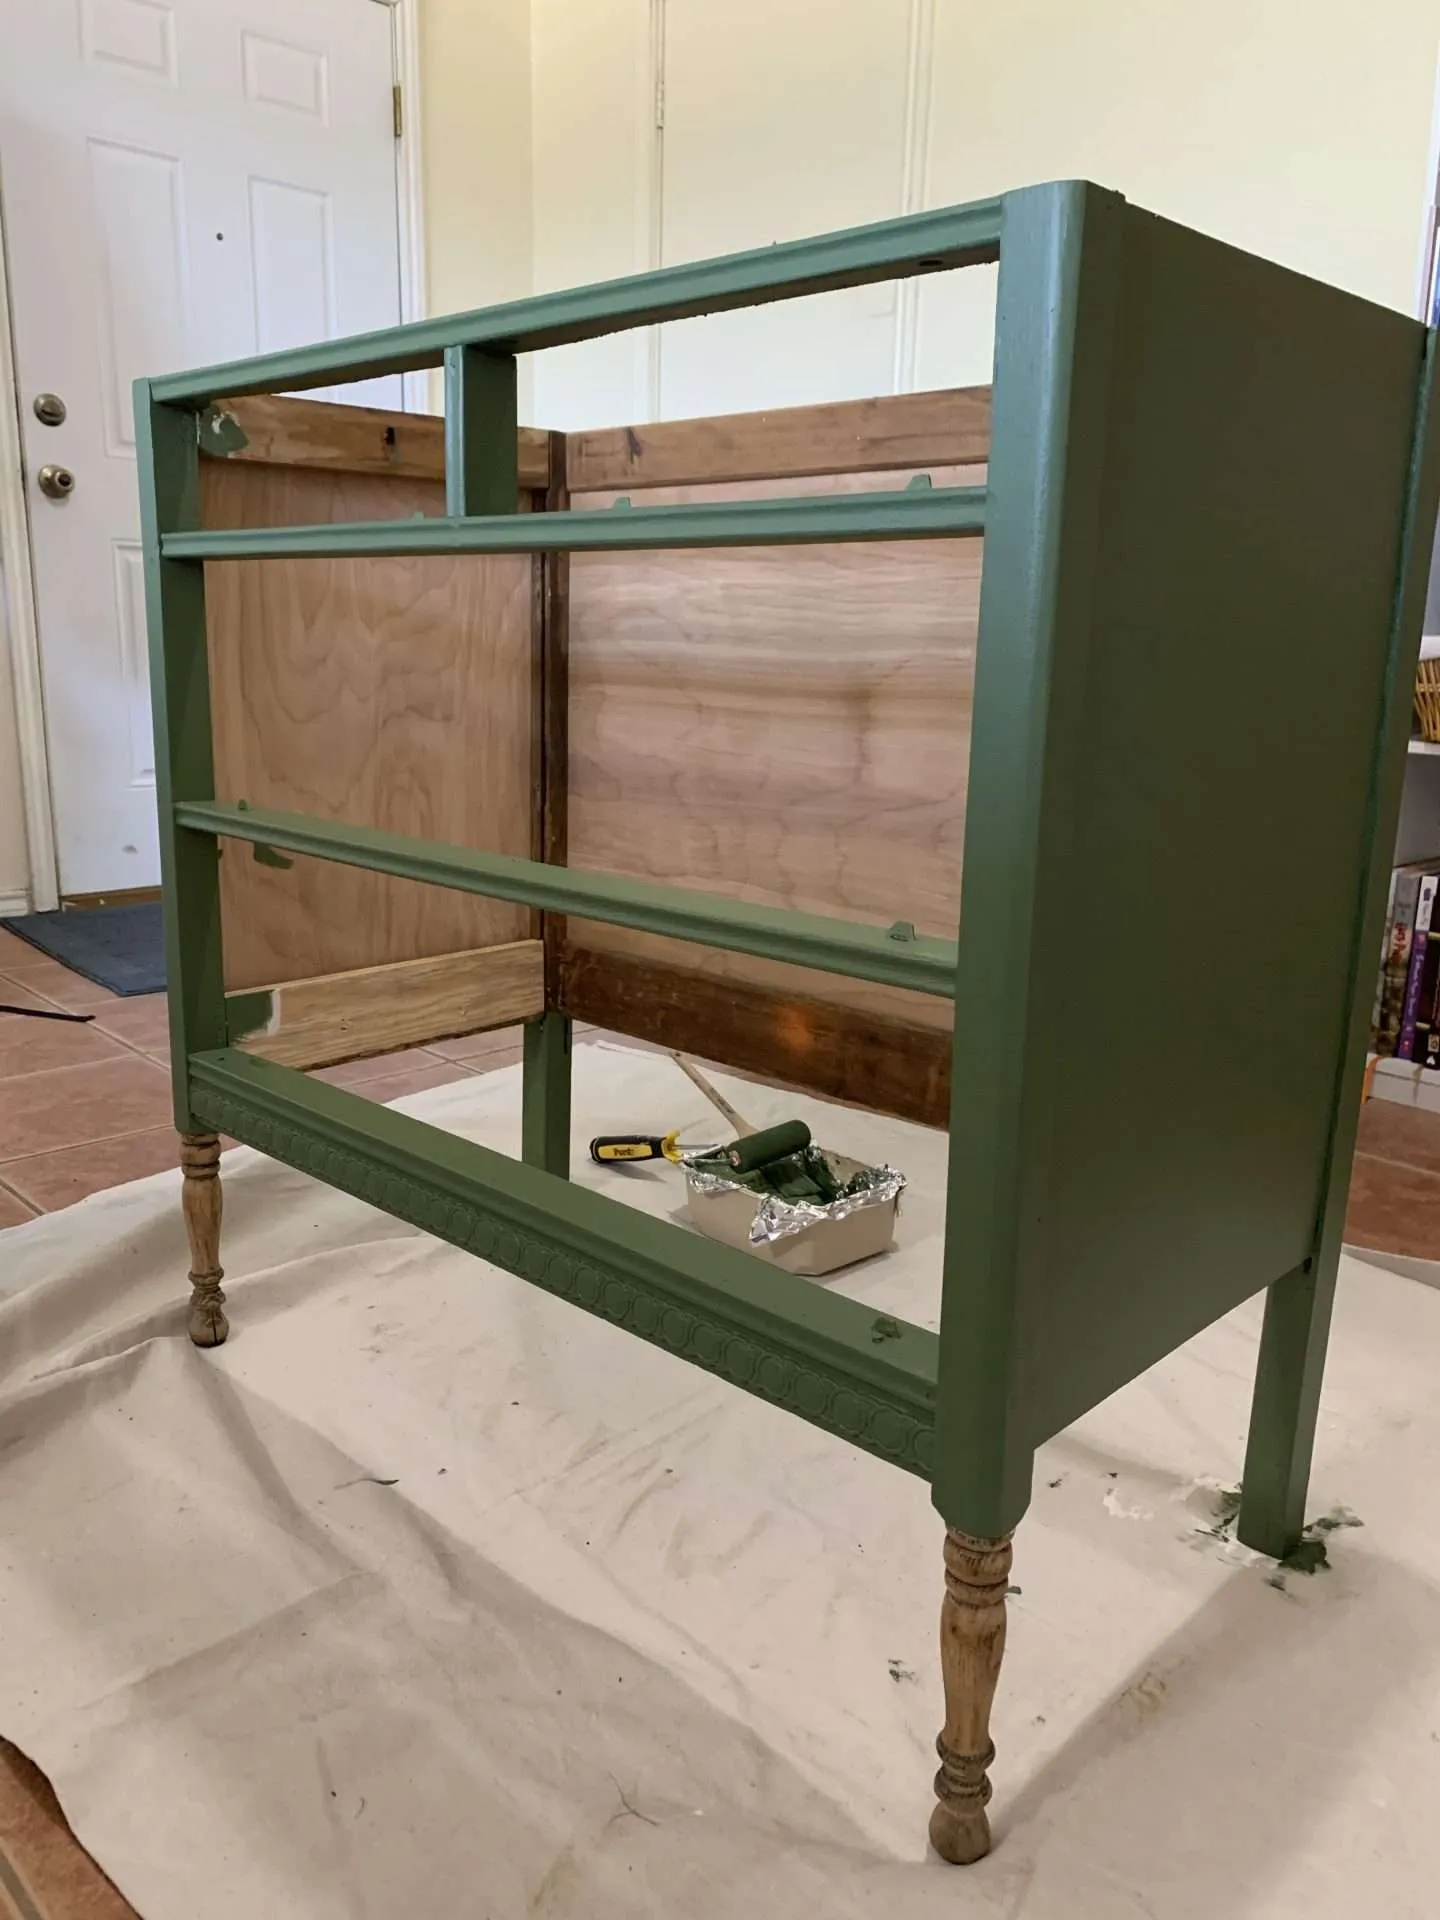
Step 8: Prime, Paint, and Stain
After sanding, I rolled 2 coats of primer onto the face and sides of the dresser, applying the primer with a paintbrush in the areas the roller couldn’t reach.
I let the primer dry for 2-3 hours before applying the first coat of paint. That coat of paint was allowed to dry overnight before I applied the second coat.
I lightly sanded the dresser between each coat of primer and paint to get a nearly flawless finish.
If you’ve been around the blog or my Instagram long, then you’ll recognize this Dark Sage paint color. I flipped another dresser using this same color and when I was buying the supplies, I accidentally ordered a whole gallon of it. So, I’m trying to use it up before our next PCS, which is rapidly approaching.
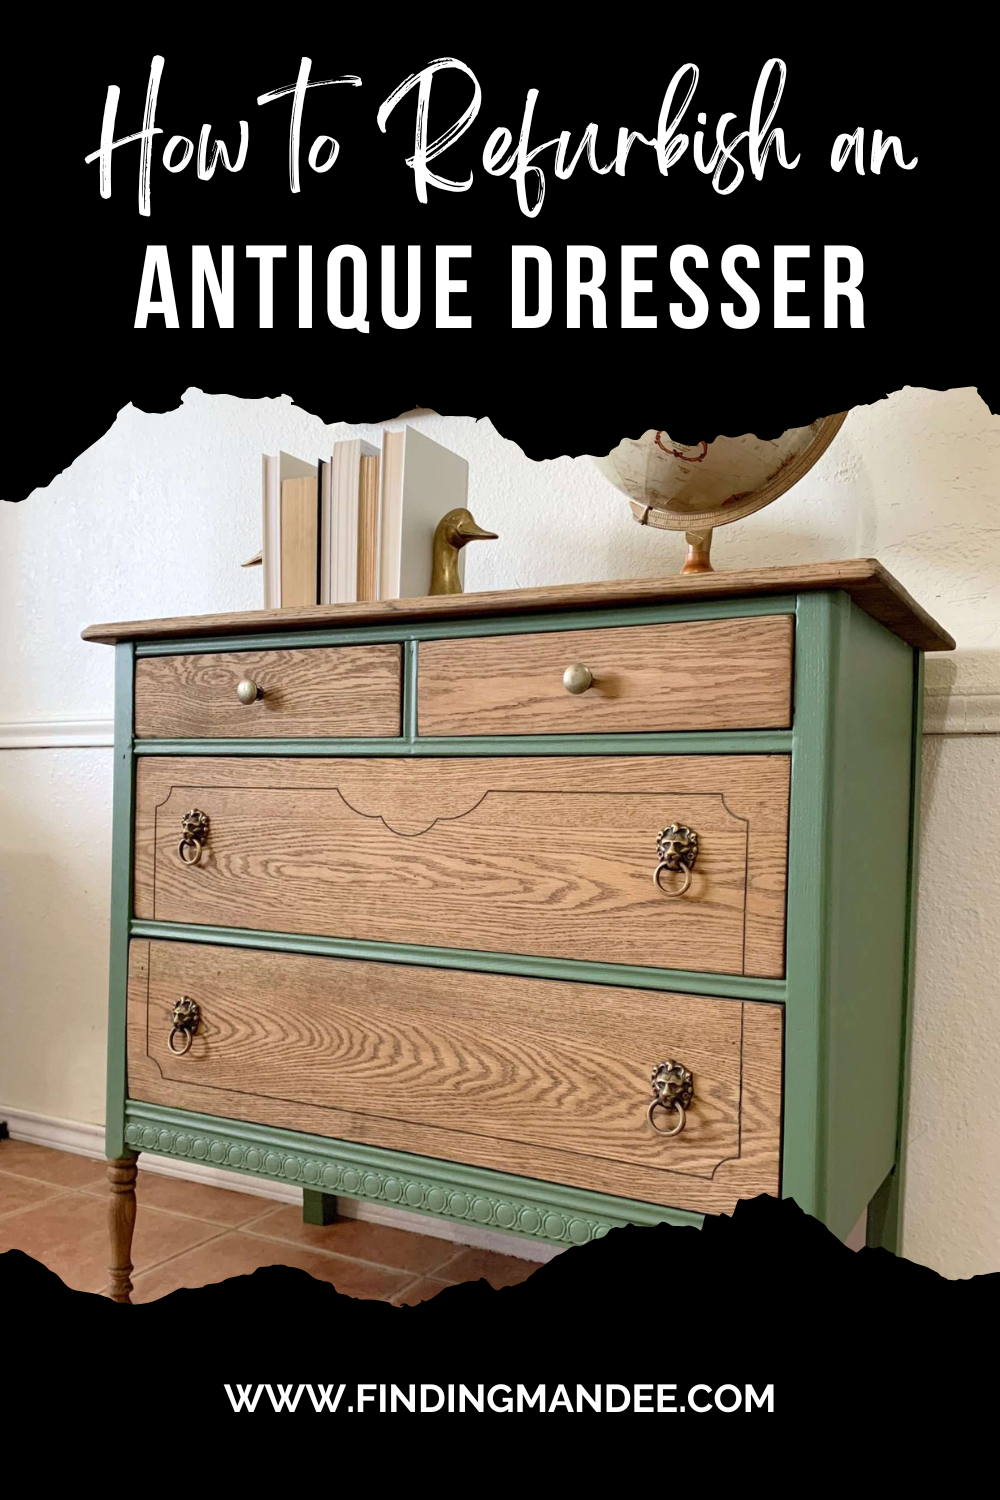
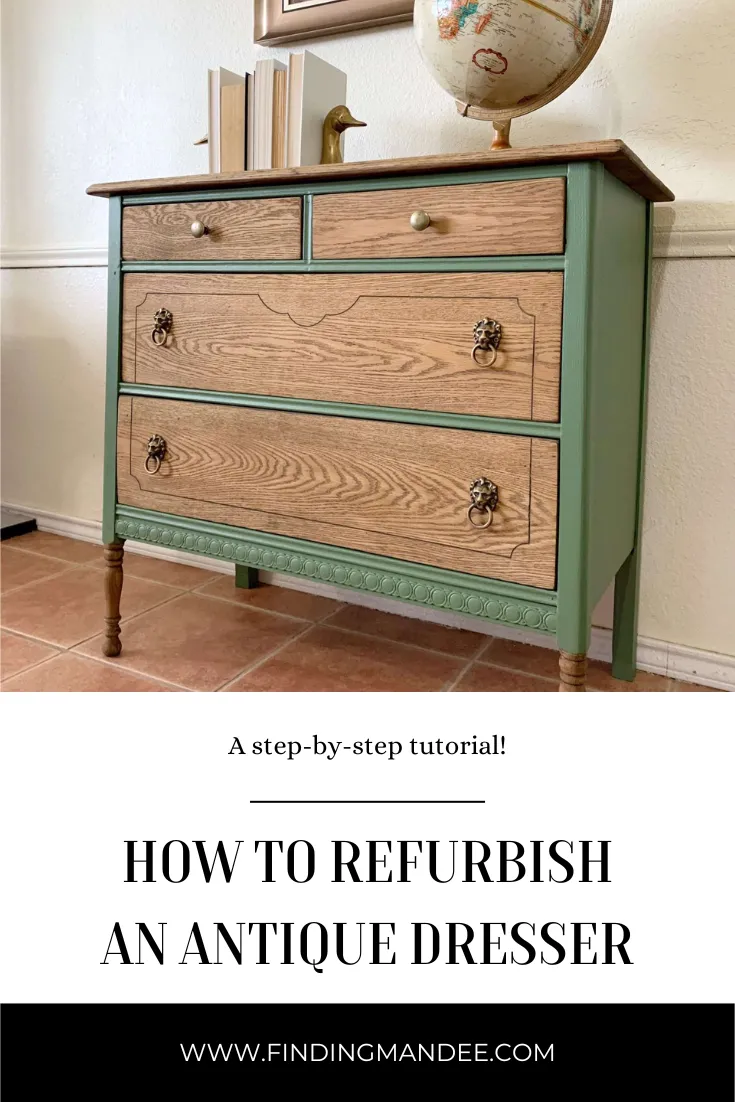
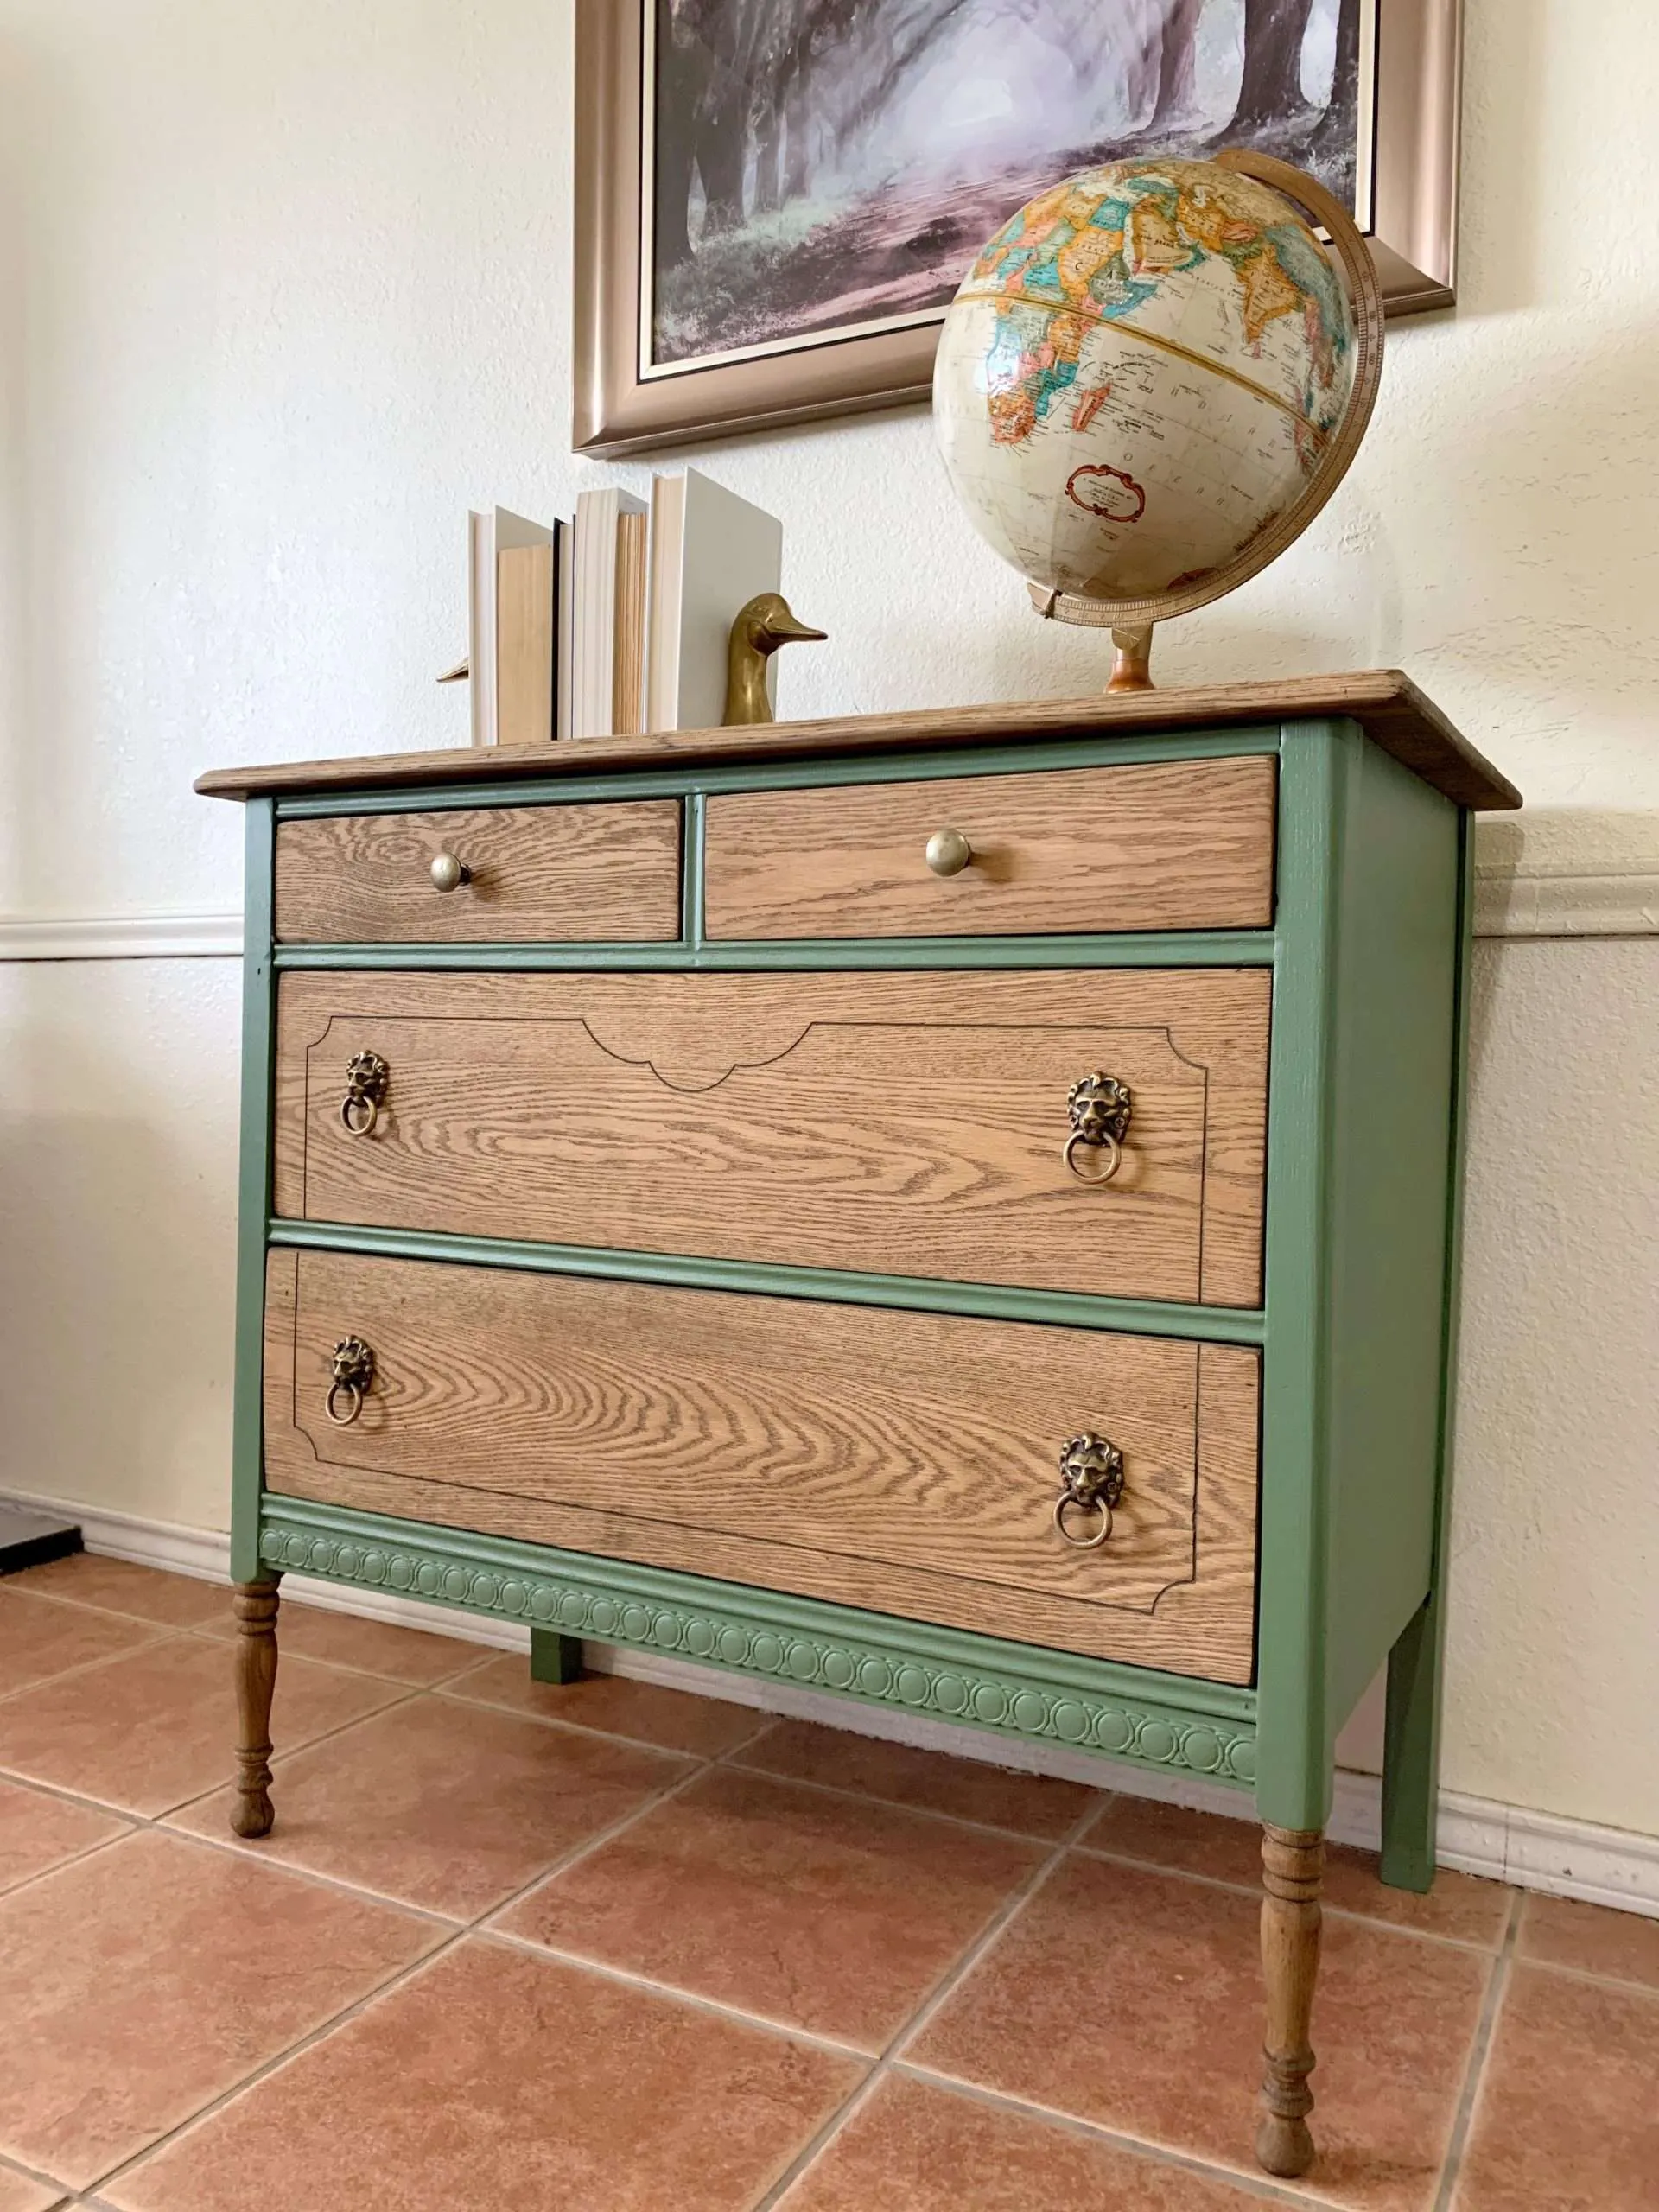
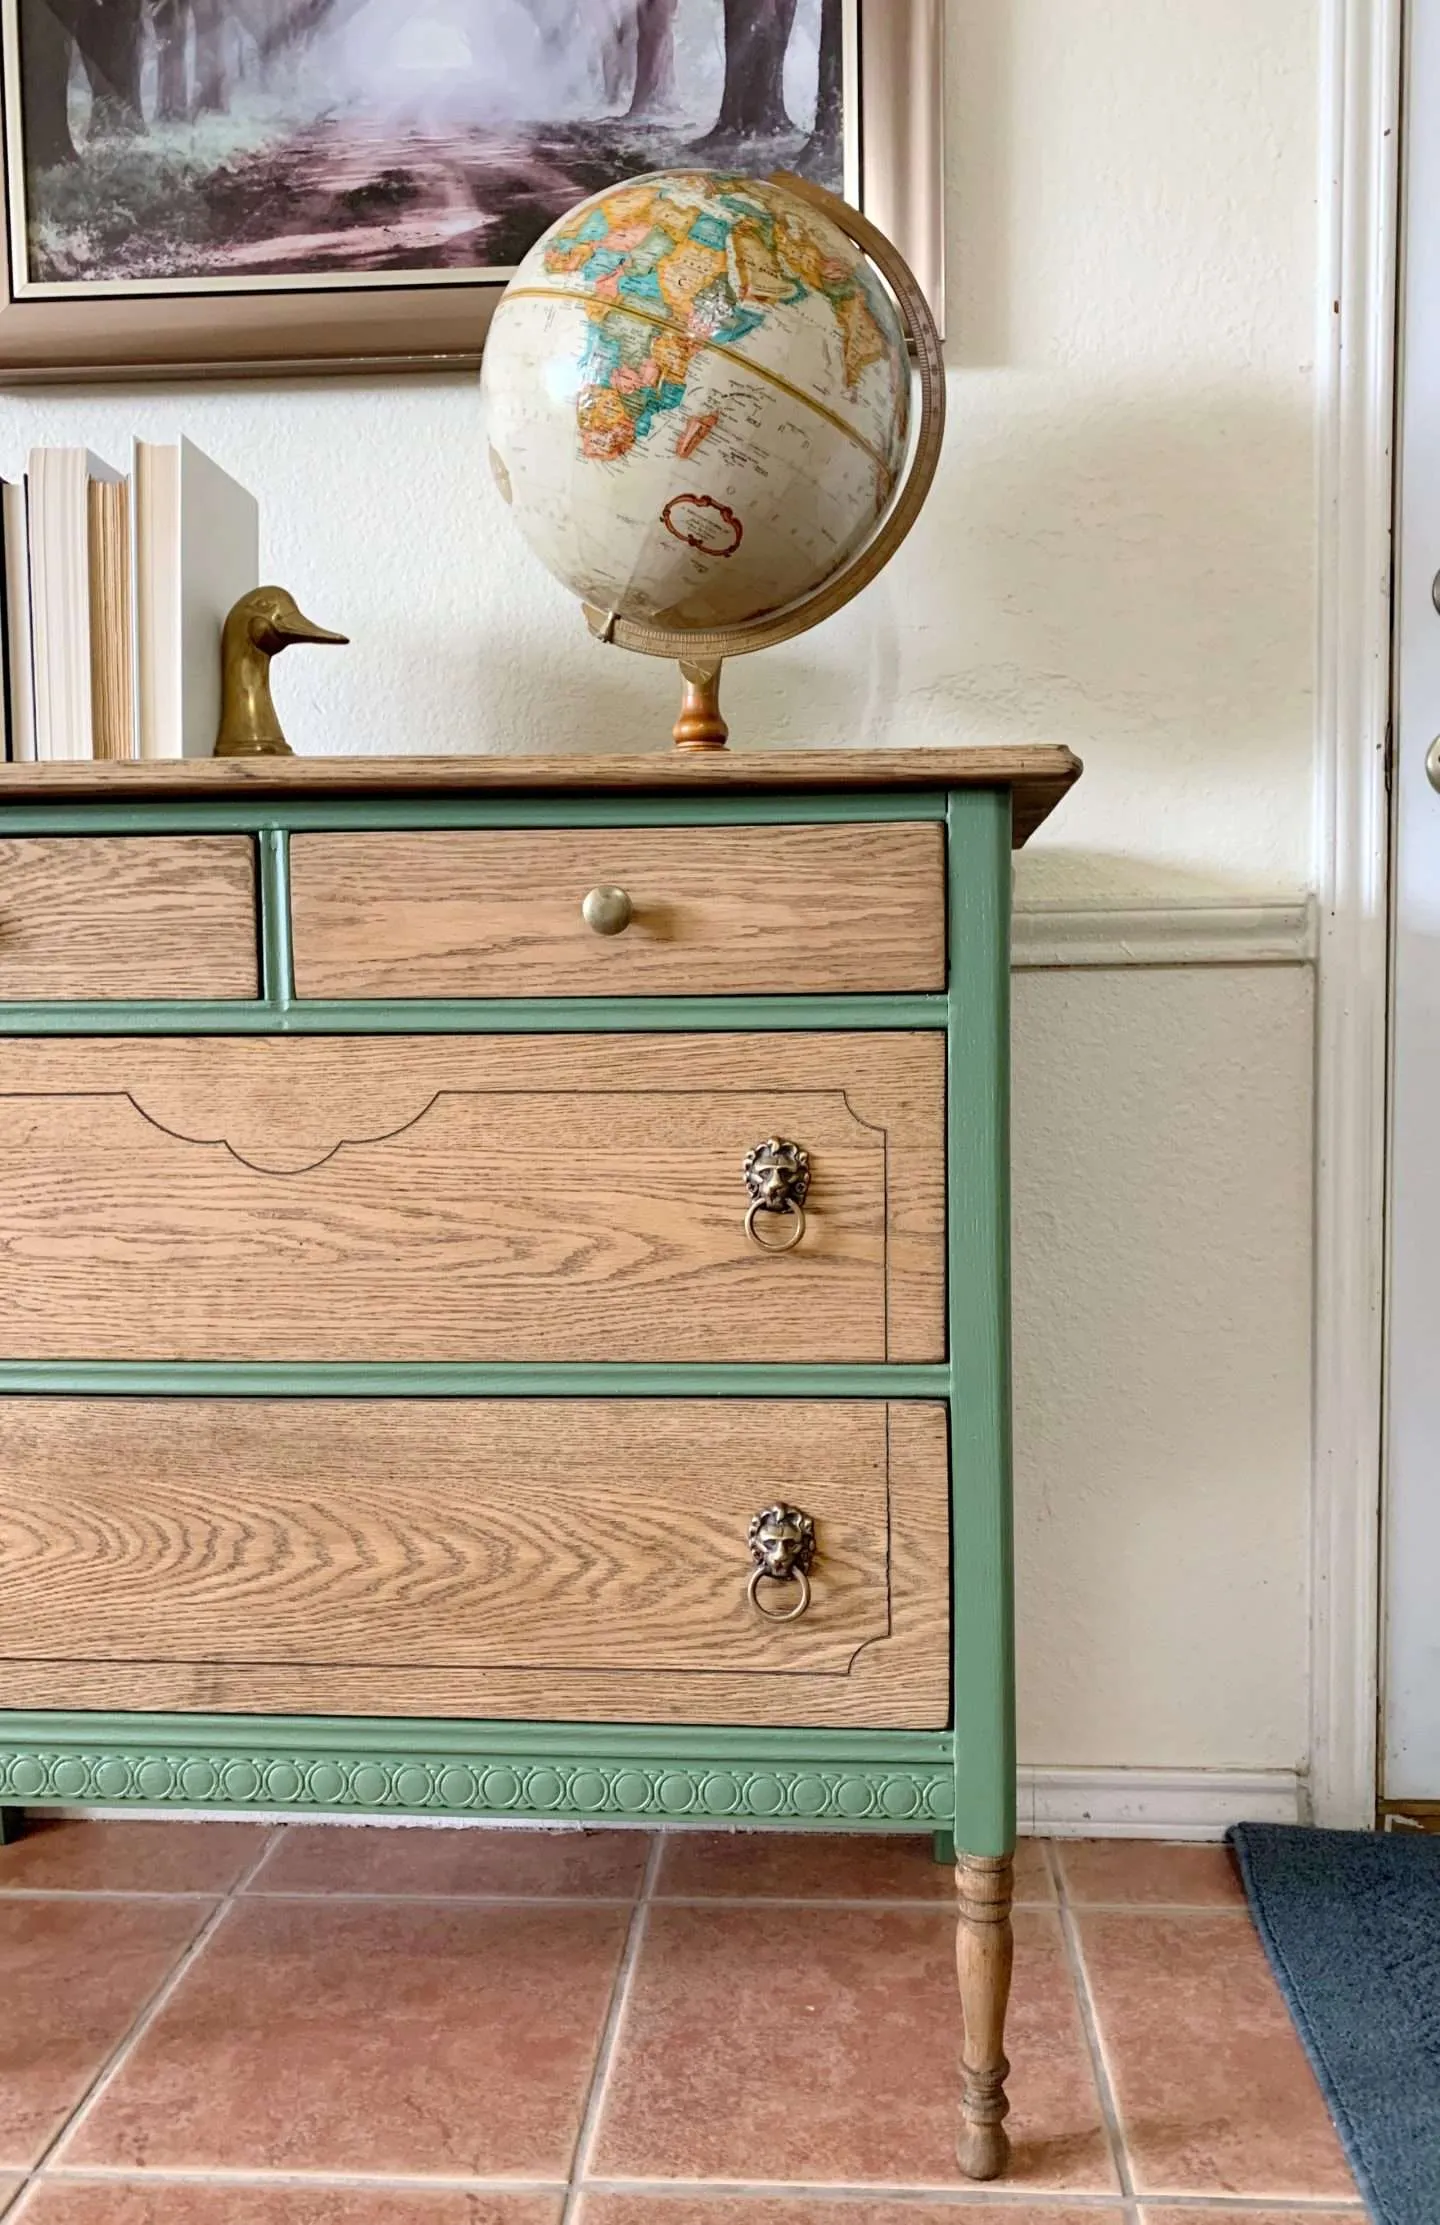
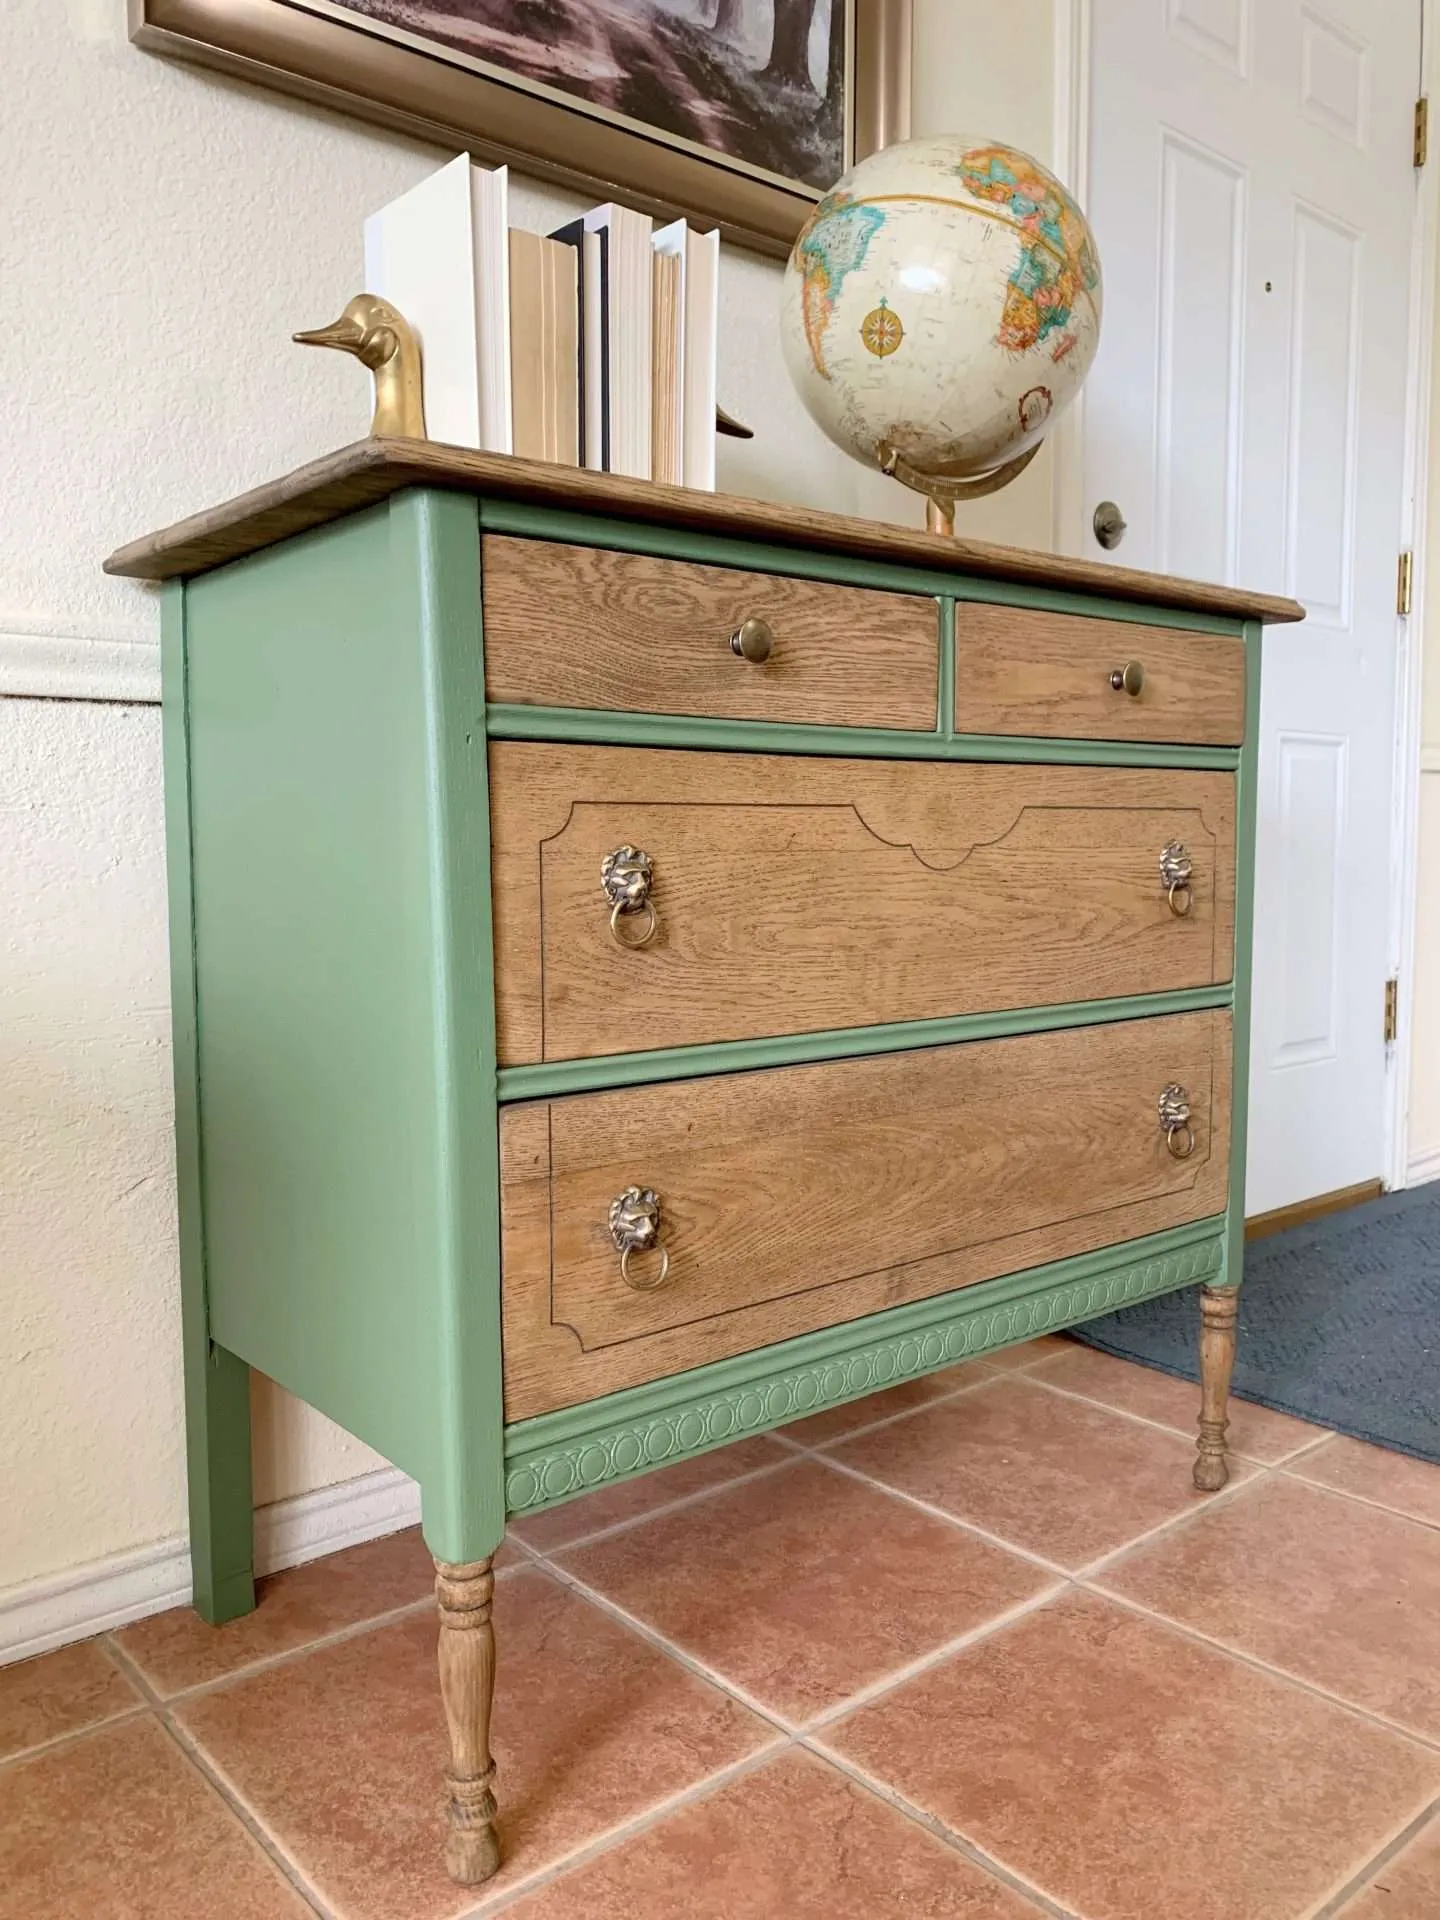
Once the last coat of paint dried, I stained the top, drawer faces, and front legs using Behr Rustic Wood Effects Stain (color: Rustic Brown).
Put Top Back On & Add Hardware
Once everything was dry once again, we nailed the top of the dresser back on with 1 nail in each corner.
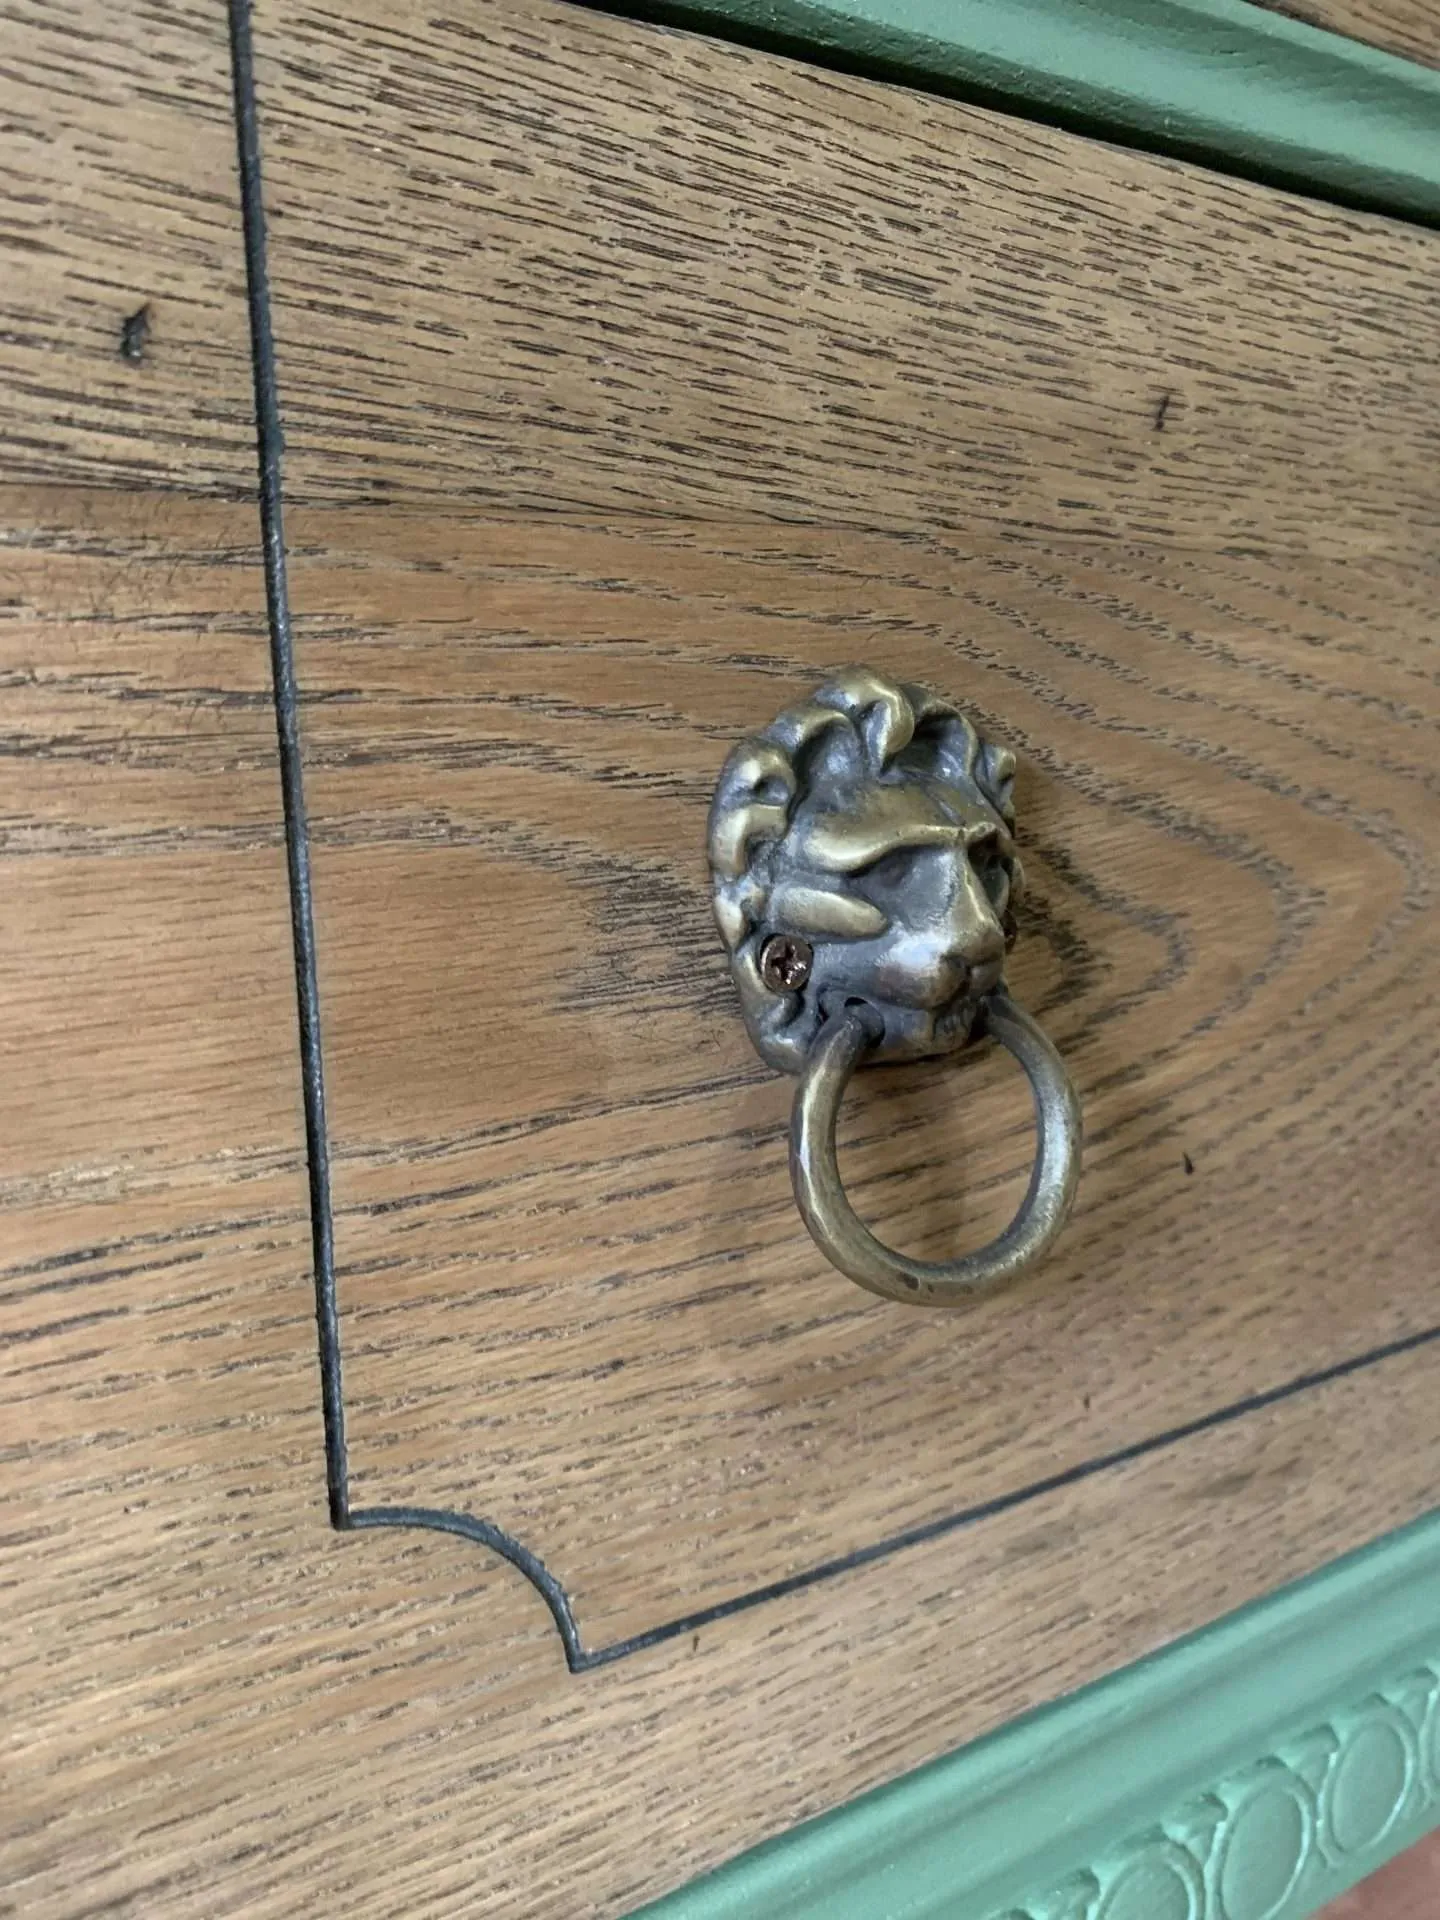
But the finishing touch was the new hardware for the drawers. Heff picked out the lion head drawer pulls and I was hesitant, but they are perfect for this piece!
And I think they match great with the simple antique brass knobs.
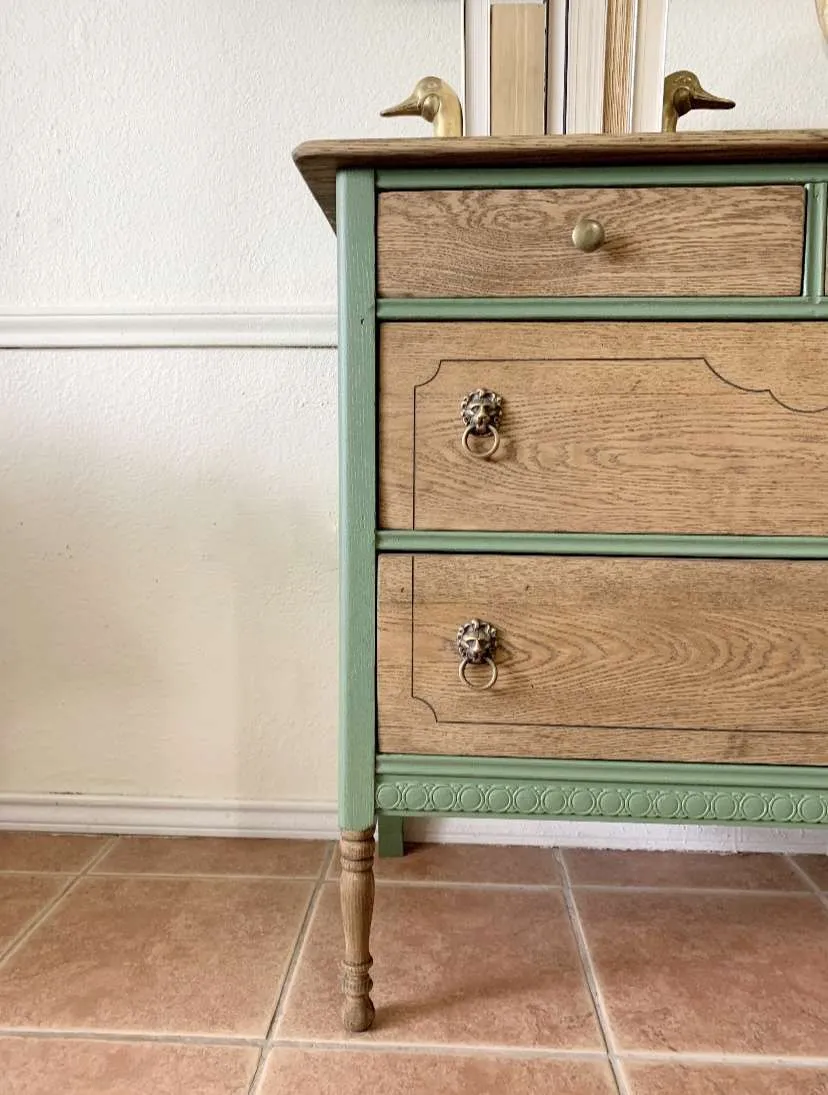
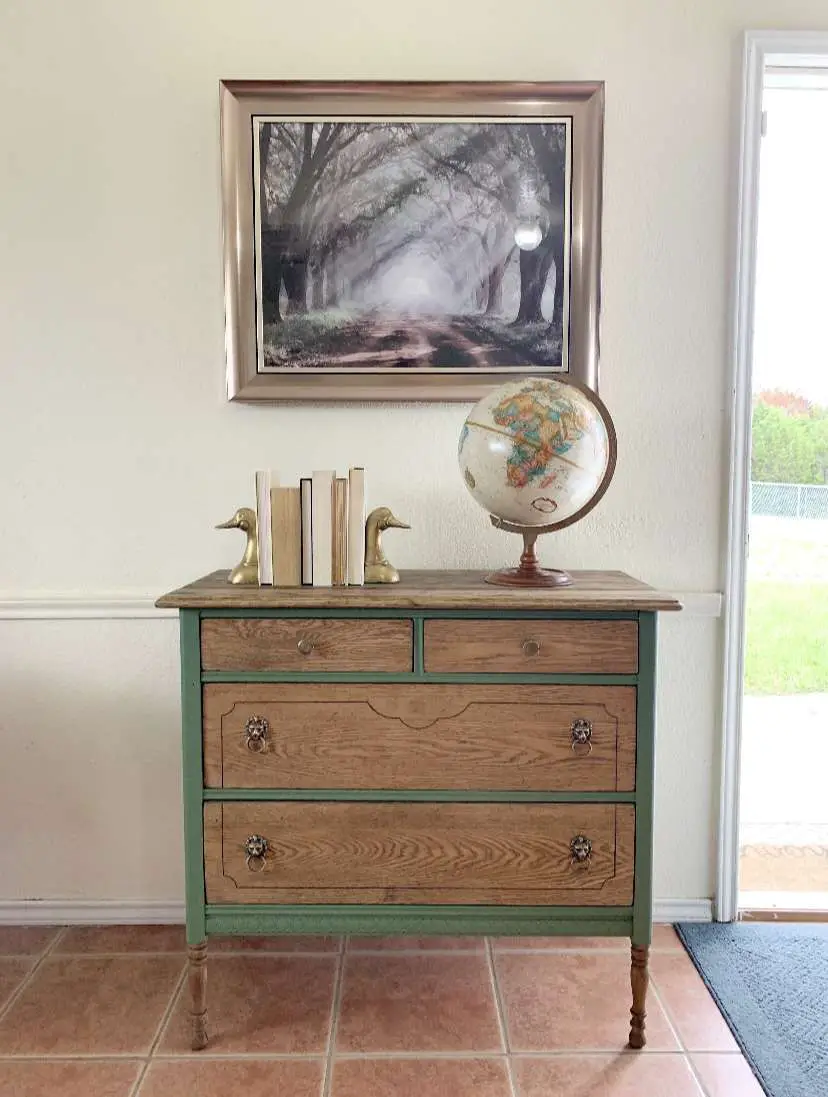
In the end, the dresser came together beautifully.
However, as you can see, it was a LOT of work. In the beginning, we worried that we bit off more than we could chew.
I’m not sure that this antique dresser would have been worth the work if we were flipping it to sell, but we plan on keeping it. I want to use it as an entryway table for years to come!