[Disclaimer: Finding Mandee is reader-supported, if you purchase through links on my site I may earn an affiliate commission at no additional cost to you. As an Amazon Associate, I earn from qualifying purchases.]
When my daughter brought home a paper for a new school project, I was kinda excited about it.
I’m a “Pinterest Mom” and like helping the kids with their projects!
Since she didn’t give us the project rubric until THREE days before the project was due, we didn’t have time for anything elaborate.
We were able to put together this 3-D solar system model in one afternoon, including the trip to the store to get supplies!
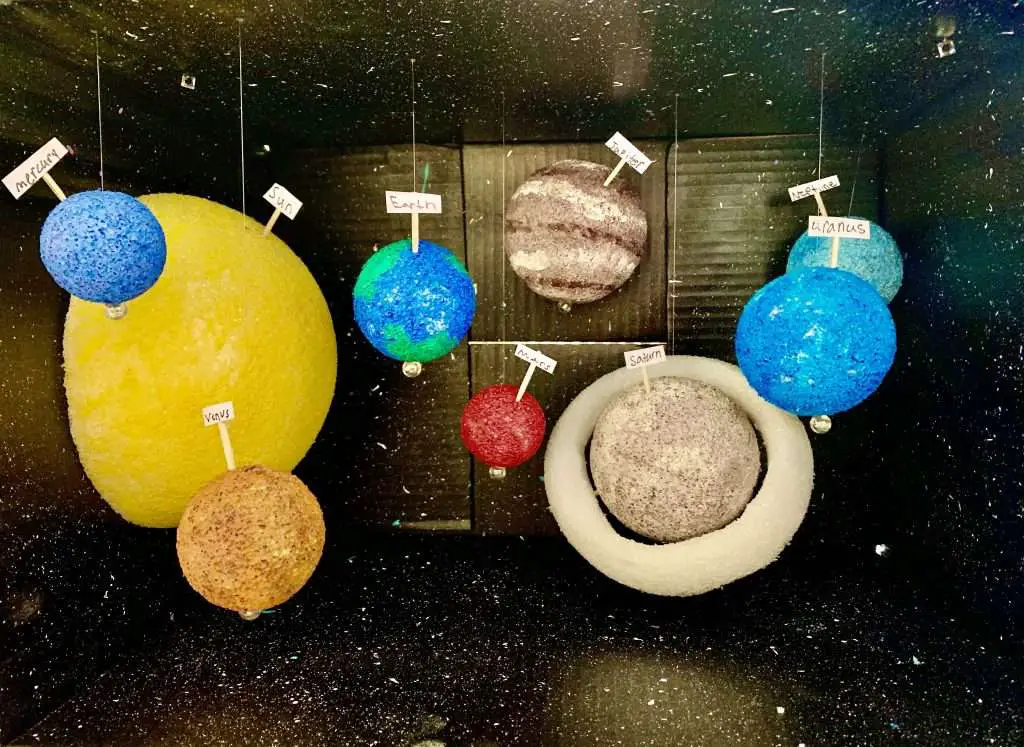
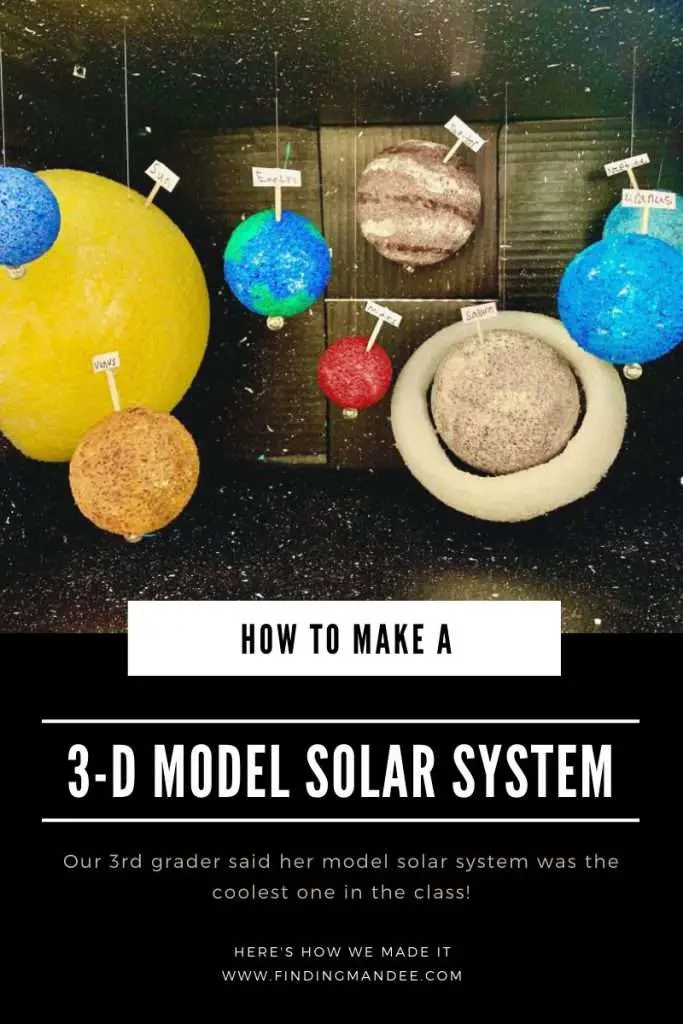
How to Make a Solar System Model
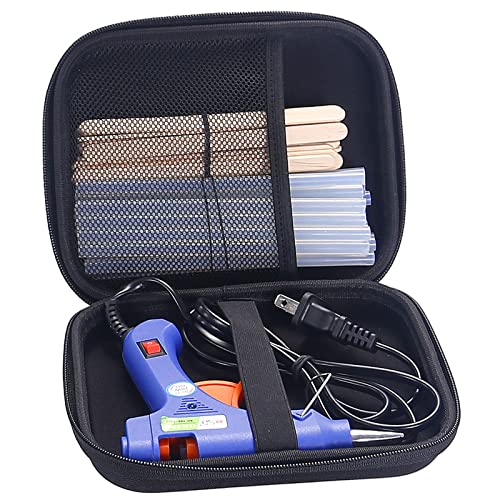
Step 1: Gather Supplies
Thankfully, all of the supplies for this project could be found at our local Wal-Mart. (Yay for not having to drive to the craft store!)
Here’s what you need for this solar system model:
- an empty box (a long narrow one is best)
- black spray paint
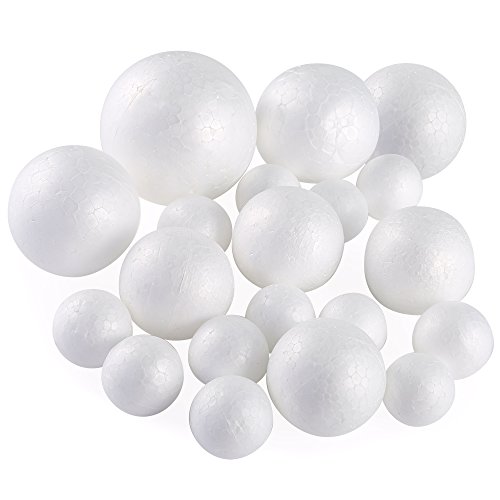
- 10 foam balls (1 giant, 2 XL, 2 large, 2 medium, 2 small)
- fishing line (or string)
- hot glue gun/glue sticks
- sponge brushes
- scissors
- skewer (or pencil)
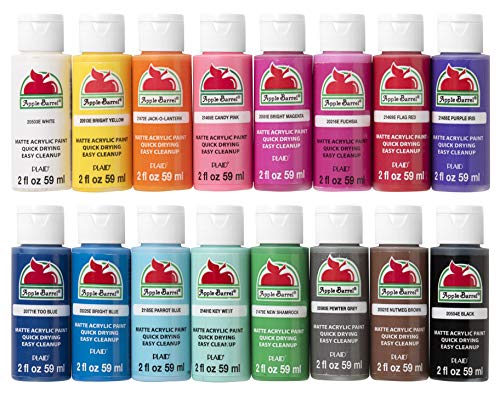
- paint (yellow, blue, green, orange, silver, white, brown, and red)
- toothpicks
- beads (optional)
- pen
- letter stickers and embellishments (optional)
While this looks like a long list, we had all of these supplies already, except for the foam balls and 2 paint colors.
Step 2 : Paint Model Solar System Box
After getting all of the supplies, it’s time to paint the box.
We used a small moving box for this project. A longer box would have been better, but we already had this one on hand and decided that we could make it work.
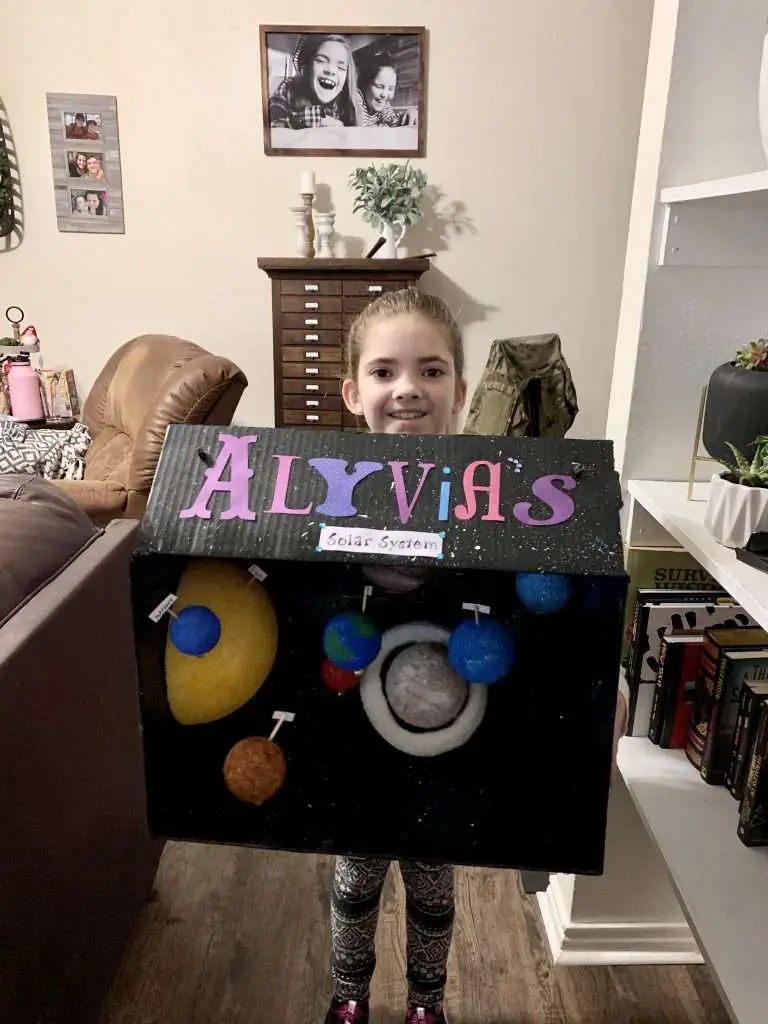
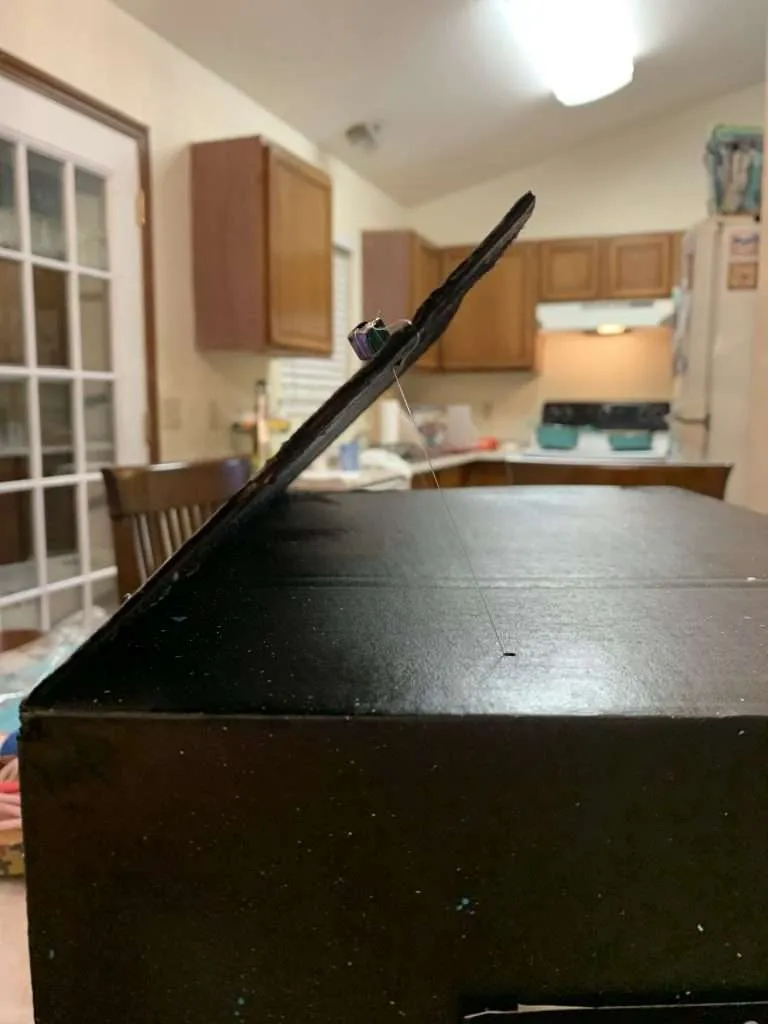
First, we cut off 3 of the box flaps. We left one long flap at the top of the box because Lyvi wanted to add her name to it.
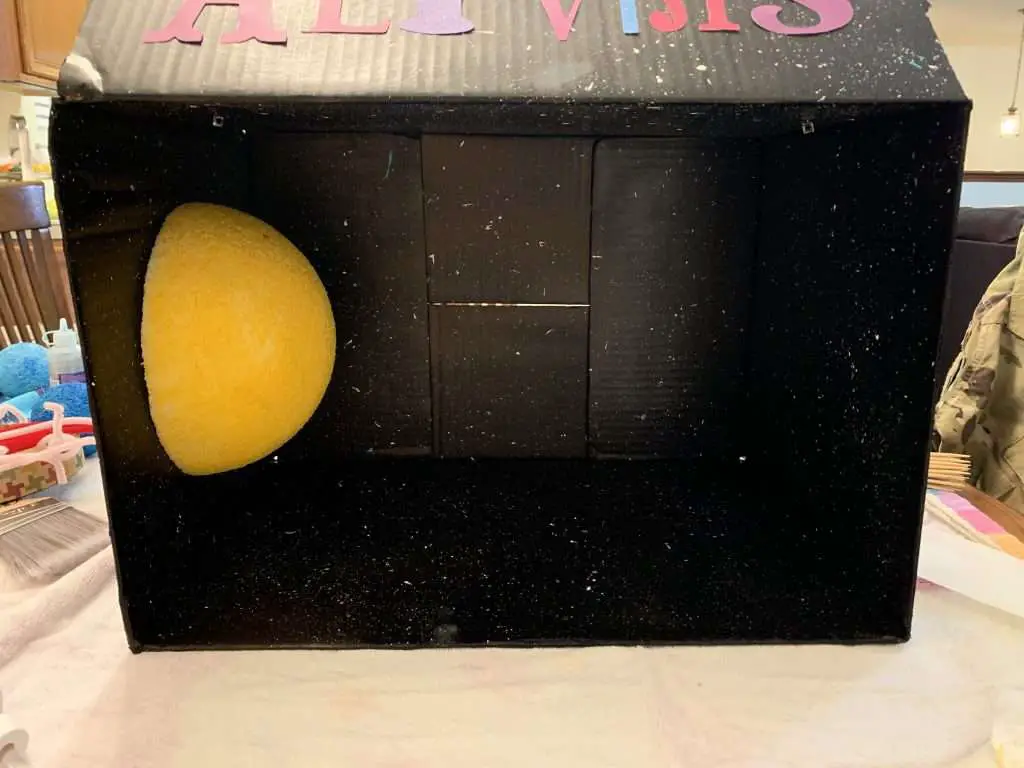
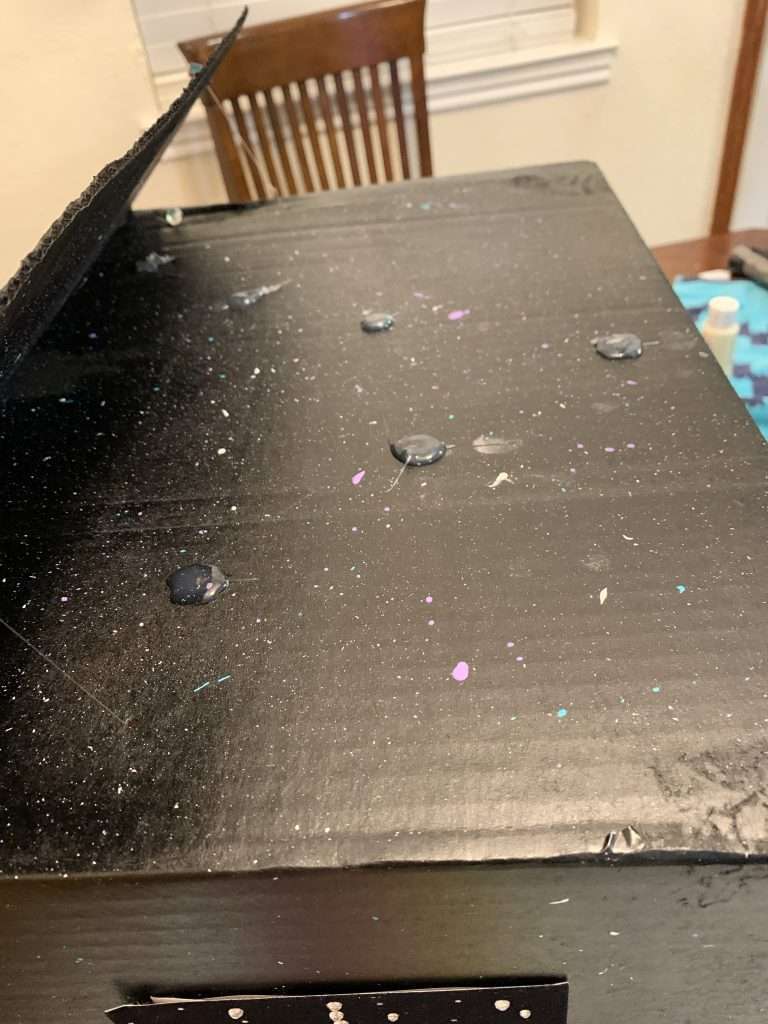
Then, we spray-painted the box black (inside and out), then added white speckles to it, to make it look more galactic.
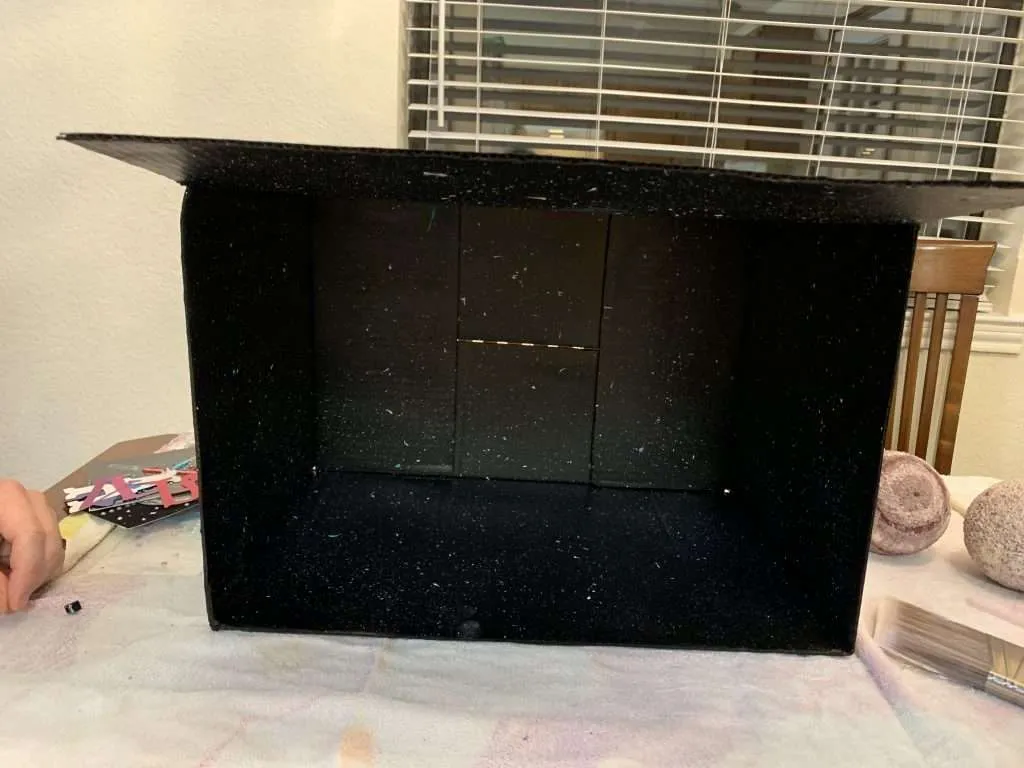
We tied the flap of the box back to make it stay upright.
To do this, fold the flap back to where it is touching the top of the box and poke a hole through both pieces of cardboard. Then tie the flap to the top of the box using fishing line or string.
Rust-Oleum 331182 Painter’s Touch 2X Ultra Cover Spray Paint, 12 oz, Ultra Matte BlackFishing Wire 1640 FT Mckanti Fishing Line Clear Nylon String Invisible Hanging Beading Wire Strong Abrasion Resistant Monofilament Fishing Line for Balloon Garland Hanging Crafts Decorations


Step 3: Paint the Planets
Painting the planets was my girls’ favorite part of the project!
We found that using a sponge brush was faster and easier than a regular paintbrush. We also discovered that the foam balls will soak up a lot of paint. So, don’t be afraid to really pile it on!
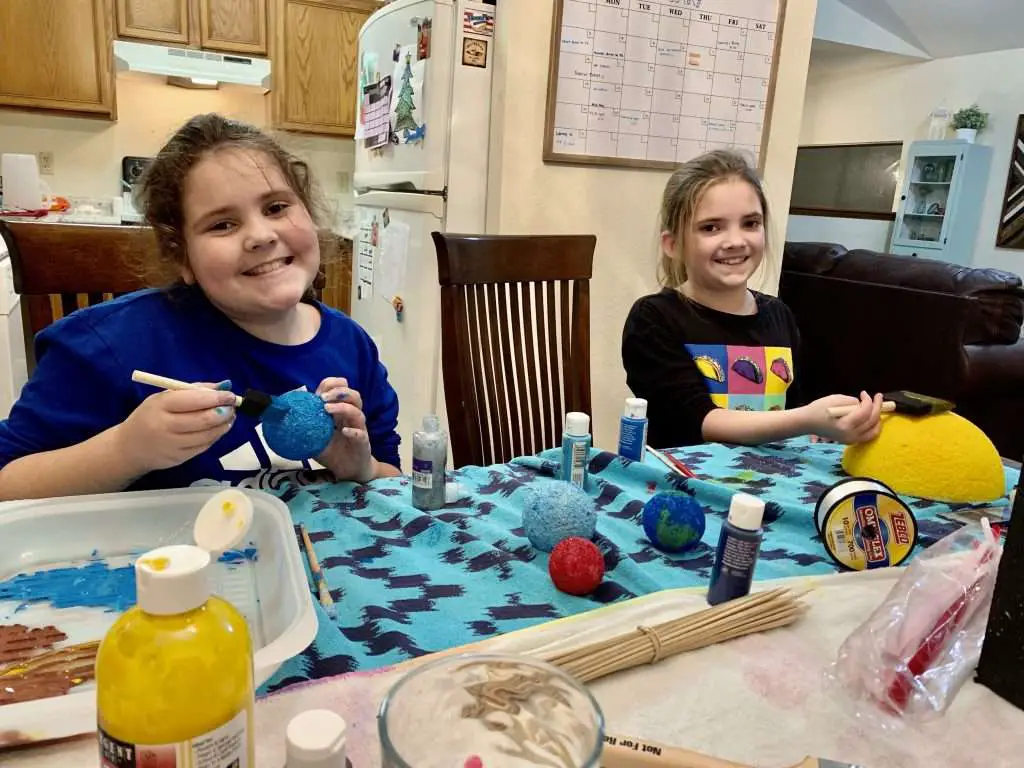
The most difficult part of this step was deciding what colors to paint some of the planets. We also had to make sure to get the planets the right size. To get a good grade, these details had to be as accurate as possible.
Here’s what we did:
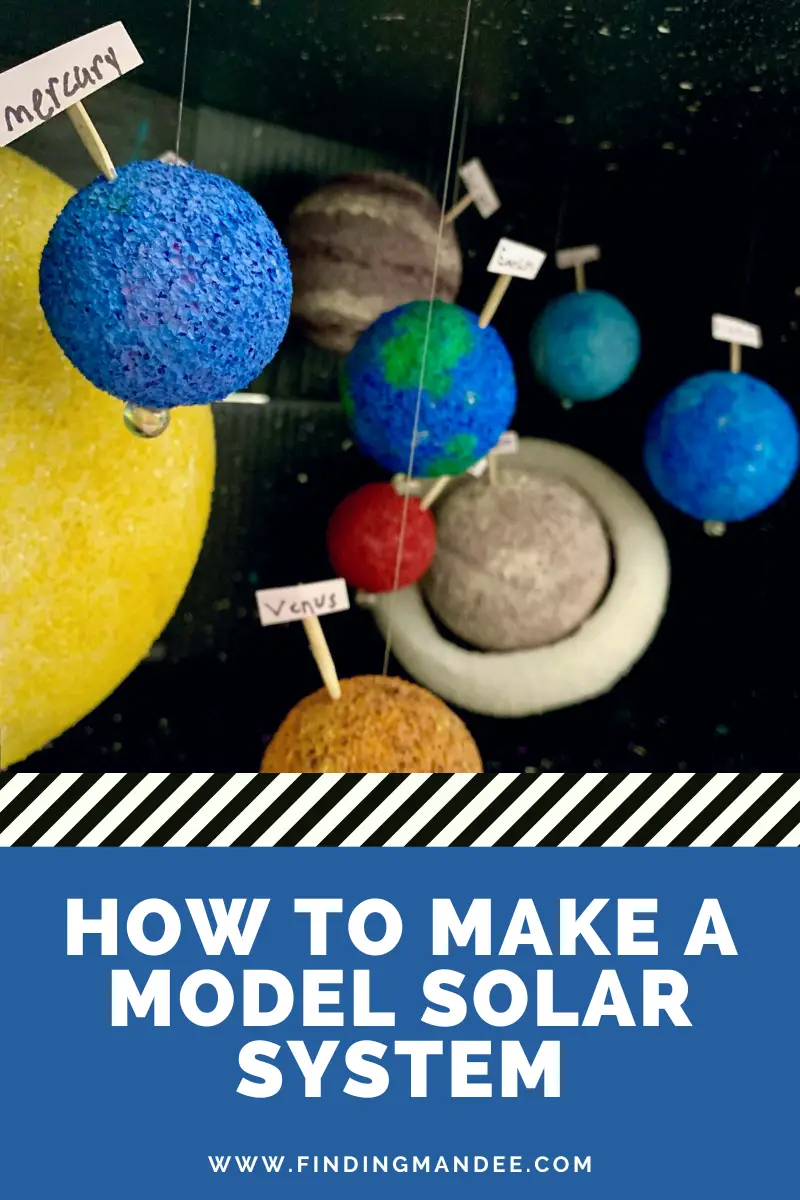
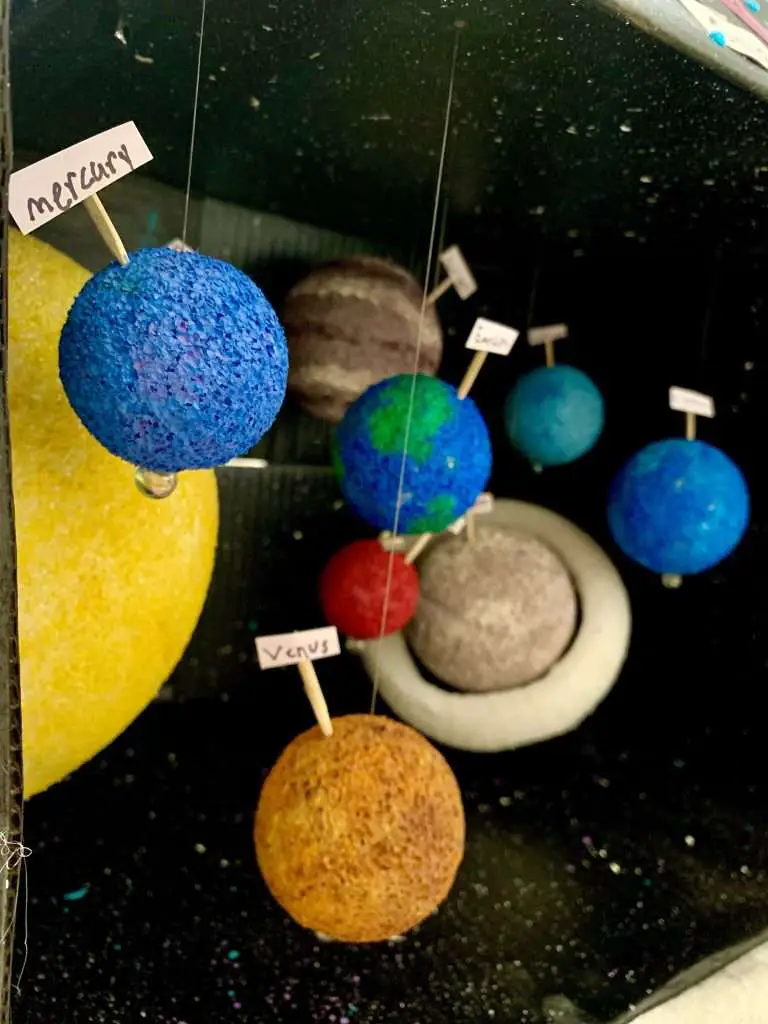
- Sun (Giant) – yellow
- Mercury (Small) – silver/gray
- Venus (Medium) – orange/brown
- Earth (Medium) – blue and green
- Mars (Small) – red
- Jupiter (Extra Large) – brown with light & dark stripes
- Saturn (Extra Large) – tan/light gray
- Uranus (Large) – light blue
- Neptune (Large) – blue/purple
While the girls were busy painting, my husband and I made Saturn’s ring.
We cut a chunk off of the unused (and unpainted) half of the sun. Then cut that chunk down to a 1.5 inch thick and hollowed out the center. We attached Saturn in the center of the ring with 2 toothpicks.
Pllieay 20 Pieces 5 Sizes White Foam Balls Polystyrene Craft Balls Art Decoration Foam Balls for Art, Craft, Household, School Projects and Party DecorationApple Barrel Acrylic Paint Set (2-Ounce), Best Colors Count, 32 Fl Oz (Pack of 16)
Step 4: Hang the Planets
The first planet we placed in our solar system was the sun. We glued it to the left side of the box.
One of the guidelines for this project was that the planets had to be in order based on their distance from the sun.
Ideally, we would have wanted to line them up one after the other in front of the sun, but our box was too short. We improvised and hung the planets at varying depths inside the box to make them fit.
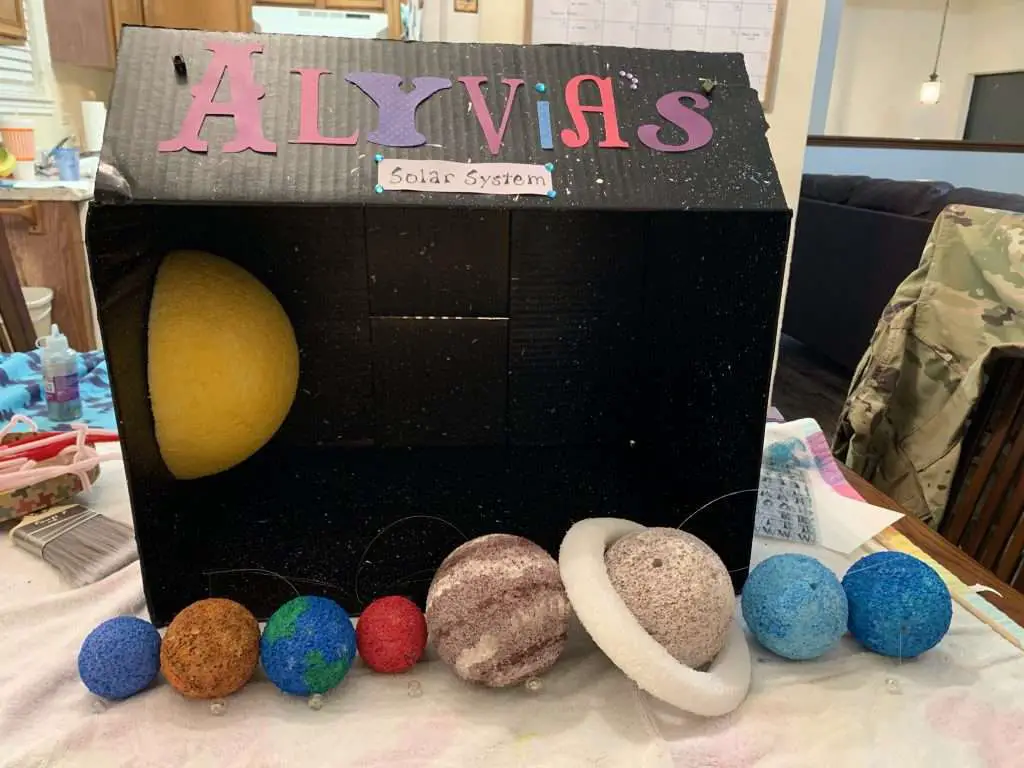
It wasn’t as pretty and orderly as we hoped, but they all fit and were in the correct order starting with Mercury and ending with Neptune.
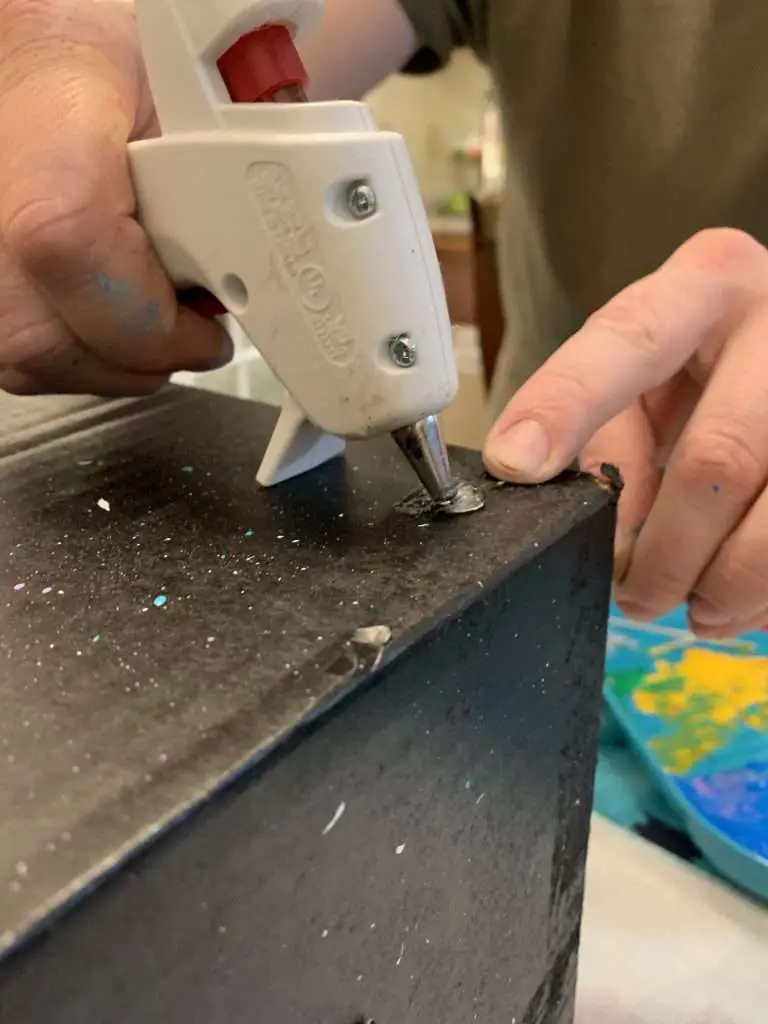
To hang the planets, we poked a hole through the styrofoam ball with a wooden skewer, ran the fishing line through it, and tied a bead to the end. (If you don’t have beads, you can always use a big glob of hot glue.)
We poked a hole in the top of the box and glued the fishing line to the outside of the box. You have to hold the string in place until the hot glue cools and hardens a little, or the planet will slip and fall.
Hot Glue Gun Kit, Hot Melt Glue Gun Mini for Crafts with 20 Pcs Glue Sticks and 20 Wood Craft Sticks,Hot Mini Glue Guns with Hardshell Carrying Case for School DIY Arts, Craft1000+ Pcs Pony Beads Bulk – Plastic Bracelet Beads Sukh 6x9mm Crystal White Clear Pony Beads for Bracelets Making Hair Beads for Braids DIY Crafts Key Chai Jewelry Making Home Decor Beads

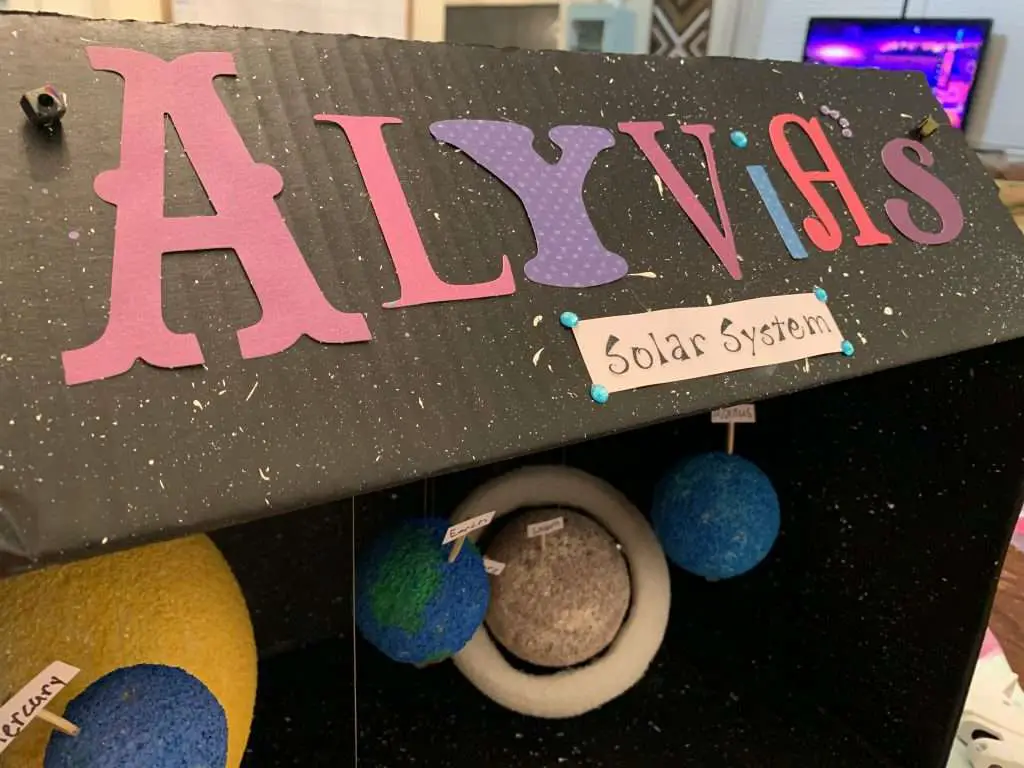
Step 5: Label the Planets
Finally, it was time to label the solar system! (This was another project requirement.)
I made Lyvi write the names of the planets on a piece of card stock (regular paper would work too) and cut them out. It was hard for her to write small, but she did a great job!
We hot glued the labels to a toothpick and stuck them in the planets.
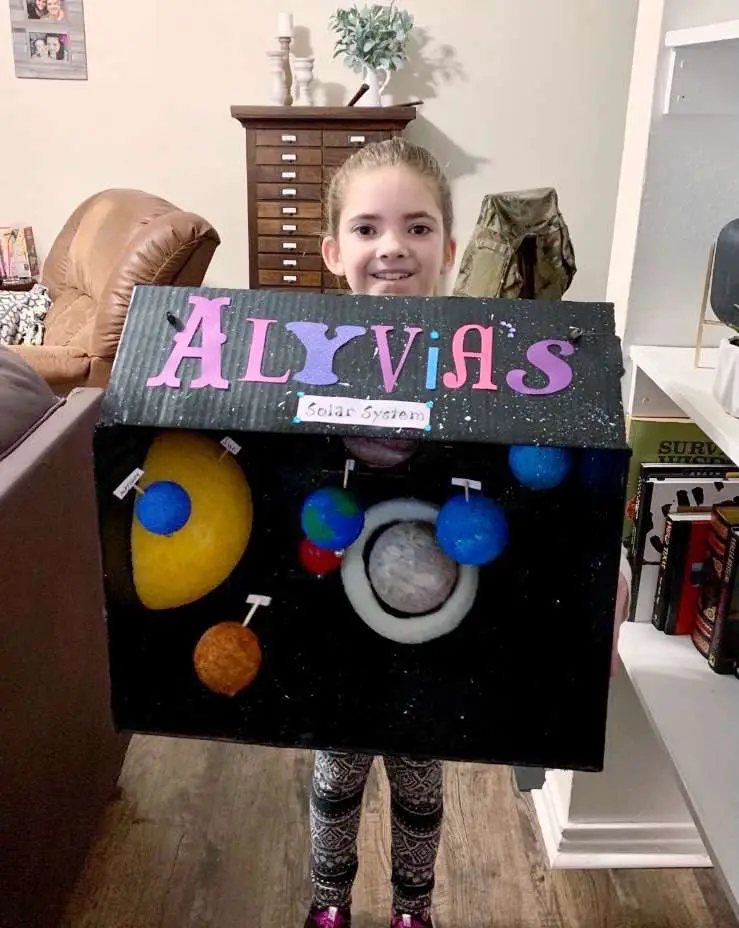
Step 6: Decorate the Solar System Model
This step is optional, but Lyvi was more than excited to have her name big and bold on the front of her model solar system!
We used scrapbook letters that I already had on hand.
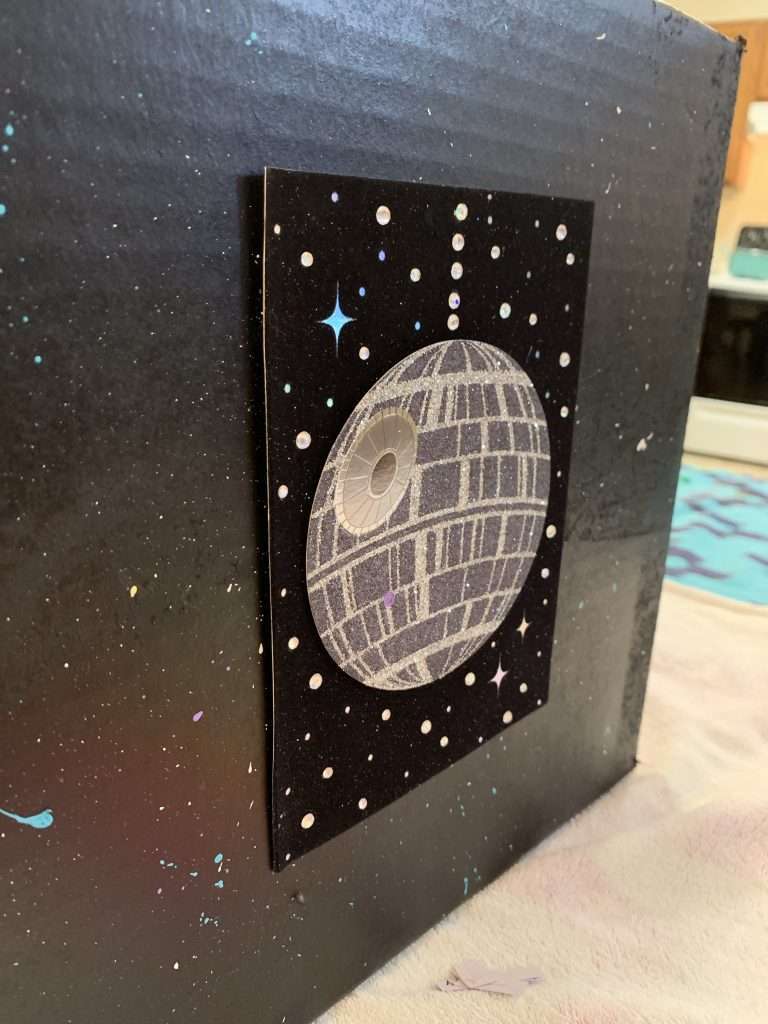
We also used old Star Wars greeting cards that I had to decorate the side of the box. What kid doesn’t want a Death Star on their Galaxy project?
MAXSNOW Star Wars Film Theme Fans Stickers for Laptop Water Bottle Luggage Snowboard Bicycle Skateboard Decal for Kids Teens Adult Waterproof Aesthetic StickersLEOBRO Black Glitter, Holographic Chunky Glitter, 160G/5.64OZ Glitter, Craft Glitter for Resin, Metallic Iridescent Chunky Fine Glitter Sequin Flake Bulk, Nail Glitter for Makeup Body, Epoxy Tumblers


As far as school projects go, this one was pretty fun, despite the short notice she gave us. But with all 4 of us working on it (it was a family affair), we finished this solar system model in just a few hours!
And most importantly, Lyvi LOVES it! She said that it was the coolest one in her whole class!
I hope that your model turns out just as great and that you have as much fun making it as we did!