[Disclaimer: Finding Mandee is reader-supported, if you purchase through links on my site I may earn an affiliate commission at no additional cost to you. As an Amazon Associate, I earn from qualifying purchases.]
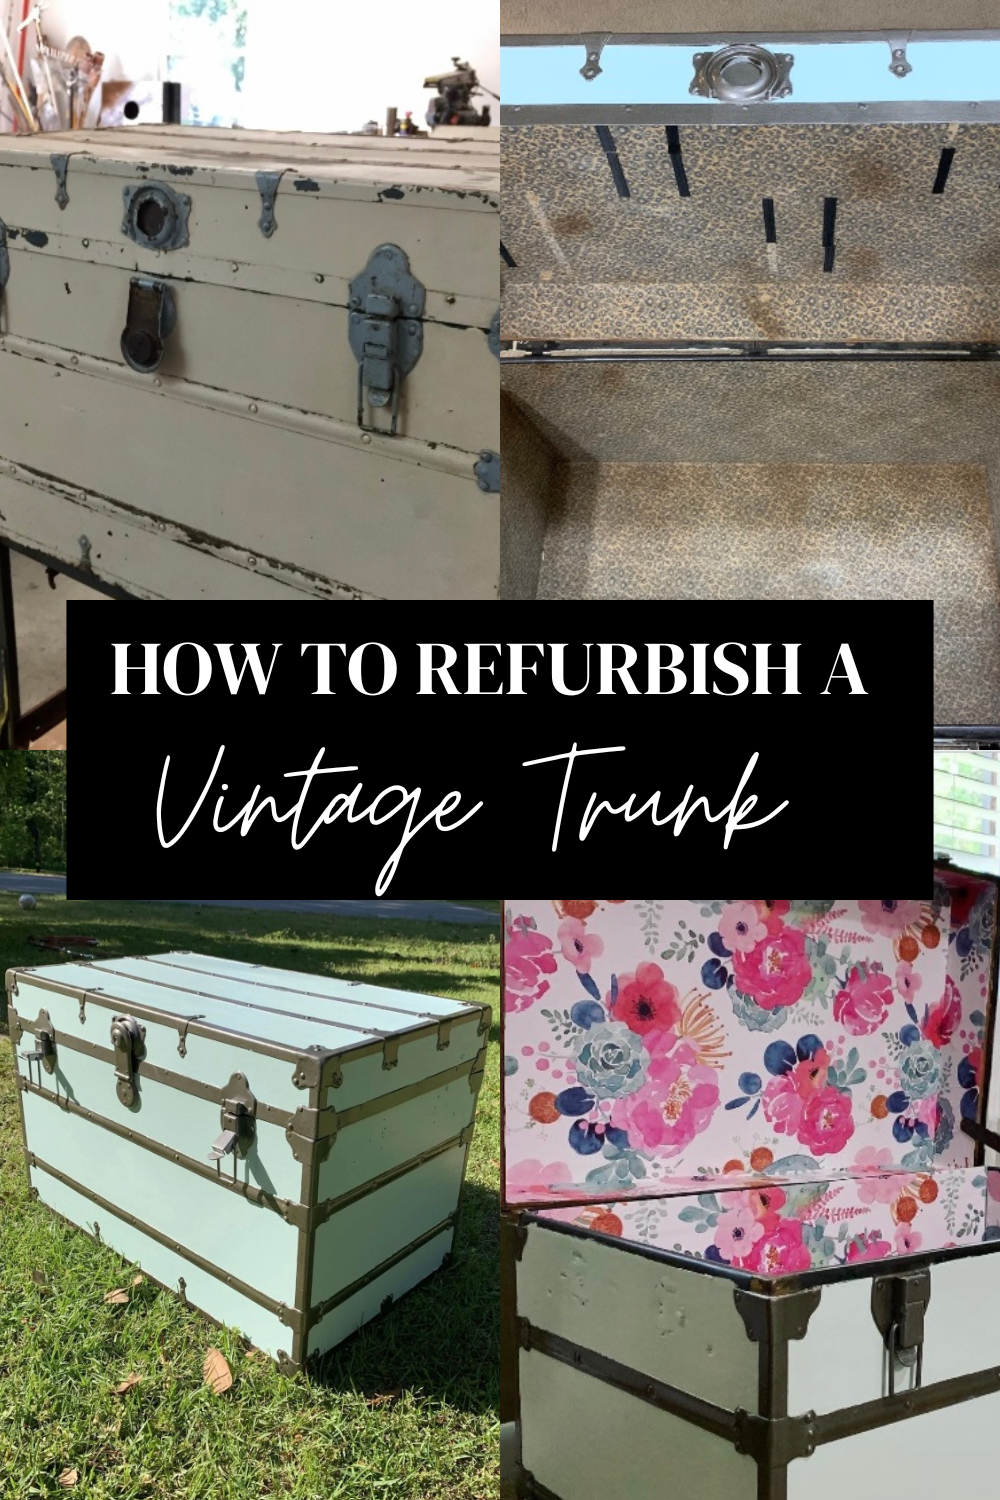
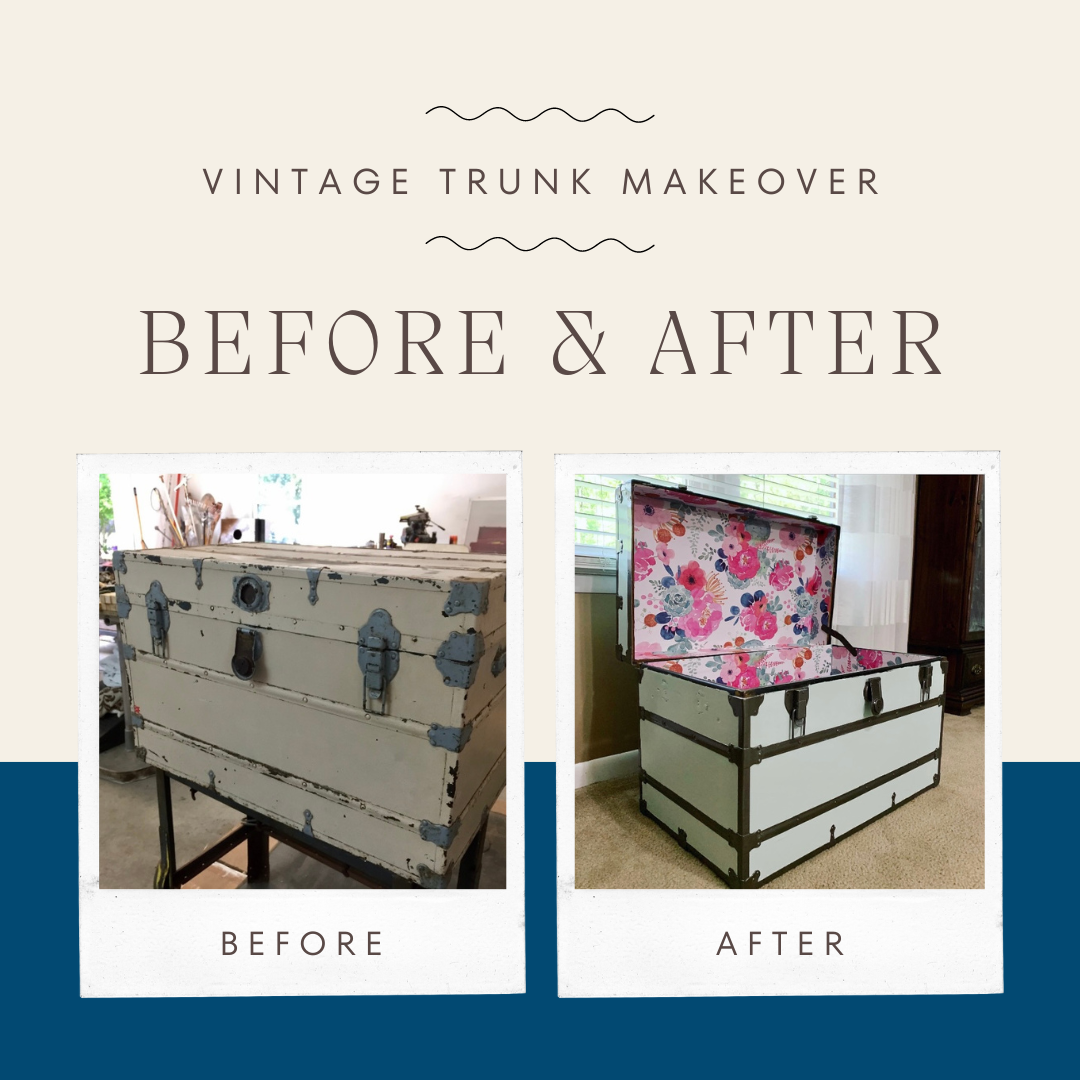
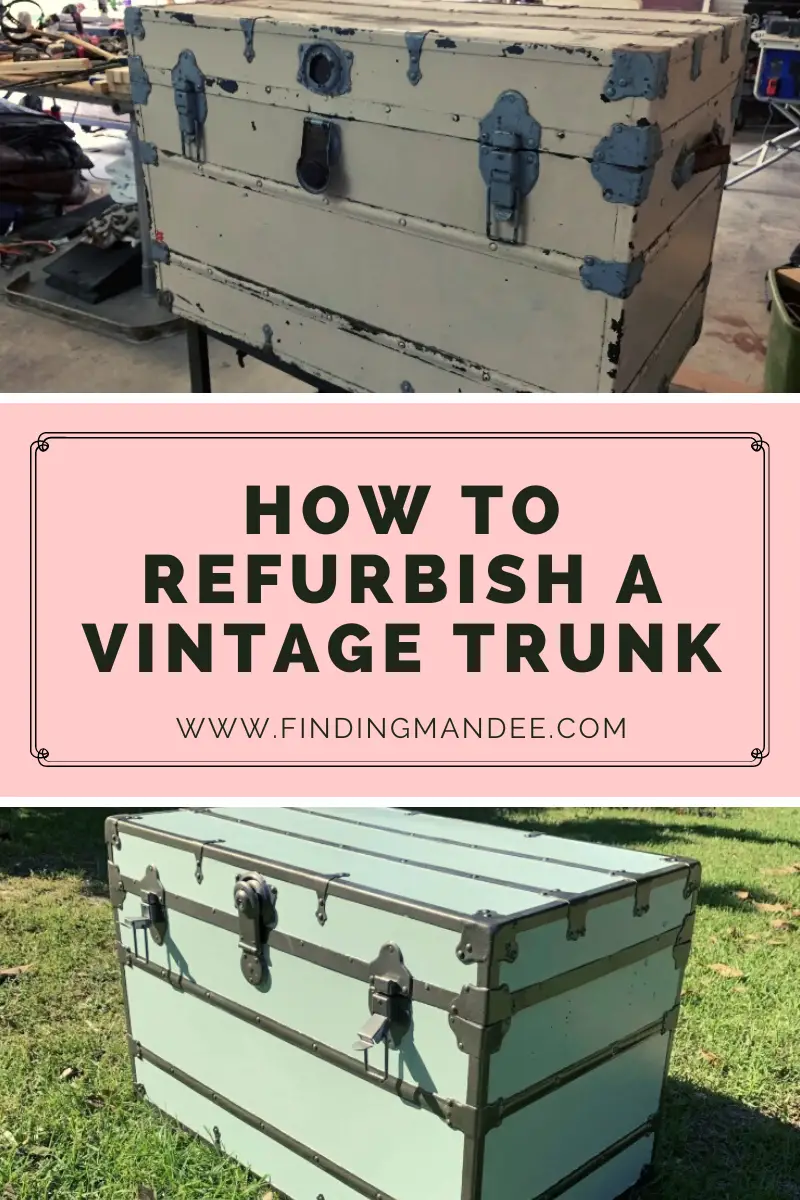
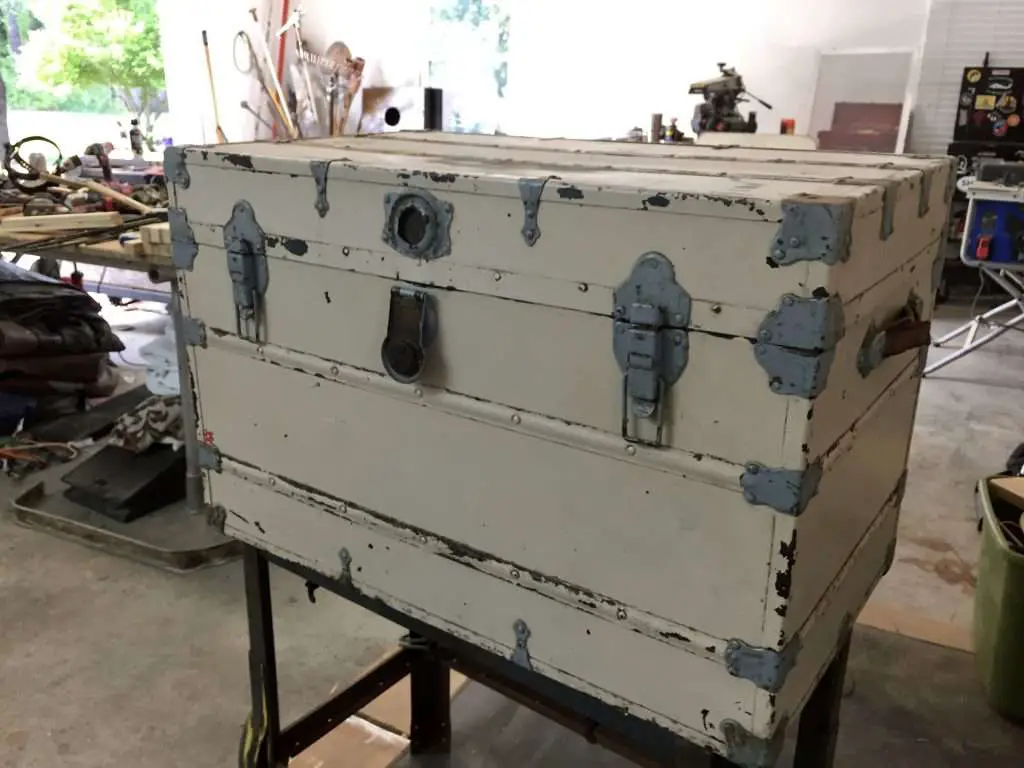
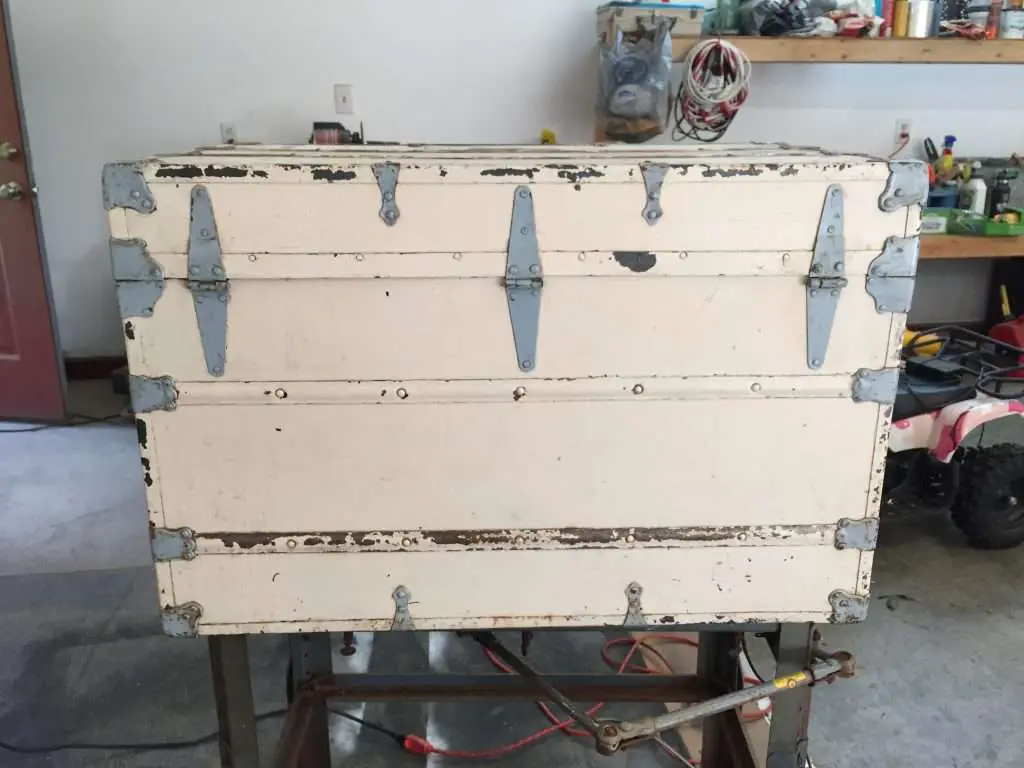
My mother-in-law gifted us a vintage trunk.
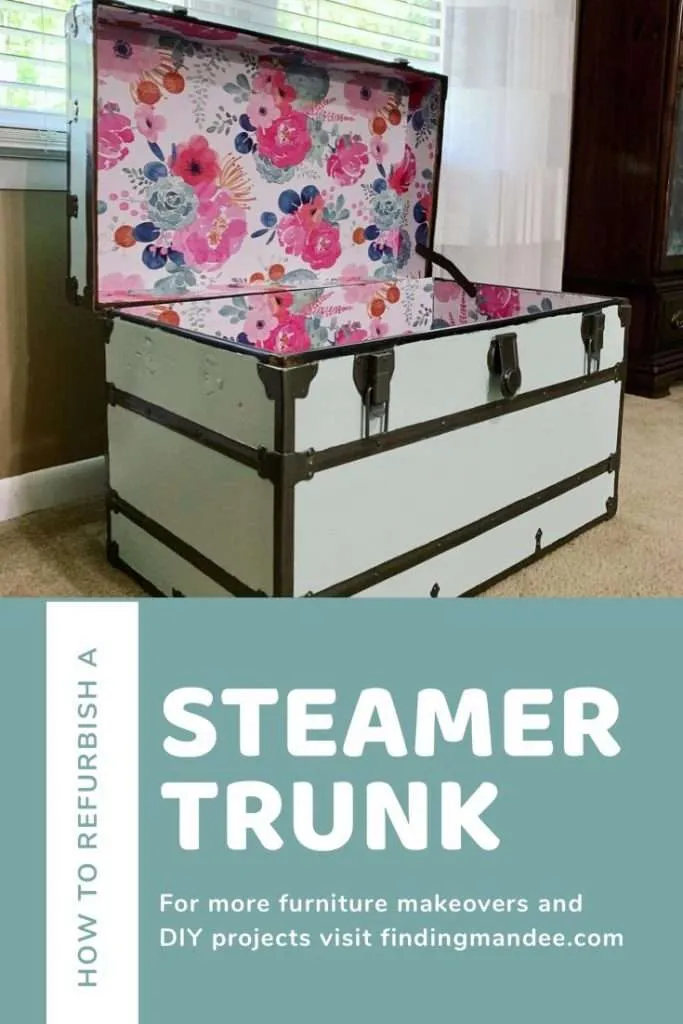
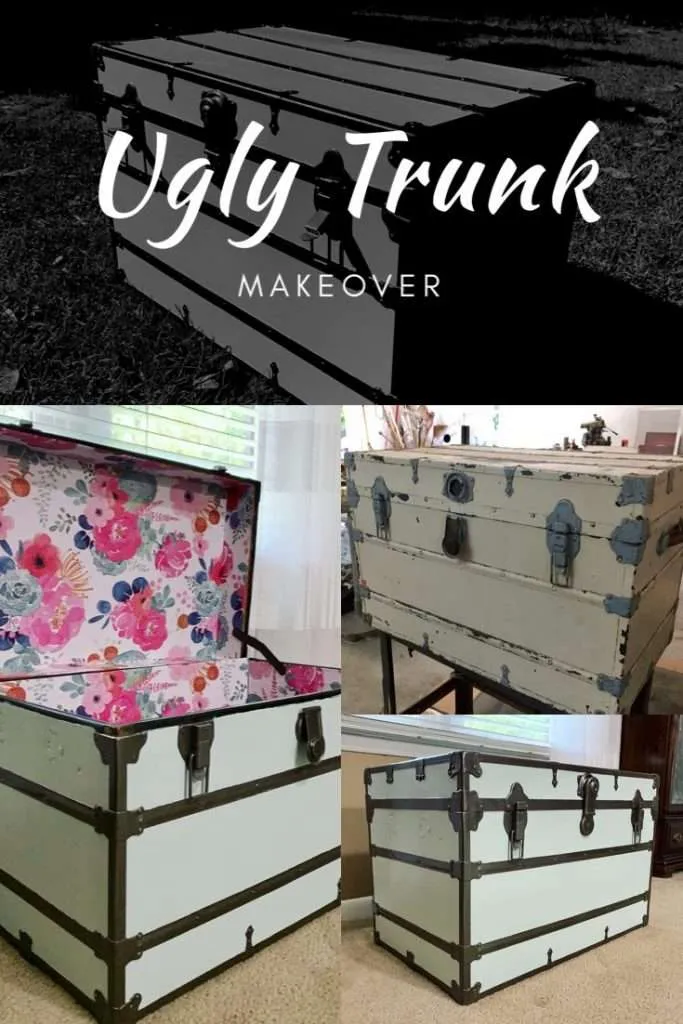
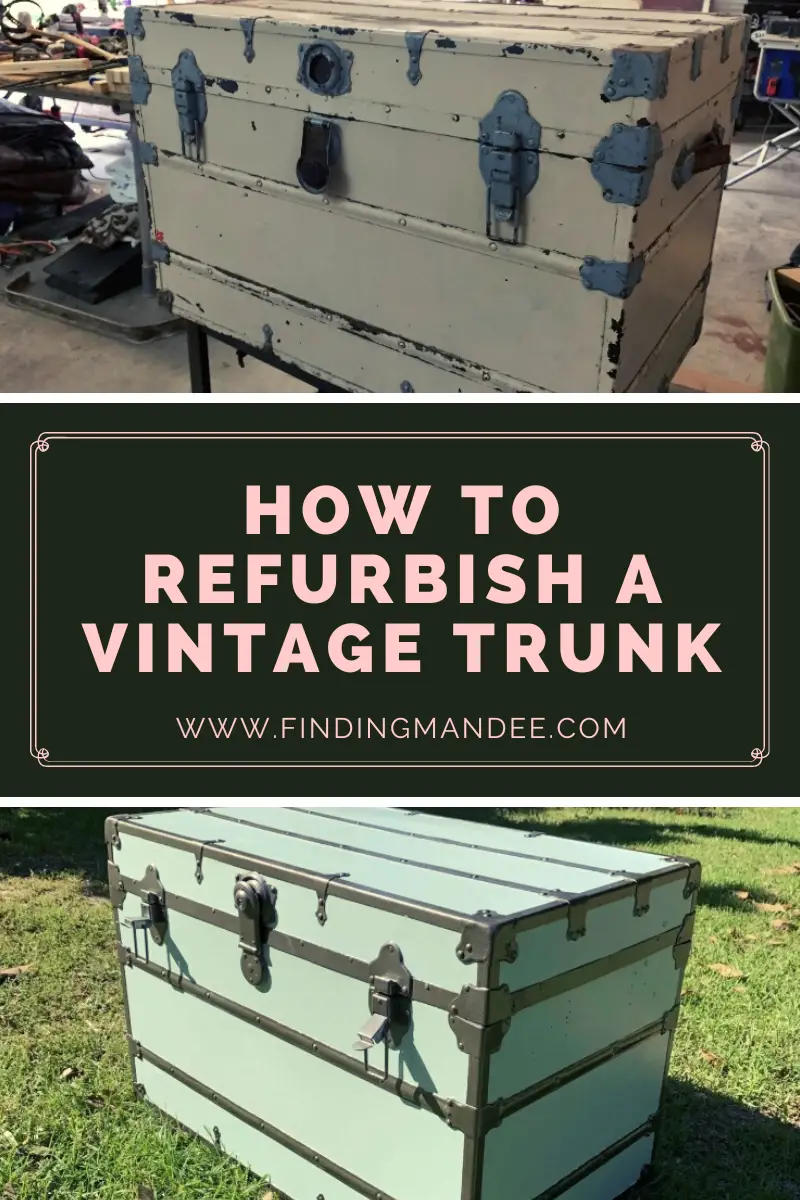
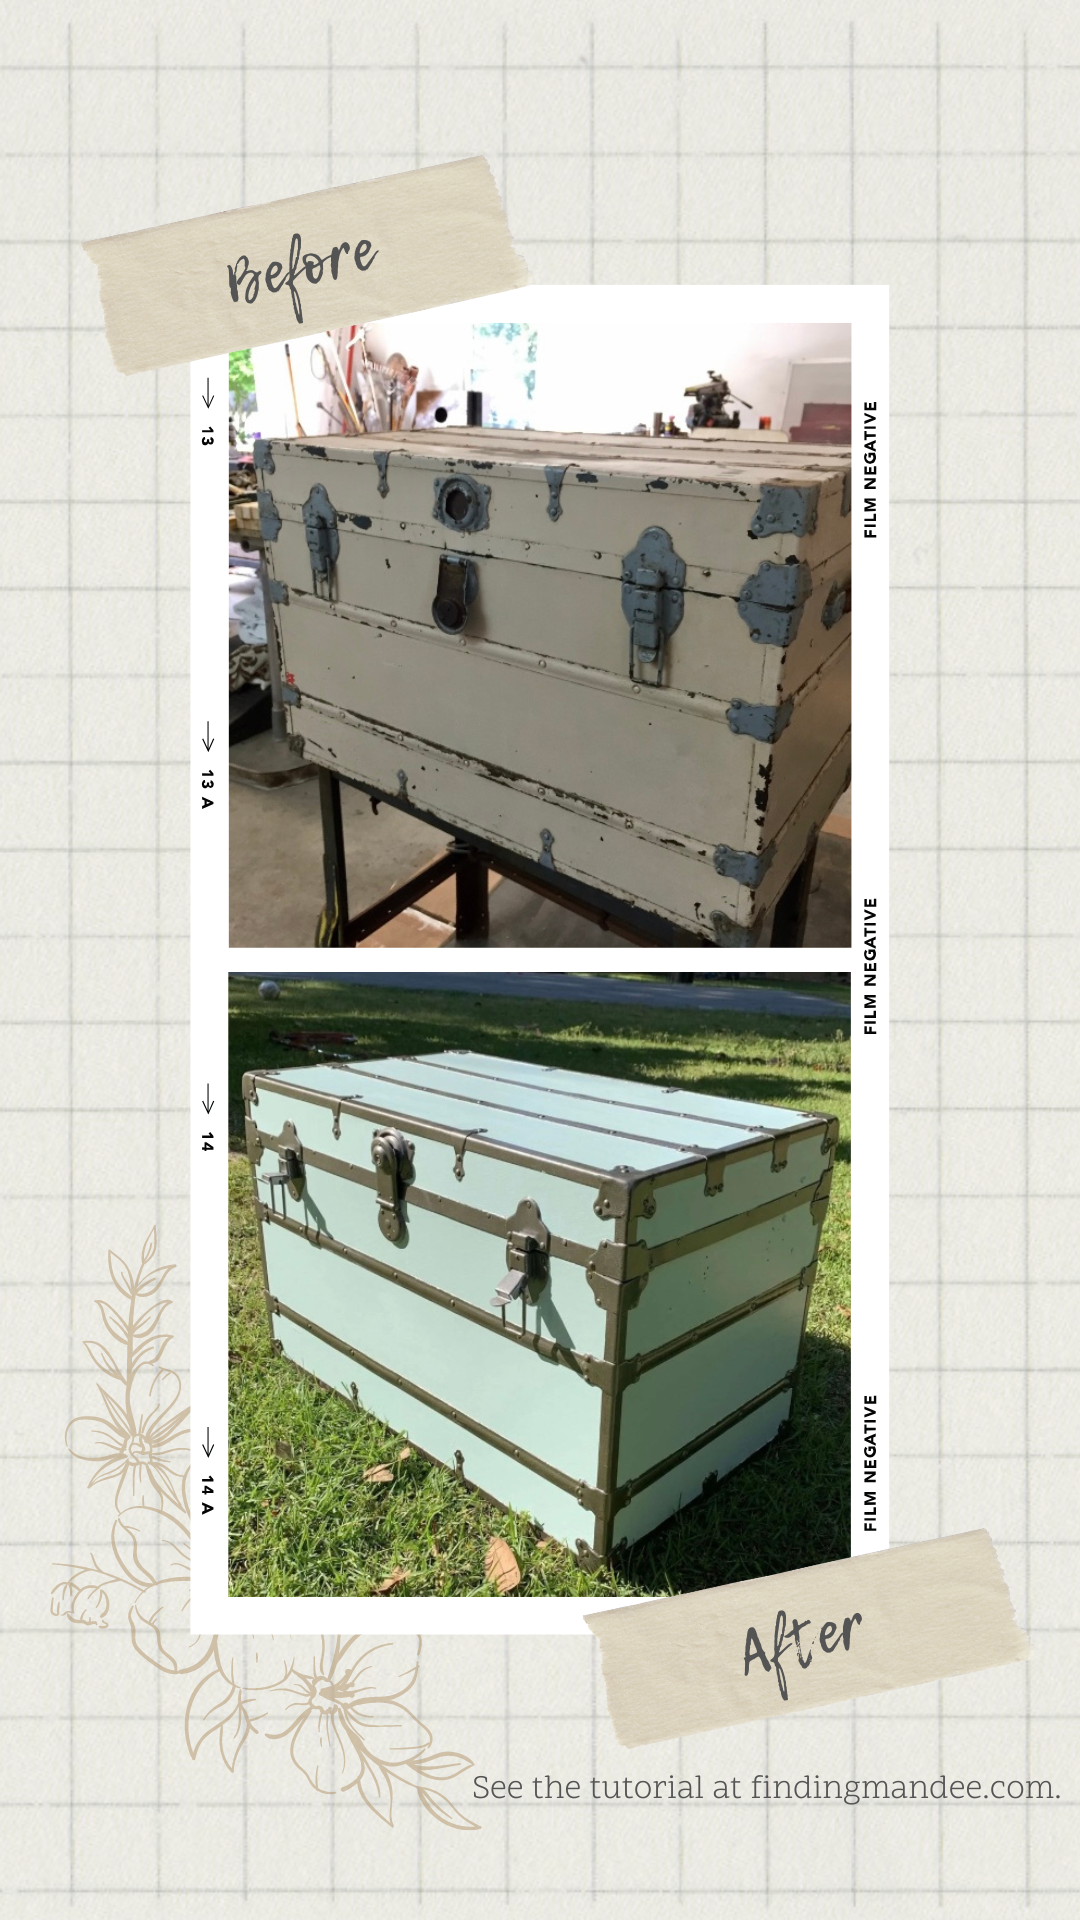
It was painted a dingy cream color and the interior was covered in a yellowing paper that was peeling and crumbling. This thing had definitely seen better days.
But I loved it as soon as I saw it!
I knew that with a little TLC, this trunk could be a fabulous way to store the girls’ dress-up clothes.
The kids loved it, regardless of the dismal shape it was in. They piled their dress-up clothes in it as soon as we got it home.
And that’s how it stayed….for 3 years!
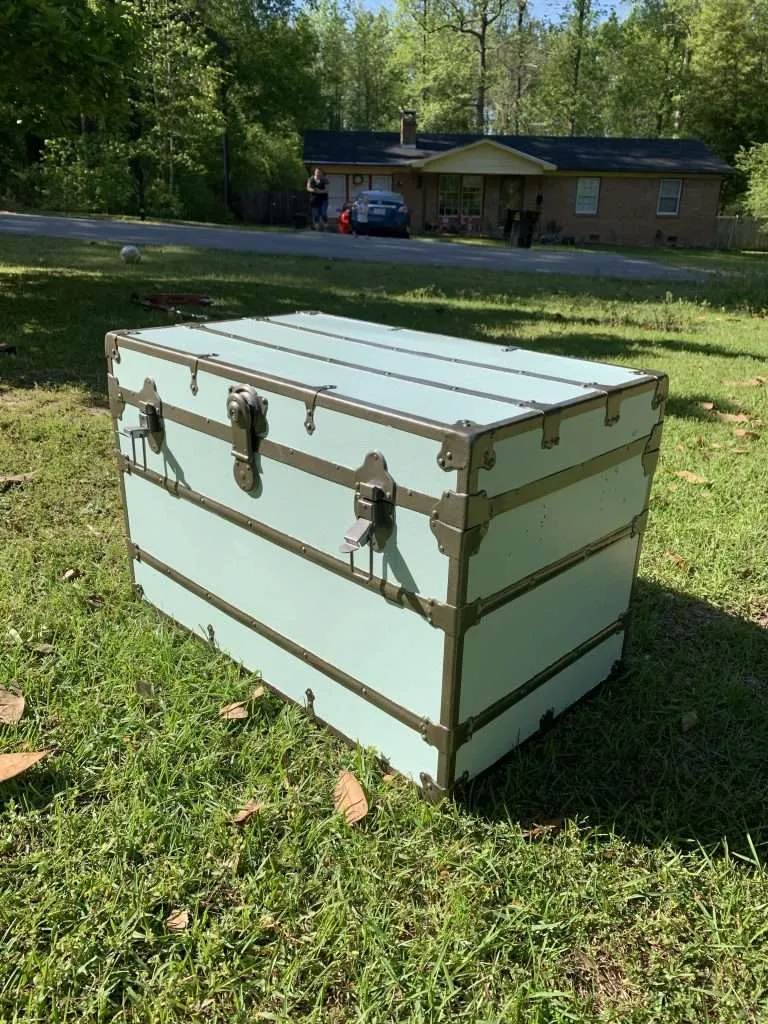
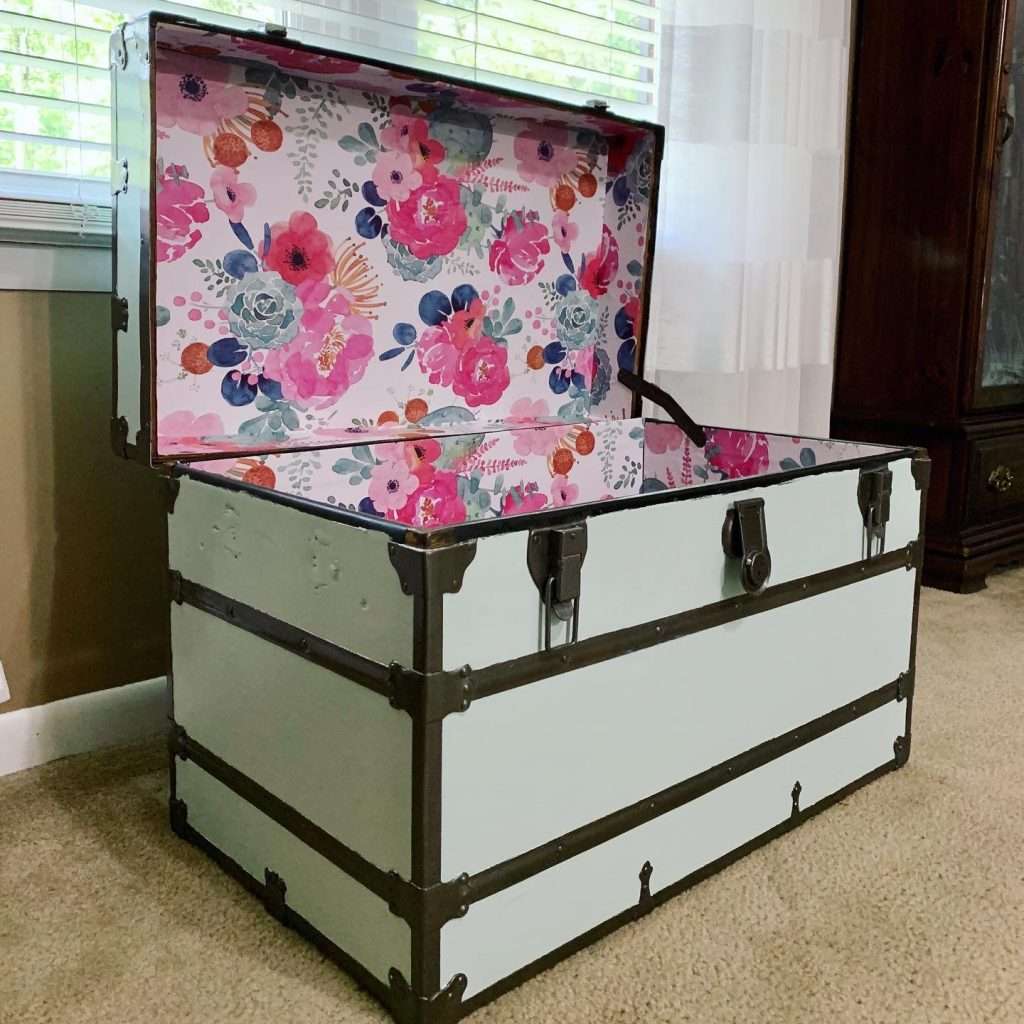
During the Covid lockdown, I finally made the time to refurbish this vintage trunk and I LOVE how it turned out!
Here is how we took this crusty old trunk from drab to fab!
The Supplies
- old steamer trunk
- orbital sander
- 120-grit sanding pads
- mini paint roller
- paint tray
- painter’s tape
- wrapping paper
- Zinsser Bullseye 1-2-3 Primer
- pretty paint (I used Sherwin Williams ‘Waterscape’)
- hammered bronze spray paint
- peel-and-stick wallpaper
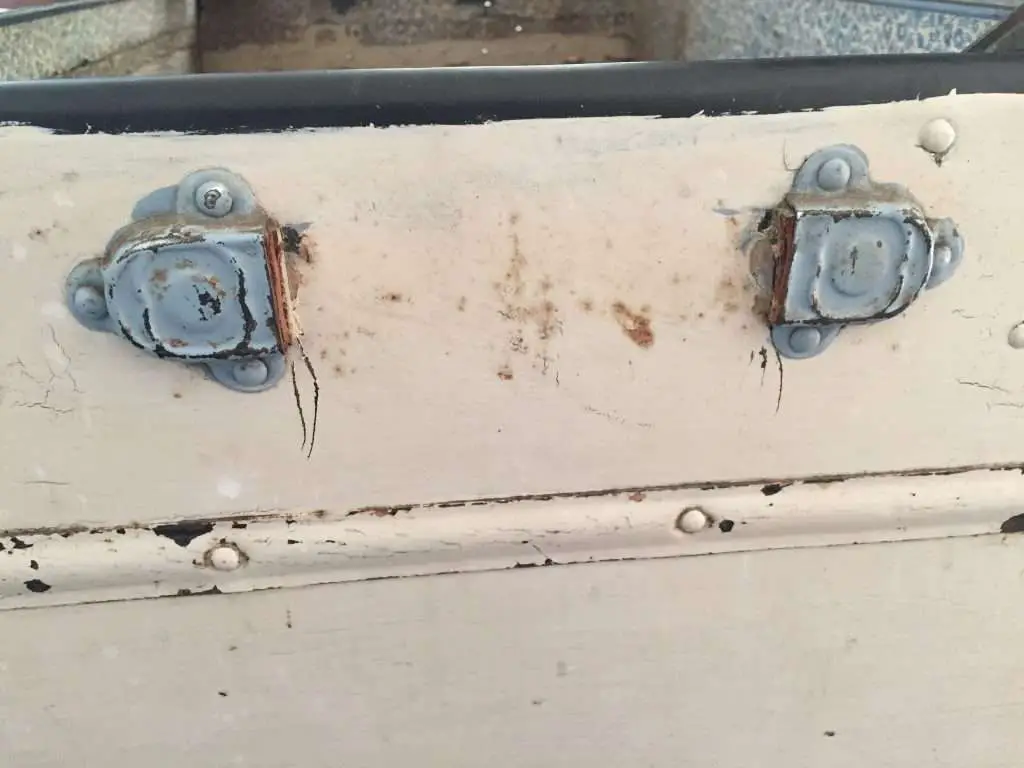
Step 1: Remove the Old Handles
The first step in refurbishing this vintage trunk was to remove the old handles.
At one point, it had leather handles attached to the sides by metal hardware. The leather straps rotted away long ago, so we had to remove the remaining metal hardware. A task that sounded easy, but was so much harder than we anticipated.
After a lot of unsuccessful prying, my husband finally removed them by using a punch and a hammer. He essentially hammered the trunk nails out backwards (from the inside of the trunk).
HORUSDY 2-Pack Super Strong 6ESTWING Hammer – 16 oz Straight Rip Claw with Smooth Face & Shock Reduction Grip – E3-16S

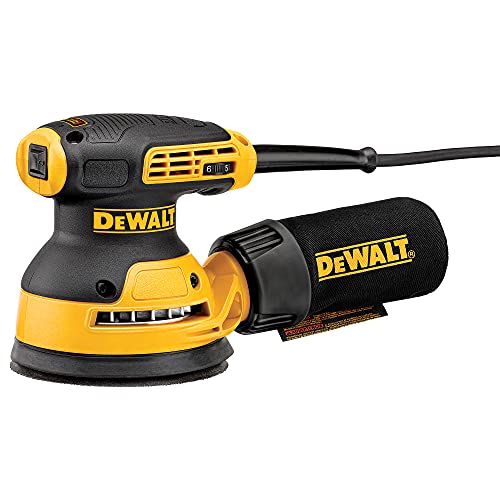
Step 2: Sand It
The next step of refurbishing the vintage trunk was sanding.
Using an orbital sander, I went over the whole trunk using 120-grit sand paper. I sanded the wooden surface, as well as the metal hardware.
I didn’t sand it down completely, just enough to make the surface rough enough to hold paint.
DEWALT Random Orbit Sander, Variable Speed, 5-Inch (DWE6423)Mirka Abranet Net Disc / 6 inch/Grit 120 /Sandpaper Sanding Discs Hook and Loop / 10 pcs / 9A-241-120RP

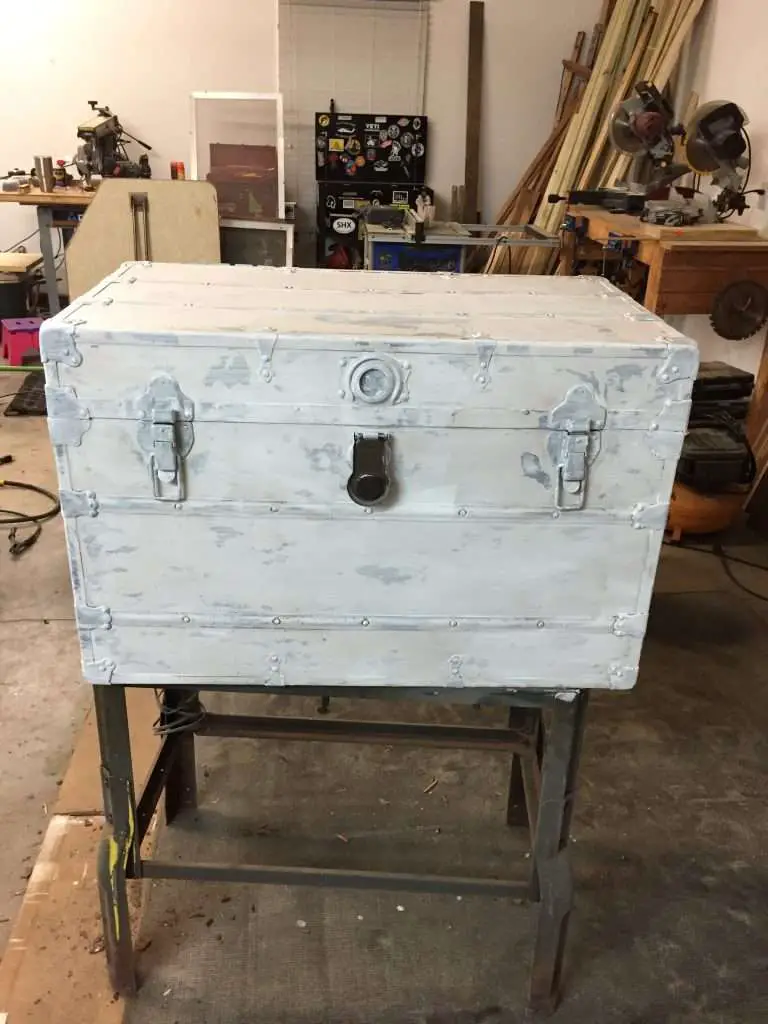
Step 3: Coat with Primer
After sanding, there were several dark spots on the trunk. It seems that the trunk was originally painted black.
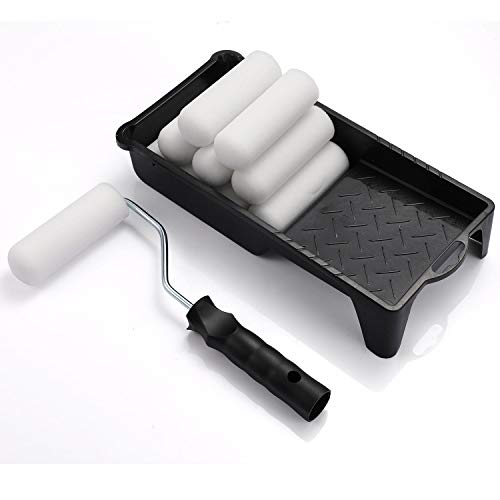
It took 2 thin coats of primer before it was ready for paint. I applied the primer using a mini foam paint roller, covering the whole trunk, metal hardware and all.
I used Zinsser Bulls Eye 1-2-3 Interior/Exterior Primer, which I use on almost all of my projects and it works great!
Zinsser Bulls Eye 123 Plus White Primer For All Surfaces 1 qt.Foam Paint Roller, Roller Frame with 4-Inch Mini Paint Roller Cover Refills with Foam-Covered Ends, High-Density Foam Paint Tray Set for Room Home Repair Mini Paint Kits(12 Piece)

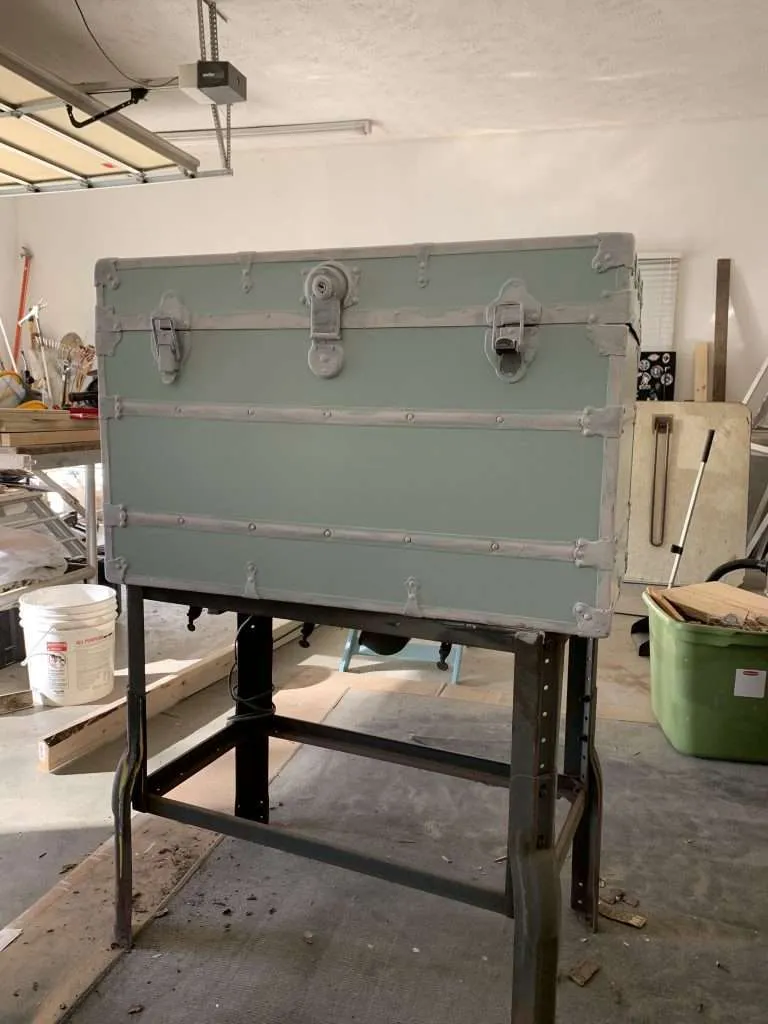
Step 4: Paint the Wood
The next step was to paint the wood portions of the chest.
Using the same mini rollers, I painted the wood portions of the trunk. I tried not to get paint on the metal hardware, but if I touched it a little it was okay – the hardware paint would cover it with no problem.
I let the paint dry overnight.
The paint color I is Waterscape by Sherwin Williams. We also used this paint on our vintage medicine cabinet makeover too.
PRESTIGE Paints Interior Paint and Primer In One, 1-Gallon, Semi-Gloss, Comparable Match of Sherwin Williams* Waterscape*Mister Rui Foam Paint Roller, 2 Inch Mini Paint Roller Kit (8 Pack), Small Paint Roller with Tray, Small Paint Rollers 2 Inch, Mini Rollers for Painting Cabinets, Furniture, Stenciling, Art Crafts


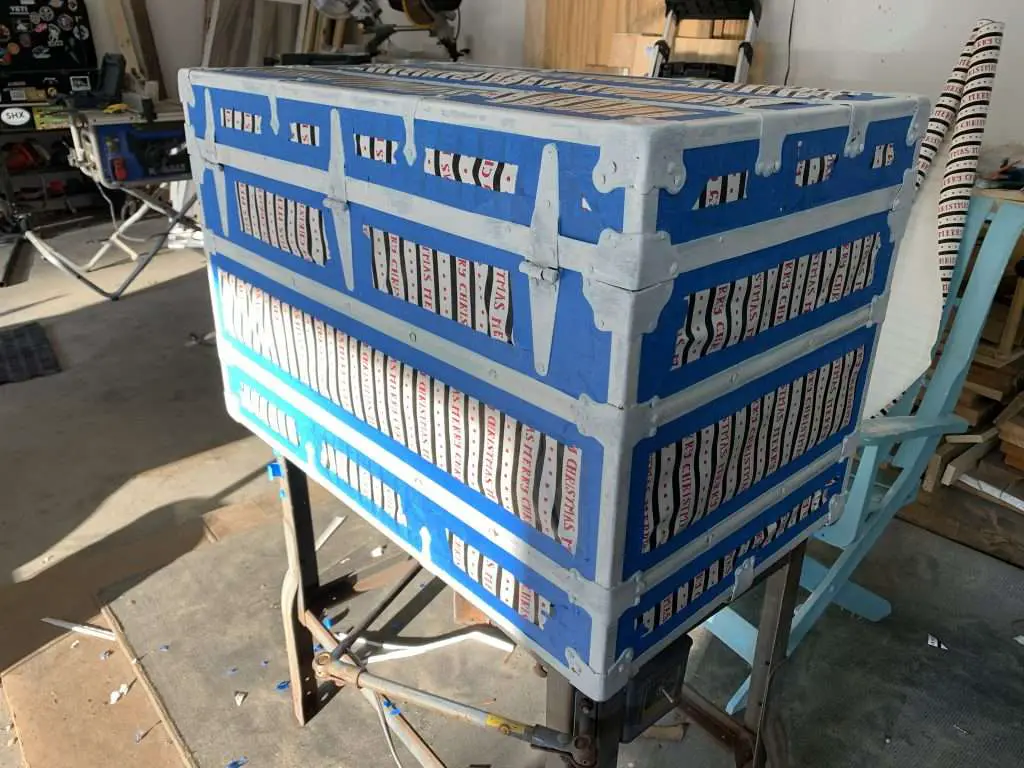
Step 5: Tape It
Hands down, this step was the most tedious and time-consuming part of this project.
In a perfect world, I would remove all of the metal hardware in order to paint the trunk and hardware separately.
However, this is not a perfect world and there was no way to remove all of the metal and hardware from this trunk without potentially wrecking it. Trying to pull the metal strips off would have bent and possibly cracked them, not to mention the corner pieces and clasps.
So, I was stuck taping around all of the metal pieces on the trunk. It was extremely time-consuming and used up 2 rolls of tape.
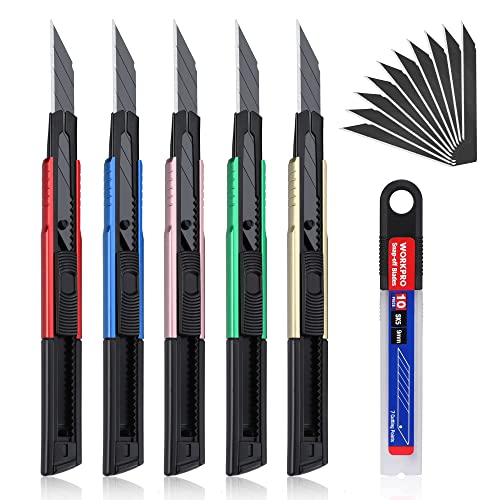
Using a box cutter with a sharp new blade, I was able to cut the tape to hug the rounded edges of the corner pieces and lock.
I used to leftover Christmas wrapping paper to cover the middle of each section.
It looked crazy, but it worked!
FROGTAPE 240661 Multi-Surface Painter’s Tape with PAINTBLOCK, Medium Adhesion, 1.88 Inches x 60 Yards, Green, 3 RollsWORKPRO Premium Utility Knife Retractable Snap-off Blade, Heavy Duty Aluminum Box Cutter Set, Razor Knife Exacto Craft Knives, with 10 Extra 9mm Blades, Pack of 5

Step 6: Paint the Hardware
FINALLY, after hours and hours of taping, I was ready to spray paint the trunk’s metal hardware.
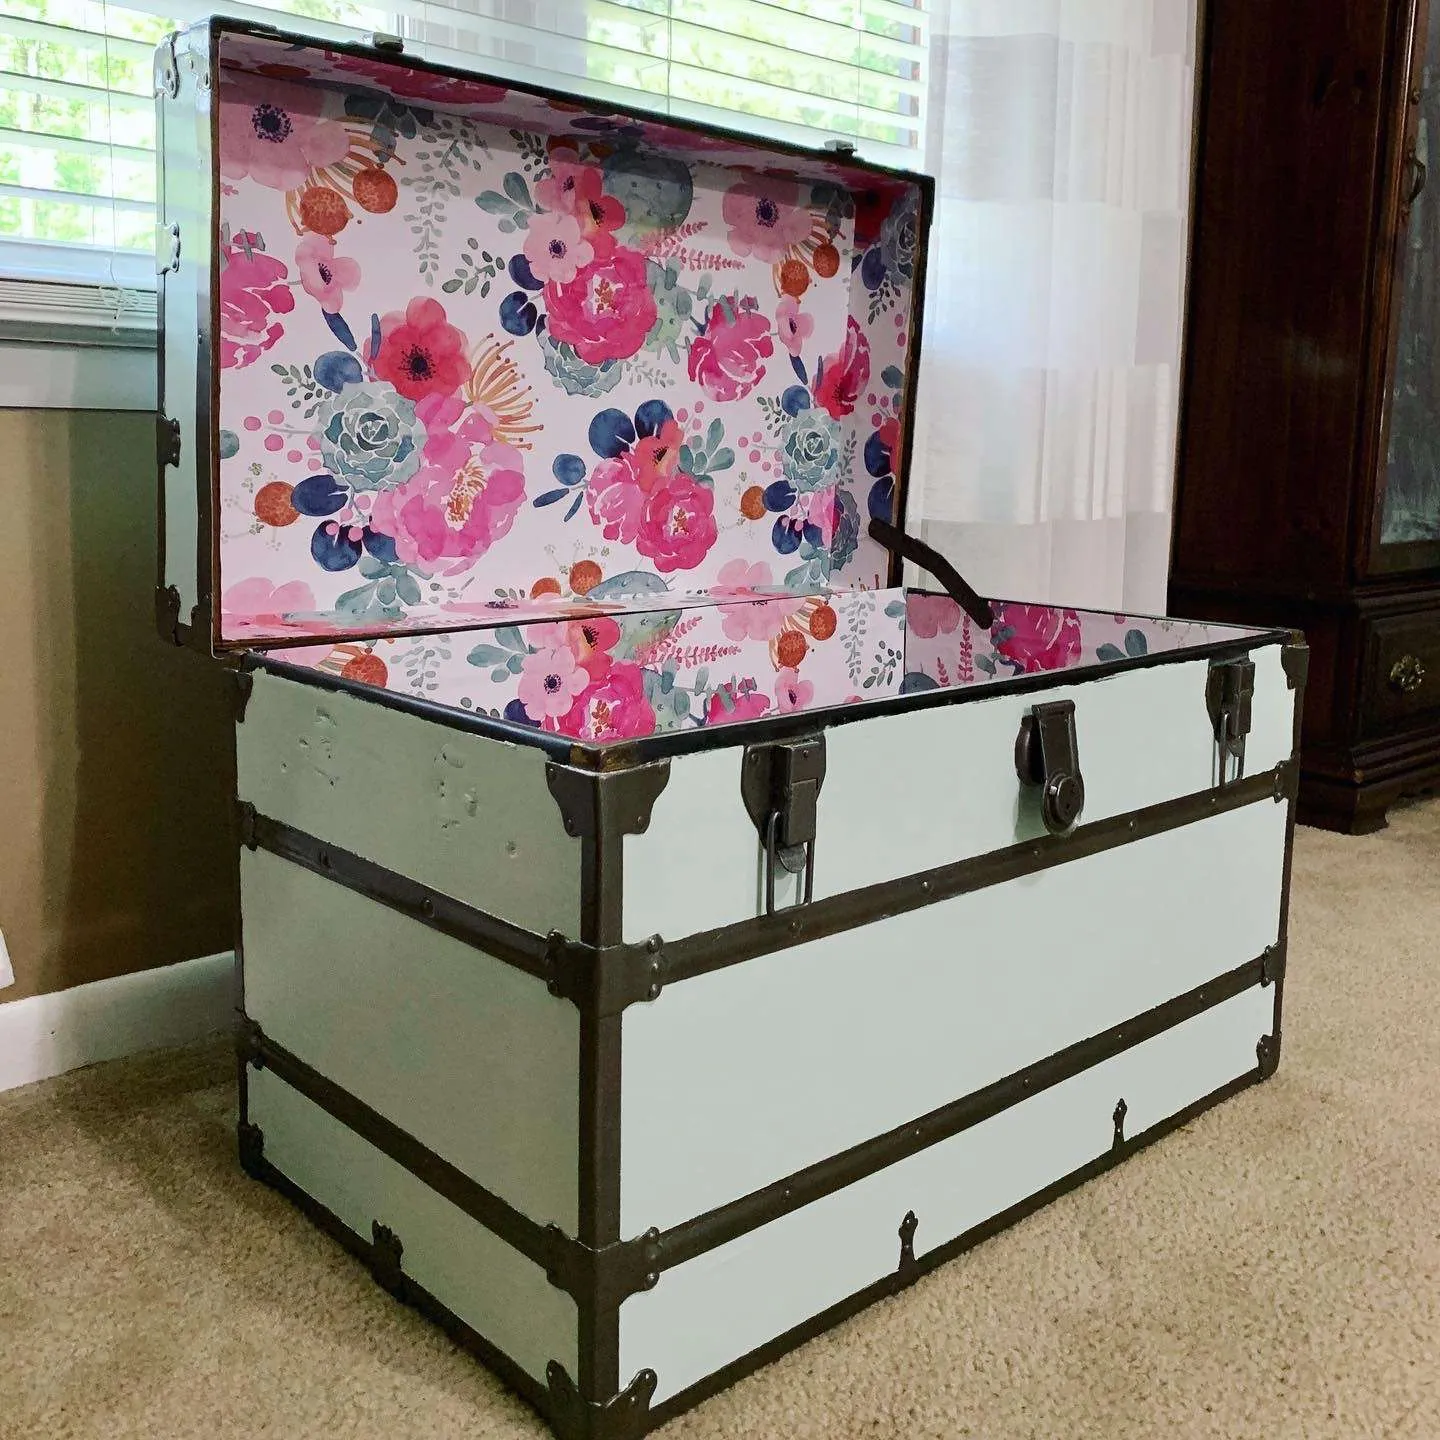
I knew I wanted a darker metal (but not black) and something that would hold up to our kids playing. A hammered bronze spray paint was the perfect complement to the light blue of the trunk.
I sprayed it on the hardware in 2 light coats and then removed the tape while the paint was still wet.
Rust-Oleum 7218830 Stops Rust Hammered Spray Paint, 12 Oz, Dark Bronze, 12 Ounce (Pack of 1), 12 Fl OzHammered Spray Paint, Dark Bronze, Hammered, 12 oz


Step 7: Apply Paper to Interior
The final step of this makeover was to address the ugly interior of the trunk.
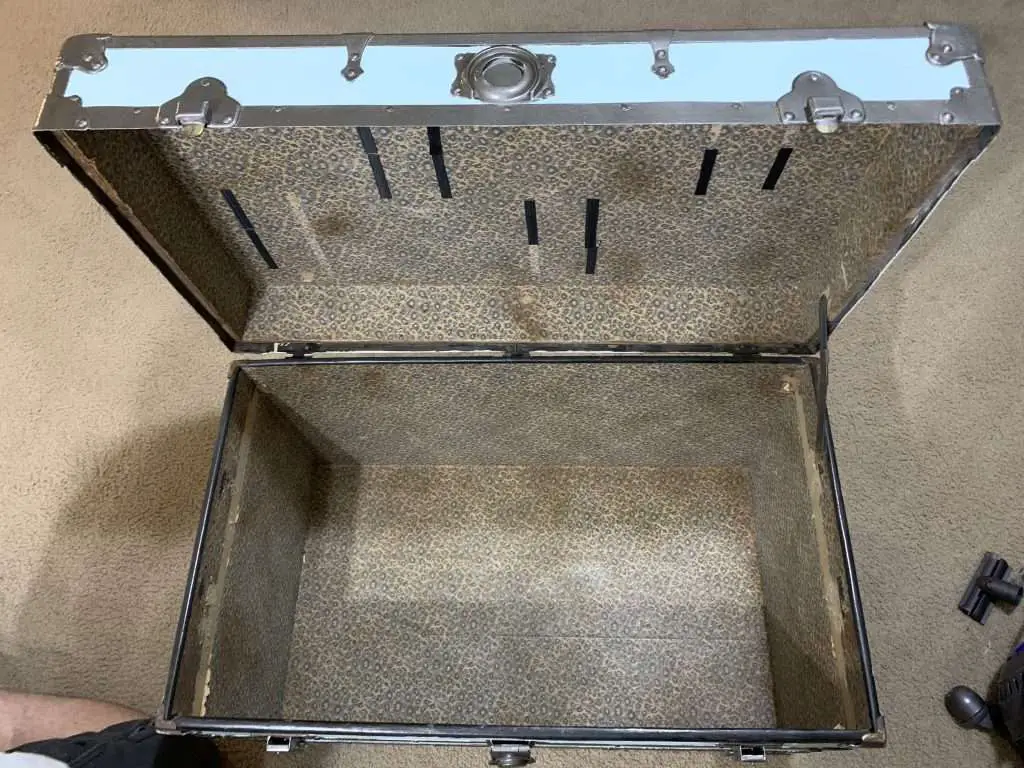
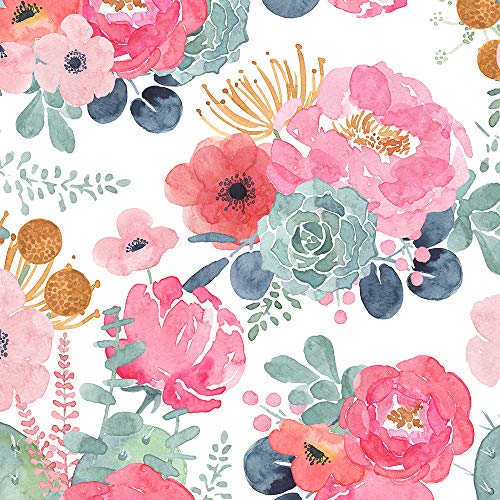
Inside, the trunk was covered with deteriorating printed paper. We chose to recover it with a floral peel and stick wallpaper that we found on Amazon.
This paper is the same kind we used inside our vintage hardware cabinet and it works great! It is truly a removable wallpaper, as we had to pull it up and reposition it SEVERAL times to get it right.
I won’t give a tutorial for applying this wallpaper because it was truly a trial and error process for us. It was hard and aggravating and we cussed through most of the ordeal, but it was SO worth it!
Beautysaid Peel and Stick Wallpaper Floral: Boho Wallpaper for Bedroom 17.5×118 Inch Vintage Removable Wallpaper Pink Watercolor PeoniesHAOKHOME 93005-2 Floral Wallpaper Peel and Stick Watercolor Cactus White/Pink/Green/Navy Blue Vinyl Self Adhesive Prepasted Decorative 17.7in x 9.8ft

We are planning to put new handles on the trunk, but haven’t found any that we love yet. Eventually, we’ll come across the perfect ones.
Refurbishing this vintage trunk was a long, tedious process, but I am obsessed with how beautifully it turned out!