[Disclaimer: Finding Mandee is reader-supported, if you purchase through links on my site I may earn an affiliate commission at no additional cost to you. As an Amazon Associate, I earn from qualifying purchases.]
When we took a trip to the Bragg Boulevard Flea Market in Fayetteville, we expected to spend the day together and mark an item off of our Fort Liberty Bucket List. What we didn’t expect, was bringing home a big, exciting new project.
When I saw this old dresser among the dusty flea market furniture, I KNEW I had to have it!
I didn’t care that it was missing its mirror and most of its knobs or that it was scuffed along the bottom, water damaged on the back, or grimy and sticky to the touch. Thanks to my Pinterest addiction, I saw endless possibilities.
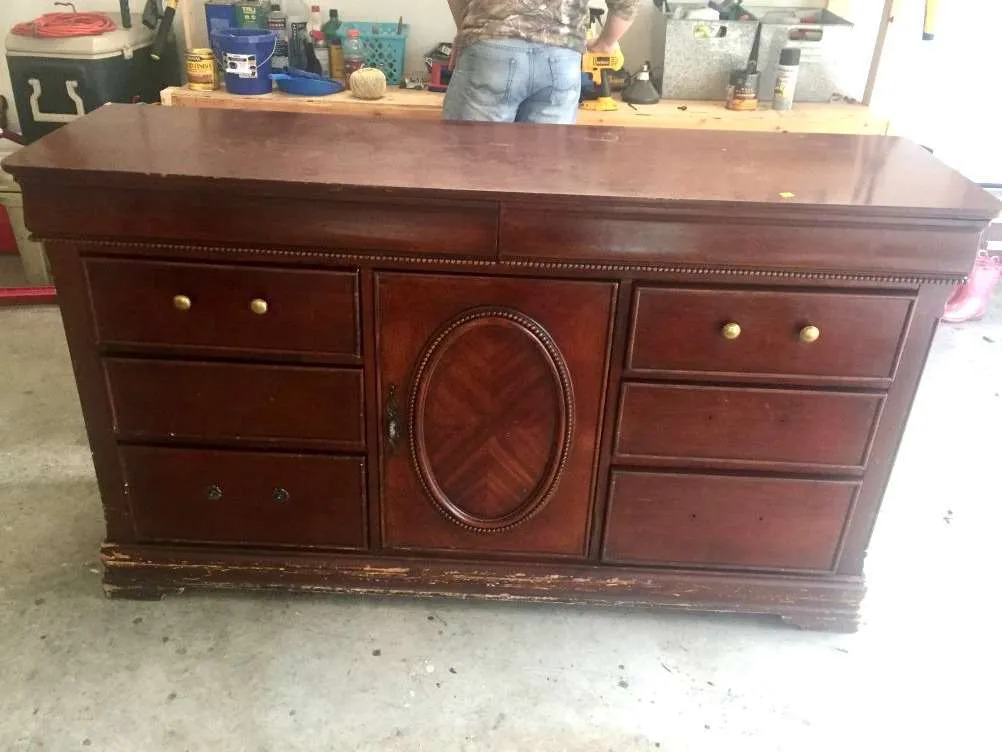

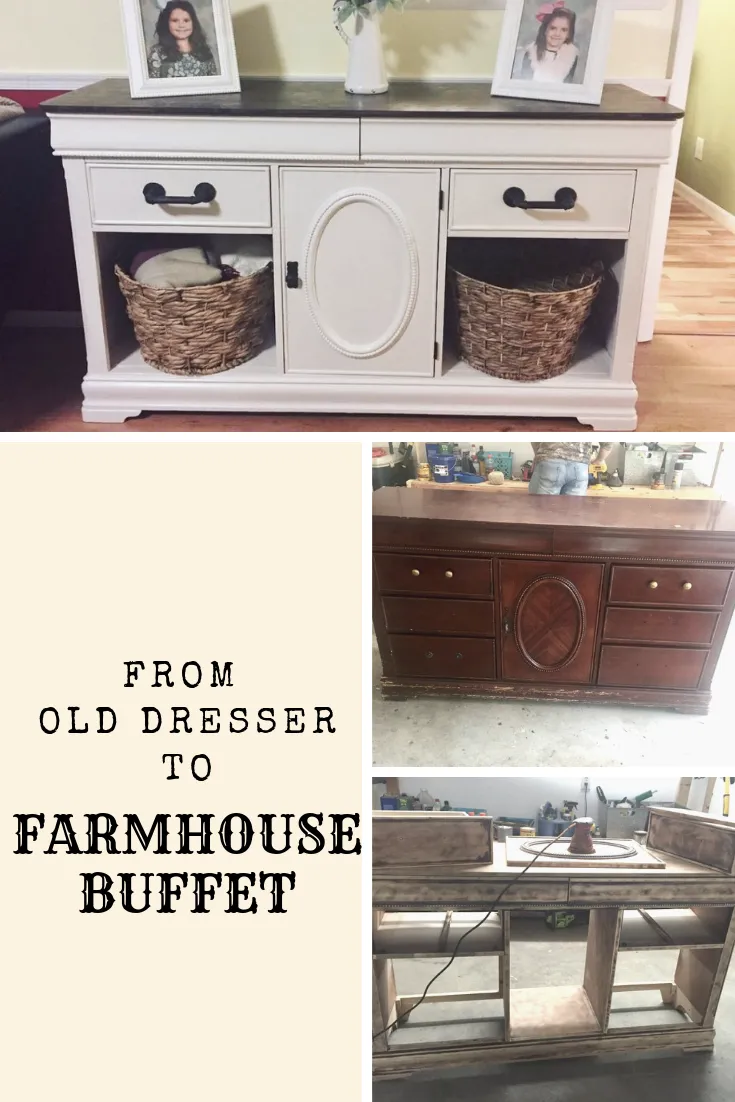
I knew exactly what I wanted to do with this diamond in the rough. I was going to turn this beat-up old dresser into a farmhouse-style buffet that would double as a charging station.
Thankfully, my husband is pretty handy and willing to help me with all of the projects that I drag home. (No matter how ugly and nasty they initially seem.)
This is how we turned an ugly old dresser into a beautiful farmhouse buffet!
Supplies
Tools:
- screwdriver
- hack saw
- orbital sander
Materials:
- 60-grit sandpaper for sander
- sanding sponge
- paint brushes
- primer (Zinsser Bull’s Eye 123)
- paint (Sherwin Williams Showcase Stain-Blocking Paint & Primer)
- stain (Minwax Gel Stain)
- 1/4″ plywood
- handles and knob
Rust-Oleum Corporation Zinsser Bulls Eye 1-2-3 02001 Water-Base Primer, 1-Gallon, WhiteMister Rui Chalk Wax Paint Brush 3 pcs, Large Wax Brushes for Chalk Paint, Chalk Paint Brushes for Furniture, Acrylic Paint/Milk Paint, Natural Bristles, 1 Small Round Brush and 2 Large Oval Brushes


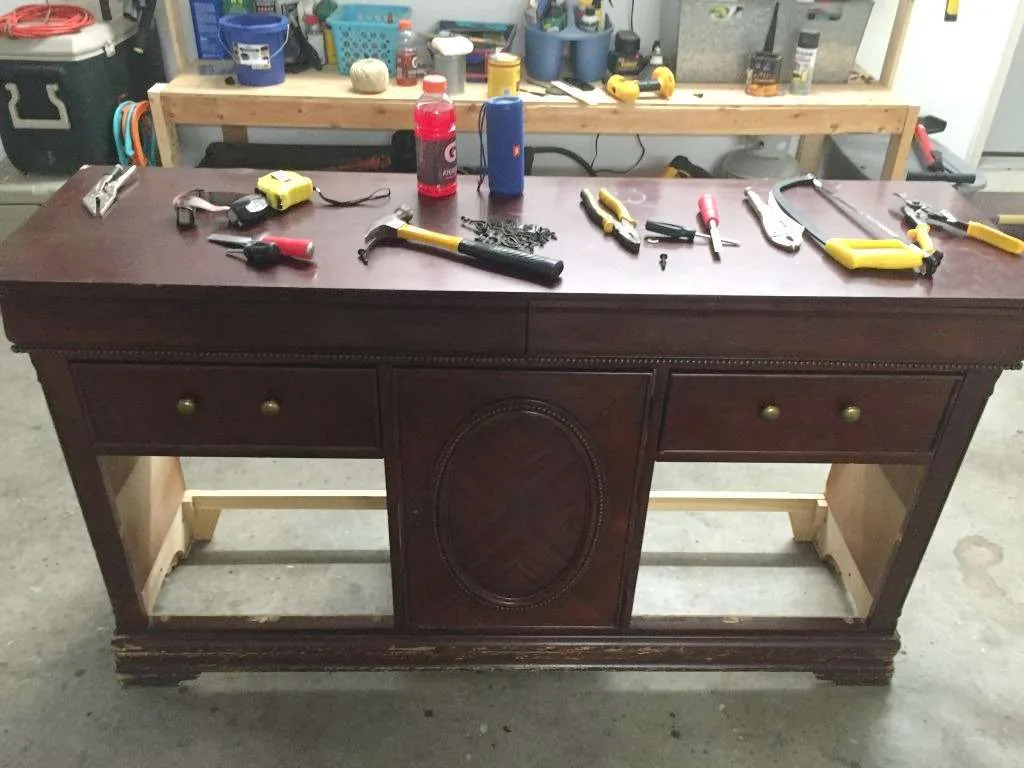
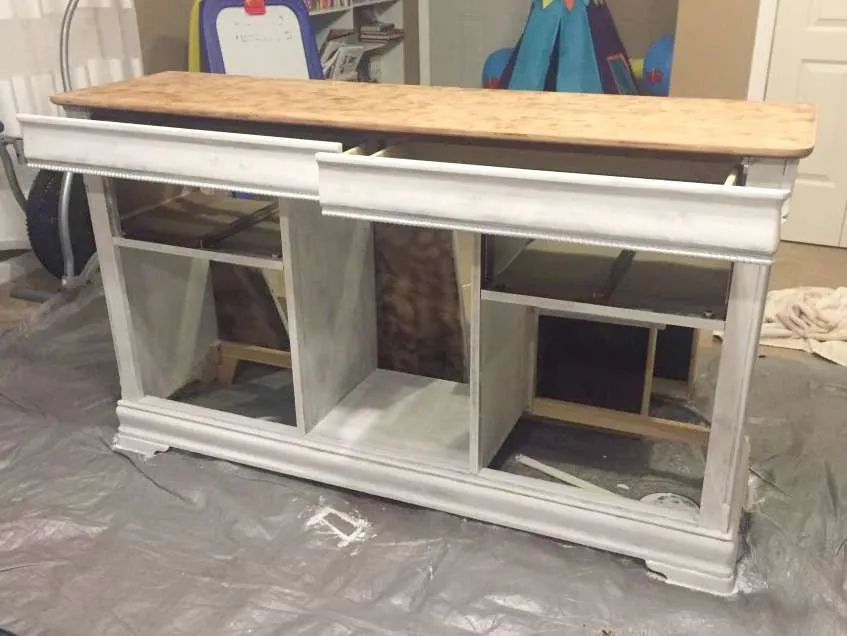
Step 1: Remove Damaged Parts & Drawers
First, we had to remove the wooden backing of the dresser, since it was badly damaged and falling apart. It was easy to remove, as it was only held on by a few screws.
Next, we took out the four bottom drawers, revealing more damaged particle board underneath.
After removing the damaged bottom, we cut out the wooden supports between the drawers with a hack saw.
Make sure to fill in any damaged areas or holes with wood putty.
LENOX Tools High-Tension Hacksaw, 12-inch (12132HT50), BlueMinwax 13616000 Wood Putty, 3.75 oz, White, 3 Ounce


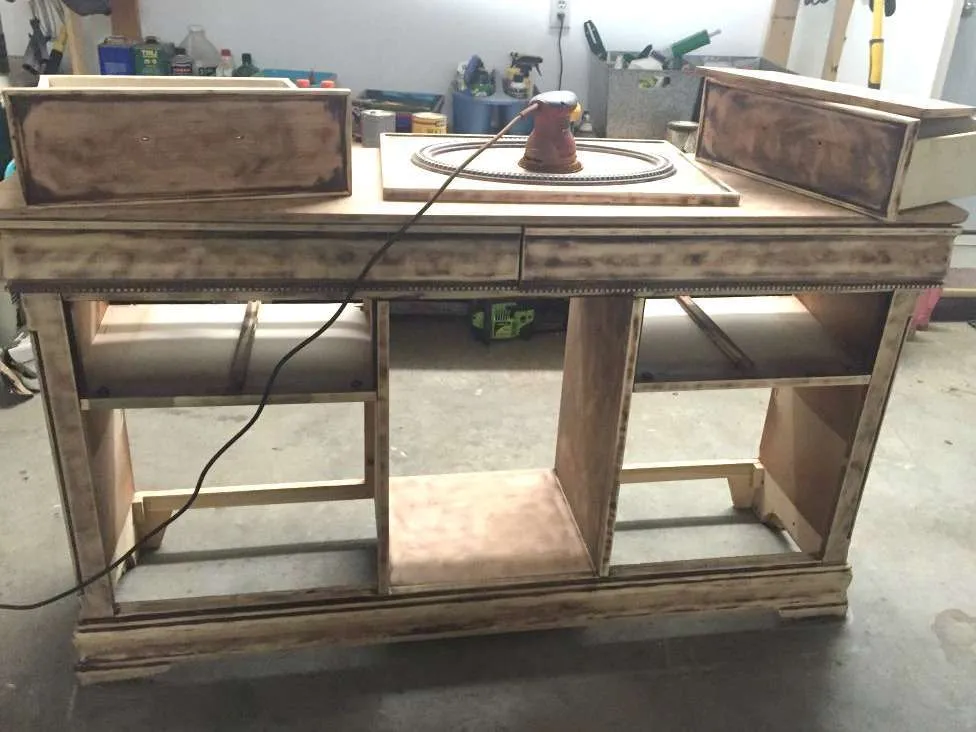
Step 2: Start Sanding
Then came the REAL work of any furniture refurbishment…the dreaded sanding!
Sanding is my least favorite part of the whole process. It’s messy and tedious, but it has to be done.
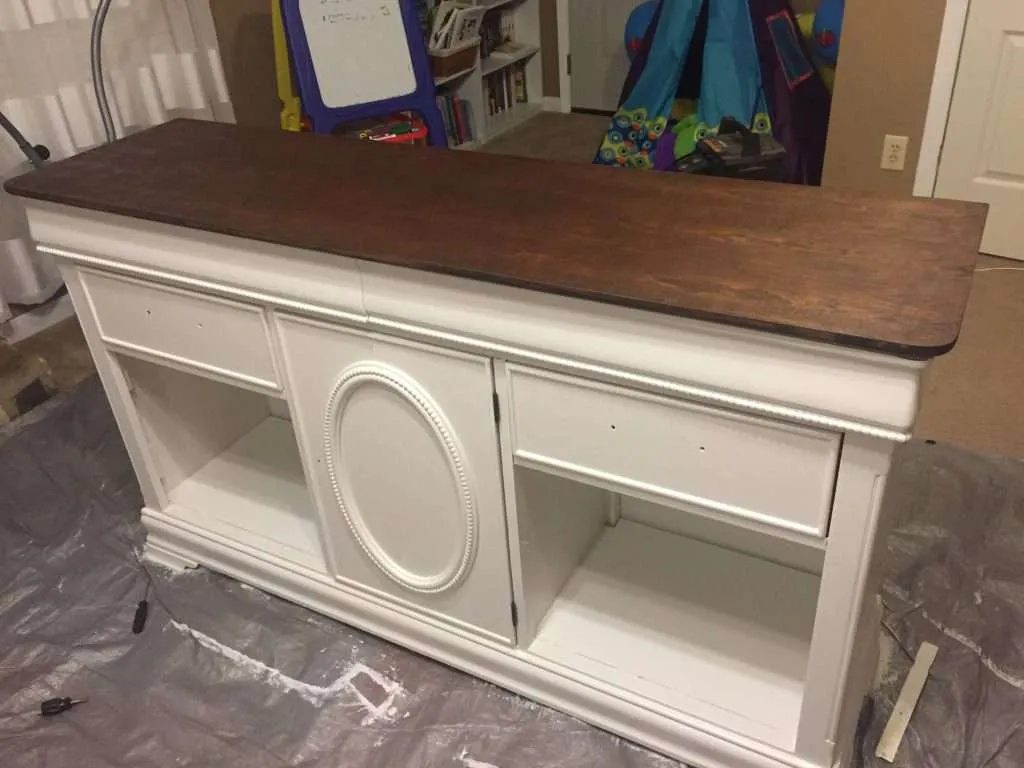
We removed the door and the remaining drawers to make them easier to sand. Then went to town with an orbital sander and 80 grit paper to smooth our surface for painting. We used a sanding sponge to really get in the corners and for all of those little beads.
The majority of the dresser only needed a scuff-sanding. That means a light sanding to remove the shiny surface, but you don’t necessarily need to get down to bare wood.
We want to stain the top of the dresser instead of painting it. So, starting with an 80-grit sanding pad, we made sure to remove all of the stain and get down to the bare wood. After the wood was completely stripped, we increased the grit on the sanding pads, to make the wood smooth. We went from an 80-grit to 120-grit to 220-grit, going over the entire top with each increment.
After sanding till our hands hurt, we took a damp rag and wiped the whole thing down.
Dewalt DCW210BR 20V MAX XR Brushless Variable-Speed Lithium-Ion 5 in. Random Orbital Sander (Tool Only) (Renewed)BAIWEN 20PCS 5 Inch Mesh Hook & Loop Sanding Discs 80 120 180 240 600 Assort Grit Dust Free Abrasive Net Sander Disc Anti-Blocking Long-Lasting Mesh Sanding Pads, Sandpaper for Wood Furniture Floor


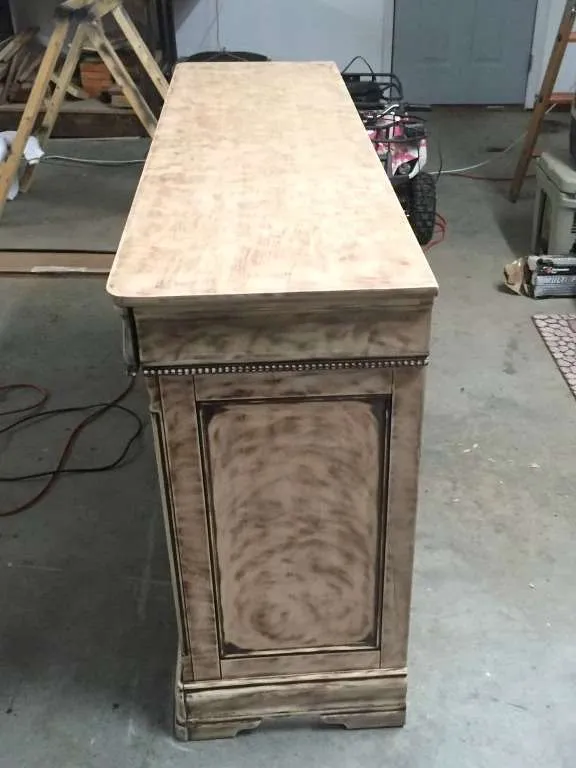
Step 3: Prime
Finally, we were able to start painting!
Some brands of paint and different techniques say that you don’t have to prime or sand anything before you start painting. However, I believe that anything worth doing is worth doing right, so I don’t skip these steps.
I plan on keeping this thing for a long time. So, it’s definitely going to need paint that is going to hold up to rambunctious kids and Army movers.
The primer we used was Zinsser Bull’s Eye 123 Primer. I used a paintbrush to get into corners and the beaded detailing, but rolled the primer onto the flat surfaces with a mini foam roller.
The foam roller leaves a much smoother finish than paint brushes!


Paint Roller 2 Inch,High-Density Foam Roller with Frame,Tray,Mini Paint Roller Refills, Small Sponge Roller Painting Supplies for Smaller DIY Stenciling Projects(Pack of 6)Mister Rui-Foam Paint Roller, 4 Inch-8 Pack Paint Roller Kit, Complete 4

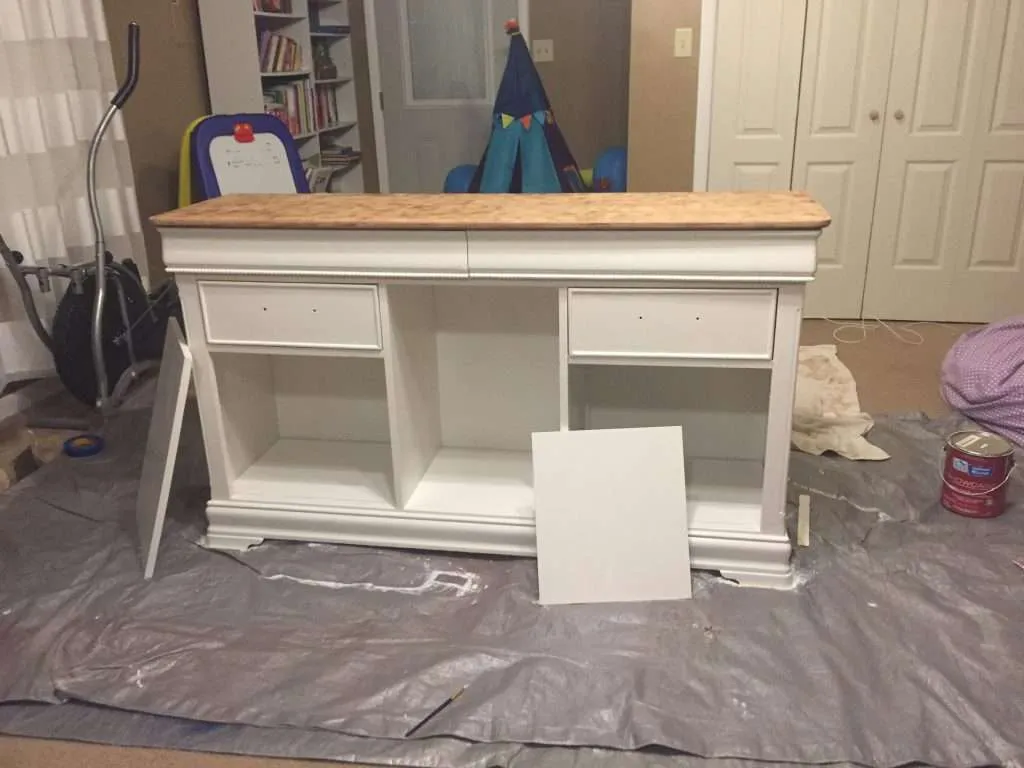
Step 4: Paint
After 2 coats of primer, we let it dry overnight and started painting the next day.
We used Sherwin Williams Showcase Stain-Blocking Paint in Origami White (semi-gloss) from our local Lowes.
Again, I used a paint brush for corners and details and the foam roller for the flat surfaces.
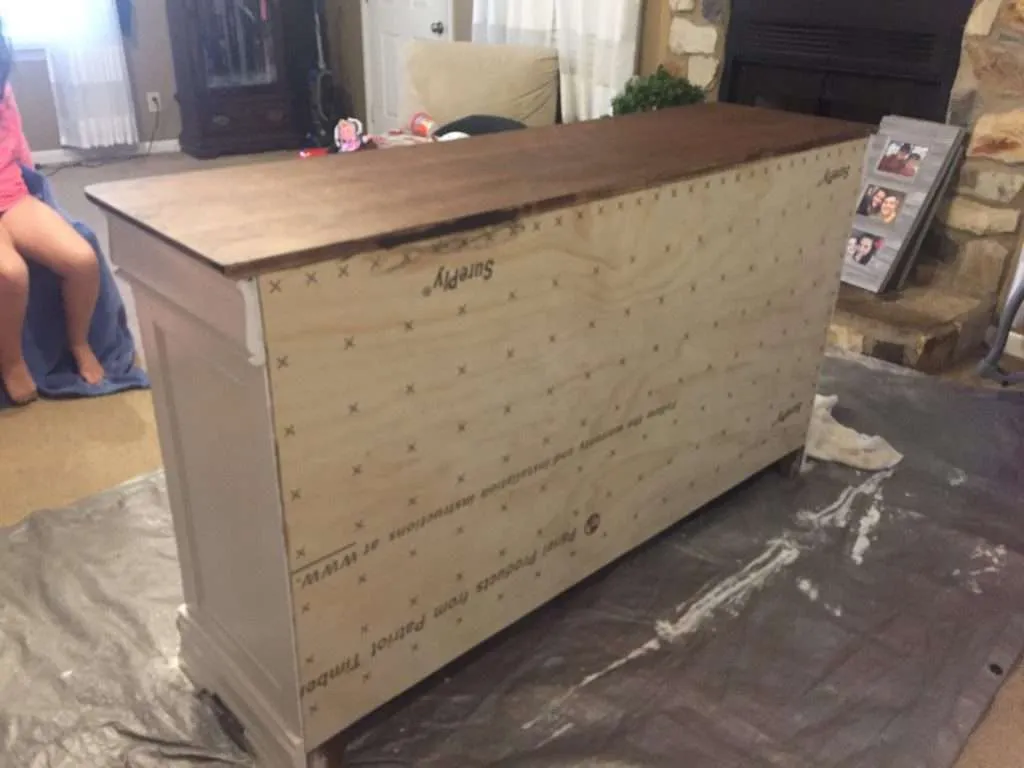
After the paint dried, we nailed a thin sheet of plywood to the back and put the drawers and door back in. It was finally starting to look like the farmhouse buffet that I had envisioned.
THINKWORK Paint Sprayer, High Power Spray Paint Gun with 5 Copper Nozzles & 3 Patterns, HVLP Spray Gun, for House Painting, Furniture, Fence, Car, Bicycle, Chair, Gifts for WomenPainters Plastic Drop Cloth 6 Pack, 9×12 Feet, Plastic Tarp Dust Cover, Plastic Covers for Furniture, Plastic Drop Cloth for Painting, Painting Tarp


Step 5: Stain
One of the last steps in this process was to add stain to the top of the dresser.
We tried something new with this project and used a gel stain for the first time. This coffee-colored Minwax Gel Stain was easier to use than I expected.
The pros of using the gel stain were that it only took one coat and that it didn’t have hardly any odor. The downside, however, was that you had to wipe off the excess stain with an old rag, which was a little messy.
Minwax Gel Stain for Interior Wood Surfaces, Quart, CoffeeTrimaco 10102 SuperTuff Sponge, 2 Pack Staining Pad, White

Step 6: Add Handles & Knobs
After staining, we added new handles and a knob that we found at Hobby Lobby (for 40% off!).
Step 7: Cut Holes for Cords
Since we want to use our farmhouse buffet as a charging station, my husband cut holes in the plywood on the back of the buffet. The holes are placed behind the top drawers to allow a short extension cord to run from the wall outlet to a power strip inside the drawer.
Now, we can charge all of our devices at the same time, in the same place. No more lost cords or fear of stepping on an expensive iPad because the kids are charging it on their bedroom floor.
Richelieu Hardware BP2209128900 Steampunk Collection 5 1/32 in (128 mm) Center Matte Black Eclectic Cabinet PullRichelieu Hardware BP873900 Toulon Collection 3-inch (76 mm) Center-to-Center Matte Black Traditional Round Cabinet and Drawer Pull Handle for Kitchen, Bathroom, and Furniture


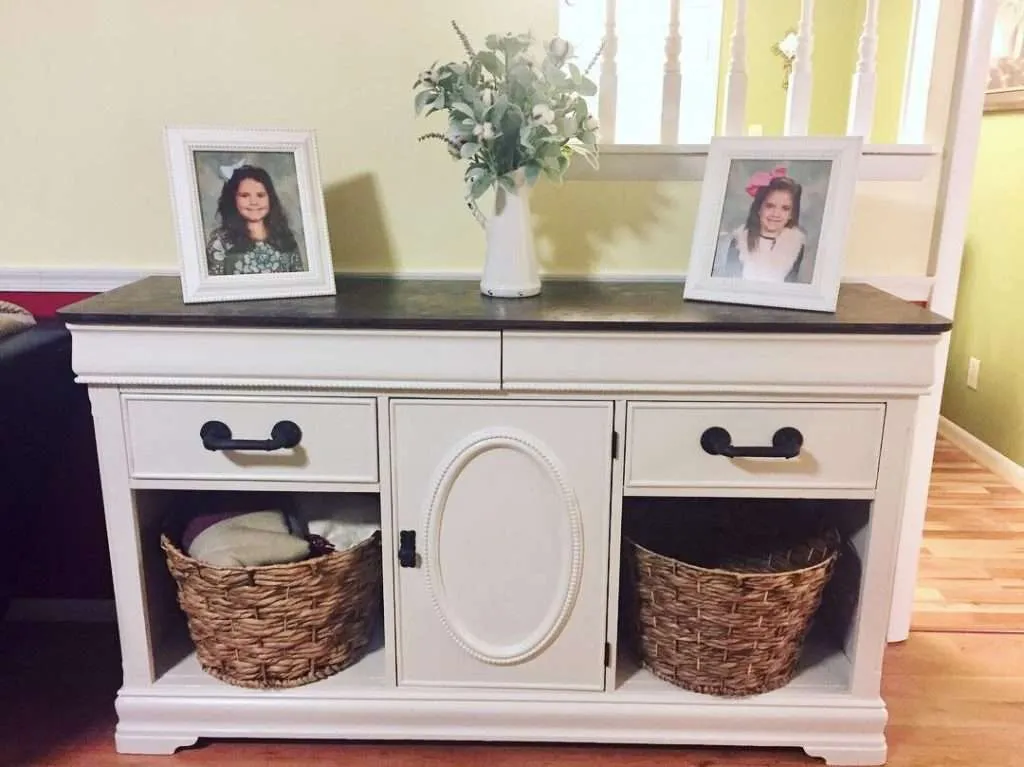
And it’s done! We are slightly obsessed with our new (to us) farmhouse buffet.
It’s both functional and beautiful and should last for years to come!


Pretty! This has been an extremely wonderful post. Many thanks for providing these details.
Thank you! It’s one of my favorite pieces of furniture!