[Disclaimer: Finding Mandee is reader-supported, if you purchase through links on my site I may earn an affiliate commission at no additional cost to you. As an Amazon Associate, I earn from qualifying purchases.]
Being a military wife has its unique struggles. One of which is making your furniture fit into houses of all different shapes and sizes. Which is why I recently had to make some DIY nightstands.
Our house in Texas is smaller than our house in North Carolina. So, when we moved our furniture into the master bedroom, it wouldn’t all fit.
The nightstands we used at Fort Liberty were a set of end tables that matched our penny coffee table. However, they wouldn’t fit in our new room, so we had to find new, smaller nightstands.
I love a good refurbish project and I knew the perfect piece for our new DIY nightstands.
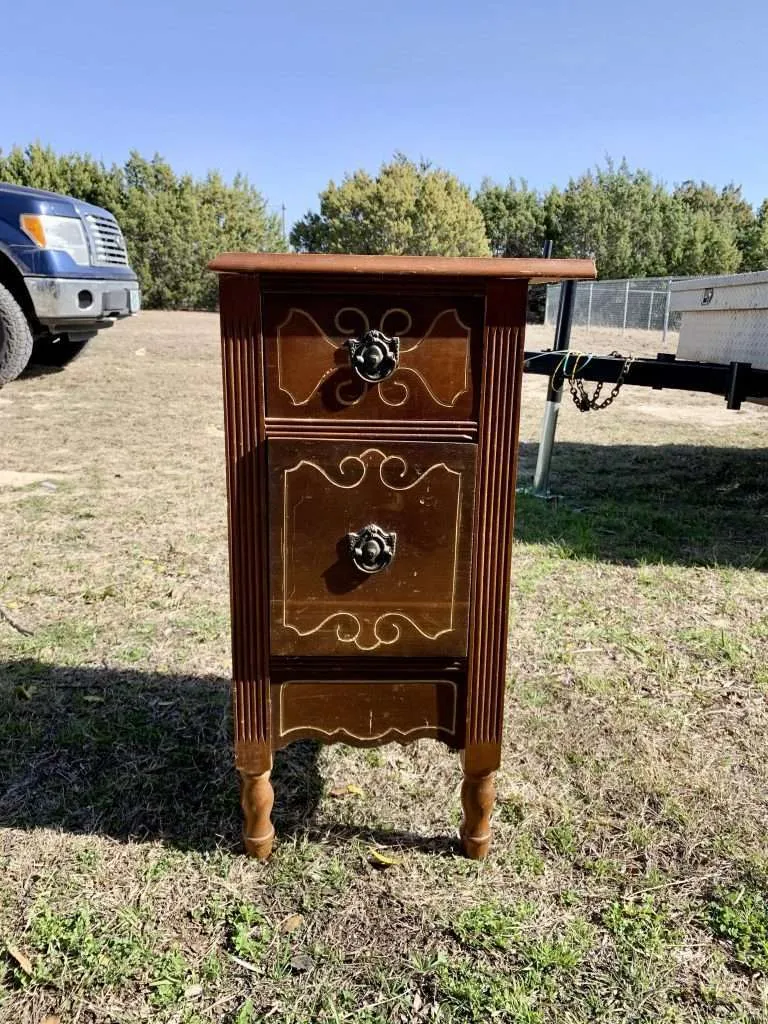
My dad has had an antique vanity sitting out in his barn for years and was more than happy to let us have it (thanks, Pop!).
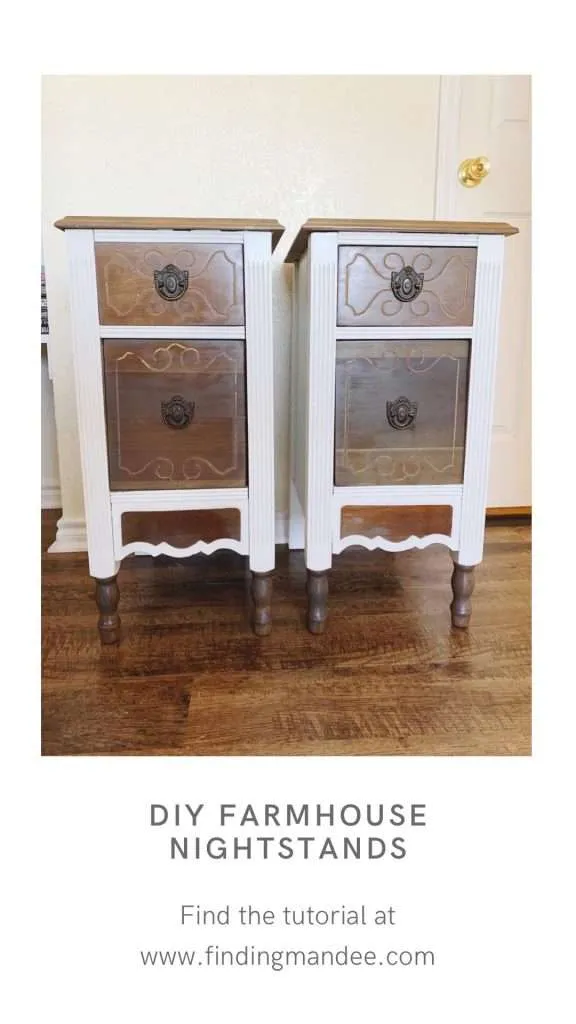
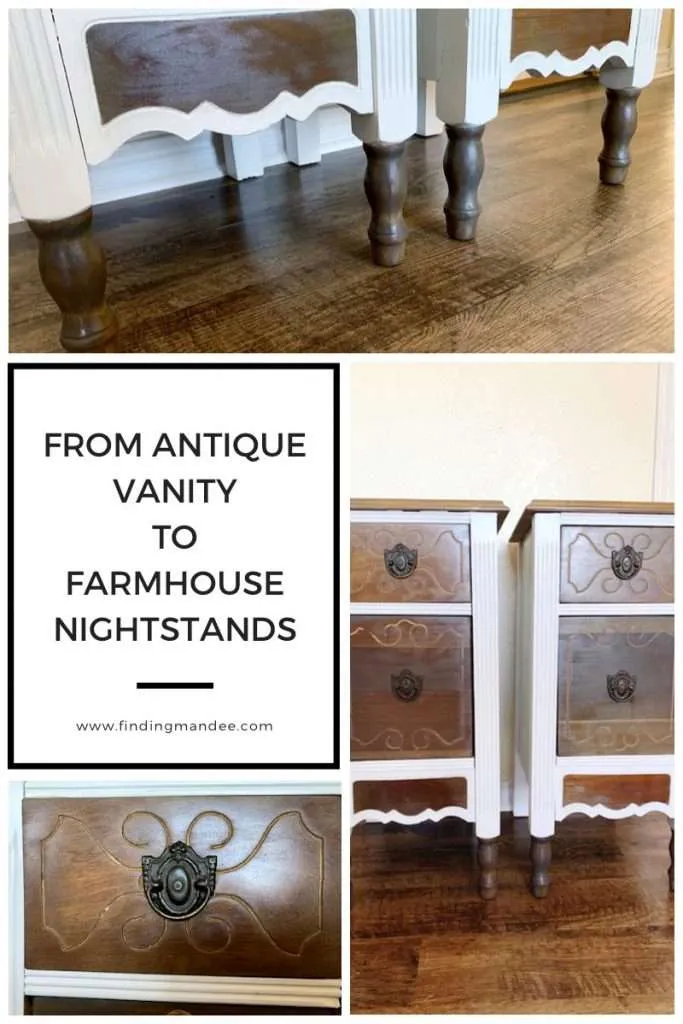
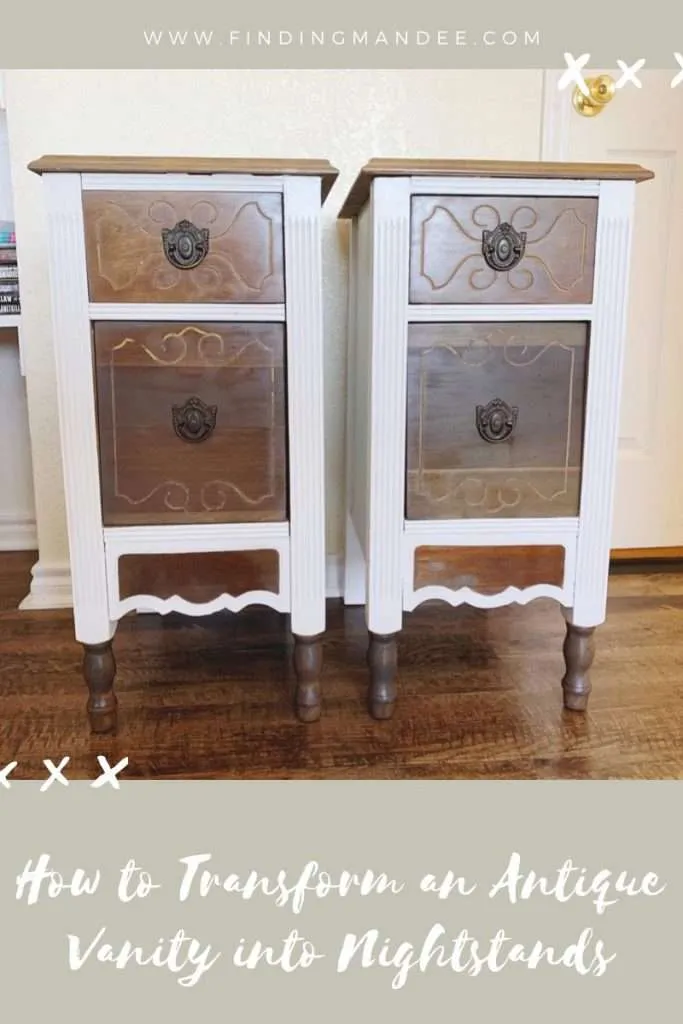
Here’s how we turned an antique vanity into nightstands.
What You’ll Need:
Step 1: Cut the Vanity in Half
First, we detached the vanity mirror and set it aside. Then using a circular saw, we cut the top of the vanity next to the drawers.
We made sure to leave a few extra inches on the vanity top, in case we made a mistake routing the edge. It looked a little wonky because one side was longer than the other, but it’s better to be safe than sorry!
Ryobi 18V 5-1/2RZDEAL 4 Pack Solid Antique Brass Cabinet Pulls Ring Drawer Pulls, Antique Style Kitchen Cabinet Handles Pulls Vintage Pulls Brass Drawer Handles for Cabinets


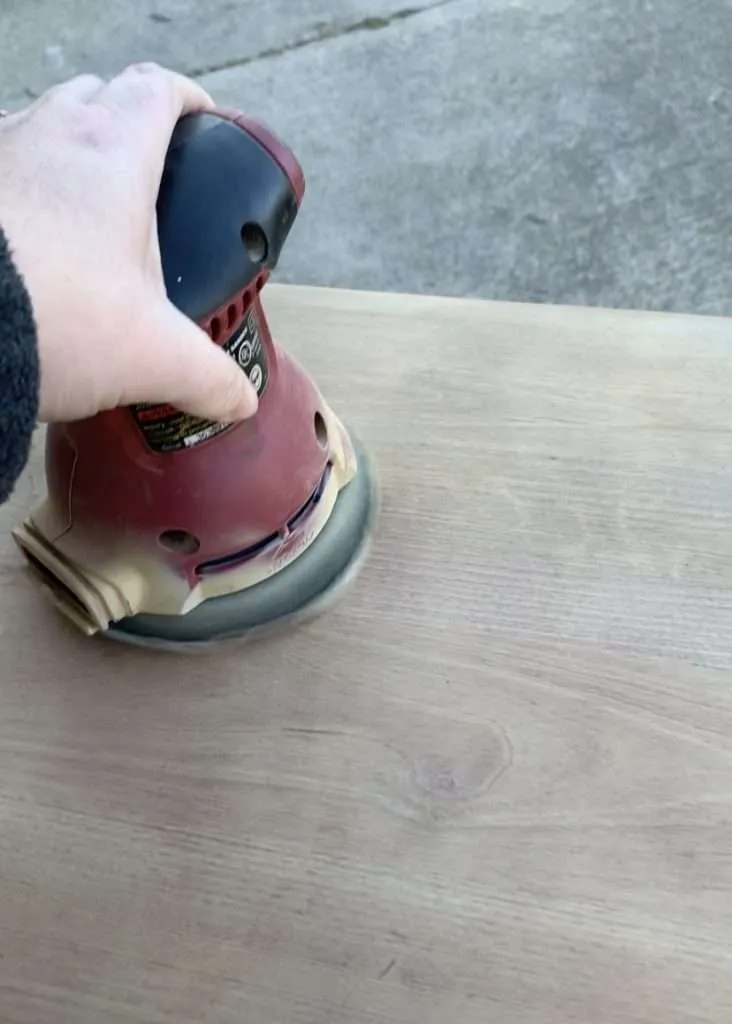
Step 2: Sand It Down
After the antique vanity was chopped into two separate pieces, it was time to sand them down and prep them for painting.
Before sanding, I removed the hardware from the drawers.
Then, using our orbital sander and 120-grit sanding discs, I scuff-sanded the frame of the nightstand. (Scuff sanding means lightly sanding the surface.) I just made sure to rough it up enough to give the paint something to adhere to.
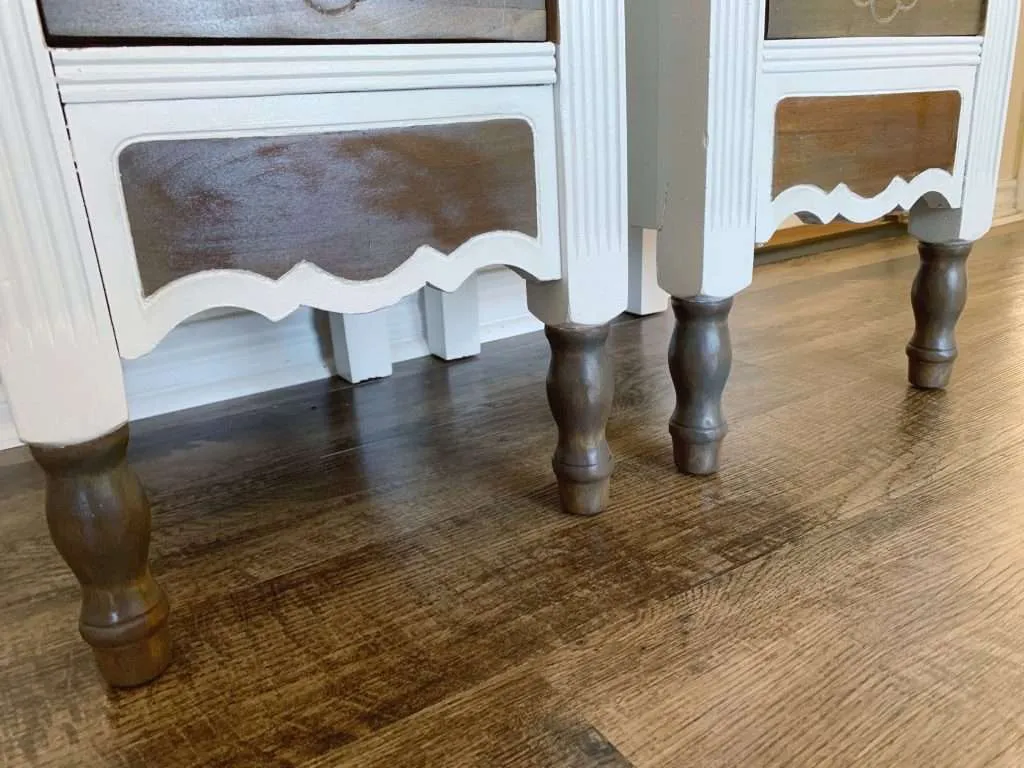
However, I sanded all of the varnish off of the tops, drawer faces, legs, and wood detail on the bottoms of the nightstands. These were sections that we were going to leave wood and not paint over.
DEWALT Random Orbit Sander, Variable Speed, 5-Inch (DWE6423)30PCS 5 Inch Mesh Hook & Loop Sanding Discs 80 100 120 150 320 600 Assort Grit Dust Free Abrasive Net Sander Disc Anti-Blocking Long-Lasting Mesh Sanding Pads, Sandpaper for Wood Furniture Floor


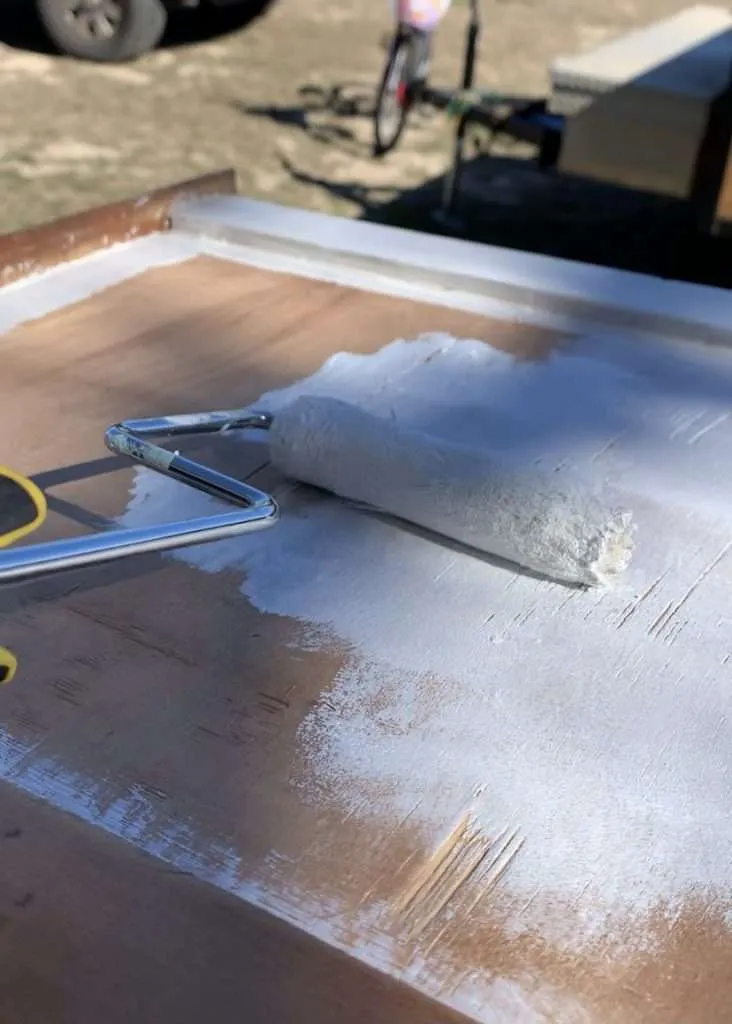
Step 3: Prime & Paint
Once the sanding was complete on the DIY nightstands, it was on to priming and painting.
I taped off the wood details and legs and used Zinsser Bulls Eye 1-2-3 Primer as a base for my paint.
**Pro Tip** When painting wooden furniture white (or any light color) you must use a primer to keep the paint from yellowing.
I covered the primer with a creamy white paint – Sherwin Williams Showcase Stain-Blocking Paint & Primer.
This paint also has a stain-blocking quality, which seems like overkill, but if you’ve ever spent hours refurbishing a piece of furniture and then had it turn yellow, you don’t want to take any chances!
Rust-Oleum ZINSSER 1 qt 02004 White, Bulls Eye 1-2-3 Water-Based Stain Blocking Primer/SealerMister Rui Foam Paint Roller, 2 Inch Mini Paint Roller Kit (8 Pack), Small Paint Roller with Tray, Small Paint Rollers 2 Inch, Mini Rollers for Painting Cabinets, Furniture, Stenciling, Art Crafts


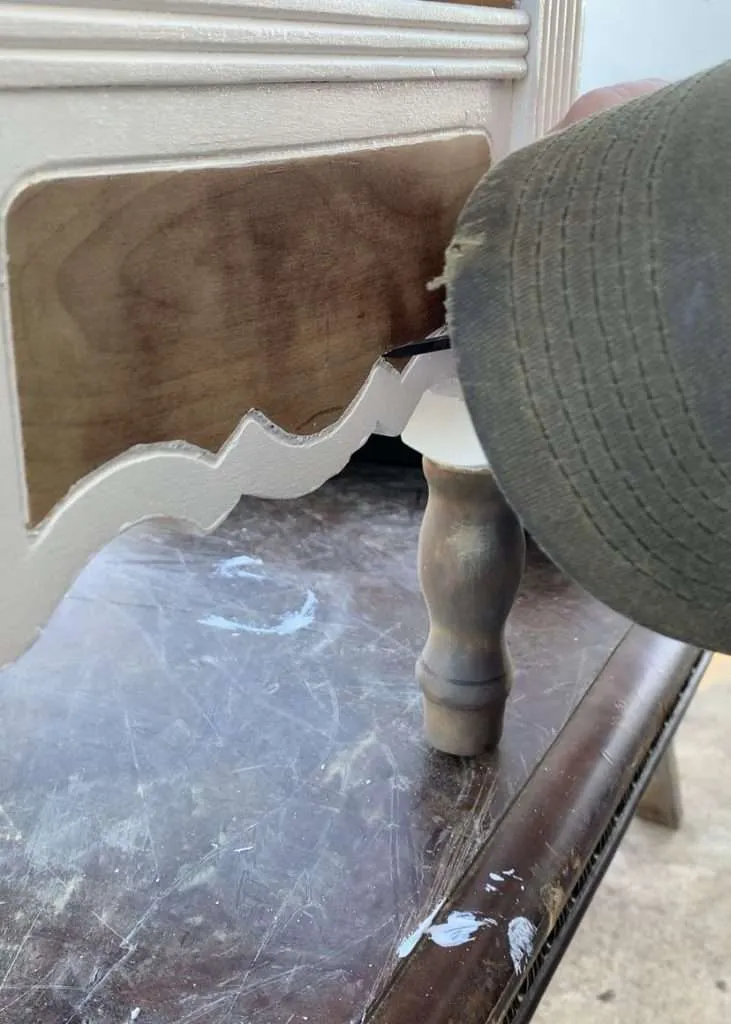
Step 4: Staining & Touch Ups
While the paint was drying, I added stain to the pieces that were remaining wood.
We did a few touch-ups to the wood detailing on the bottom and the legs by scraping off paint that bled through the tape.
Step 5: Add Hardware & Enjoy!
Finally, it was time to add the final touch and return the hardware to the drawers.
I liked the original hardware, so I just cleaned it up and re-used it.
These DIY nightstands fit so much better in our new, smaller bedroom. Plus, they match our style and the rest of our thrifted/refurbished furniture.