[Disclaimer: Finding Mandee is reader-supported, if you purchase through links on my site I may earn an affiliate commission at no additional cost to you. As an Amazon Associate, I earn from qualifying purchases.]
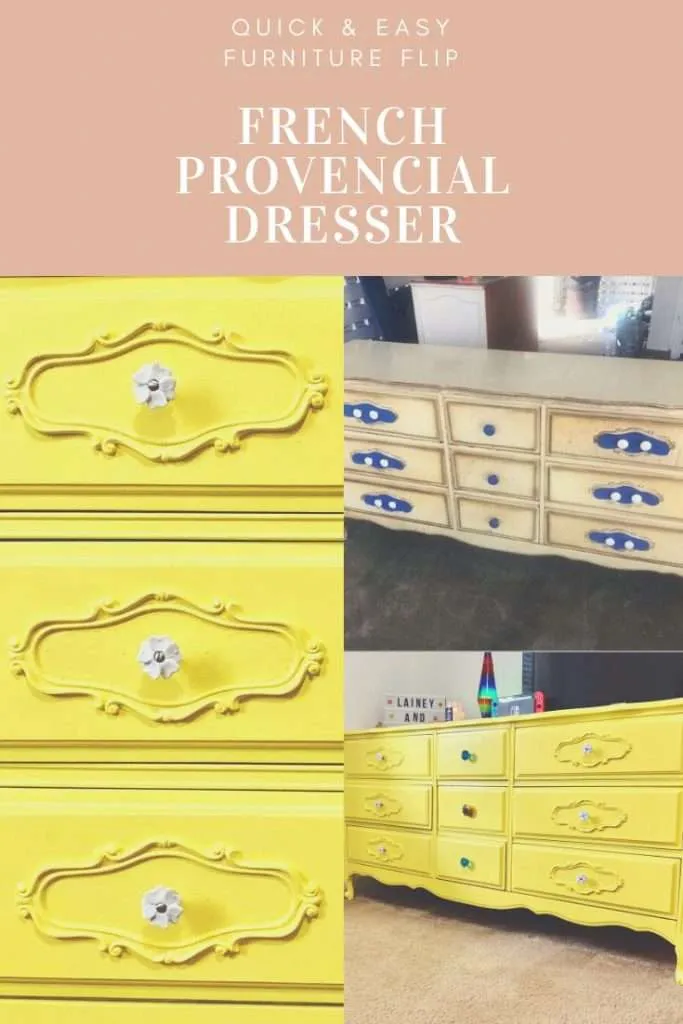
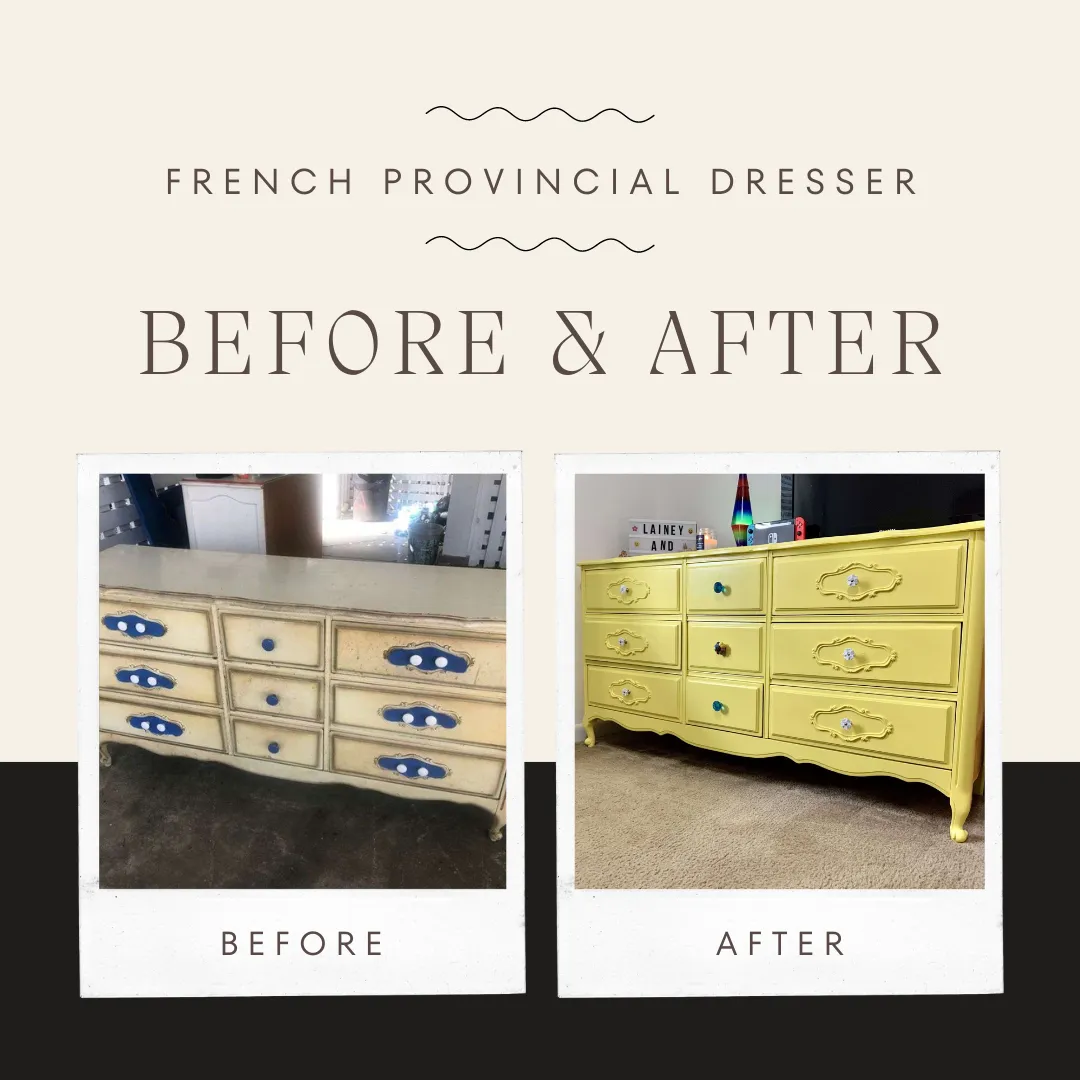
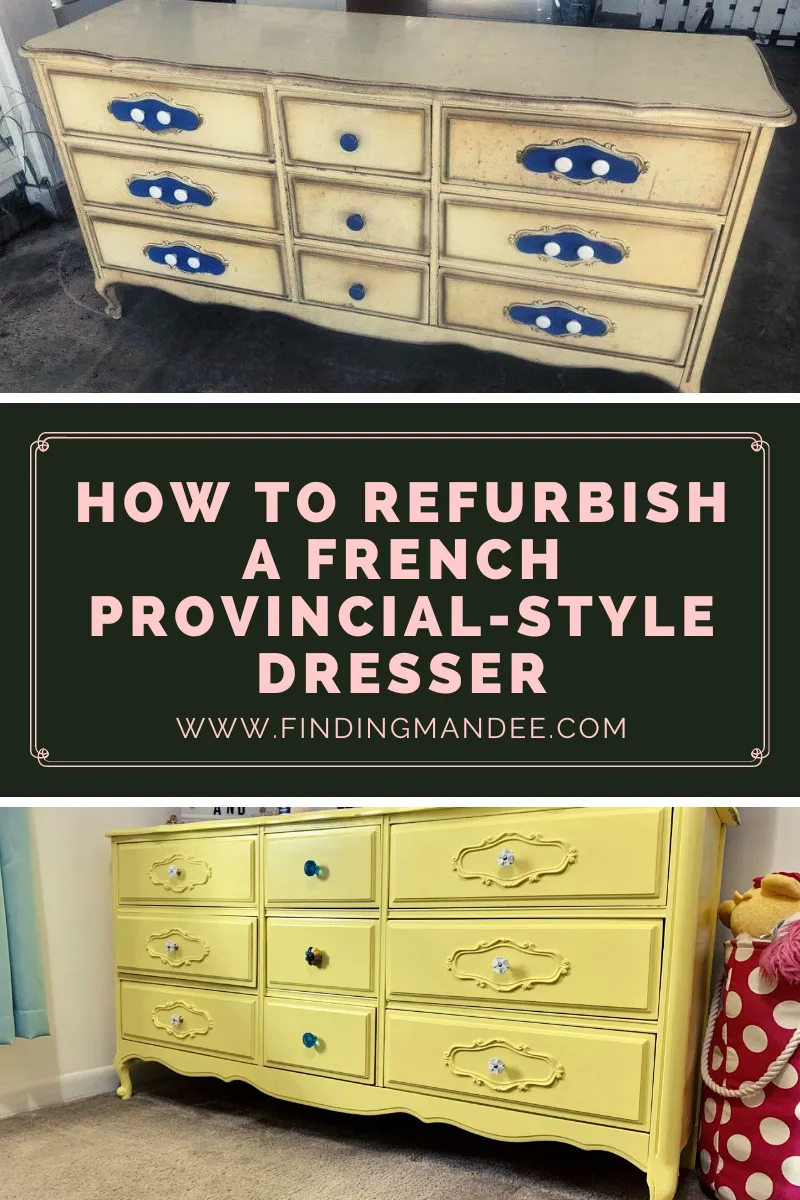
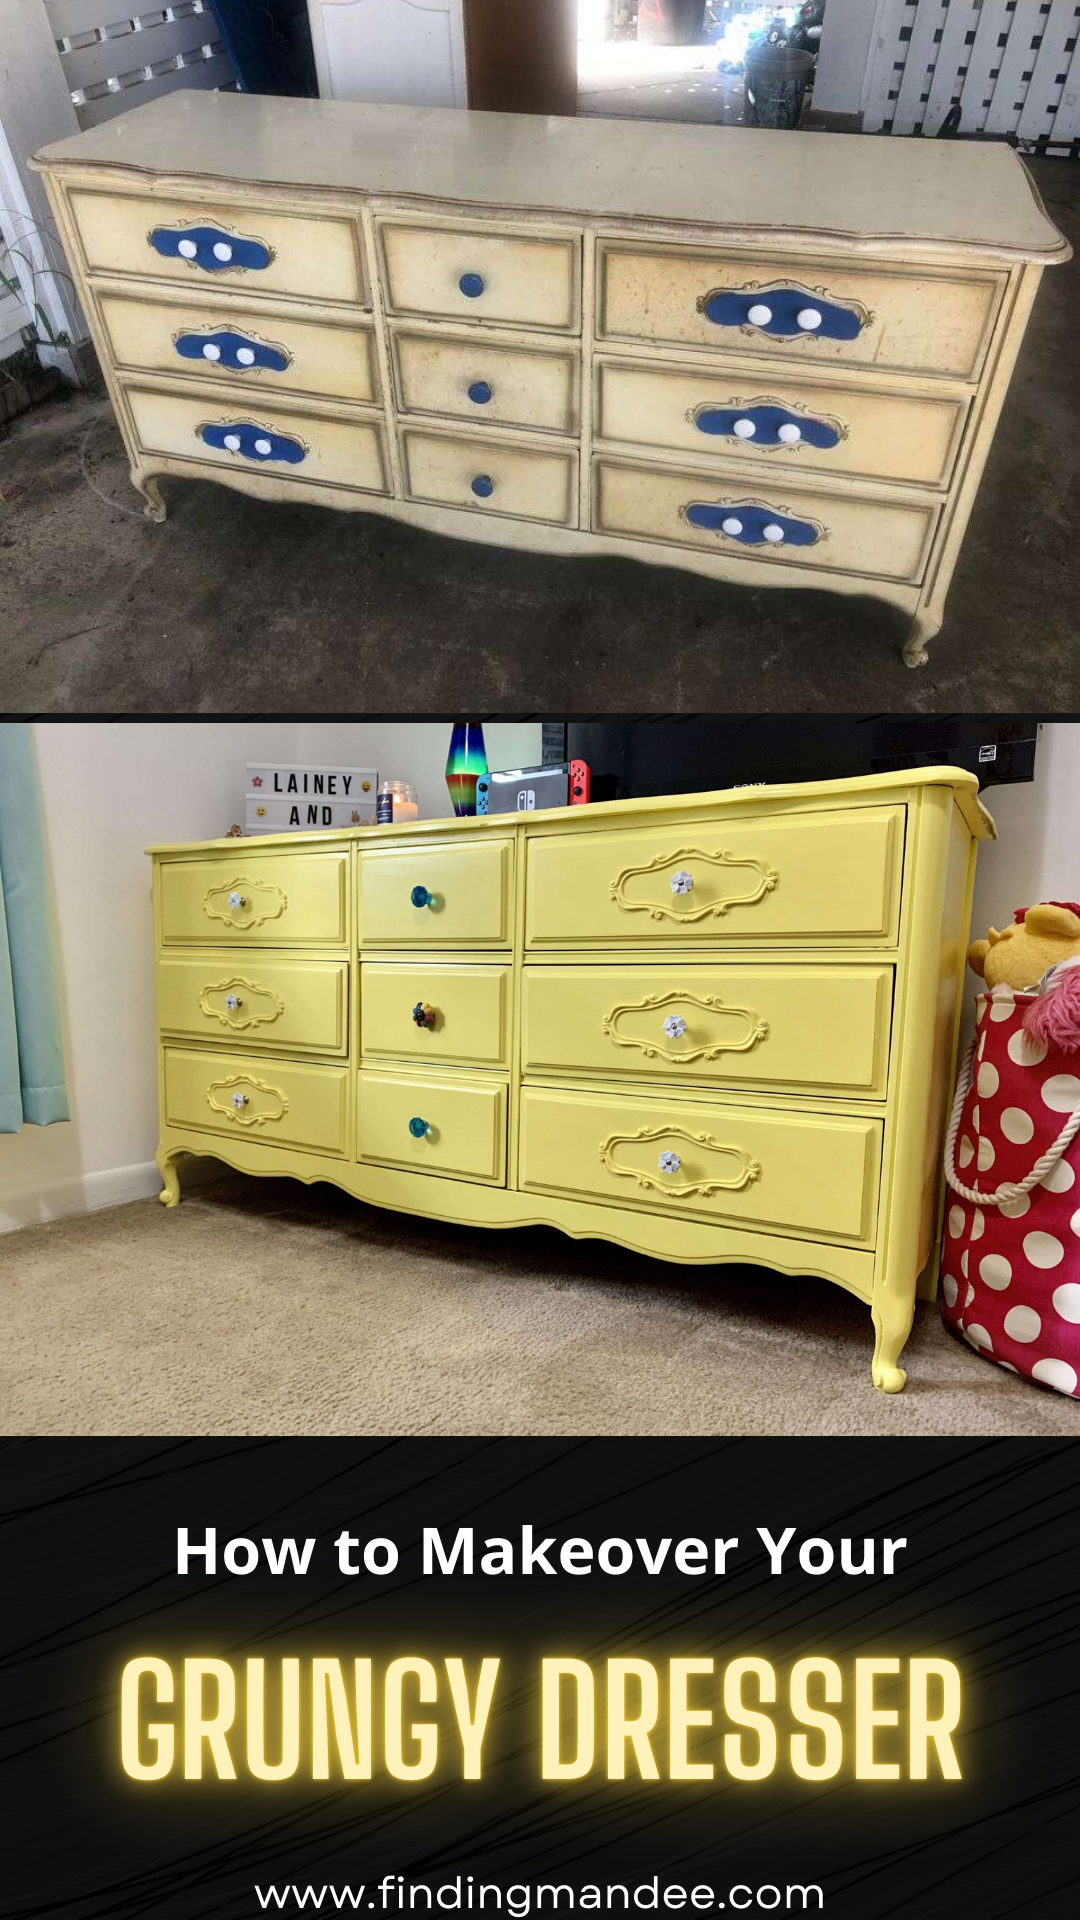
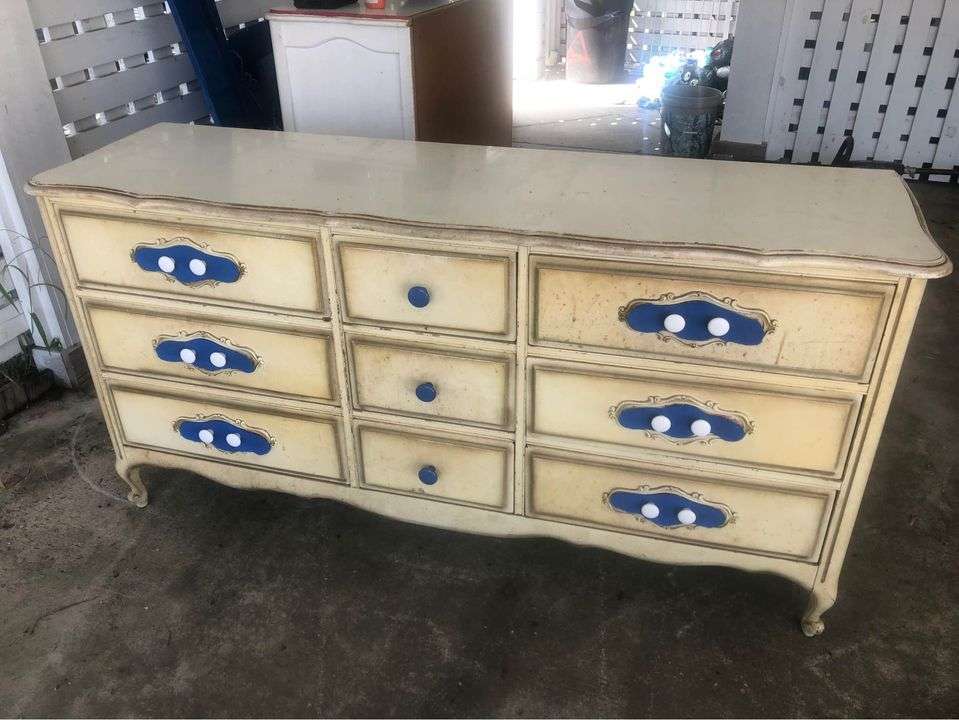
While scrolling Facebook Marketplace (which is quite a dangerous pastime), I came across this very dirty and grimy French Provincial dresser.
We have been looking for a ‘long’ dresser for my oldest daughter’s room. Not only does she need more clothing storage, but she desperately needs more ‘counter-space’ for her TV, lamps, and picture frames.
The French Provincial dresser looks girly to me. It could easily work painted pink with gold accents in a ‘princess’ room! But you could also remove the decorative accents on the drawers and use it in a boy’s room too.
For $40, I knew that I could make this one work. And could even make it beautiful!
The Supplies
The dresser was $40 and the paint was $22. We had all the other supplies on hand. So, this whole project cost a total of $62.
- wood putty
- plastic knife/spreader
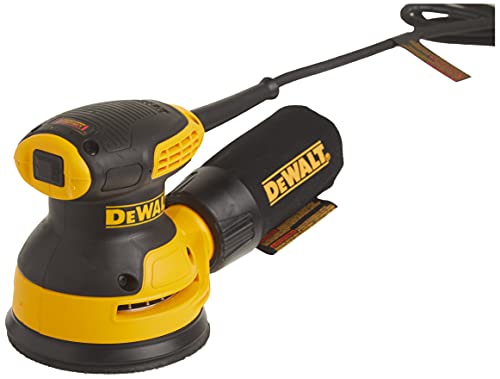
- orbital sander
- sanding nets (120-grit)
- rags
- primer (we use Zinsser Bulls-Eye primer on all of our projects)
- mini foam paint roller (4-inch)
- paint brush
- paint (Benjamin Moore: Banana Yellow)
The Prep Work
After getting the dresser home, I didn’t waste any time trying to clean this thing up.
I removed the knobs and peeled off the random blue felt glued around them.
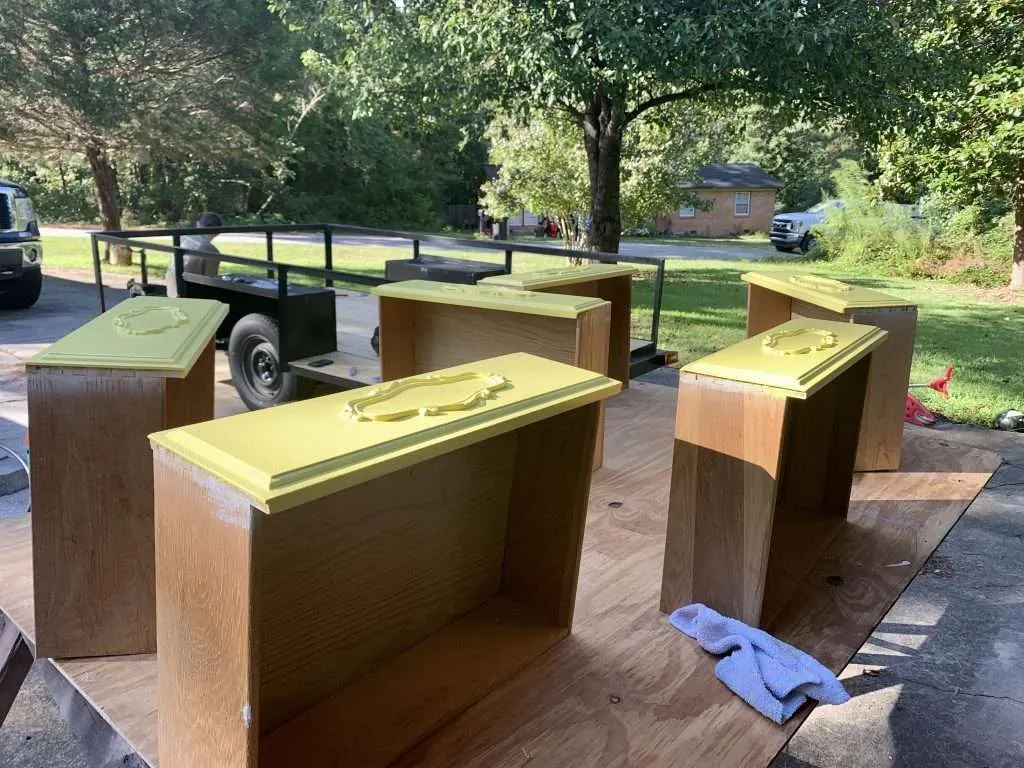
Right away I knew that I wanted to replace the knobs. I didn’t see the point of having 2 knobs on each long drawer, so I filled in the holes with wood putty.
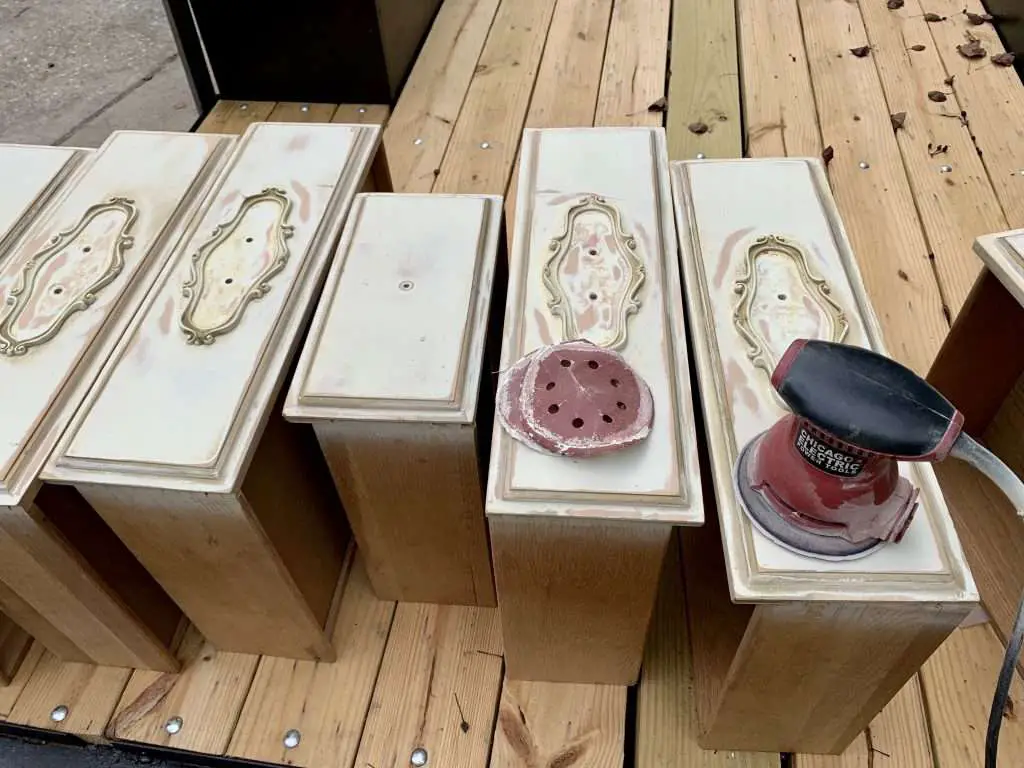
After letting the putty dry, I sanded all the drawer faces, the dresser’s sides, and the feet. I did a light scuff sanding. It wasn’t necessary to try to get down to bare wood. The dresser just needed to be ‘roughed’ up enough to hold new paint.
I didn’t sand the top because it is covered in white laminate that is in immaculate condition. Since laminate is super durable and will likely hold up to my kids’ abuse better than paint, I decided to leave it alone.
Elmer’s E842L Carpenter’s Interior Wood Filler; 32 Ounce; 1 QuartDEWALT Orbital Sander, 5-Inch (DWE6421)

The Painting
After a quick wipe-down, I was putting on a coat of primer.
Thankfully, it only took one coat of primer as the dresser was already white. Then it was time for the ‘real’ paint.
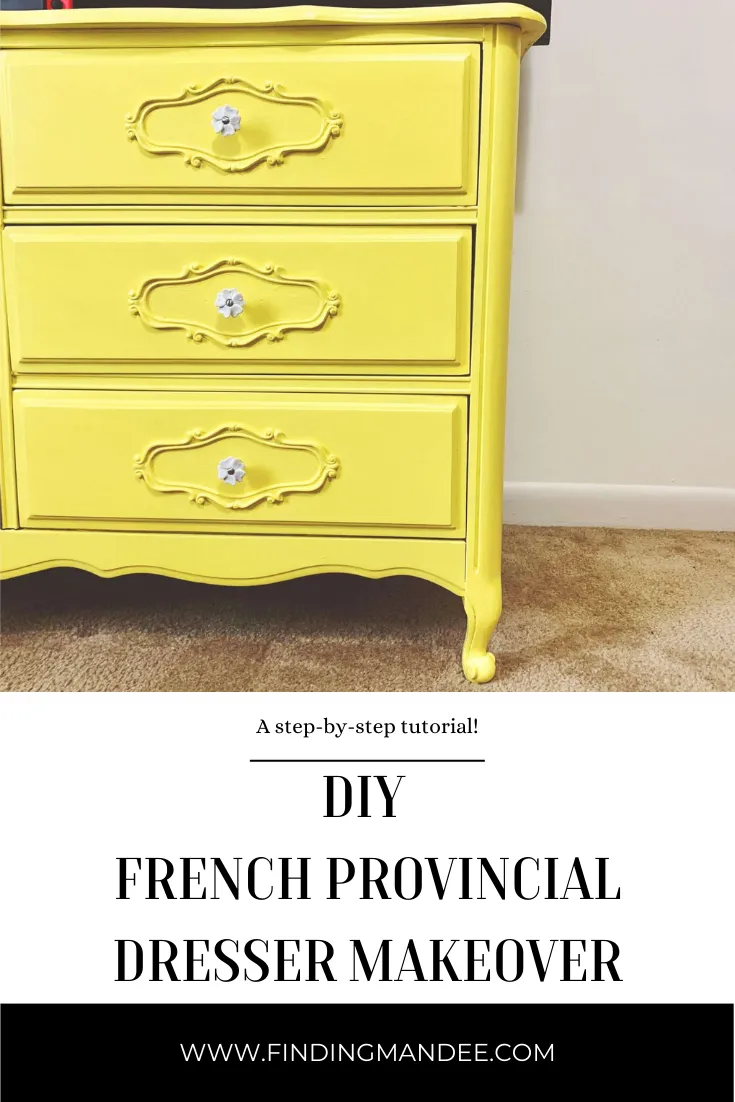
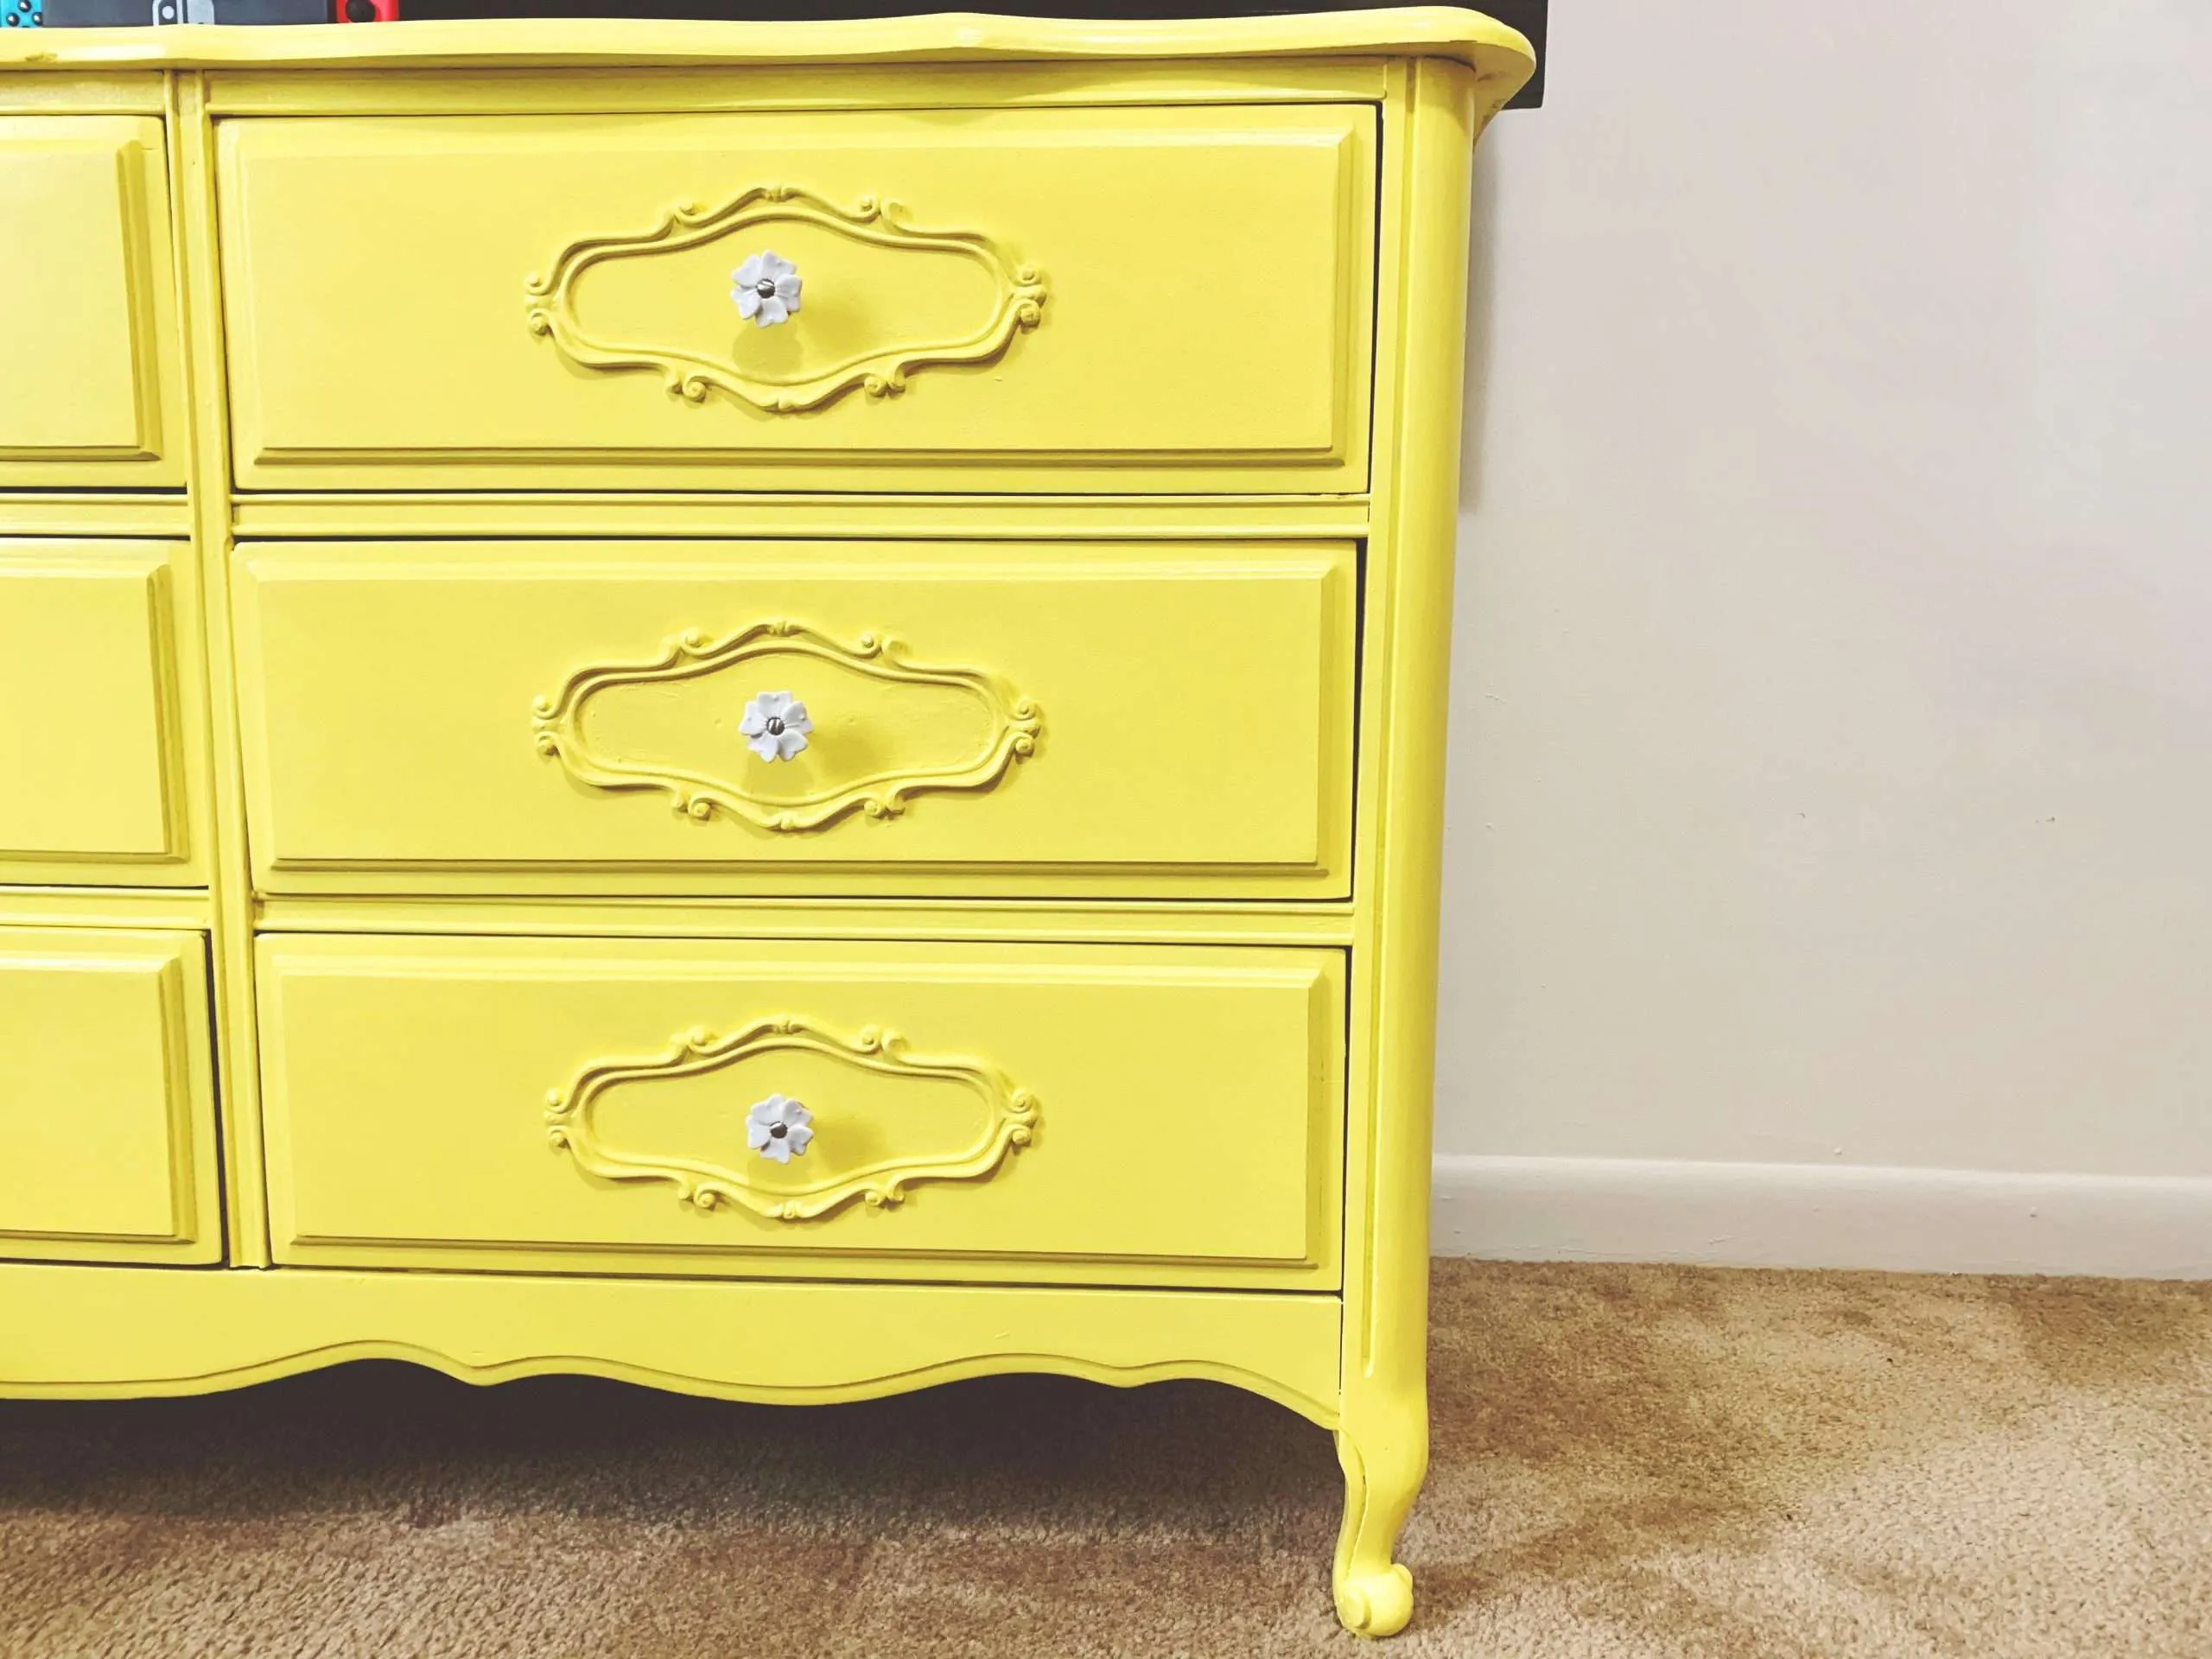
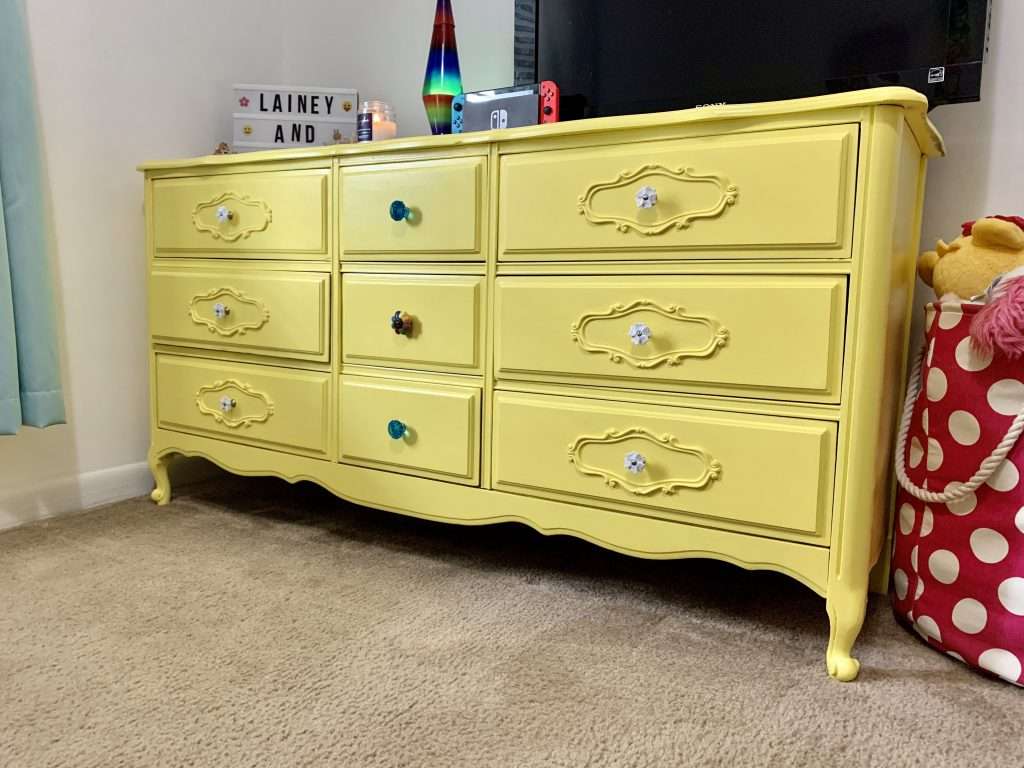
Lainey’s favorite color has always been yellow. Even as a toddler, she would ask for anything ‘lellow’. It even fits her happy, sunny personality. So, without a doubt, we were painting her ‘new’ dresser yellow.
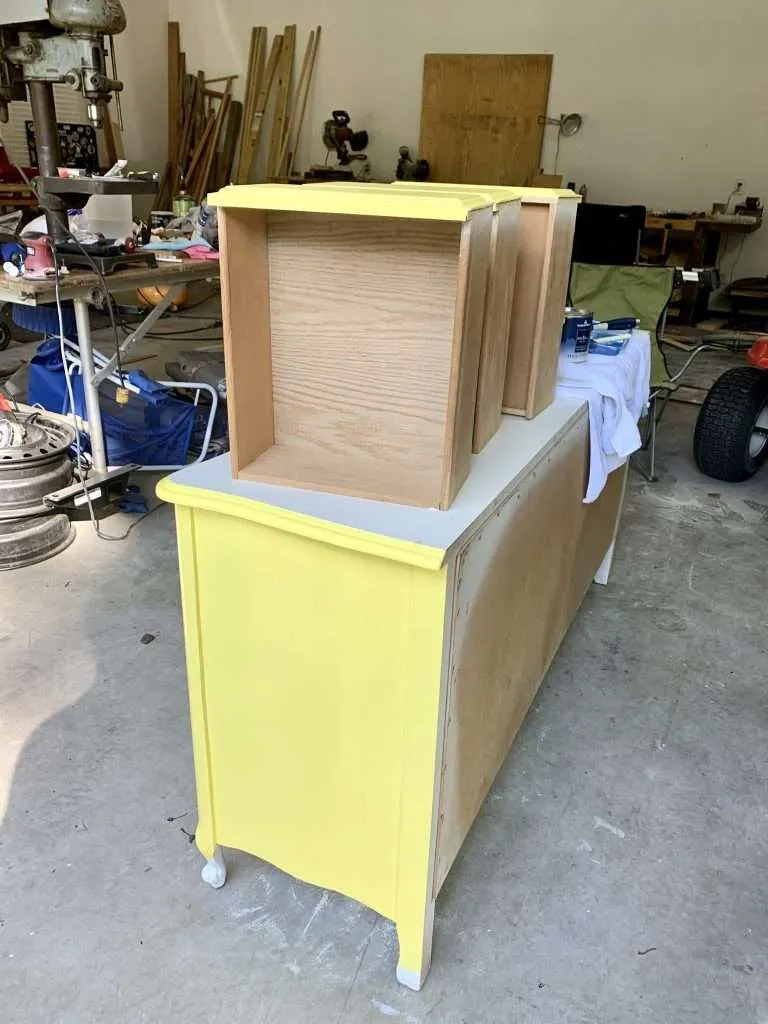
(After one coat of yellow paint!)
Yellow is such a tricky color.
It is SOOO hard to find true yellow paint. They’re either too gold or too neon, it’s hard to find something in the middle. We found this Benjamin Moore: Banana Yellow and it is absolutely perfect!
As soon as the paint dried, we added the new knobs. (Also, why is picking out knobs so hard?)
I let Lainey pick out the knobs for the middle drawers at Hobby Lobby. The white flower knobs on the 6 side drawers were from Lowes and go so perfectly on this newly refurbished dresser.
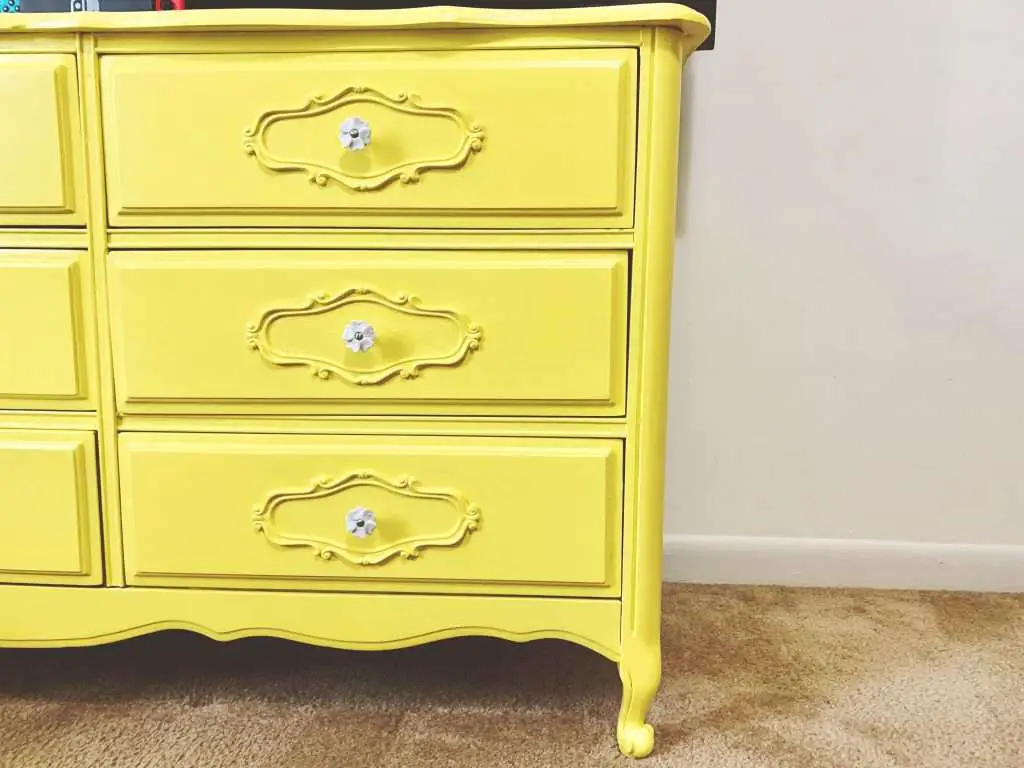
With a little TLC, the grungy dresser was grungy no more!
This French Provincial dresser was a quick and easy furniture flip. Probably the easiest one we’ve ever done!
And Lainey LOVES it! Which always makes this mama’s heart happy!
You can see some of our other refurbishing projects here:
- Vintage Medicine Cabinet Makeover
- How We Refurbished a Vintage Hardware Cabinet
- How to Turn an Old Dresser Into a Farmhouse Buffet
- From Drab to Fab: The Vintage Trunk Makeover